Perform a quick search
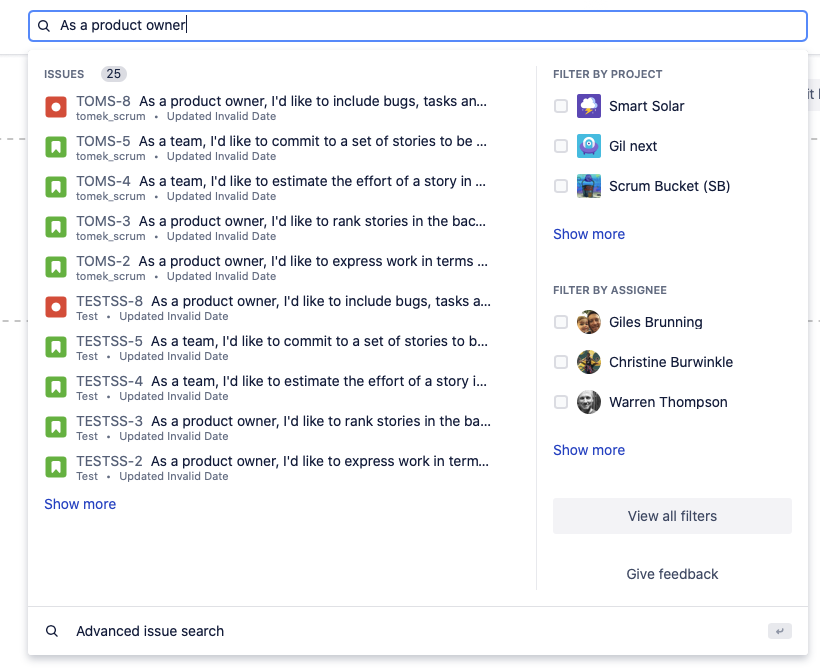
Quick search lets you find issues, projects, boards, queues, and more, including items you’ve worked on recently. To perform a quick search:
Select Search in the navigation bar (or press
/on your keyboard).Choose from recent items or type to search.
Optionally, filter the search results by choosing a project or issue assignee.
Select an item or continue to Advanced issue search (press
enteron your keyboard).
Before you start typing, the quick search shows recent items you’ve worked with, like issues, projects, boards, queues, and filters.
Search all of Jira
1. Start a search
To get to the issue search page:
- Choose Filters in the navigation bar.
- Select Advanced issue search.
Press / then enter on your keyboard to quickly go to advanced search.
2. Define your search criteria
You can use either basic or advanced JQL search modes to define your search criteria.
Basic search
Basic is the default mode for searching in Jira, and will work for most common searches. This mode provides user-friendly filters that let you define complex queries without the need to know JQL (Jira Query Language).
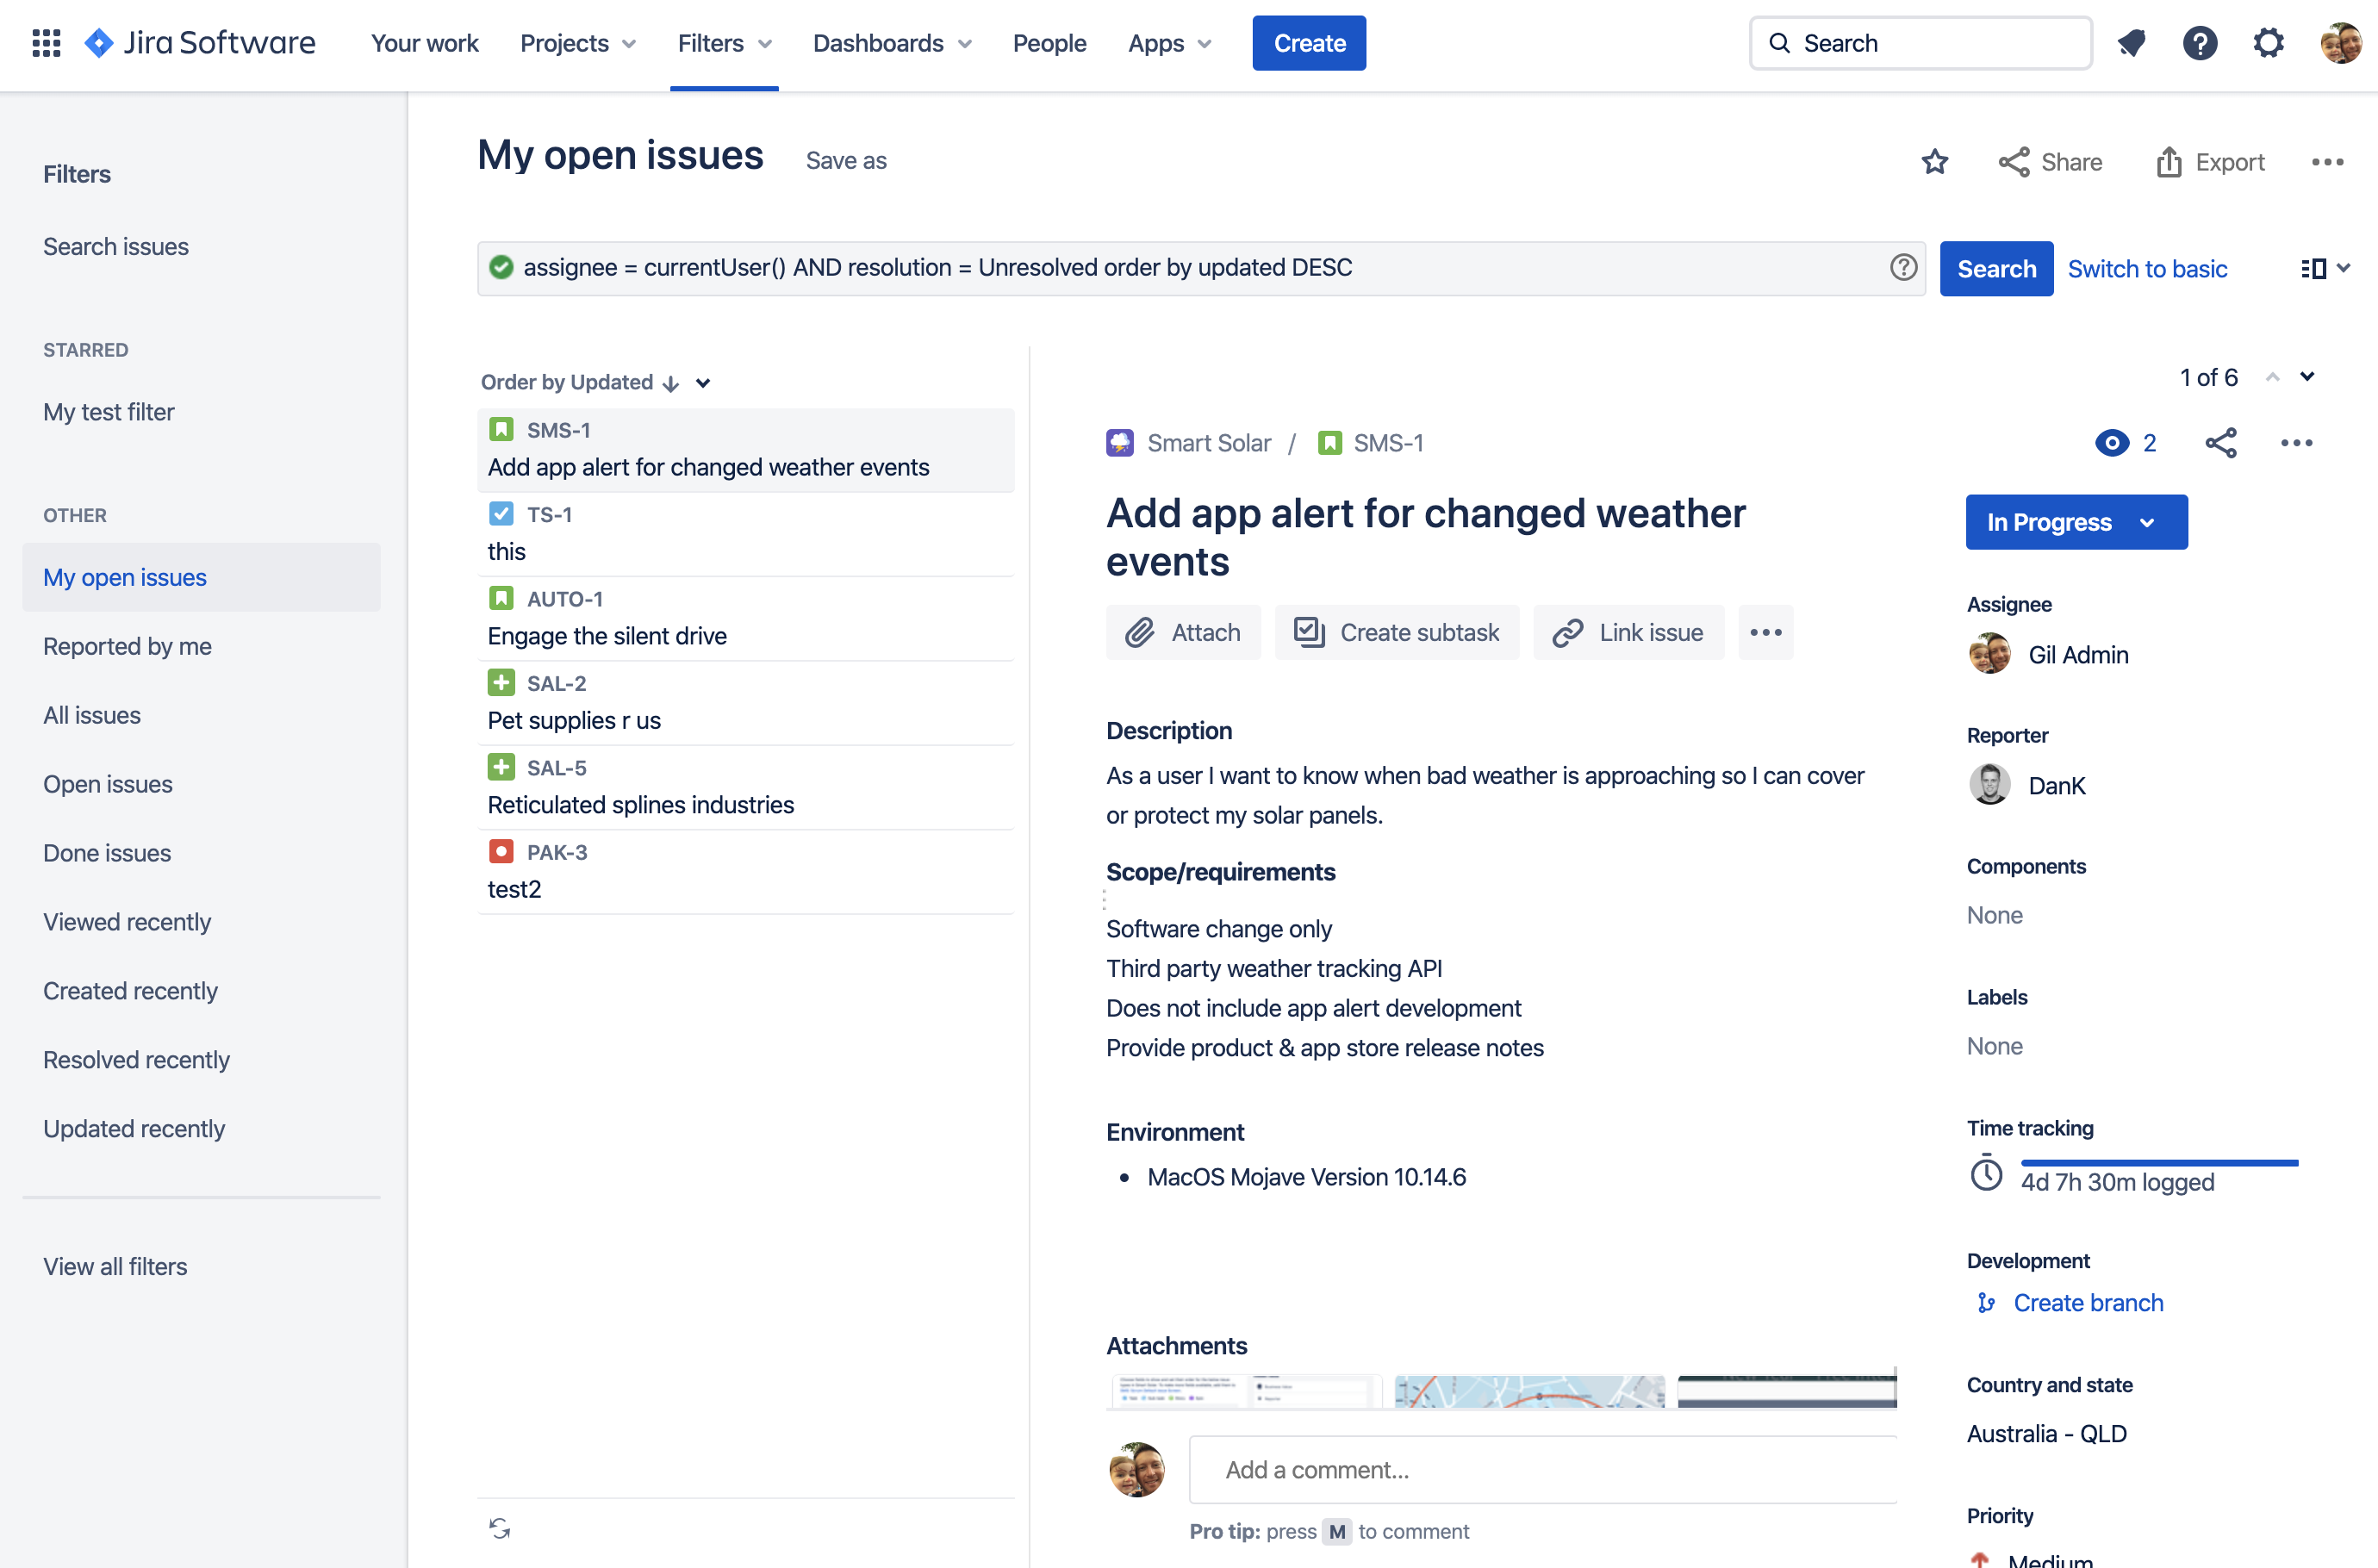
If you're already in the advanced JQL search mode, select Switch to basic to the right of the search filters to access the Basic mode.
Advanced JQL search
This mode lets you specify advanced criteria that can't be defined in the other searches (for example, the ORDER BY clause) using JQL (Jira Query Language). Select Switch to JQL to the right of the search filters to access this mode.
See Advanced searching for more info on using JQL.
If you’re in a project, you can toggle between Basic and JQL. Learn more about searching for issues in a project.
3. Change your view of the search results
Once you've run your search either in a project or from advanced search, you can change how the results are displayed by changing the view, sort order, and columns shown.
Choose list or detail view
List view is where each issue is a row and its details are in columns (similar to a spreadsheet). In the detail view, issues are shown on the left and the selected issue's details appear on the right.
From advanced search, select the view toggle ( or ) at the top-right of the search screen and select List view or Detail view.
If you’re in a project, select List view or Detail view to change the way your search results look.
Change the sort order
In list view, click the column name to change sort order.
In detail view, Choose ˅to the right of Order by above the issues list and search for a field to set the order.
Show/hide columns in list view
Click Columns above the search results on the right, and pick the columns you'd like to show.
4. Edit issues in search results
The issue navigator lets you action individual issues or the entire set of issues returned by your search.
Individual issues
- View the issue: Click the issue key or name.
- Action individual issues: Hover over an issue row, click more (•••) for that issue, then select an option.
All issues in the search results
- Export the search results to different formats, like Excel and XML: Select Export () and choose the desired format.
- Share the search results: Click share (), then enter the recipient's details.
- Create an RSS feed: Select Export () > RSS or RSS (with comments).
- Bulk modify issues in search results: Click more (•••) above the search results, then select Bulk change all <n> issue(s).
For a more detailed explanation of what you can do with issues in search results, see Working with search results.
5. Save your search
If you often run the same search, you can save it as a filter to save you from having to manually redefine the search criteria every time.
- Click Save as at the top of the search results page
- Enter a name for the filter and choose Submit
Your new filter appears in the left panel with your other starred filters and predefined filters like My open issues, Reported by me, Viewed recently, and All issues.
6. Print search results
After you’ve run your search criteria, and you’re happy with your search results, you can print them to populate physical task boards and track progress, thereby improving your team’s performance. You can print the results as a list to easily skim through your issues, or with issue details to dig deeper.
To print your search results:
- Select Export () at the top-right.
Select Print list (only in Advanced search) or Print details.


