Jira is getting a fresh new look and navigation

We’re in the process of rolling out these changes and the documentation may not match your experience. Bear with us while we update it to reflect the new changes. More about navigating the new Jira

Add files, images, and other content to describe a work item

作業項目を作成したら、担当者がその作業項目を早急に解決できるよう、十分な情報を追加することが重要です。画像、ファイル、図、サポート チケットやその他の情報はすべて、必要な作業の全体像の提供に役立ちます。

As you'd expect, you can add content like images and files from your computer, but you can also source and update content from external services via Atlassian Marketplace apps. Here are a few common ways you can add content to work items to create a richer picture for whoever's working on it.

The Free plans for Jira Cloud and Jira Service Management have a file storage limit of 2GB per product. The Standard plan allows up to 250GB per product, and file storage is unlimited on Premium plans. Read more about Jira Cloud plans.

説明の追加

A complete description on a work item can save a lot of time in the long run. If you or a teammate come to a work item, but don't really understand what it's about once you're there, it can mean chasing down the creator and asking lots of questions. A good description means the assignee can start work straight away and get it done faster.

A description can include rich text, code snippets, images, tables, and more. The editor converts things like links, code, and markdown on-the-fly, so you can paste in your content and let the editor do the work.

一般的なマークダウン フォーマット オプション:

  • ## は H2 スタイル (H2 から H5 までをサポートしています)

  • 太字は **太字** です。

  • 斜体 は *斜体* です。

  • ``` コード ブロック

  • this is link text」: [this is link text](www.atlassian.com)

  • * for bulleted lists (like this one)

  • 1. は番号付きリスト

  • [] はアクション アイテム用

チームメイトへのメンション

作業項目についてほかのユーザーに周知する必要があるが、そのユーザーに割り当てる予定がない場合は、そのユーザーをメンションできます。「@」に続いてユーザーの名前を入力し、一覧から該当するユーザーを選択します。メンションされたユーザーは通知を受け取り、作業項目に素早く移動して内容を確認できます。

Improve description using AI (beta)

AI is available and automatically activated for all apps on Premium and Enterprise plans. Organization admins can manage AI preferences from Settings > Atlassian Intelligence in Atlassian Administration.

AI is not available in Atlassian Government organizations.


AI can assist in generating work item descriptions when you simply paste Confluence links into Jira. By using the context from the Confluence link placed in the description field of the work item, AI creates structured content to improve the description.

To generate work item descriptions:

  1. Paste a Confluence link in a work item’s description field. If a Confluence link is already present, edit the description field.

  2. Select Improve description.

  3. Once the description is generated, select either Insert below or Replace to update the work item description.

ファイルまたは画像を添付する

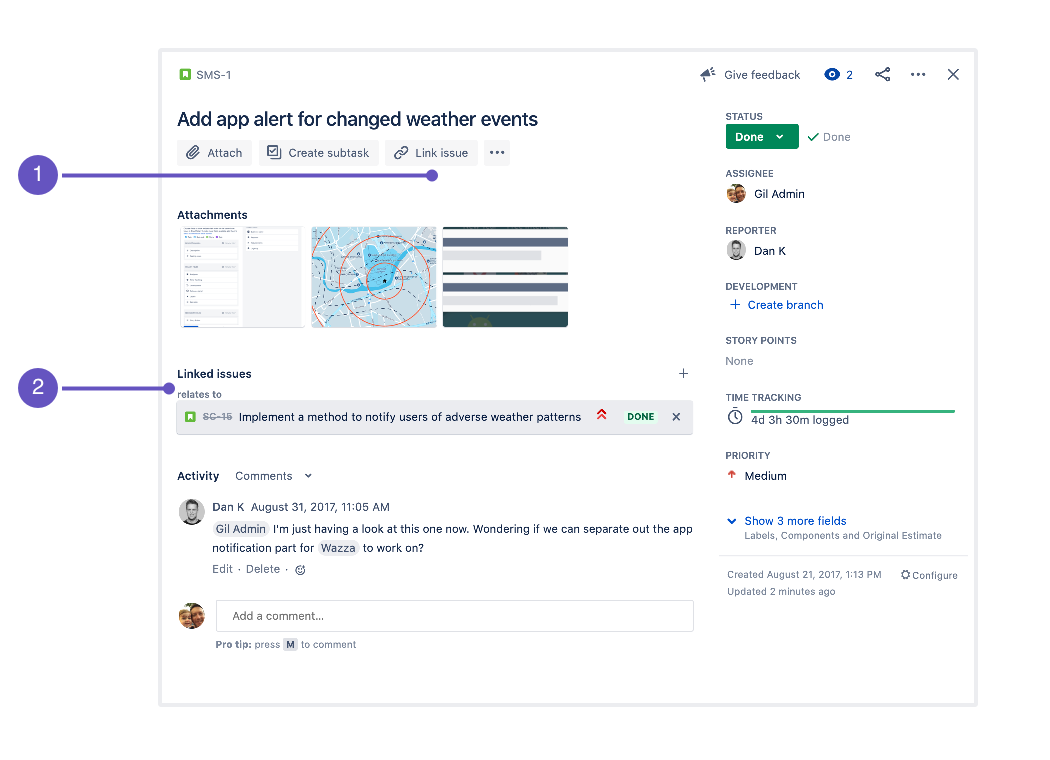
To attach a file to a work item, open the work item and drop the file on it. Alternatively, from the quick-add buttons under the work item summary, select Add and then Attachment. You can also drop or attach files in comments and other long text fields.

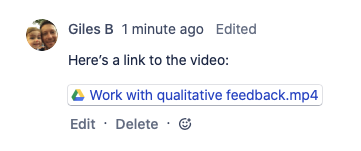
Dropbox や Google ドライブなどのサービスからファイルにリンクするには、作業項目の説明、コメント、長いテキスト フィールドにファイルへのリンクを貼り付けます。これにより、常に最新バージョンのファイルを参照するスマート リンクが追加されます。

Attached files haves some conditions:

  • 次の文字はファイル名では使用できません: \ / \ " % : $ ? *

  • 既定では、1 ファイルの最大サイズは 10 MB ですが、Jira 管理者はこの制限を変更できます。

The Free plans for Jira Cloud and Jira Service Management have a file storage limit of 2GB per product. The Standard plan allows up to 250 GB per product, and file storage is unlimited on Premium plans. Learn more

Confluence pages can add a huge amount of context to a work item without the need for huge descriptions or comments on the work item itself. And Confluence comes with handy built-in templates to help you get started, like product requirements and retrospective.

Read more about Confluence.

作業項目とページのリンクを作成する最も簡単な方法の 1 つは、Confluence ページに作業項目へのリンクを貼り付けることです。作業項目リンクが自動的に作成され、作業項目には対象のページへの便利なリンクが表示されます。

  1. 作業項目を開きます。

  2. From the quick-add button at the top of the work item, select Add.

  3. Select Existing Confluence page. If the page you want to link to doesn’t exist, select New Confluence page.

  4. 最近表示したページから選択するか、ページへのリンクを貼り付けます。

Confluence ページを作業項目にリンクすると、作業項目とページの両方に双方向のリンクが表示され、作業項目とページを素早く簡単に切り替えられるようになります。

You need a Confluence license to link to Confluence pages. Try it free if you aren't using Confluence already.

AI is available and automatically activated for all apps on Premium and Enterprise plans. Organization admins can manage AI preferences from Settings > Atlassian Intelligence in Atlassian Administration.

AI is not available in Atlassian Government organizations.


Use AI to effortlessly find and link related Confluence content to your work item. This allows you to have all key information at your fingertips and helps you to fully understand the work context needed to make progress.

This feature searches through your site’s Confluence, taking into account all access permissions, and presents a curated list of related content to link to the work item.

To find and link Confluence content using AI:

  1. 作業項目を開きます。

  2. Select Improve work item in the work item’s details section.

  3. Select Link Confluence content. AI finds and shows a list of Confluence links.

  4. Select Link for individual links or Link all to link all related Confluence content at once.

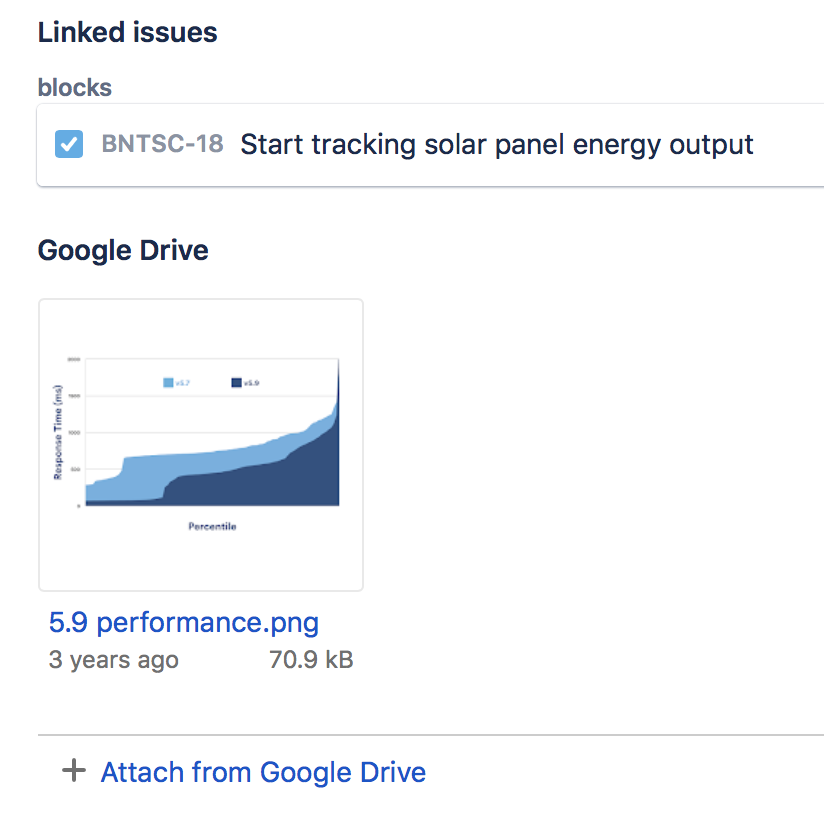
作業中の作業項目に関連する既存の作業項目があり、そこに含まれる詳細情報が作業項目のコンテキストの把握に役立つ場合があります。2 つの説明をリンクすると、それぞれの作業項目ビューで作業項目の説明の下に各作業項目が表示されます。作業項目をリンクしても、そのリンク以外に作業項目に影響が及ぶことはありません。

作業項目をリンクするには、以下の手順に従ってください。

  1. Open a work item and from the quick-add buttons under the work item summary, select Add.

  2. Select Linked work item.

  3. 関係 ("is blocked by"、"relates to" など) を選択します。

  4. リンクする作業項目を検索し、選択します。

  5. Choose Link.

To create a new linked work item, select + Create linked work item and enter the details of the new work item, including the relationship ("is blocked by" or "relates to," for example).

Once a work item is linked, it will display ion the Linked work items panel on each work item. You can also search for work items that are linked to a particular work item. More about advance searching in Jira.

Give a work item context from anywhere on the web by linking the URL. Copy and paste any link and you'll be able to see the work.

Web URL をリンクするには:

  1. Open a work item and from the quick-add buttons under the work item summary, select Add.

  2. Select Web link.

  3. Type or copy the web URL and the Link text.

  4. Choose Link.

You can do this with your keyboard via Jira’s command palette. Use command + (for Mac) or Ctrl + K (for Windows) to open the command palette while you’re in Jira.More about Jira’s command palette.

Add content from marketplace apps

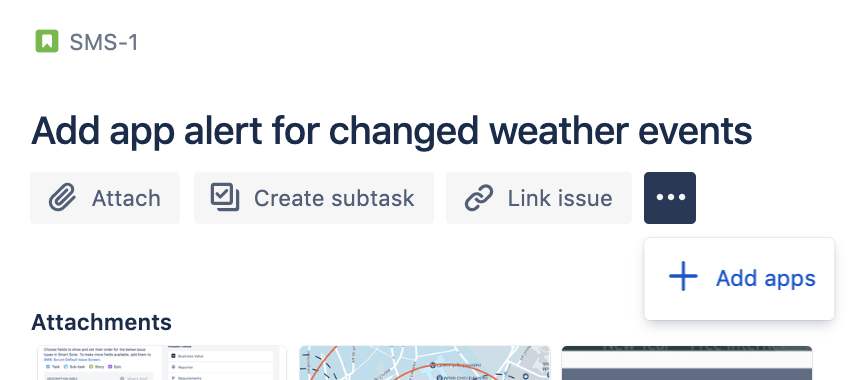
If you're a Jira admin, you can find and try new Atlassian Marketplace apps right from the work item view. Select the Apps quick-add button under the work item summary and choose Add apps.

Work item content helps describe a work item in ways a description and other details can't. If your Jira site has installed Atlassian Marketplace apps, you can add content via the quick-add buttons under the work item summary. Diagrams and charts are two common types of content that can help describe a work item, but there are many other options on the Marketplace.

More about Atlassian Marketplace apps.

To the right of the Add quick-add button, you'll find the Apps button, which lists the actions you can take in any of the installed apps you have permission to use. Select Apps and then follow any required steps to add your content.

Once you select the quick-add button, you can add content from the app to your work item. This way, you can ensure everyone's seeing the latest version of a file.

さらにヘルプが必要ですか?

アトラシアン コミュニティをご利用ください。