Set up Jira Cloud
Learn how to set up Jira Cloud and integrate it with other products and applications.
You can only use the Kanban backlog if it's already enabled by a Jira administrator or a board administrator.
The Kanban backlog must be enabled for a particular board, for the board users to use it. See Enabling the Kanban backlog for more information.
Managing your backlog in the first column of your Kanban board is easy to do—as long as there are only a few issues in your backlog. As your backlog grows, viewing and scrolling through these issues can become difficult.
If you're planning work for your team, the Kanban backlog gives you a bigger backlog with an optimized list view of the issues you're creating and ranking for your team. If you're a team member working on a Kanban project, you can focus on your work-in-progress on the Kanban board, without the distraction of items in planning.
Go to the Backlog of your Kanban project.
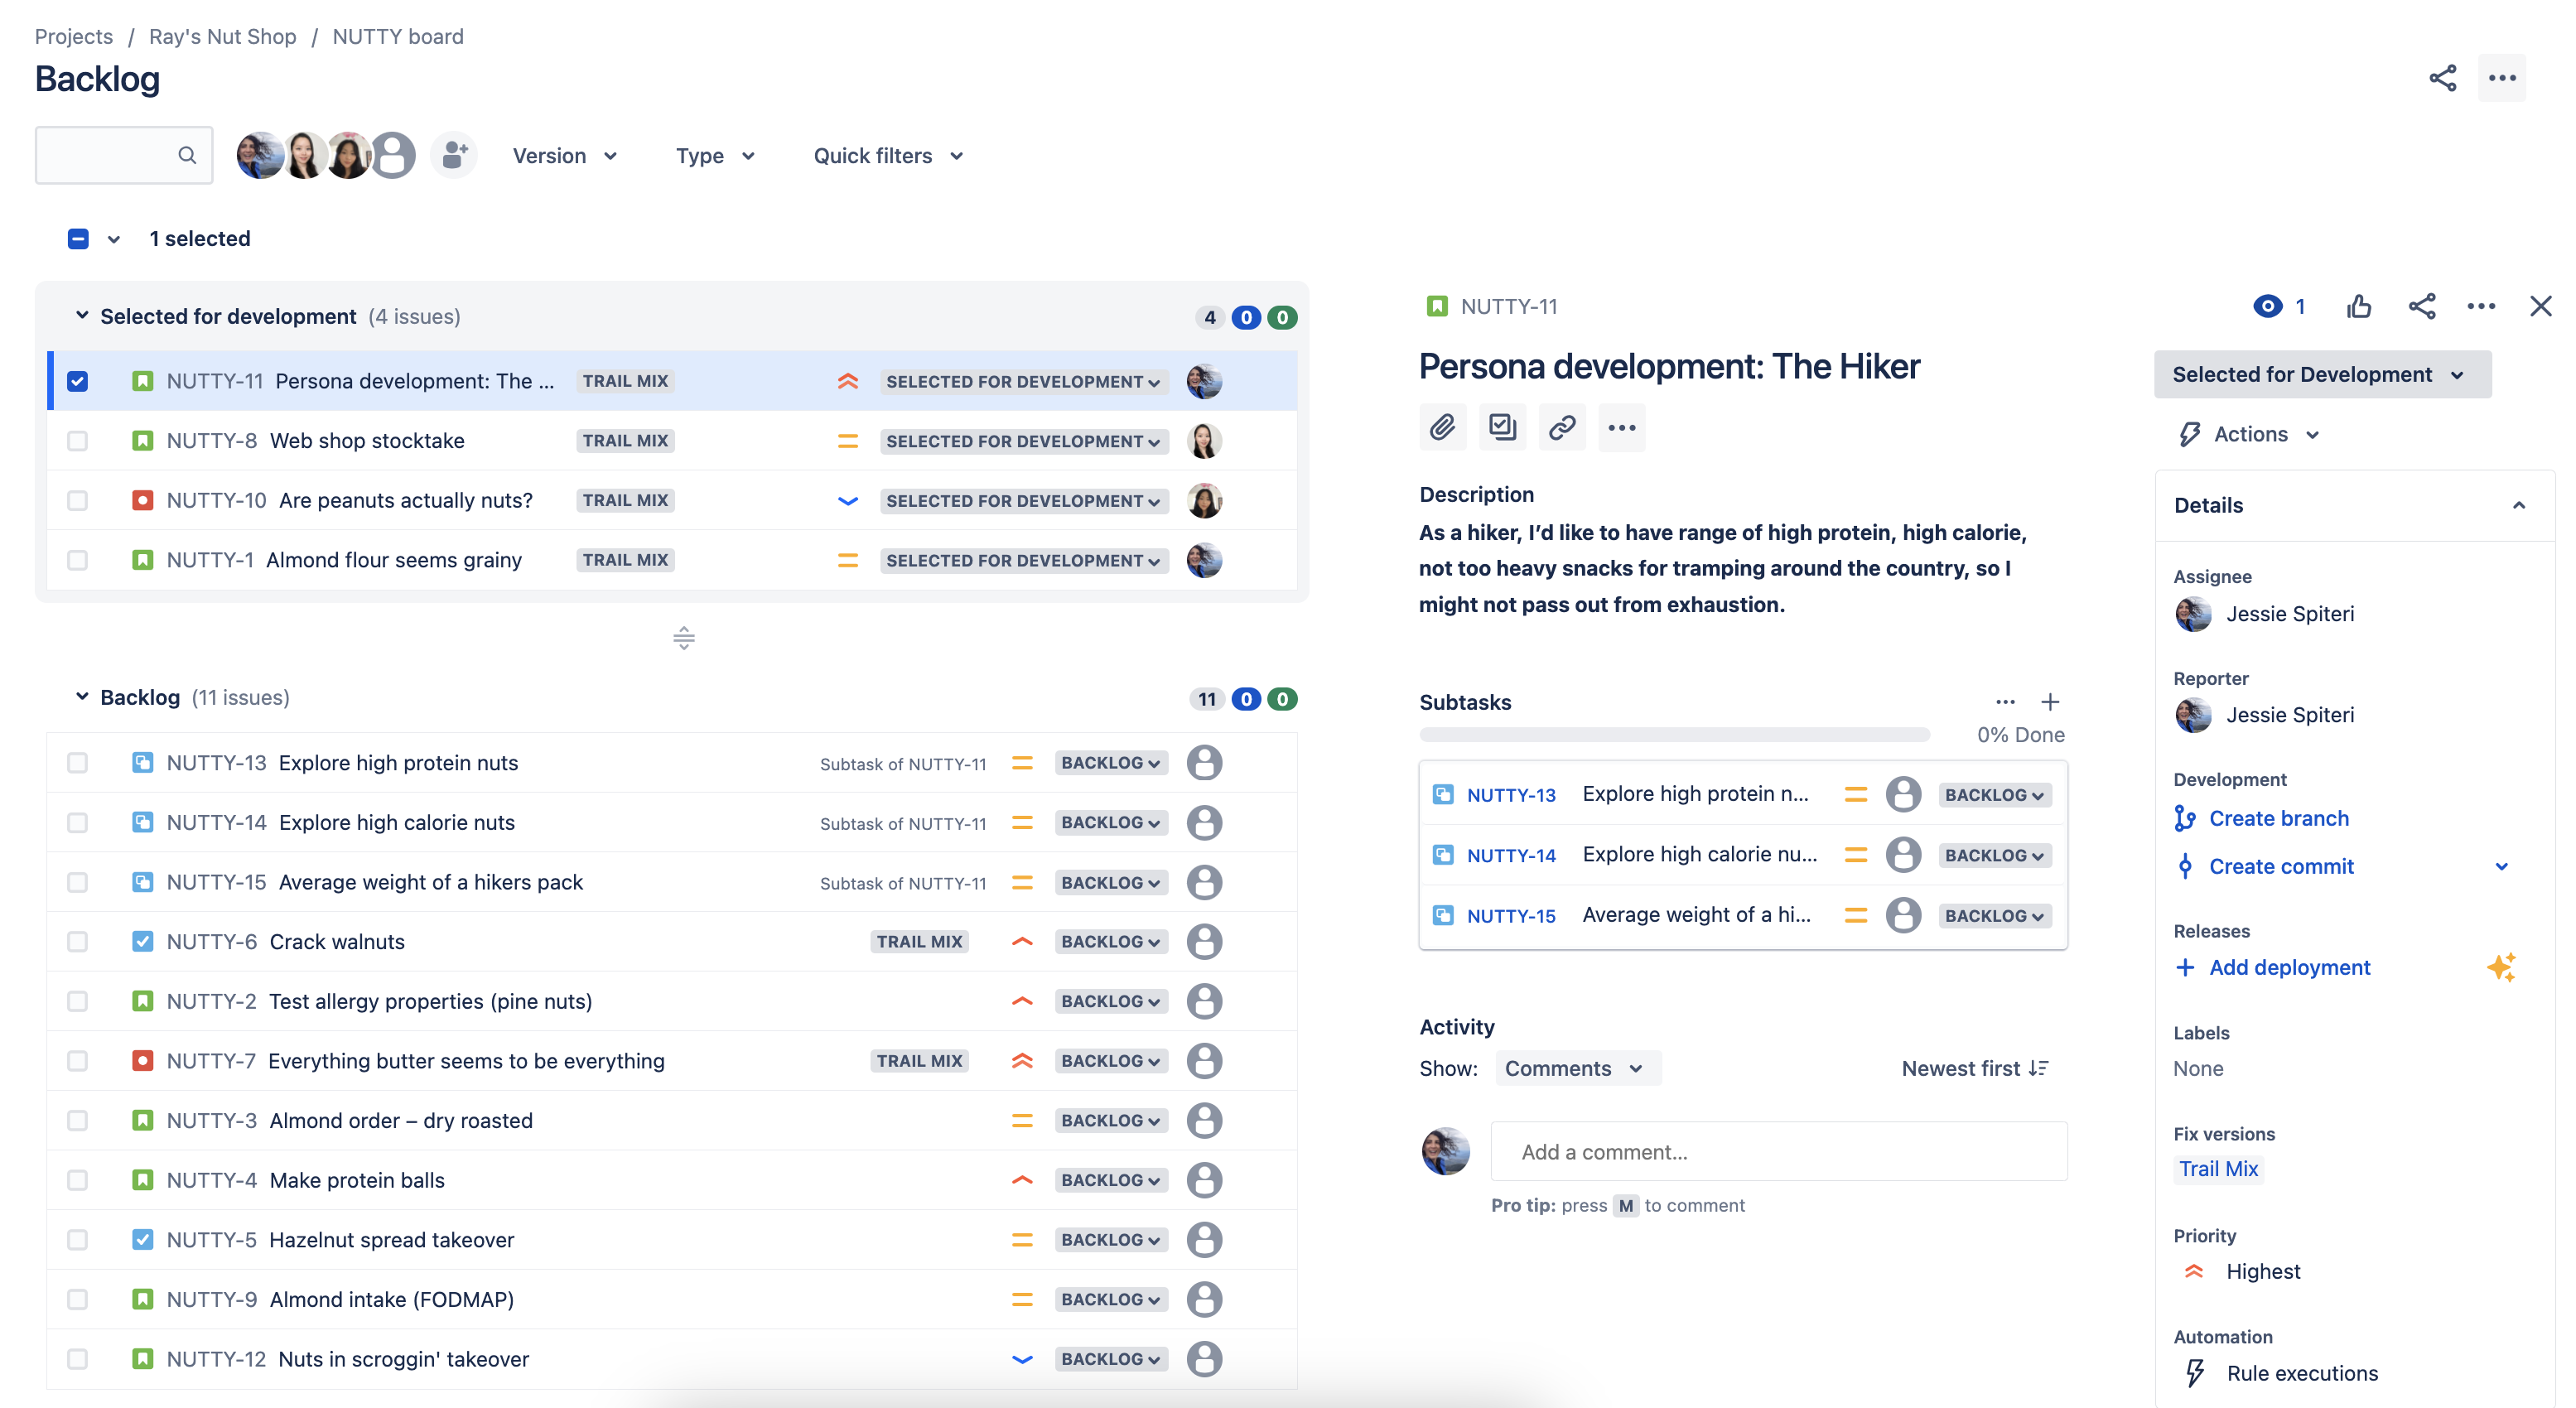
In the screenshot above, the Kanban backlog shows issues in both the Backlog and Selected for Development sections. This makes it easy for you to drag issues from one section to the other. Drag issues from the Backlog section when you're ready to work on them.
An issue will only be visible in the Kanban backlog if:
the issue matches the board's saved filter, and
the issue's status maps to the Kanban backlog column and the next column on the Kanban board.
This means that if you have the columns Selected for Development, In Progress, and Done on your Kanban board, ensure that you have a status mapped to In Progress at least. If you map all the statuses to the first column (Selected for Development), you won't see any issues in the Backlog section of the Kanban backlog. You will only see issues in the Selected for Development section.
Task | Instructions |
|---|---|
Add issues to the backlog | Select Create in the navigation bar. Fill in the issue details in the Create issue dialog, then select Create. The issue will be added to the backlog under the currently selected issue, or at the top of the backlog if no issue is selected. Check the Create another issue checkbox in the Create Issue dialog to keep it open, if you're creating multiple issues. You can create issues directly on the backlog. Just select + Create issue at the bottom of a sprint or the Backlog section. |
Prioritize the backlog | Drag and drop an issue to rank it. You can also right-click the issue to open a menu that allows you to send it to the top or the bottom of the backlog. |
View and edit an issue's fields | Select an issue on the board to view the issue detail view and edit issue fields. To open the issue in a separate tab or window, right-click on the issue key. You can edit the following issue fields directly on the backlog:
Select the relevant field on an issue card to edit it. To edit multiple issues from the backlog:
|
Create subtasks | Select an issue, then select Subtasks are useful for breaking a story down into implementable chunks. Notes when creating subtasks
|
Transition an issue | Drag and drop an issue from the Backlog section to the Selected for Development section (or the next column of your Kanban board), to move the issue from the backlog to the next status in your workflow. Note, the Selected for Development section may be named differently, depending on the column configuration of your Kanban board Transition issues with subtasks
You can also transition multiple issues from the backlog |
Split an issue | Right-click an issue and select Split issue. You can split an issue in the Backlog or Selected for Development sections. Note, these sections may be named differently, depending on the column configuration of your Kanban board. Splitting an issue is useful when an issue is so big, that it's better to divide it into two or more issues, and make work more manageable. Note that you can only split an issue from the Kanban backlog, and not from the Kanban board. What happens when I split an issue? After splitting an issue, the new issue will be sent to the Backlog section. This depends on the column configuration of your Kanban board, but this is essentially the section for the column that's mapped to the initial status of your workflow. What happens to the issue details?
|
Flag an issue | Select an issue and select … > Add flag. You can also add a comment with your flag, perhaps to indicate your reason for adding the flag. |
Delete an issue | Select an issue and select … > Delete. To delete multiple issues from the backlog:
|
Find issues | Create your own quick filters to view only the issues you want. See Configure quick filters for details. |
Organize issues into epics | An epic is essentially a large user story, used for grouping smaller stories. For example, you may have a 'Quarterly audit' theme for your release, which you could capture as an epic. You can create epics, drag and drop issues into epics, and filter epics by using the epic panel. Note, you need to enable the epic panel for your board for this panel to display. Once enabled, use the toggle in the epic filter dropdown to open and close the panel (or use keyboard shortcut 'E'). |
Plan versions | You can create and edit versions, assign issues to versions via drag-and-drop, and filter by versions using the version panel. To open and close the panel, use the toggle in the version filter dropdown (or use keyboard shortcut 'V'). |
Select issues for your team to work on | After grooming the issues in your backlog, you can select which issues your team will start working on, by dragging and dropping issues from the Backlog section to the Selected for Development section. Issues selected for development will then appear on your Kanban board, and your team can start working on them accordingly. Note that you can move a subtask from the Backlog to Selected for Development independently of its parent, and vice versa. |
Need help? If you can't find the answer you need in our documentation, we have other resources available to help you. See Getting help.
Was this helpful?