How do I navigate my plan?
This page refers to the advanced planning features that are only available as part of Jira Cloud Premium and Enterprise.
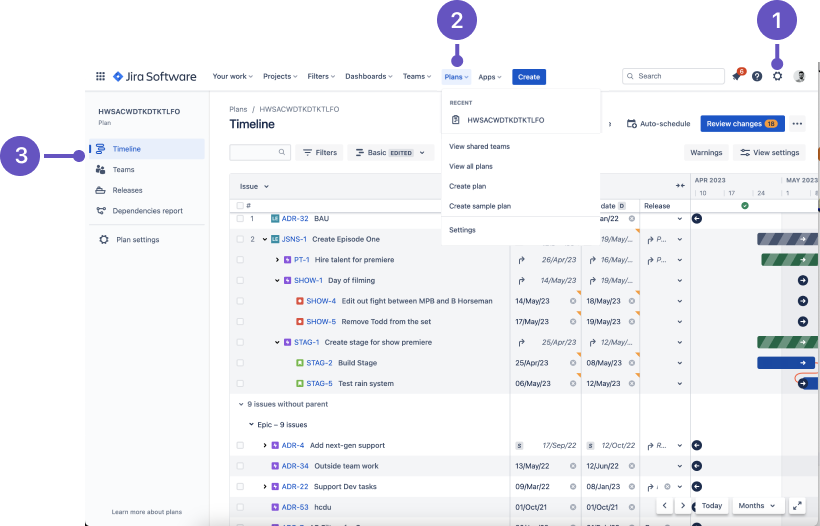
1. menu
The menu contains all of the Jira-wide configuration settings, including some that apply to your plan.
2. Plans tab
Access existing plans and create new ones using the Plans tab. Once you’ve created a plan, you can quickly navigate to it using the dropdown menu shown above.
3. Plan navigation
The nav on the left side of your screen contains four sections:
Your Timeline shows the issues in your plan and where you’ll do most of your planning work.
Teams is where you’ll find more information about the teams included in your plan.
Releases is where you configure and manage the releases associated with your plan.
Dependencies shows you a visual map of issues that are linked and must be completed in a specific order.
Beneath these options, you’ll find settings that apply to your plan where you can configure your plan-specific settings or delete your plan.
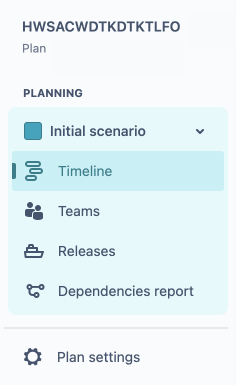
Scenarios
If you have scenarios enabled, you’ll see a colored menu that surrounds your navigation. It only shows once scenarios have been enabled in your plan.
Was this helpful?