Enable code
The code feature gives you greater visibility of your team's work by automatically connecting and displaying information from your linked code repositories in your space.
Enable or disable code for your software
Only space admins can enable and disable features on a space.
You can enable or disable reports by:
Select Add to navigation (+).
Select Code, then Add to navigation.
The Code tab will now be accessible from your space navigation.
Linking your team’s repositories
To use the code feature, you’ll need to integrate Jira with a source code management tool like Bitbucket or GitHub. More about integrating Jira with your development tool.
The code feature will display all the repositories your team has linked to the current space. To link a repository, include work item keys in your branch names, commit messages, and pull requests.
Code settings
You can navigate to the code settings from the More options (•••) menu on the top-right corner of the page.
Also, if you have GitHub installed, select Github settings to manage your app integration.
View development information in Jira
Once you start referencing work items in your development work, you’ll get the following benefits:
Repositories and pull requests on the Code page
On the Code page, you’ll see a list of all repositories related to the space. If you include work item keys in pull request titles, you’ll also see all the pull requests that have been linked to work items in your space within the last 30 days (or pull requests that have been linked previously but were updated within the last 30 days).
Development panel on Jira work items
Work items referenced in development work will have a Development panel, which you’ll see in the Details section on the work item. The panel shows the status of branches, commits, pull requests, and builds related to the work item.
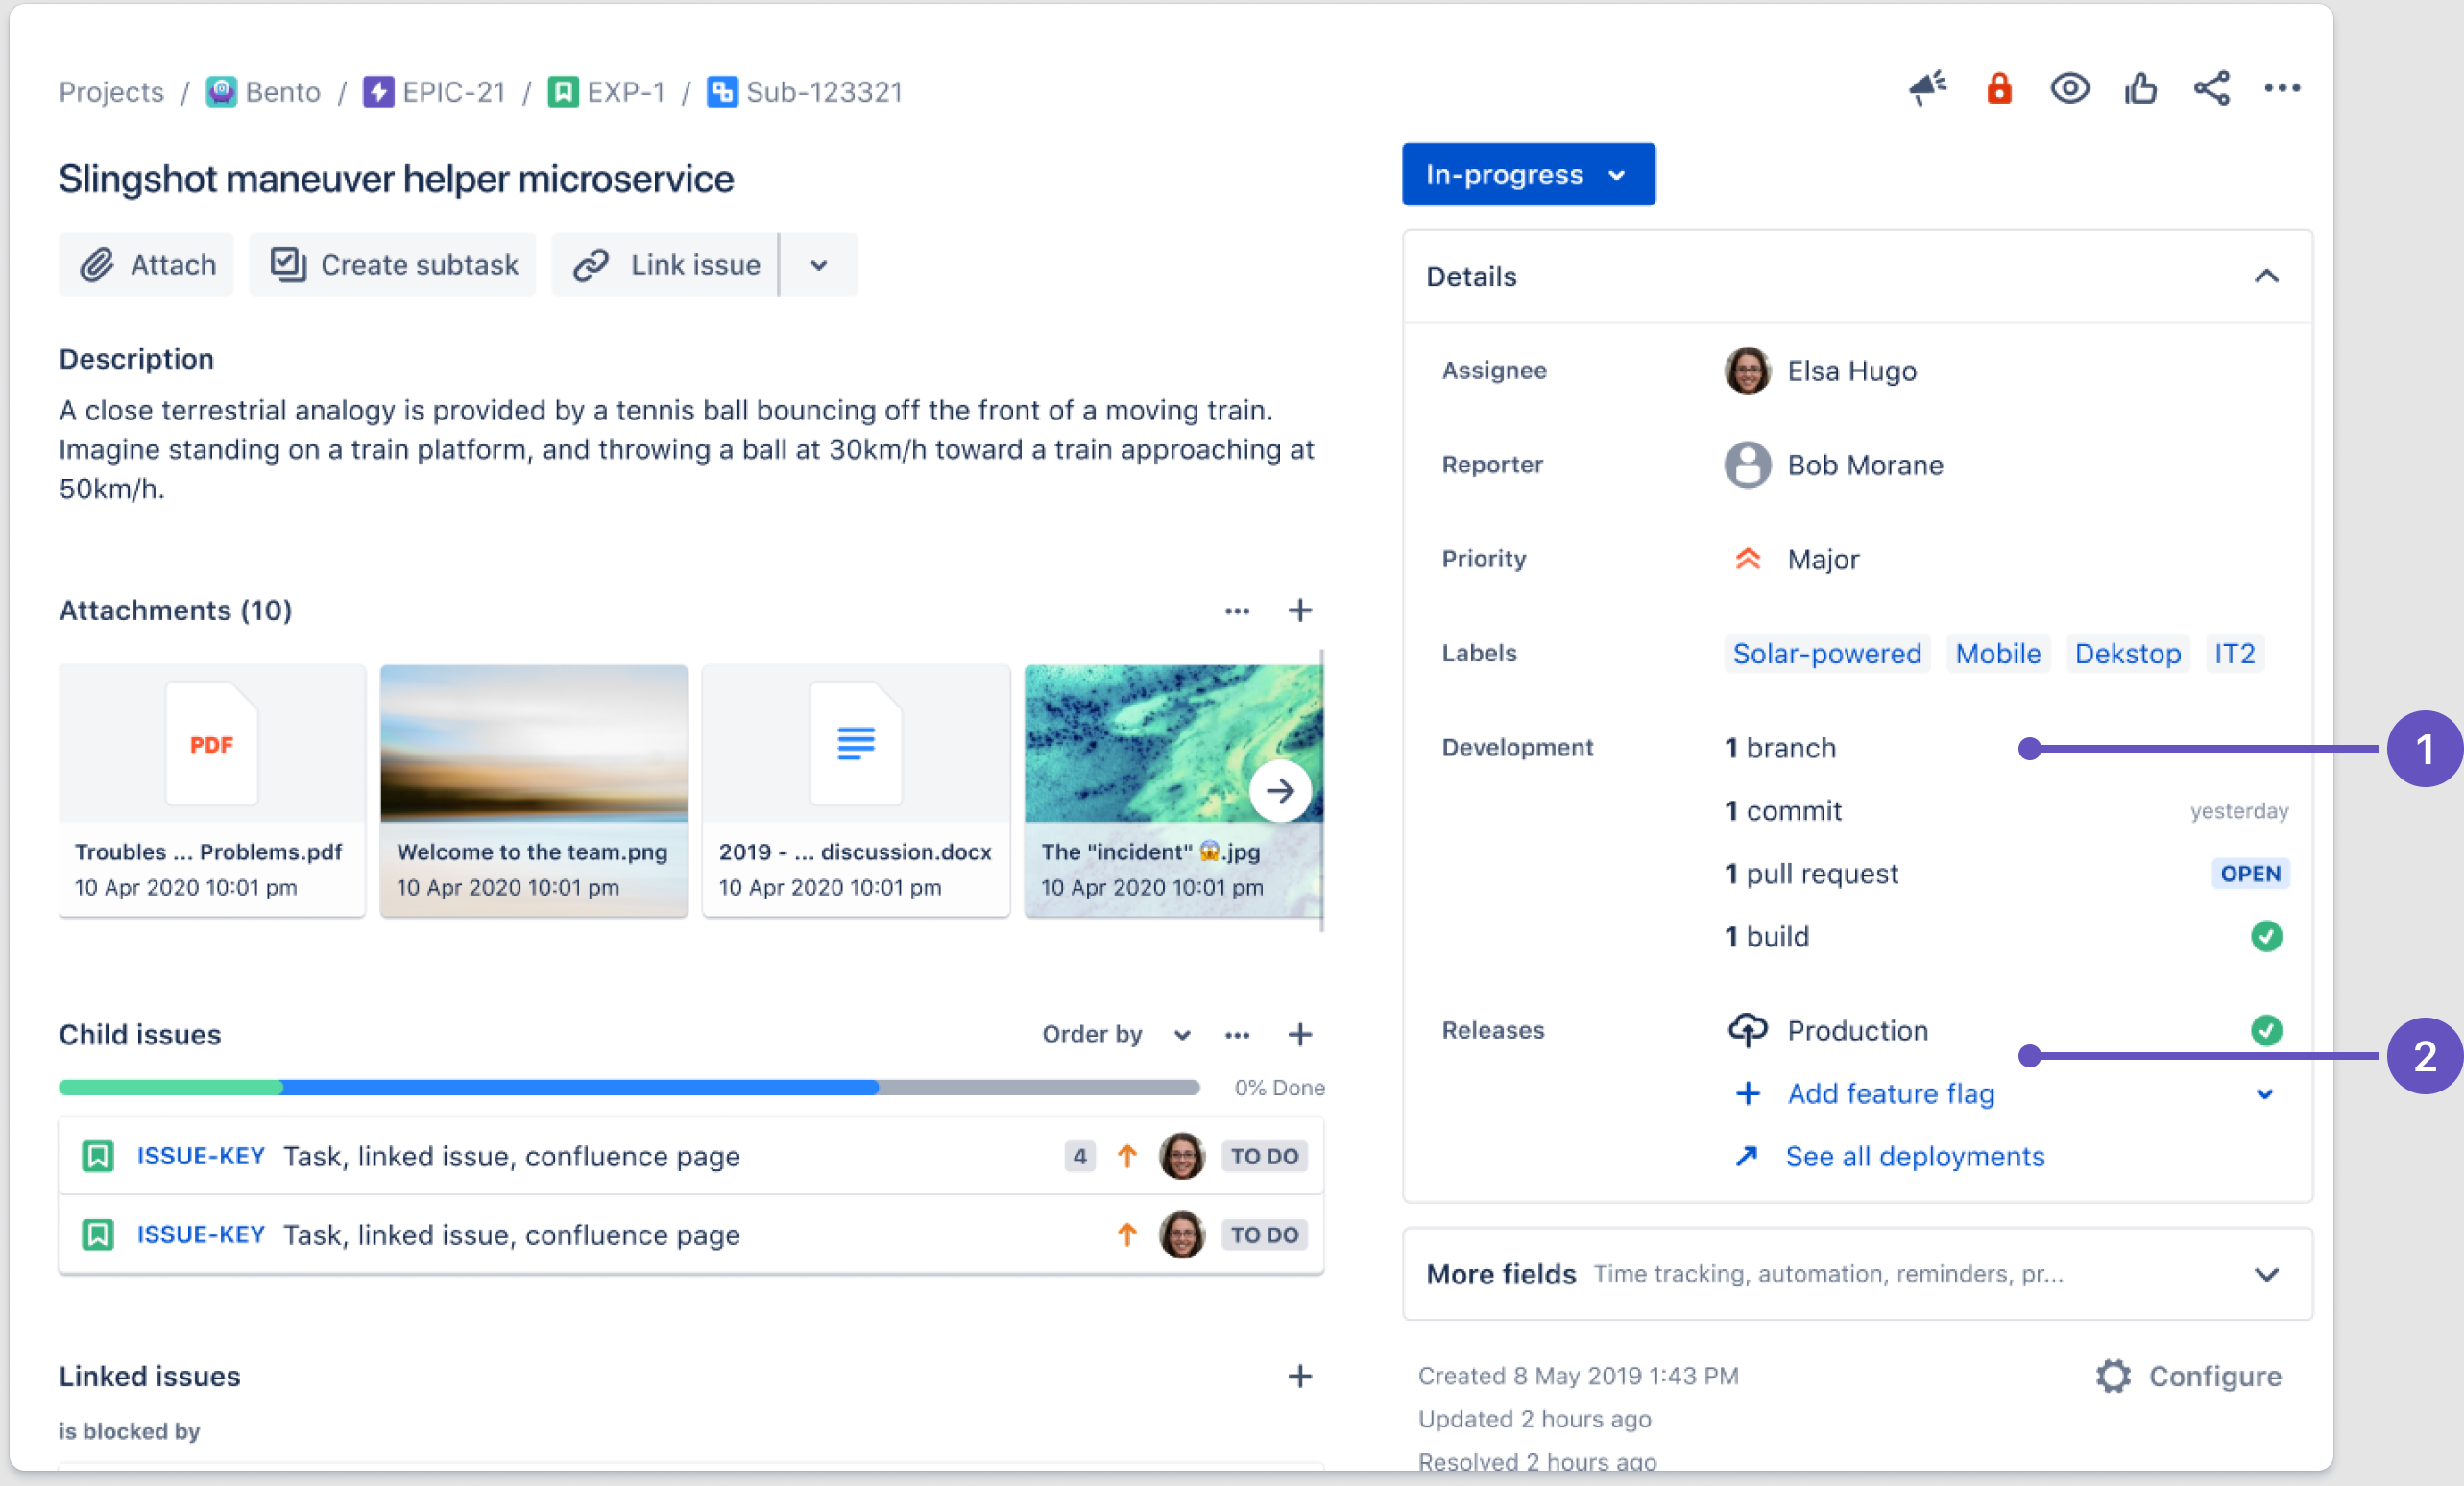
Development panel: Hover over branches, commits, and pull requests to see when they were last updated.
Releases panel: Hover over deployments and feature flags to see more details.
More about the development panel
Development info on the board
Once you’ve enabled the Code feature and your team includes work item keys in their branch names, commit messages, and pull requests, you’ll start seeing more development information on your Jira board. Work item cards will display development icons to indicate when they have pull requests, branches, or commits associated with them. You can hover over the icons to view the details of the development activity, and click through to go to your connected development tool (note, development icons will not show if your Jira board contains more than 100 work items).
Development information on the Development page
Once you’ve connected your development tools to Jira and your team is using work item keys in branch names, commit messages, and pull requests, you’ll start seeing development information on the Development page—provided the feature is enabled for your software space.
Once set up, you’ll see:
Key metrics like pull request cycle time and deployment frequency, showing your team’s delivery health.
Related work like pull requests, vulnerabilities, and deployments from apps connected to Jira—so you can view details, see who’s working on what, and jump straight into code.
Work suggestions with proactive, actionable recommendations to resolve blockers and boost your team’s progress.
Automations
Use automations to create rules related to development, like transitioning a work item to In progress when a branch is created.
Was this helpful?