How your plan shows work items on your timeline
This page refers to the advanced planning features that are only available as part of Jira Cloud Premium and Enterprise.
After you create your plan, your plan shows the work items from your sources as line items in a timeline format.
Let’s break this view down:
1. Work item column
In the first column of your plan is the Work items column. Your plan shows the following information for each work item:
work item ranking (if you’ve chosen to sort by Ranking)
work type icon
work item key
work item summary
If a work item contains children, select the arrow (>) to expand collapsed rows. Or use the Work item dropdown menu at the top to expand or collapse all work items.
If you create a work item using the + Create work item button, your plan will place your new work item at the bottom of your current space. If you’ve made a child-level work item (such as a story or subtask), it will be listed under the collapsible x work items without parent heading at the bottom of your timeline until it’s linked to a parent task.
2. Fields
The middle columns shows values like start and end dates, status, teams, releases, and any other information you decide to include in your plan. Use the Fields dropdown menu to add or remove columns. To edit a field, select the one you want to change, edit it, and press Enter when you’re done. How to add or remove fields from your plan.
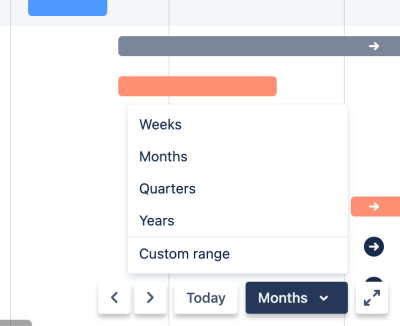
3. Timeline bars
Lastly, the timeline bars represent the expected duration of scheduled work items. You can change the timespan that your plan covers using the timeline menu in the bottom corner of your timeline.
Further reading
Manage and edit work items in your plans
Was this helpful?