Database views
Databases aren’t available in the Atlassian Government environment.
Depending on your needs, you can view the same database in multiple ways and change between them. You can select a layout and add filters and sorts to categorize your content within a view easily.
Create and switch views
When you first create a database, the default view is View 1. After this, you can create a new view by selecting + next to your existing views.

Depending on your screen size, you may have to open the menu next to your current view and select Add view.
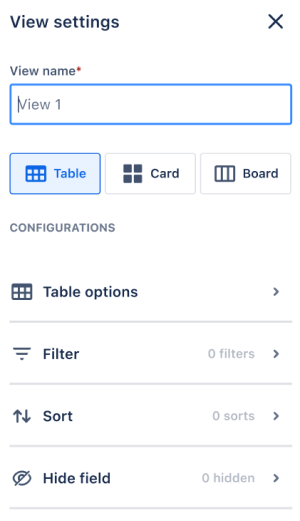
The View settings dialog will open. You must name the new view and configure the layout, filters, sorting, and hidden fields.
Switch views by simply selecting the tab of the view you want to use.
Temporary views
You can change layouts, apply filters, sort, and hide fields without saving them as a new view. This allows you to change how you see the data in your database temporarily. Only you can view temporary views; you will lose any changes when you refresh the page or navigate away. To keep or share these view changes, you must save them as a new view or save the changes to an existing view.
Customize views
Each view of the database has several components that you can customize:
Layout and Layout options: Choose how you want your database to be visually organized and configure options for your views selected layout.
See Layouts and options for more information on different layout options.Filters: Add criteria based on field values to show or hide data.
See Filter your data for more information on filter options.Sorts: Sort by a field to change the order in which you display entries.
See Sort fields for more information on sorting fields.Hide field: Show or hide database fields for each view.
See Hide fields in your database for more information on hiding fields in a view.
View actions
When you’re in a given view, select the arrow next to its name to access the following option:
Edit view
Make default
Copy link
Delete view
Share views
Once you've created your view, you can share it with others in two ways:
Copy and paste the URL: With the desired view active, simply copy the URL from your web browser's address bar. This link will automatically display your chosen view when pasted onto a Confluence page, or anywhere that supports Smart Links.
Use the 'Copy link' option: When you're in a given view, select the arrow next to its name, and select Copy link from the view actions menu. This will provide a ready-made URL to share.
Want to learn more about advanced sharing options and permissions? Our documentation has a section on Share databases, entries, or values.
Was this helpful?