会社ハブの作成とカスタマイズ
この機能は、Confluence Cloud Premium および Enterprise でのみ利用できます。
会社ハブを利用すると、見栄えのよい全社レベルの情報センターを作成およびカスタマイズできます。ここでは、すべての従業員が最新のお知らせ、ニュース、検証済みリソースなどを入手できます。
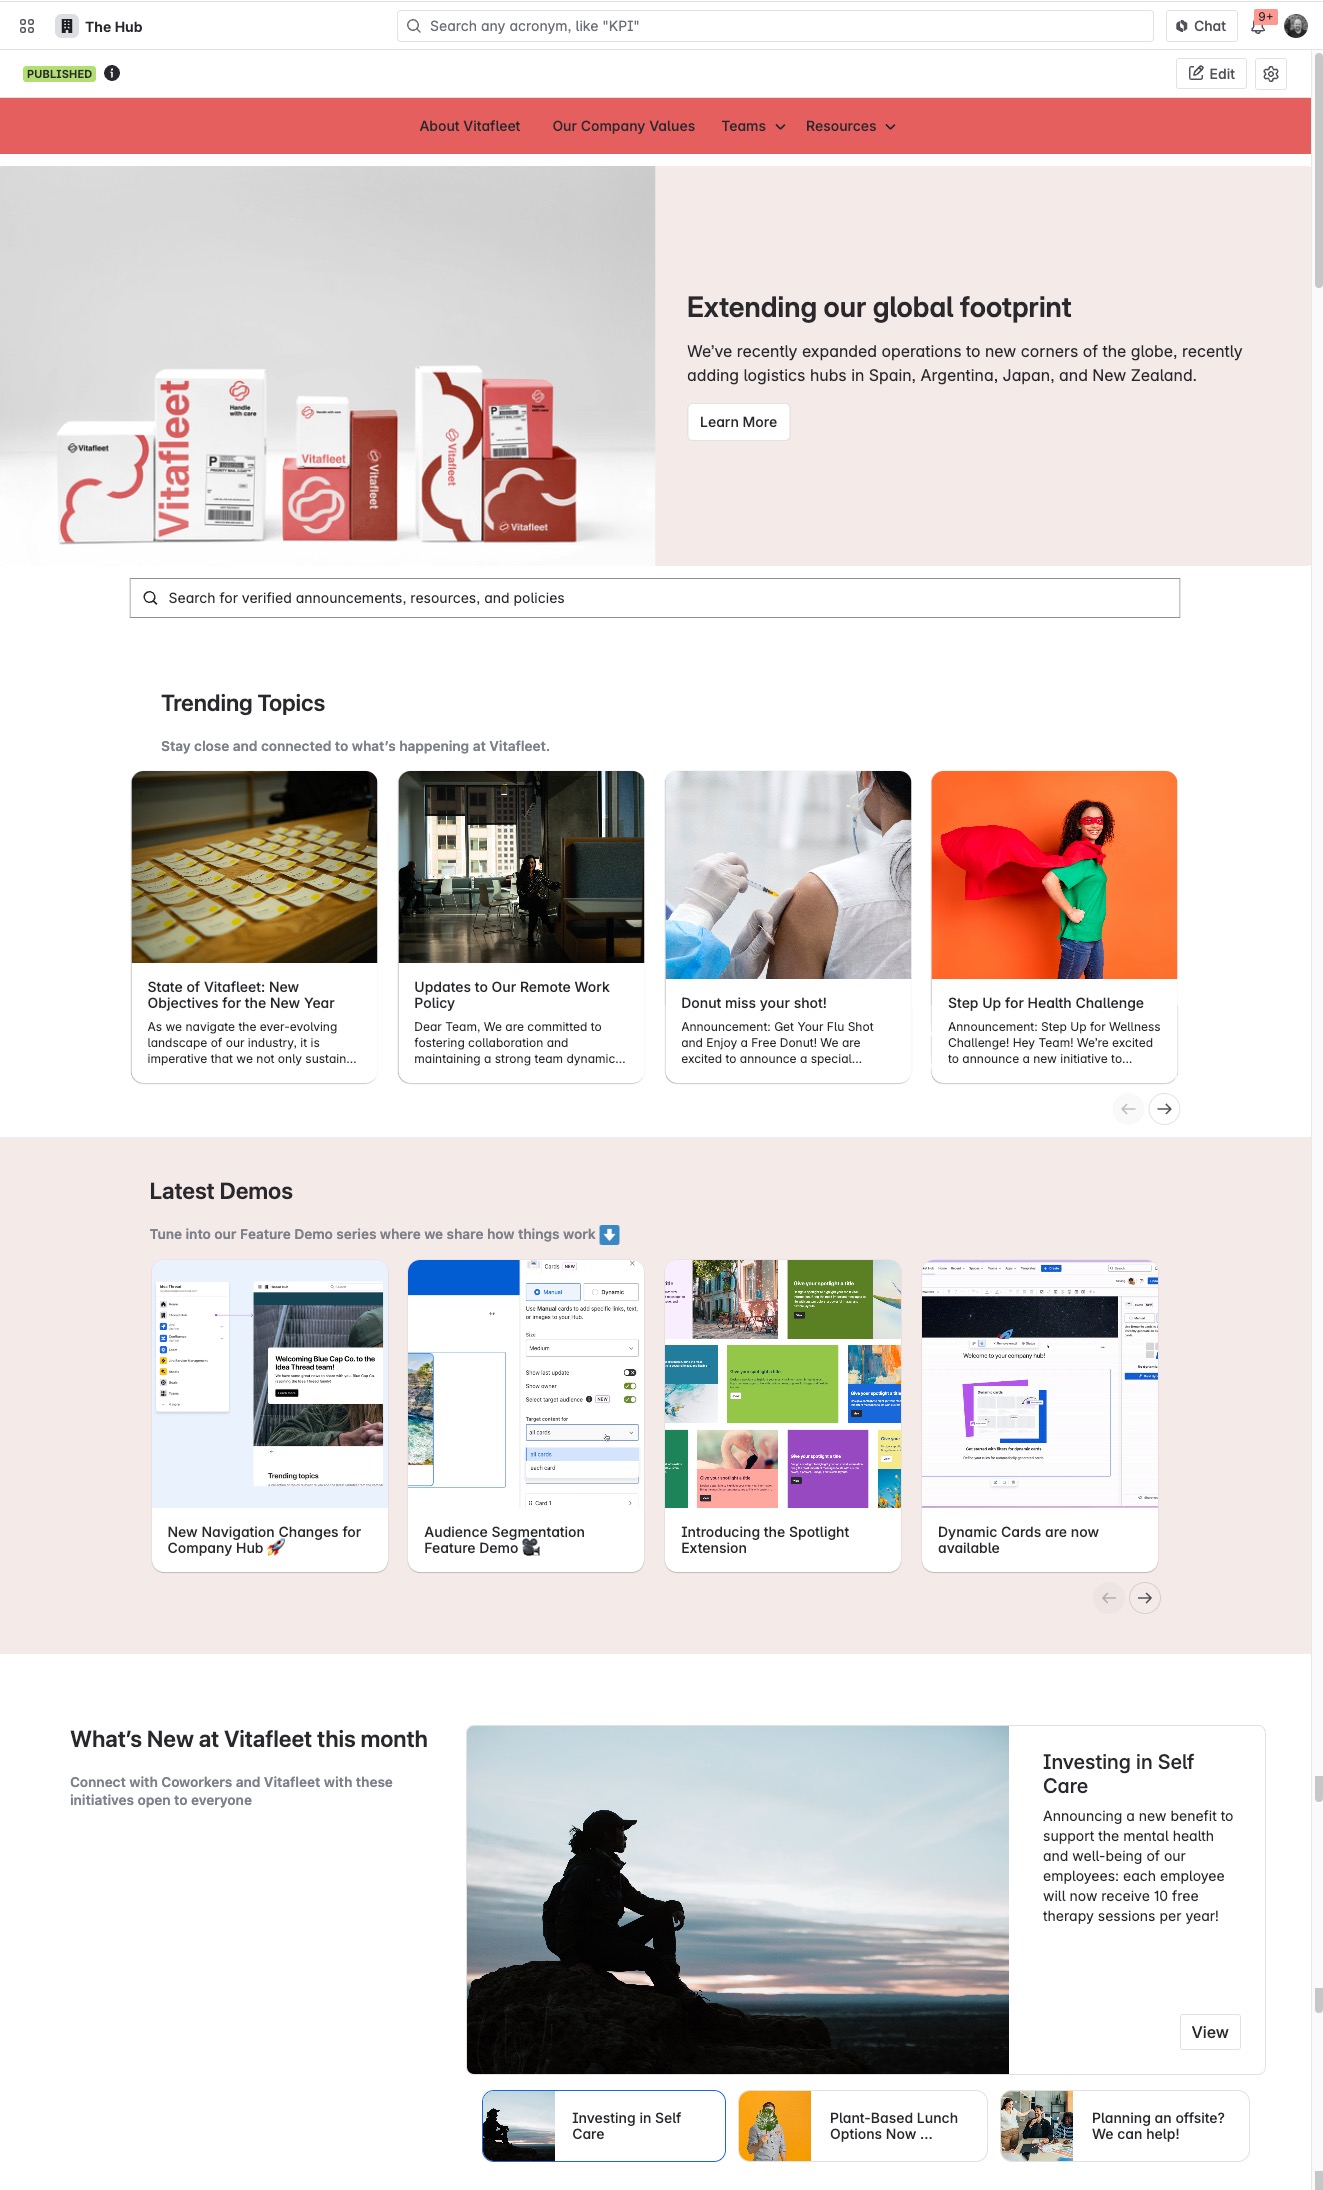
最新の情報が含まれる魅力的な会社ハブがあれば、チーム、コンテンツ、リソースを 1 か所にまとめて、コミュニケーションのギャップを埋め、生産性とコラボレーションを促進するのに役立ちます。
カスタム名と画像カルーセル、ビジュアル カード、クイック リンク、重要なリンクのメニューなどを容易に追加して、会社の行きつけの場所のような見た目と雰囲気 (ルック & フィール) を持つハブを作成できます。
ハブをセットアップする
この機能を表示して設定できるのは、アプリ管理者とサイト管理者のみです。ただし、他の編集者に設定を委任して手伝ってもらう場合を除きます。アプリ管理者とサイト管理者、そしてハブ固有の編集権限を持つ人なら誰でも、サイドバーから [会社ハブ] を選択して、ハブの設定を開始できます。
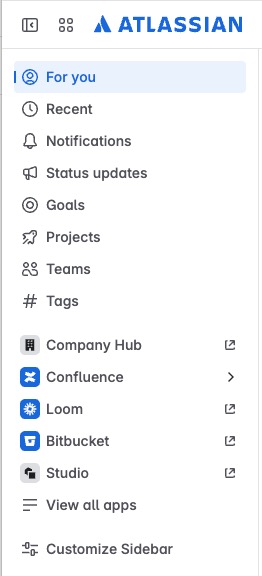
ハブが初めて公開されてアクティブになるまでは、ハブ固有の編集権限を持つユーザーのみが閲覧またはアクセスできます。
名前を選択する
開始するには、 会社ハブに一意の名前を選択します。
この名前は、ナビゲーション バーから、またハブ自体にアクセスしたときに誰にでも表示されます。
この名前は後で変更することが可能で、ハブにまったく名前を付けないこともできます。
会社ハブの名前は自由に決めることができます。創造的で遊び心のあるものにして、組織の文化や価値観を表現するのに使用してください。名前がユニークで記憶に残るものであれば、オーディエンスを引き付ける可能性が高くなります。
会社ハブをカスタマイズする
名前を付けると、便利なスターター テンプレートが表示されます。
[編集] () を選択してこのテンプレートをカスタマイズすることも、必要に応じてゼロから、会社のニーズや好みにぴったりのハブを作成することもできます。
会社ハブを次のレベルに引き上げる
ここでは、従業員のエンゲージメントを高め、重要な内部情報を広めるような素晴らしい会社ハブを設計する方法をいくつか紹介します。
上部から: 重要なリンクはすぐに利用できるようにする
最も重要なエバーグリーン コンテンツを含むリンク メニューを上部に追加します。メニューをカテゴリ別に整理して、内部または外部の URL へのリンクを設定できます。従業員名簿やチーム名簿、主要部門、従業員リソース (福利厚生など) をはじめ、アクセス頻度の高いコンテンツは、ハブの上部の目立つ場所に追加できます。
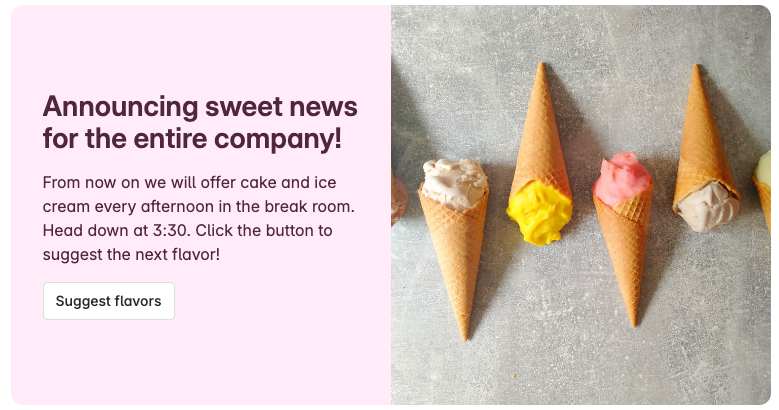
目を引く: 人に強い興味を持たせるような画像を使用して、重要なメッセージにスポットライトを当てる
次に、スポットライト要素を追加します。スポットライトでは、カラフルな背景を持つ大きなメッセージに加え、短いメッセージまたは長いコンテンツへのリンクを表示できます。Confluence、Jira、Atlas のリンクや外部 URL を大きなプレゼンテーションとして表示することで、重要なメッセージに注意を喚起します。メッセージを作成して、画像をアップロードして追加するか、ライブラリから選択します。
カードを使いこなす: カードは視覚的に説得力のあるコンテンツを提供する
Confluence、Jira、Atlas、または外部 URL へのリンクを視覚的にわかりやすく表示します。カード一式を使用して、あらゆるコンテンツの画像、短い説明、外部リンクを追加できます。特定の項目を選択した手動カードや、フィルター セットに基づいて入力される動的カードを設定できます。
ハブに何を含めるかについてのインスピレーションをお探しですか?
これらのアイデアを試してみてください。
従業員への称賛セクション
チームのお祝い
エグゼクティブ リーダーの最新情報
新入社員のオンボーディング ガイド
福利厚生ポリシーのクイック リンク
ハブ設定を管理する
アプリ管理者には、既定でハブに対する編集権限があります。また、会社ハブの設定で他の編集者を追加できます。
この内容はお役に立ちましたか?