Create and customize a Company Hub
This feature is only offered with Confluence Cloud Premium and Enterprise.
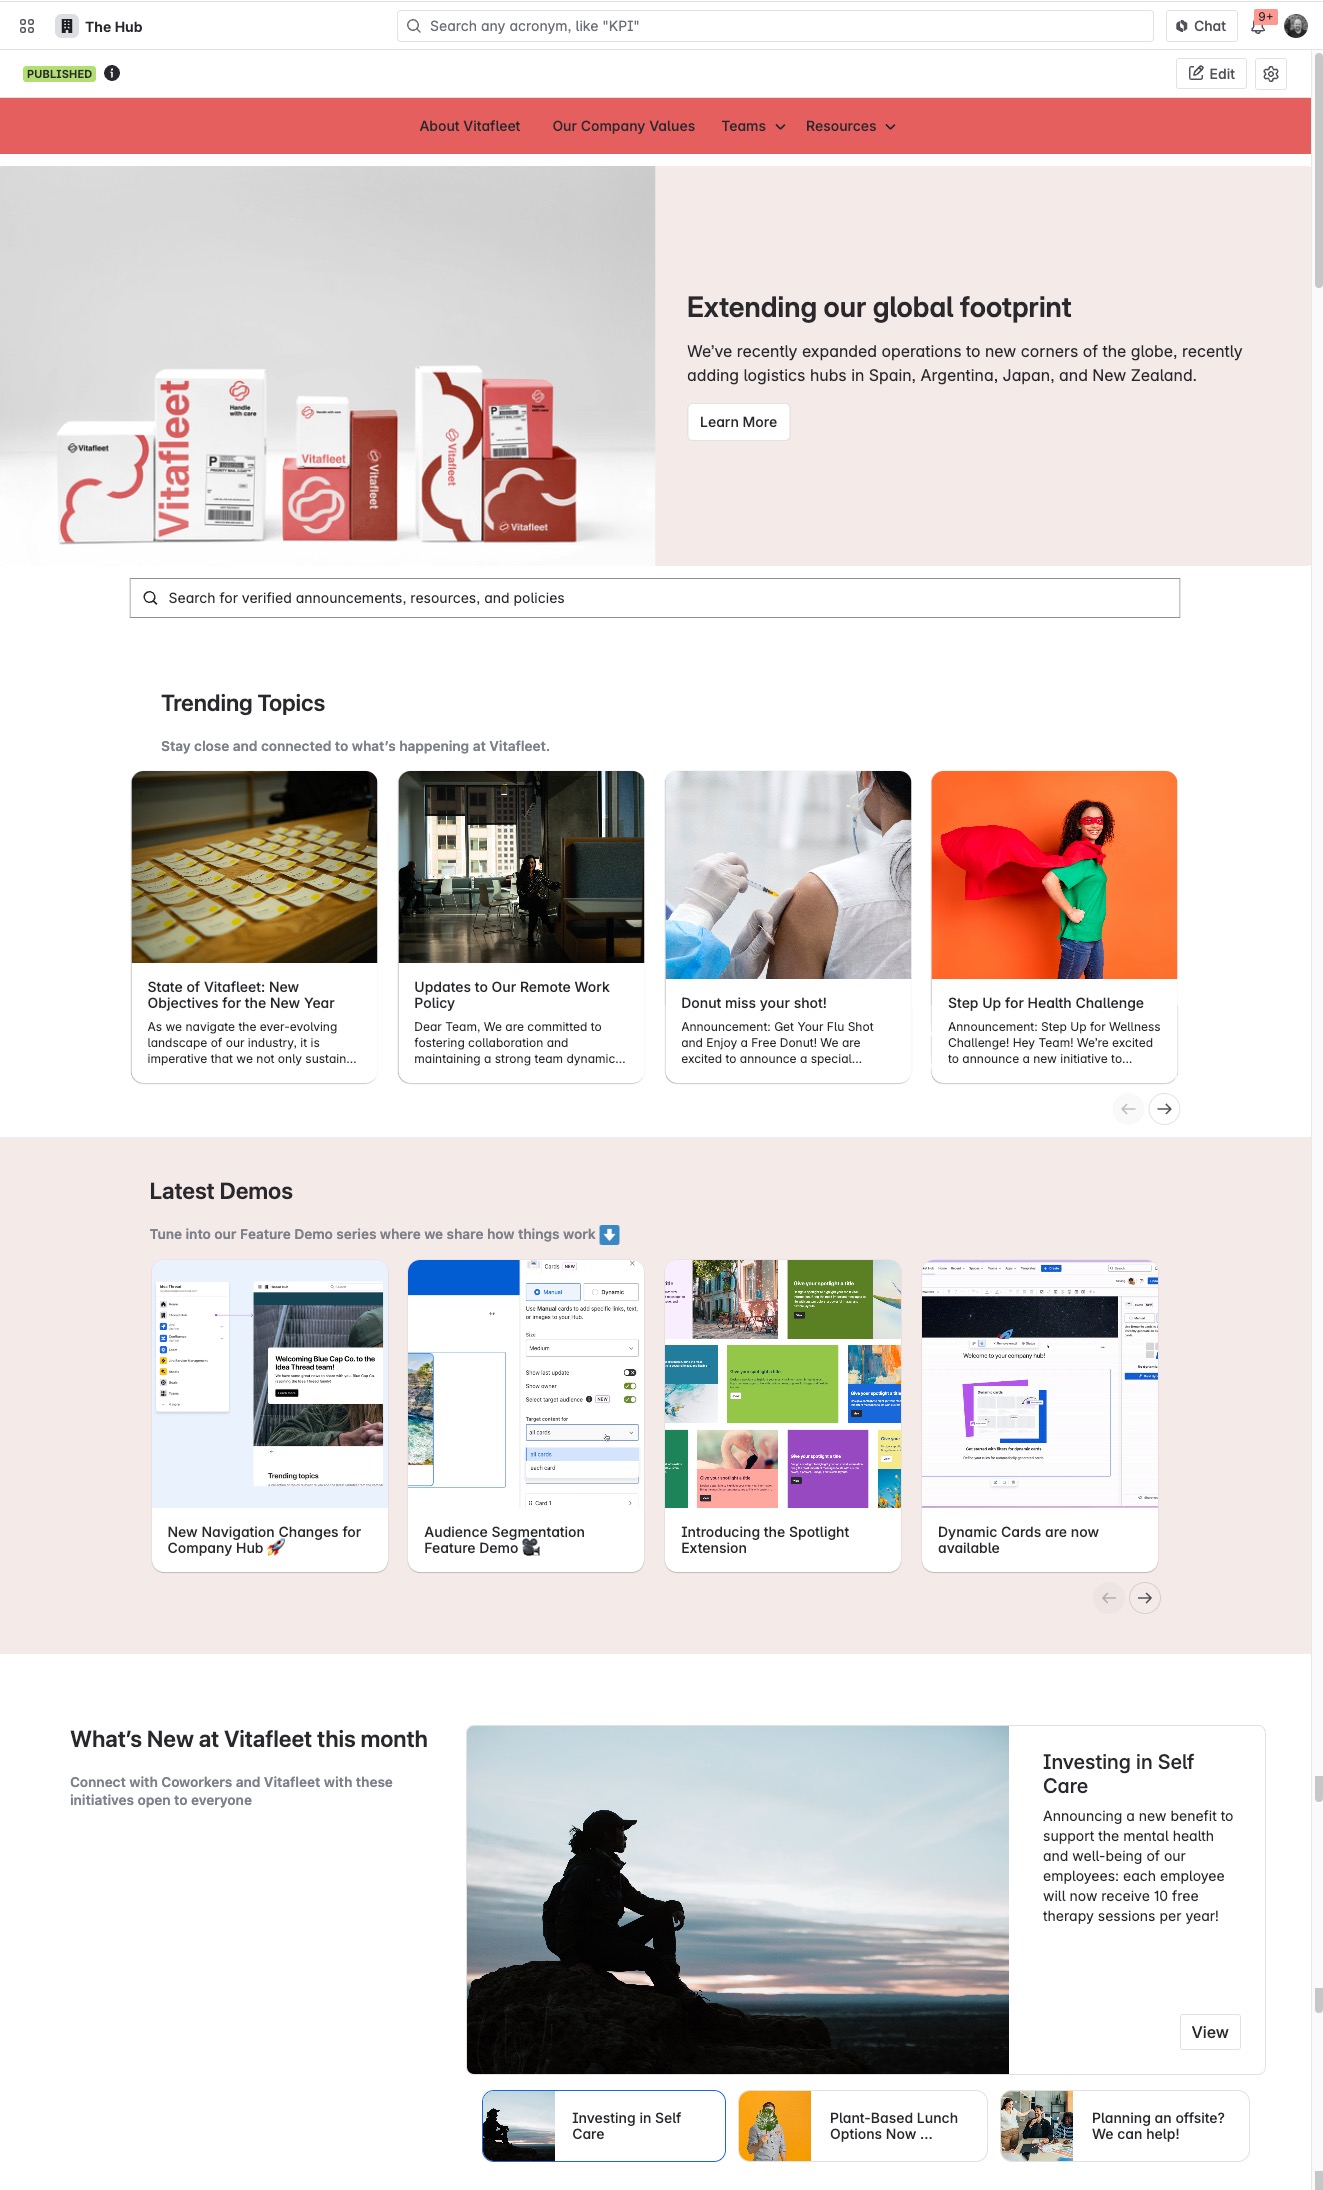
With Company Hub, you can create and customize a beautiful company-wide information central. This is where all employees can go for up-to-date announcements, news, verified resources, and more.

An inviting and up-to-date Company Hub can help close communication gaps and promote productivity and collaboration by connecting teams, content, and resources in one central place.
You can craft a Hub that looks and feels like your company’s go-to destination by adding a custom name along with image carousels, visual cards, quick links, a menu of important links, and more with ease.
Set up your hub
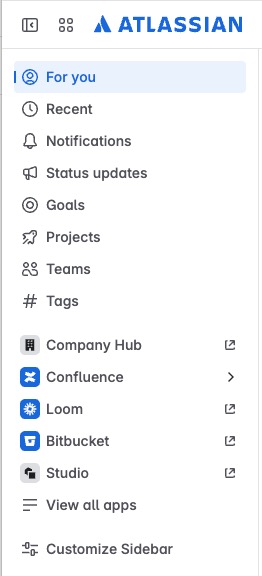
Only app and site admins can see and set up this feature, unless they choose to delegate additional editors to assist them in setting it up. App admins, site admins, and anyone else with hub-specific edit permissions can start setting up their Hub by selecting Company Hub from the sidebar.

Until your hub has been activated upon being published for the first time, only those with hub-specific edit permissions can see or access it.
Choose a name
To get started, choose a unique name for your Company Hub.
This name will be visible to everyone from the navigation bar, and when visiting the hub itself.
You can opt to change this name later on, or not name your hub at all.
Feel free to get creative and playful with your Company Hub name and use it to express your organization’s culture and values. Names that are unique and memorable are more likely to attract an audience.
Customize your Company Hub
After naming, a helpful starter template will appear.
You can select Edit () to customize this template, or start from scratch if desired, to make a hub that perfectly suits your company’s needs and preferences.
Taking your Company Hub to the next level
Here are some ways to design an amazing Company Hub that will drive employee engagement and get the word out about important internal information.
From the top: Important links available any time
Add a Links menu to the top with your most important evergreen content. You can organize the menu into categories and provide links to any internal or external URL. Frequently accessed content such as employee or team directories, major departments, or employee resources like benefits can be added in a prominent location at the top of the Hub.
Catch the eye: Use a compelling image to spotlight key messages
Next, add a Spotlight element. Spotlights can present a large message with a colorful background and either a short message or a link to longer content. Call attention to key messages by presenting Confluence, Jira, and Atlas links or external URLs as large presentation pieces. Craft your messaging and add upload an image or choose one from our library.

Stack the deck: Cards provide visual interest to your content
Display links to Confluence, Jira, Atlas, or external URLs with a visual flare. A set of cards lets you add images, a short description, and an outbound link for any content. You can set up manual cards with specific you choose or dynamic cards that populate based on your set of filters.
Looking for some inspiration on what to include in your hub?
Give these ideas a try:
Employee kudos section
Team celebrations
Executive leadership update
New hire onboarding guide
Benefits policy quick links
Manage hub settings
App admins have default edit permissions for the hub. They can add other editors in Company Hub settings.
Was this helpful?