Add a status to your content
Give your content a status to help set expectations for viewers and collaborators when they come to a page, live doc, or blog post. This avoids the need to add “draft” or “work in progress” to your title when you want to communicate that the content isn’t final yet. After all, no one wants to assume that something is done and spend time and energy commenting before you are ready for their feedback and questions!
Content statuses are only available in the cloud editor.
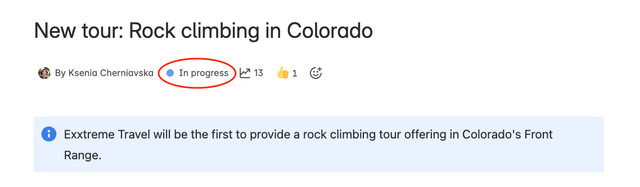
Each status is a combination of a colored indicator (purple, blue, red, yellow, or green) and a label (up to 20 characters) that can help people easily understand where your content is in its lifecycle. They can also be useful when reviewing version history and deciding which versions to compare.
Space admins control whether content statuses are on to begin with and if content authors/editors can add their own custom statuses. Additionally, admins can decide what (if any) default statuses should be suggested.
Space settings
To change content statuses settings:
Next to your space's name in the sidebar, select More actions (•••), then Space settings.
Open the General menuand select Avatars and status.
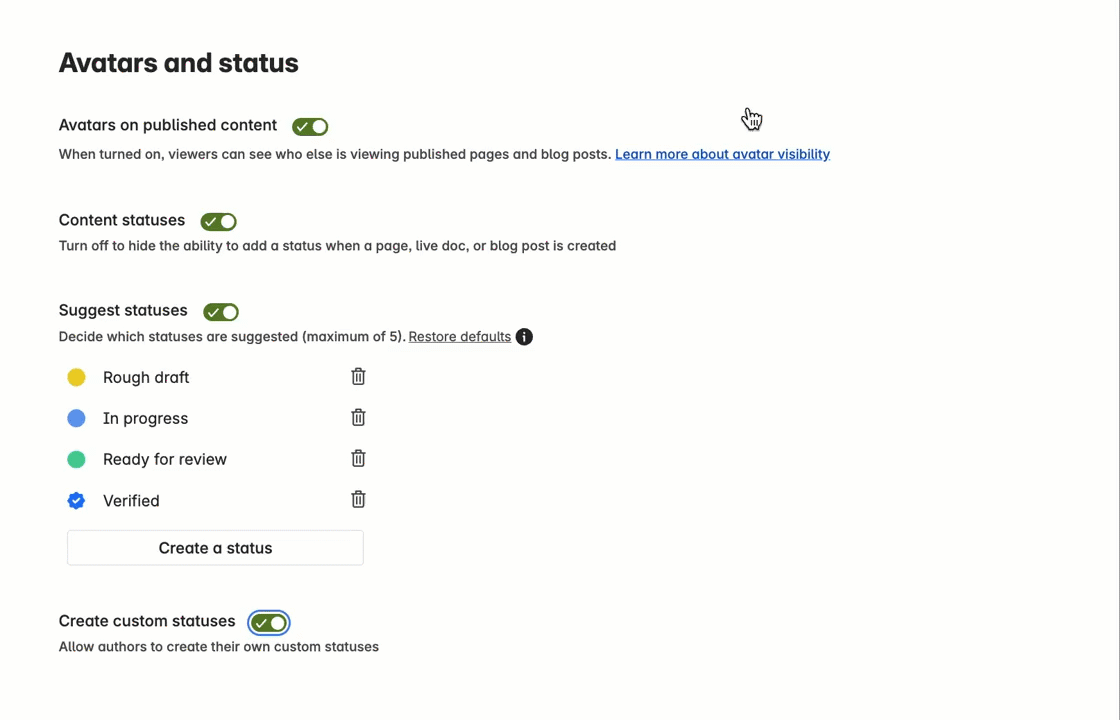
The space admin can:
Turn content statuses off for a space (or turn them back on)
Suggest certain statuses for use in the space
The three default suggested statuses are Rough draft, In progress, and Ready for review. You can remove these statuses or add new ones (up to five for a space) by selecting Create a status. To revert to the original default three, just select Restore defaults.
Allow or prevent people in the space from adding new statuses
If prevented from adding custom statuses, authors will only be able to use the suggested statuses determined by space admins.
Add a status
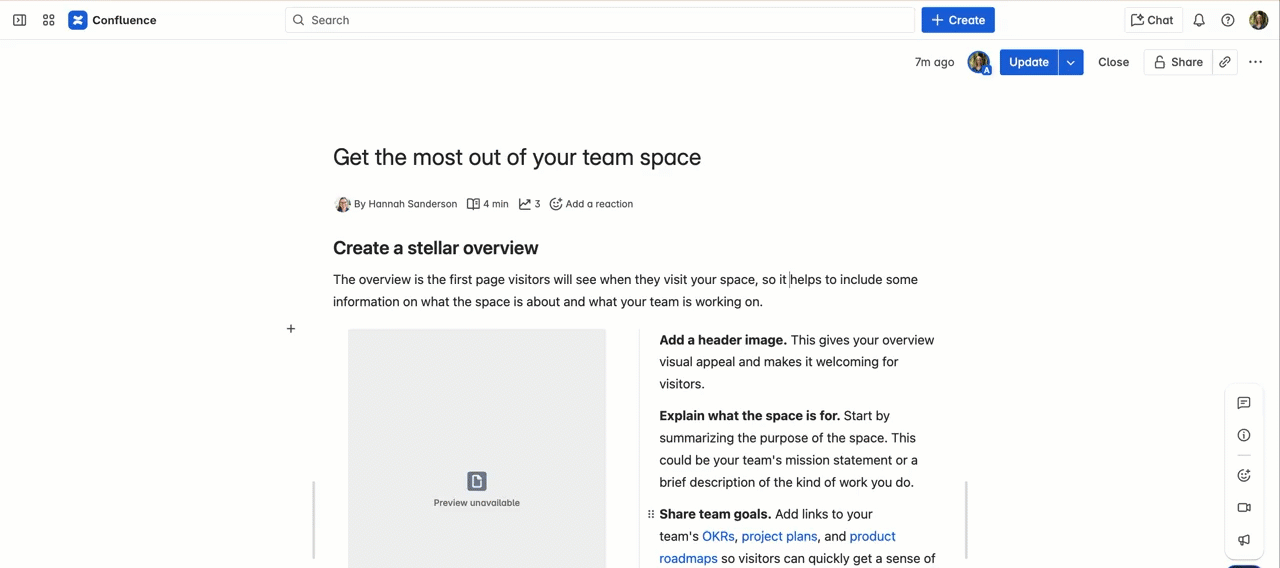
If a space admin allows statuses in a space, you can add or change them at the top of your content when editing. That means anyone with edit permissions can set the content status, choosing from the suggested options defined by the space admin or creating your own.
Select Status from above the title while editing.
Choose between a suggested or custom status from those listed or add a new one (depending on the settings chosen by the space admin.
Your custom statuses are not available to anyone else.
Viewers can only see the content status on a page or blog after it has been published, but statuses on live docs are instantly visible.
Because admins control the statuses available, statuses can differ from space to space. If content is moved from one space to another, the person moving the content will be alerted to any differences in the way statuses work in the new space.
Was this helpful?