Set up a Premium Workspace
If you've upgraded your Trello Workspace to Premium and you're looking to onboard your Workspace as smoothly as possible, you are in the right place. Follow along step-by-step to get started.
1. Invite people, and configure their permissions
Add people to the Workspace
You can invite people to your Workspace from the Members section. Individuals that are not already signed up with Trello will receive an email inviting them to sign up for Trello. When they create an account they will automatically be added to your Workspace.
More about inviting people to a Workspace.
Who do I need to add to my Workspace? Anyone you'd like to give full access to all Premium features and control with Premium permissions.
Please note that the Trello Premium subscription is per-Workspace-member, which means that every person that you invite to be a member of your Workspace will incur an additional charge.
How billing works with Premium
Set permission levels for Workspace members
Once you’ve added people to your Workspace you can set each person’s permission level.
It’s useful to have one additional trusted member that you can assign admin privileges to in case you are unavailable. To set Workspace level permissions for members, click the button to the right of the member's name that either says Admin or Normal and adjust accordingly.

You can find information about Workspace members on the Members tab. You’ll find the following details for each member:
Name and username
Last activity date
Permission level
2. Add boards, and invite people to them
Create a board or associate existing ones
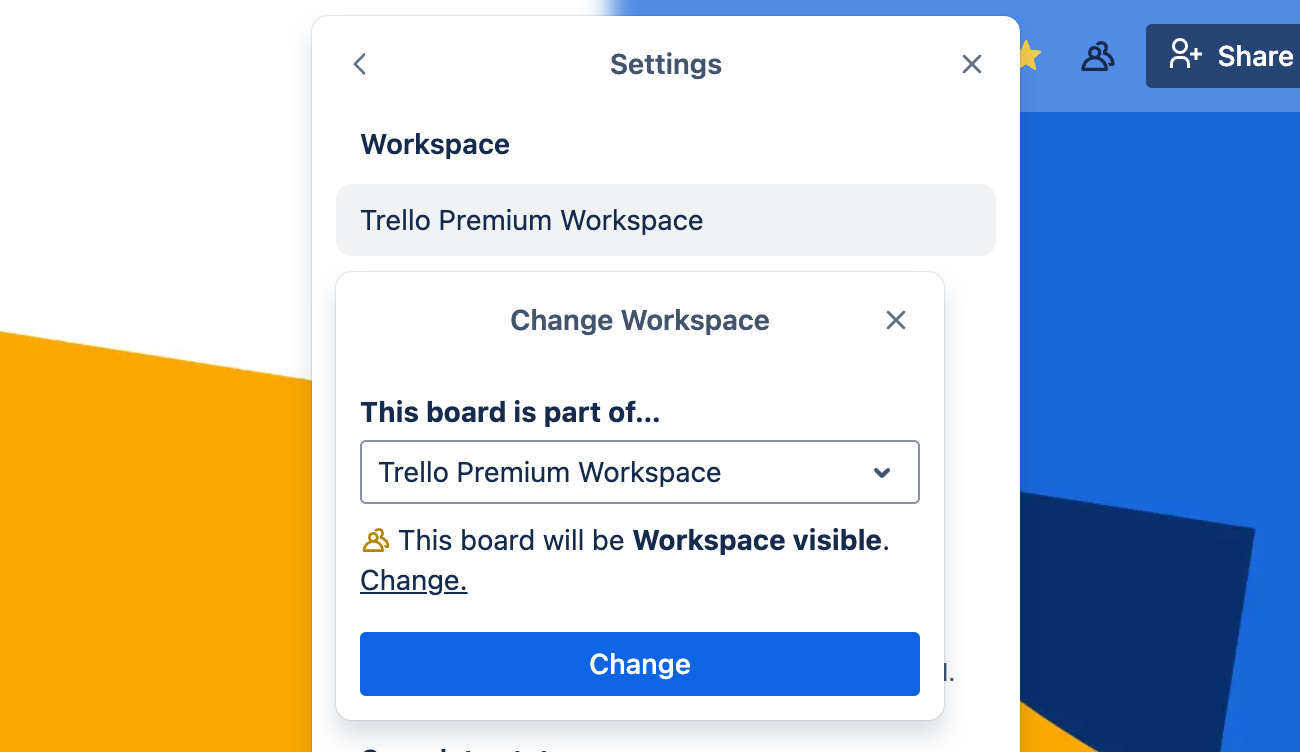
It is likely that members of your Workspace created Trello boards for projects before your Trello Workspace existed. If you like, they can move their boards into your Workspace so they can use Premium features.
If you’re an admin of a board, you can move it to your Workspace yourself. For other boards, ask board admins to move them into your Workspace.
Board admins can move a board to a different Workspace from the board menu by selecting Settings, then selecting the Workspace’s name.
Add members to your boards
Open any board and select Share to add people to it. You can add a person as Member or Observer. Type their email address or username, then select Share.
More about adding people to a board
Member types
Admins can view and edit cards, remove members, and change board settings.
Members can view and edit cards, but can't change board settings.
Observers can view, comment, and vote on cards. However, they can't move or edit cards, nor can they change settings.
Observer status makes it easier to share boards and information with clients and vendors. Give people the ability to view, but not modify, private Workspace boards without needing to make the entire board public. You can even invite people outside the Workspace to be an observer on a board. However, if the observer needs to be added to more than one board, they will be bilalble as a multi-board guest.
Because Premium upgrades are per-Workspace, you will not be charged for board members that are added to only one board in the Workspace.
Allow Workspace members to join
By default, Workspace members can't collaborate on boards unless they are added as a board member. If you don't want to go through the hassle of adding everyone to boards in your Workspace, you can select Workspace editing in the board menu.
This will give Workspace members the ability to join and edit boards in the Workspace. You will have to do this for each board on your Workspace individually.
More about setting board permissions
3. Configure Workspace settings
Set the Workspace-level permissions for members, boards, and invitation restrictions in the Workspace settings. To open the Workspace settings, expand the sidebar and click Settings > Workspace settings.
Control who can join the Workspace
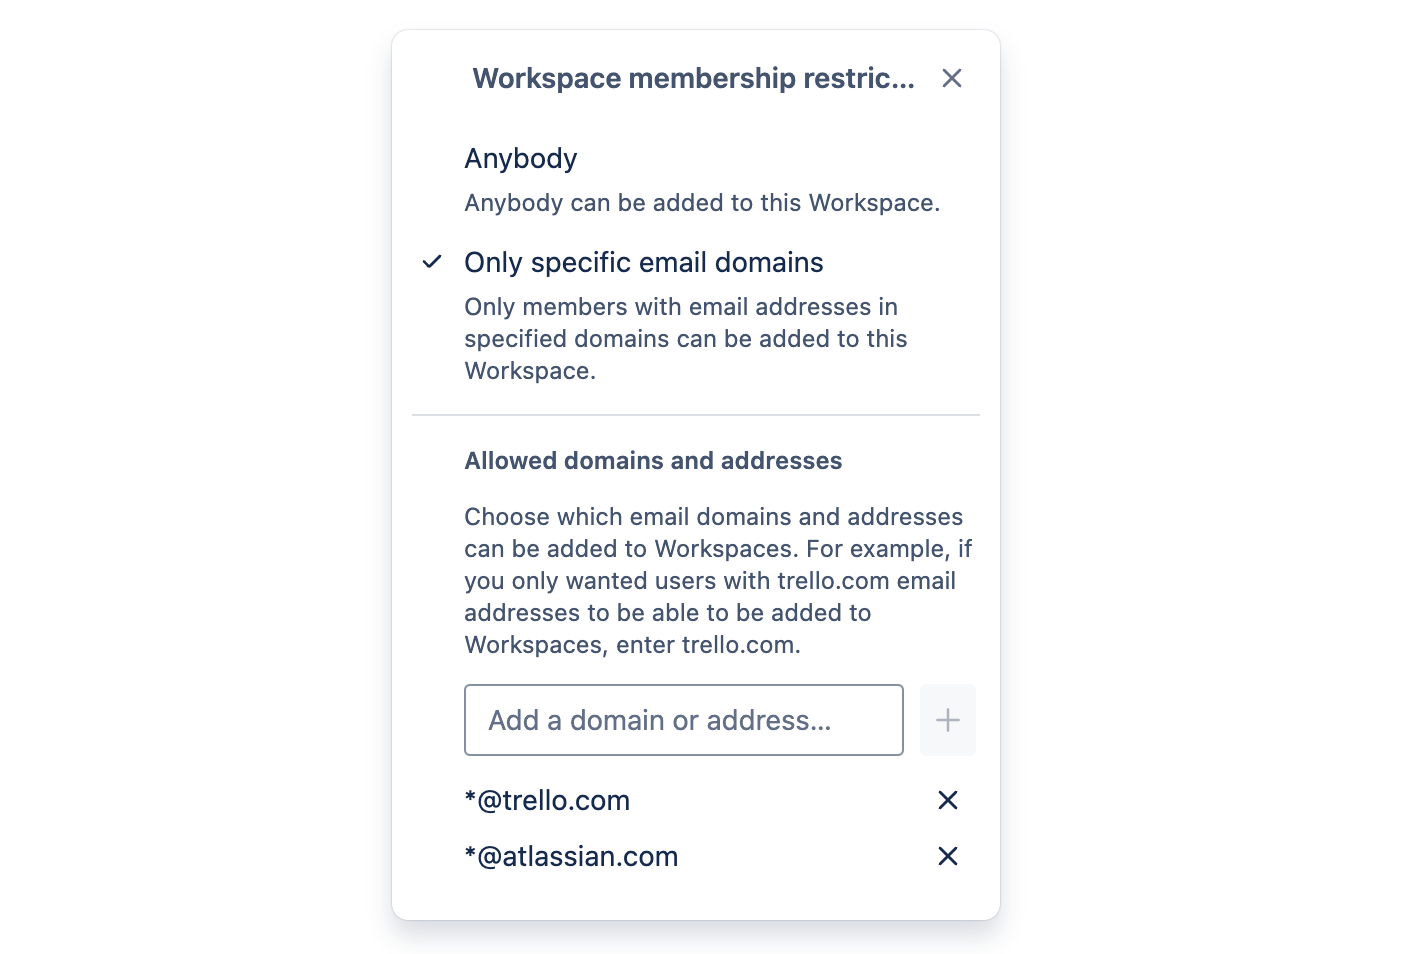
Workspace admins can use Workspace membership restrictions to prevent people from being invited to the Workspace unless their email address is from one of the approved domains.
This setting’s default is Anybody, which allows anyone to be invited to the Workspace.
To enable Workspace membership restrictions and limit who can be invited to the Workspace:
Open the Workspace settings
Find Workspace membership restrictions then select Change
Select Only specific email domains
Enter the email domains that should be able to join your Workspace. For example, trello.com. Then select Add (plus icon). You can continue approving domains this way.
Adding Workspace membership restrictions only affects future invitations. It won’t remove members from the Workspace or its boards if their email isn’t from one of the approved domains.
Restrict who can create or delete boards
Set the permissions for who can create public boards, workspace visible boards, and private boards. You can choose any workspace members, only workspace admins or nobody for each option.
Prevent people outside the Workspace from joining boards
Finally, set the permissions for Sharing boards with guests. You can choose to allow anyone to be added to boards associated with your Workspace (whether or not they are a member of your Workspace), or you can set it so that only members of your Workspace can be added to your Workspace's boards.
4. Understand billing
When you upgrade your Trello Workspace to Trello Premium you have the option to choose between a monthly or annual plan. The cost is per Workspace member, so you'll be billed for every additional member you invite to the Workspace.
Premium is an upgrade for a Workspace. This means that you're upgrading a specific Workspace instead of your account as a whole.
More about how Billing works with Trello Premium.
Was this helpful?