Add custom stickers to cards

Stickers are a simple yet fun way to add visual flair to your Trello cards. They can communicate a card's status or add a little bit of whimsy.
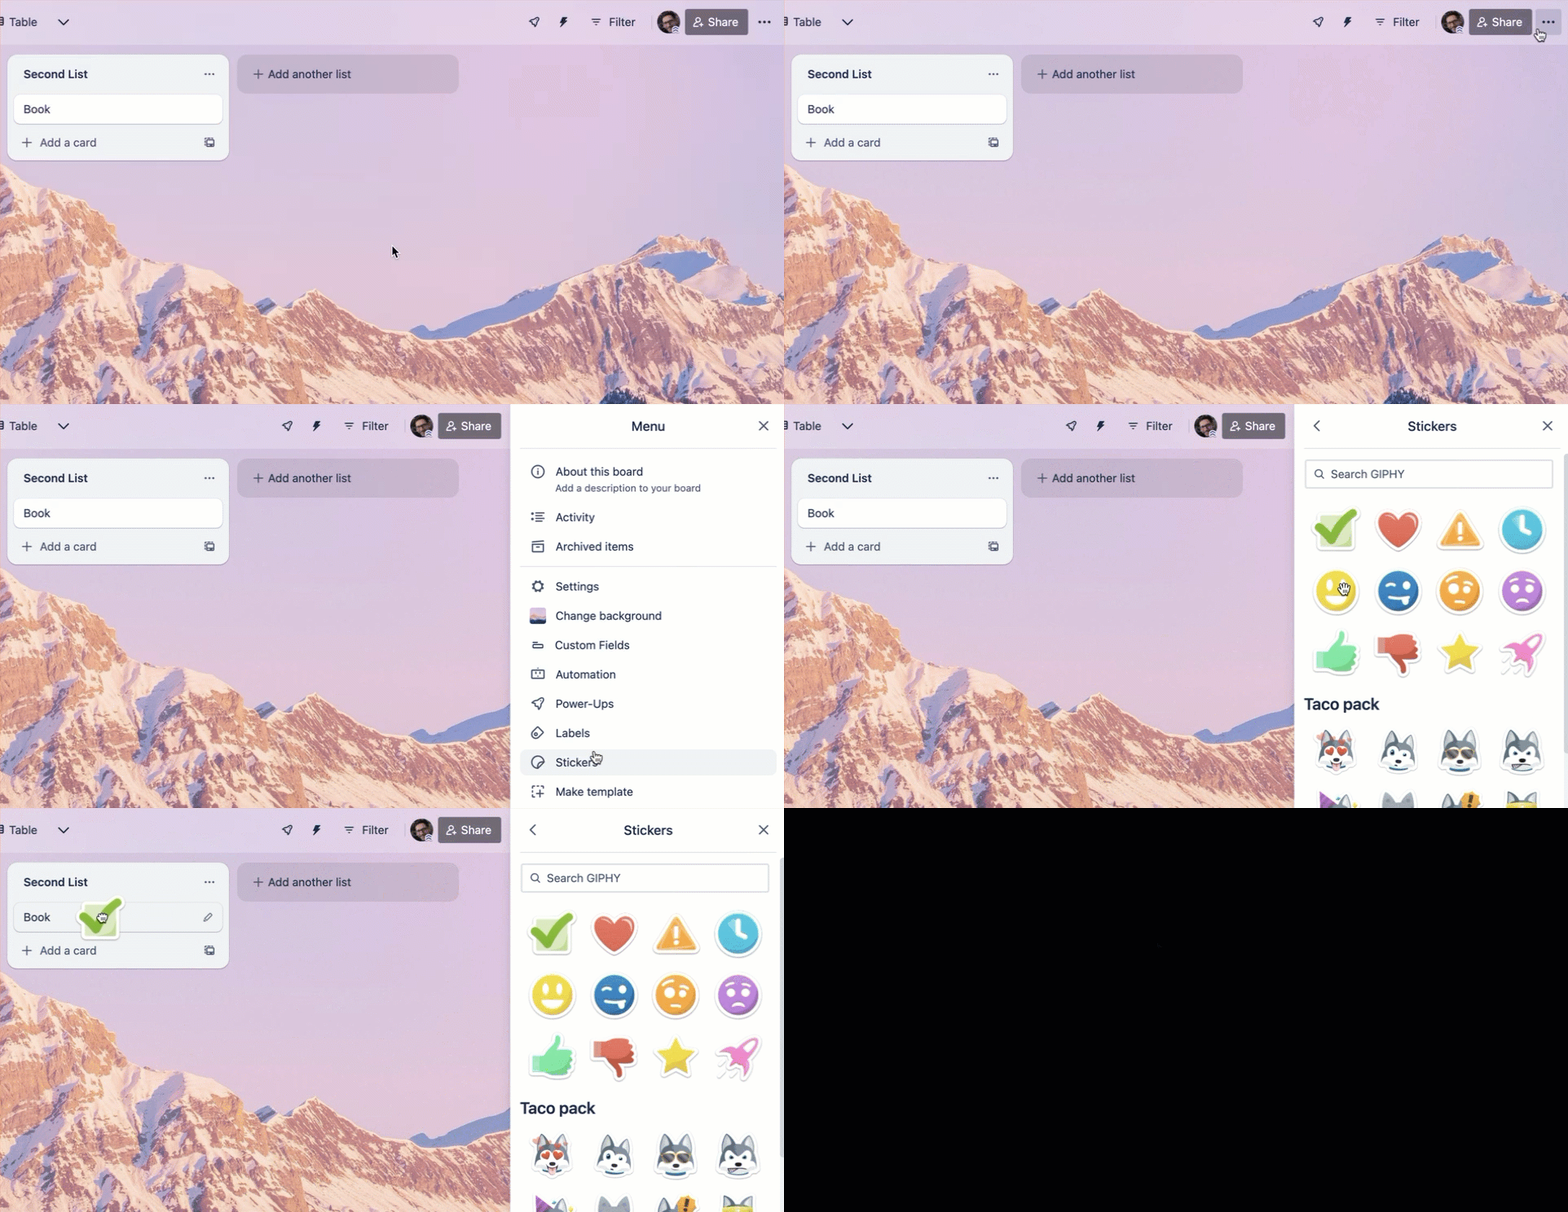
Add a sticker to a card
To add a sticker to a card:
Open the board menu
Click Stickers
Click and drag a sticker onto one of your cards
Remove a sticker from a card
To remove a sticker from the card:
Hover over the sticker
Click the remove () icon
A sticker can be removed from the front and back of the card.
Upload custom stickers
Paid Workspaces allow you to upload your own custom stickers.
To upload a custom sticker:
Click the () icon to open the board menu, then Stickers
Click the plus () icon at the bottom
Choose an image to upload
Images that are 128x128 pixels will show up the most clearly—other sizes will be letterboxed.
Delete a custom sticker from your board
Click the () icon to open the board menu, then Stickers
Hover over the sticker and click the remove () icon
Deleting a sticker is permanent and there is no undo.
Was this helpful?