Connect SharePoint to Rovo
Get answers from your documents and bring your files alongside your company knowledge.
What is indexed?
The SharePoint connector indexes these objects:
Word Documents (.doc, .docx)
Excel Spreadsheets (.xls, .xlsx)
PowerPoint Presentations (.ppt, .pptx)
PDFs (maximum 10 MB)
For each object, it indexes these attributes:
Name
URL
Created date
Last updated date
Creator
Collaborators
Document body
Before you begin
You need SharePoint global admin permissions to connect SharePoint to Rovo.
Rovo will always respect permissions. Users will only ever see files that they already have access to.
Connecting to SharePoint
To get to the setup screen for SharePoint in Atlassian Admin:
Go to admin.atlassian.com. Select your organization if you have more than one.
Select Apps > AI settings > Rovo.
Under Sites, next to the site you want to connect, select Add connector.
Select Microsoft SharePoint and press Next.
Azure portal
1. Log in to your Azure portal (portal.azure.com) and navigate to Microsoft Entra ID.
2. In the side navigation, under Manage, select App registrations > New registration.
3. On the Register an application page in the Azure portal, name the connection to Rovo (for example, “Atlassian Rovo”), select Accounts in this organizational directory only, and then select Register.
4. In the side navigation, under Manage, select API permissions, select Add a permission on the API permissions page, then Microsoft Graph.
5. Select Application permissions and select expand all.
6. Copy the following permissions one by one, and paste them into the search line. Click the checkbox. Repeat for all permissions.
Directory.Read.All
Files.Read.All
Group.Read.All
GroupMember.Read.All
User.Read.All
Reports.Read.All
Sites.Read.All
AuditLogsQuery-SharePoint.Read.All
7. Select Add permissions.
8. There’s one more permission to add, but it’s in a different API. Select Add a permission again, then this time Office 365 Management APIs.
9. Select Application permissions, and look for ActivityFeed.Read. Select the checkbox, and select Add permissions.
10. Select Grant admin consent for <workspaceName>.
11. Once this is done, back on the Manage > API permissions screen, in the Status column of the table, you should see green ticks and Granted for <workspace> (except the permission User.Read, which doesn't require Admin consent).
12. Navigate to Manage > Certificates & secrets, and select New client secret and fill in the form.
13. Once you’ve created a secret, copy the Value field (not the Secret ID, note the screenshot below). You’ll need this soon.
14. Go to Overview and copy the following details back into the Admin screen for Rovo Connector:
Your application ID
The directory ID
15. Copy the SharePoint domain name from your login. For example, copy the <domain> section of aaaa.bbbb@<domain>.onmicrosoft.com.
16. Enter the Client secret value you copied earlier as Client secret.
Microsoft 365 admin center
1. Go to the Microsoft 365 admin center at https://admin.microsoft.com/.
2. In the navigation, select SharePoint admin center.
3. You will need to grant permissions to the newly created principal. Since we're granting tenant scoped permissions, this granting can only be done via the appinv.aspx page on the tenant administration site. You can reach this site via opening this URL in your browser:
<your-sharepoint-domain>-admin.sharepoint.com/_layouts/15/appinv.aspx
There is no other way to navigate to this page. For more information, see the Azure documentation on granting permissions.
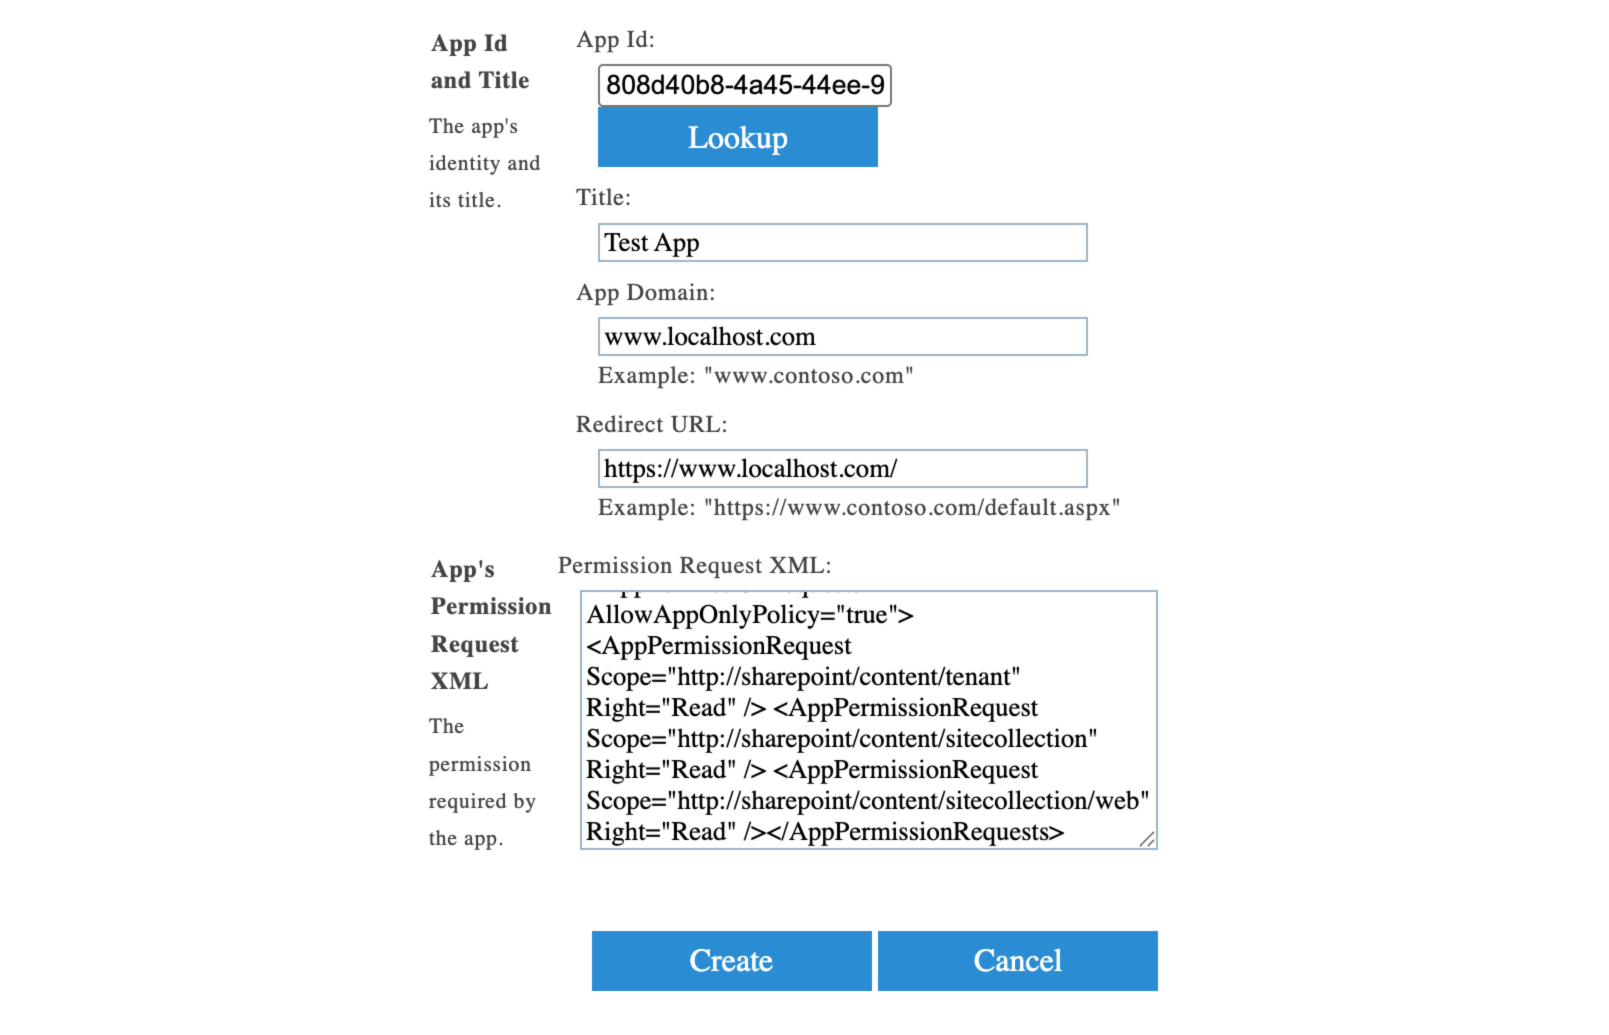
4. Using the application ID that you copied in the Azure portal earlier, paste the value in the App ID field and select Lookup.
5. Next, we need to setup SharePoint permissions. Fill in the App Domain and Redirect URL with whatever you would like (these will not be used).
Fill in the App Domain with
www.localhost.comRedirect URL with
https://www.localhost.com/Paste the following into the App's Permission request XML:
<AppPermissionRequests AllowAppOnlyPolicy="true"> <AppPermissionRequest Scope="http://sharepoint/content/tenant" Right="Read" /> <AppPermissionRequest Scope="http://sharepoint/content/sitecollection" Right="Read" /> <AppPermissionRequest Scope="http://sharepoint/content/sitecollection/web" Right="Read" /></AppPermissionRequests>
6. Select Create, and on the next screen read the permissions and select Trust it.
In Atlassian Administration
Finally, back in Atlassian Administration:
(Optional) Choose content to include. You can choose to limit SharePoint content by:
Allowlist and blocklist: Specifying site or subsite URLs to block or allow. More on blocking and allowing content
Limiting by date: Only content modified or created since a specified date will be added.
Review the disclaimer.
Select Save.
Newer SharePoint tenants
If your SharePoint tenant was recently created (post-2019), you also need to enable apps to use ACS app-only access tokens. You must run on your local Windows machine. If you only have a Mac, follow these steps to install the latest version of PowerShell on MacOS.
Open up Microsoft Powershell:
1. Install PnP Powershell Module by running:
Install-Module PnP.PowerShell -Scope CurrentUser
2. Next, run: Register-PnPEntraIDApp -ApplicationName "PnP PowerShell" -Tenant <your-sharepoint-domain>.onmicrosoft.com -Interactive
It will open a browser window for you to log in.
Once logged in, the command will successfully complete.
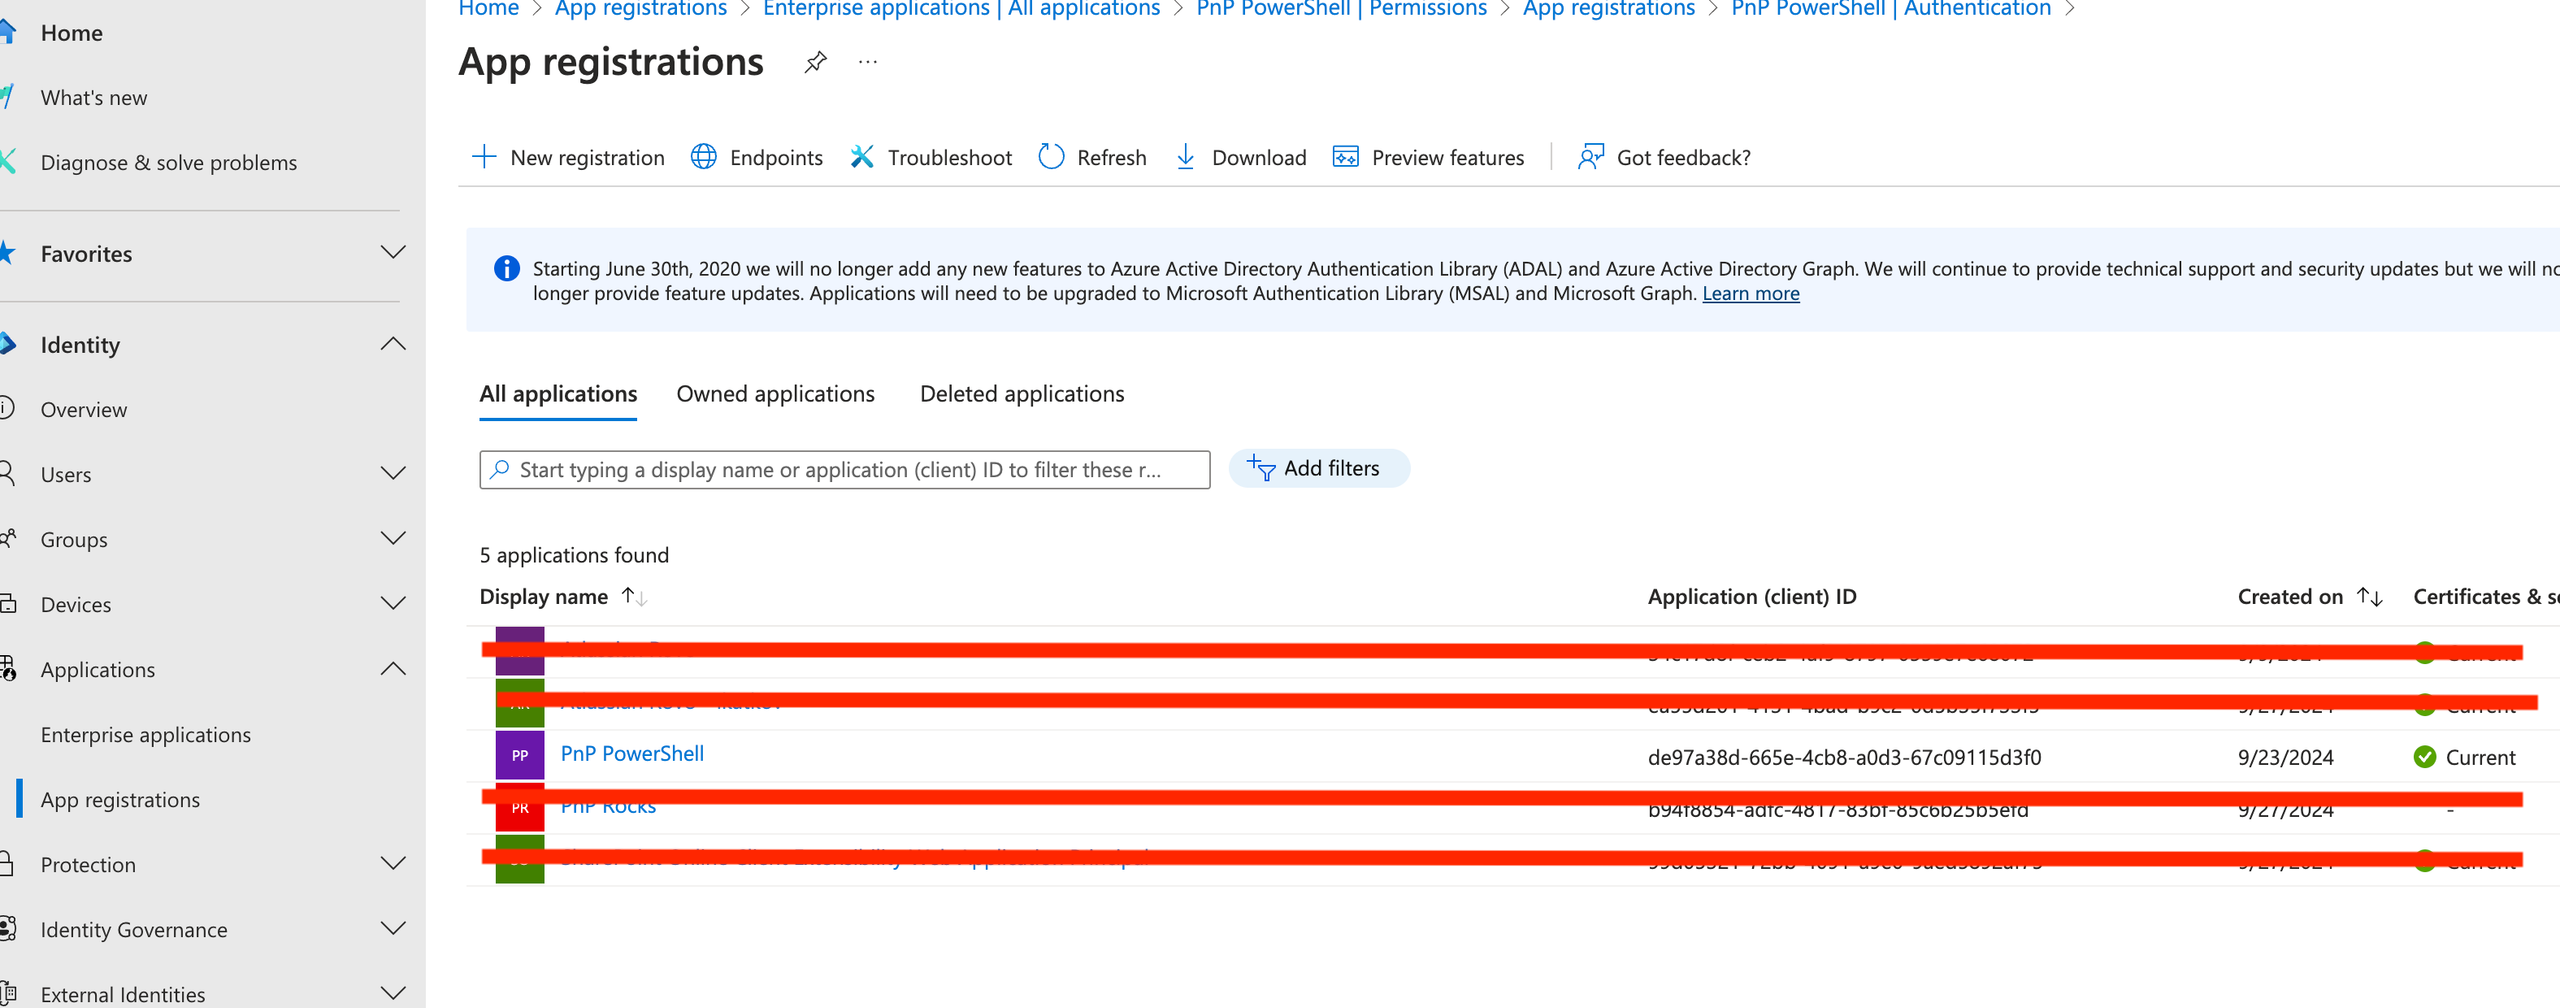
3. In new window, navigate to the newly created PnP Powershell Application in Microsoft Entra > Applications > App Registrations, and select PnP Powershell from the application list.

4. Under Manage > Authentication, under the Mobile Desktop and Application Redirect URIs heading, add http://localhost:55592
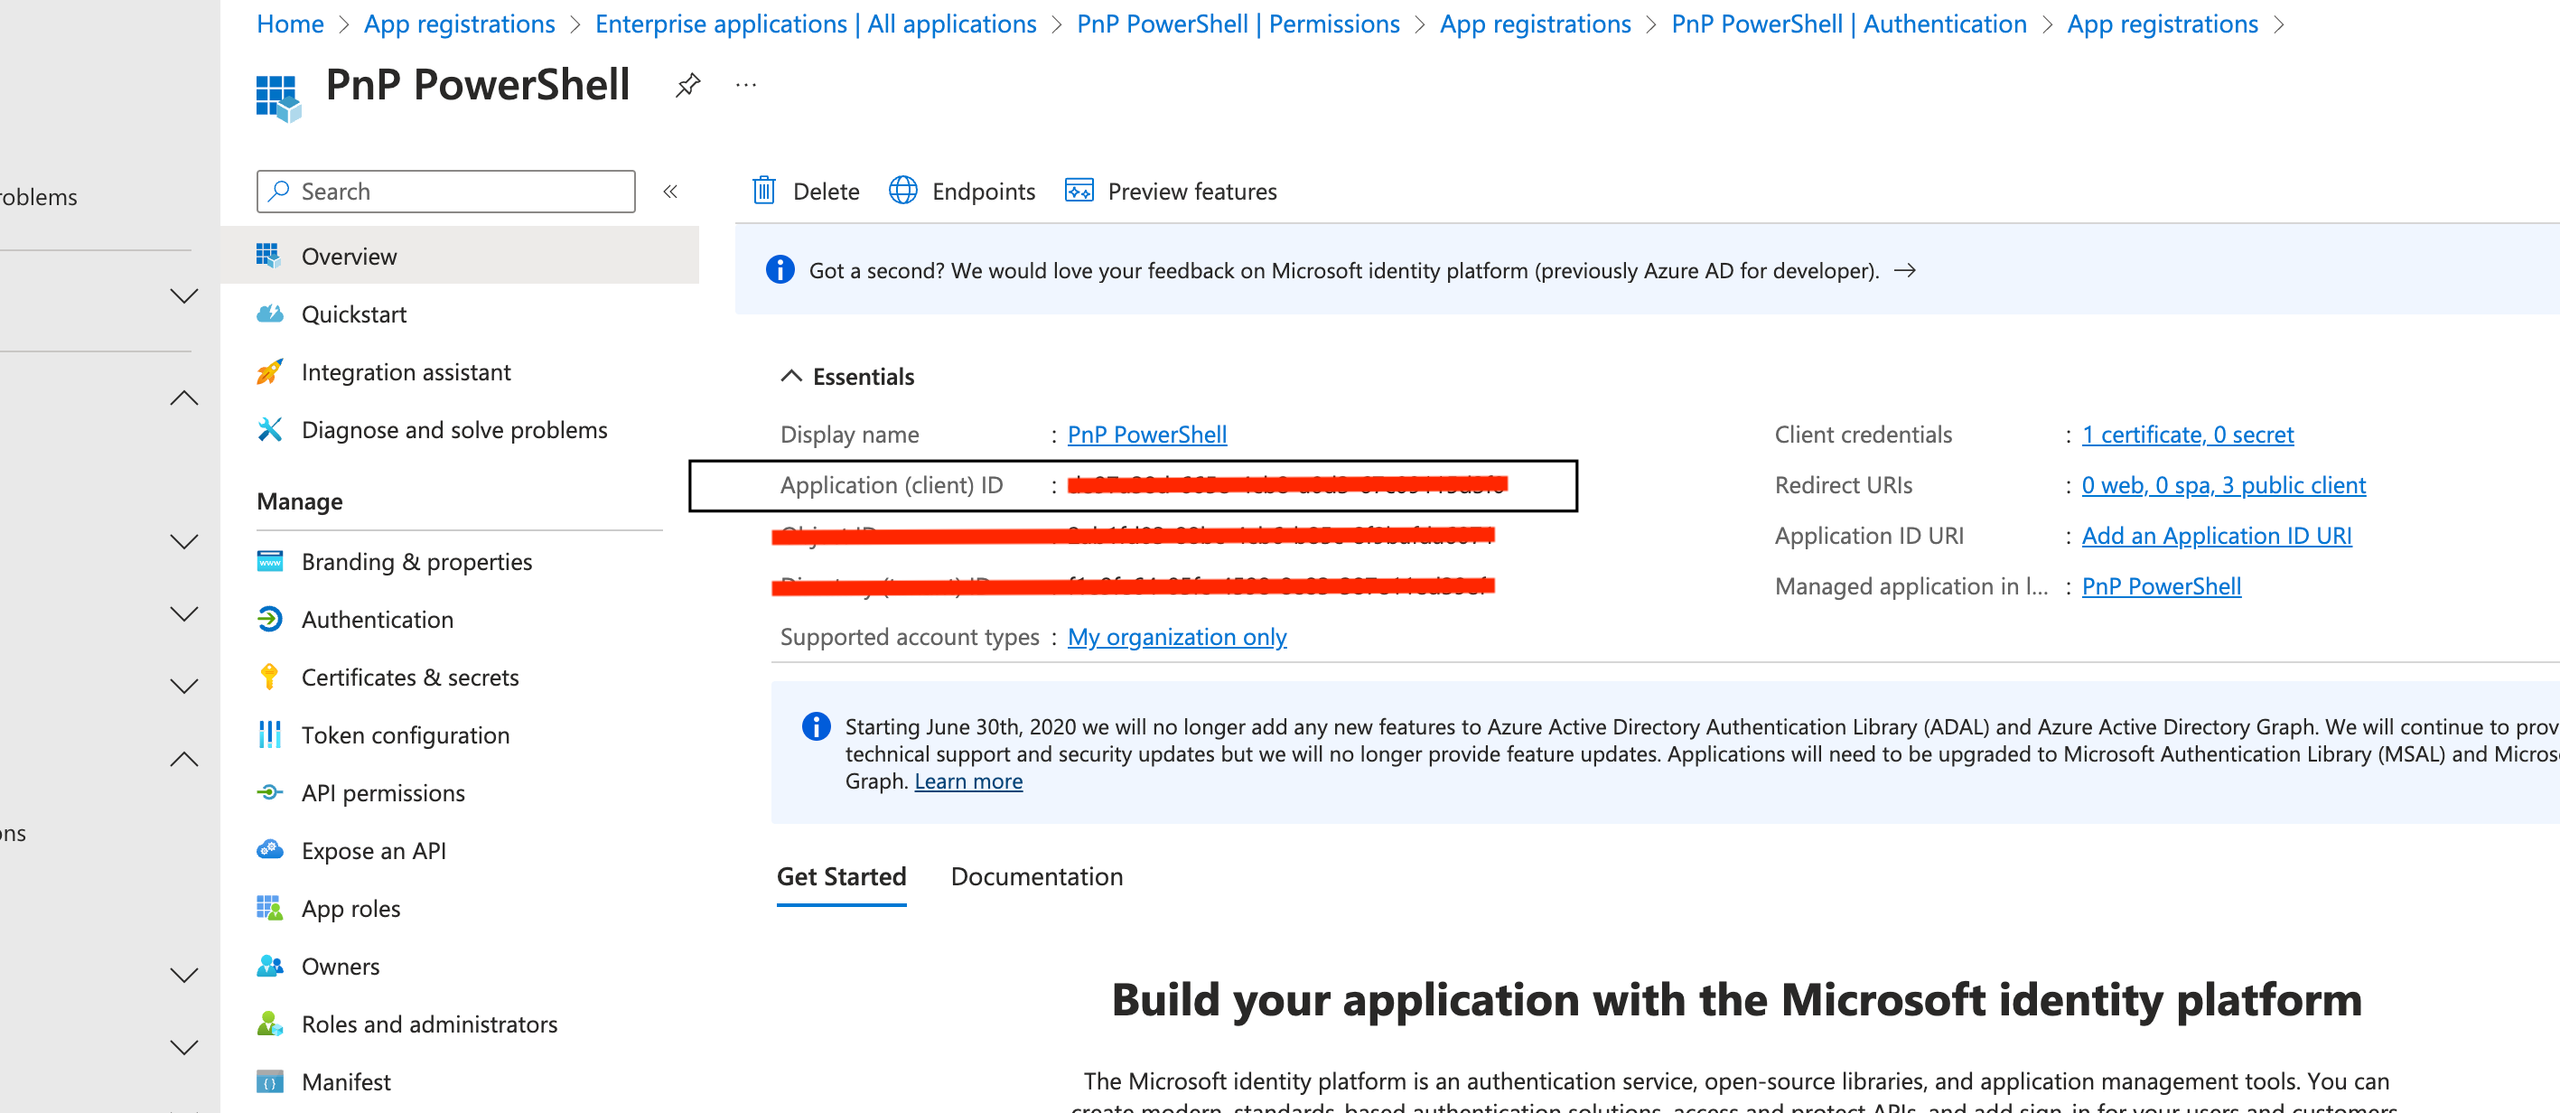
5. Navigate to Overview and copy the Application (client) ID. You’ll need this for the next step.

6. In PowerShell, using your SharePoint domain and the Application (client) ID you just copied, runConnect-PnPOnline -Url https://<your-sharepoint-domain>-admin.sharepoint.com -ClientId <Application (client) ID> -Interactive
It will open a browser window for you to log in.
Once you’ve logged in, the command will successfully complete.
7. Run Set-PnPTenant -DisableCustomAppAuthentication $false in PowerShell.
See Microsoft's documentation on ACS app-only access tokens
Next steps
After you’ve finished Connecting SharePoint:
Documents will start to show in Search incrementally over the next few hours.
Your team members will see SharePoint show up as a filter option in Search. If they haven’t connected to SharePoint from their Atlassian account, they may be asked to connect before they can see results. This is required so Rovo can make sure your teammates only see results they usually have access to.
Depending on the number of documents in SharePoint, it may take some time for all your SharePoint content to be indexed and appear in Search.
Was this helpful?