Add a custom domain
Before you add a custom domain, there are some things to know:
You need to be an Organization admin.
You’ll need to make changes to your DNS provider. You may need to work with your IT team or network administrator to do this.
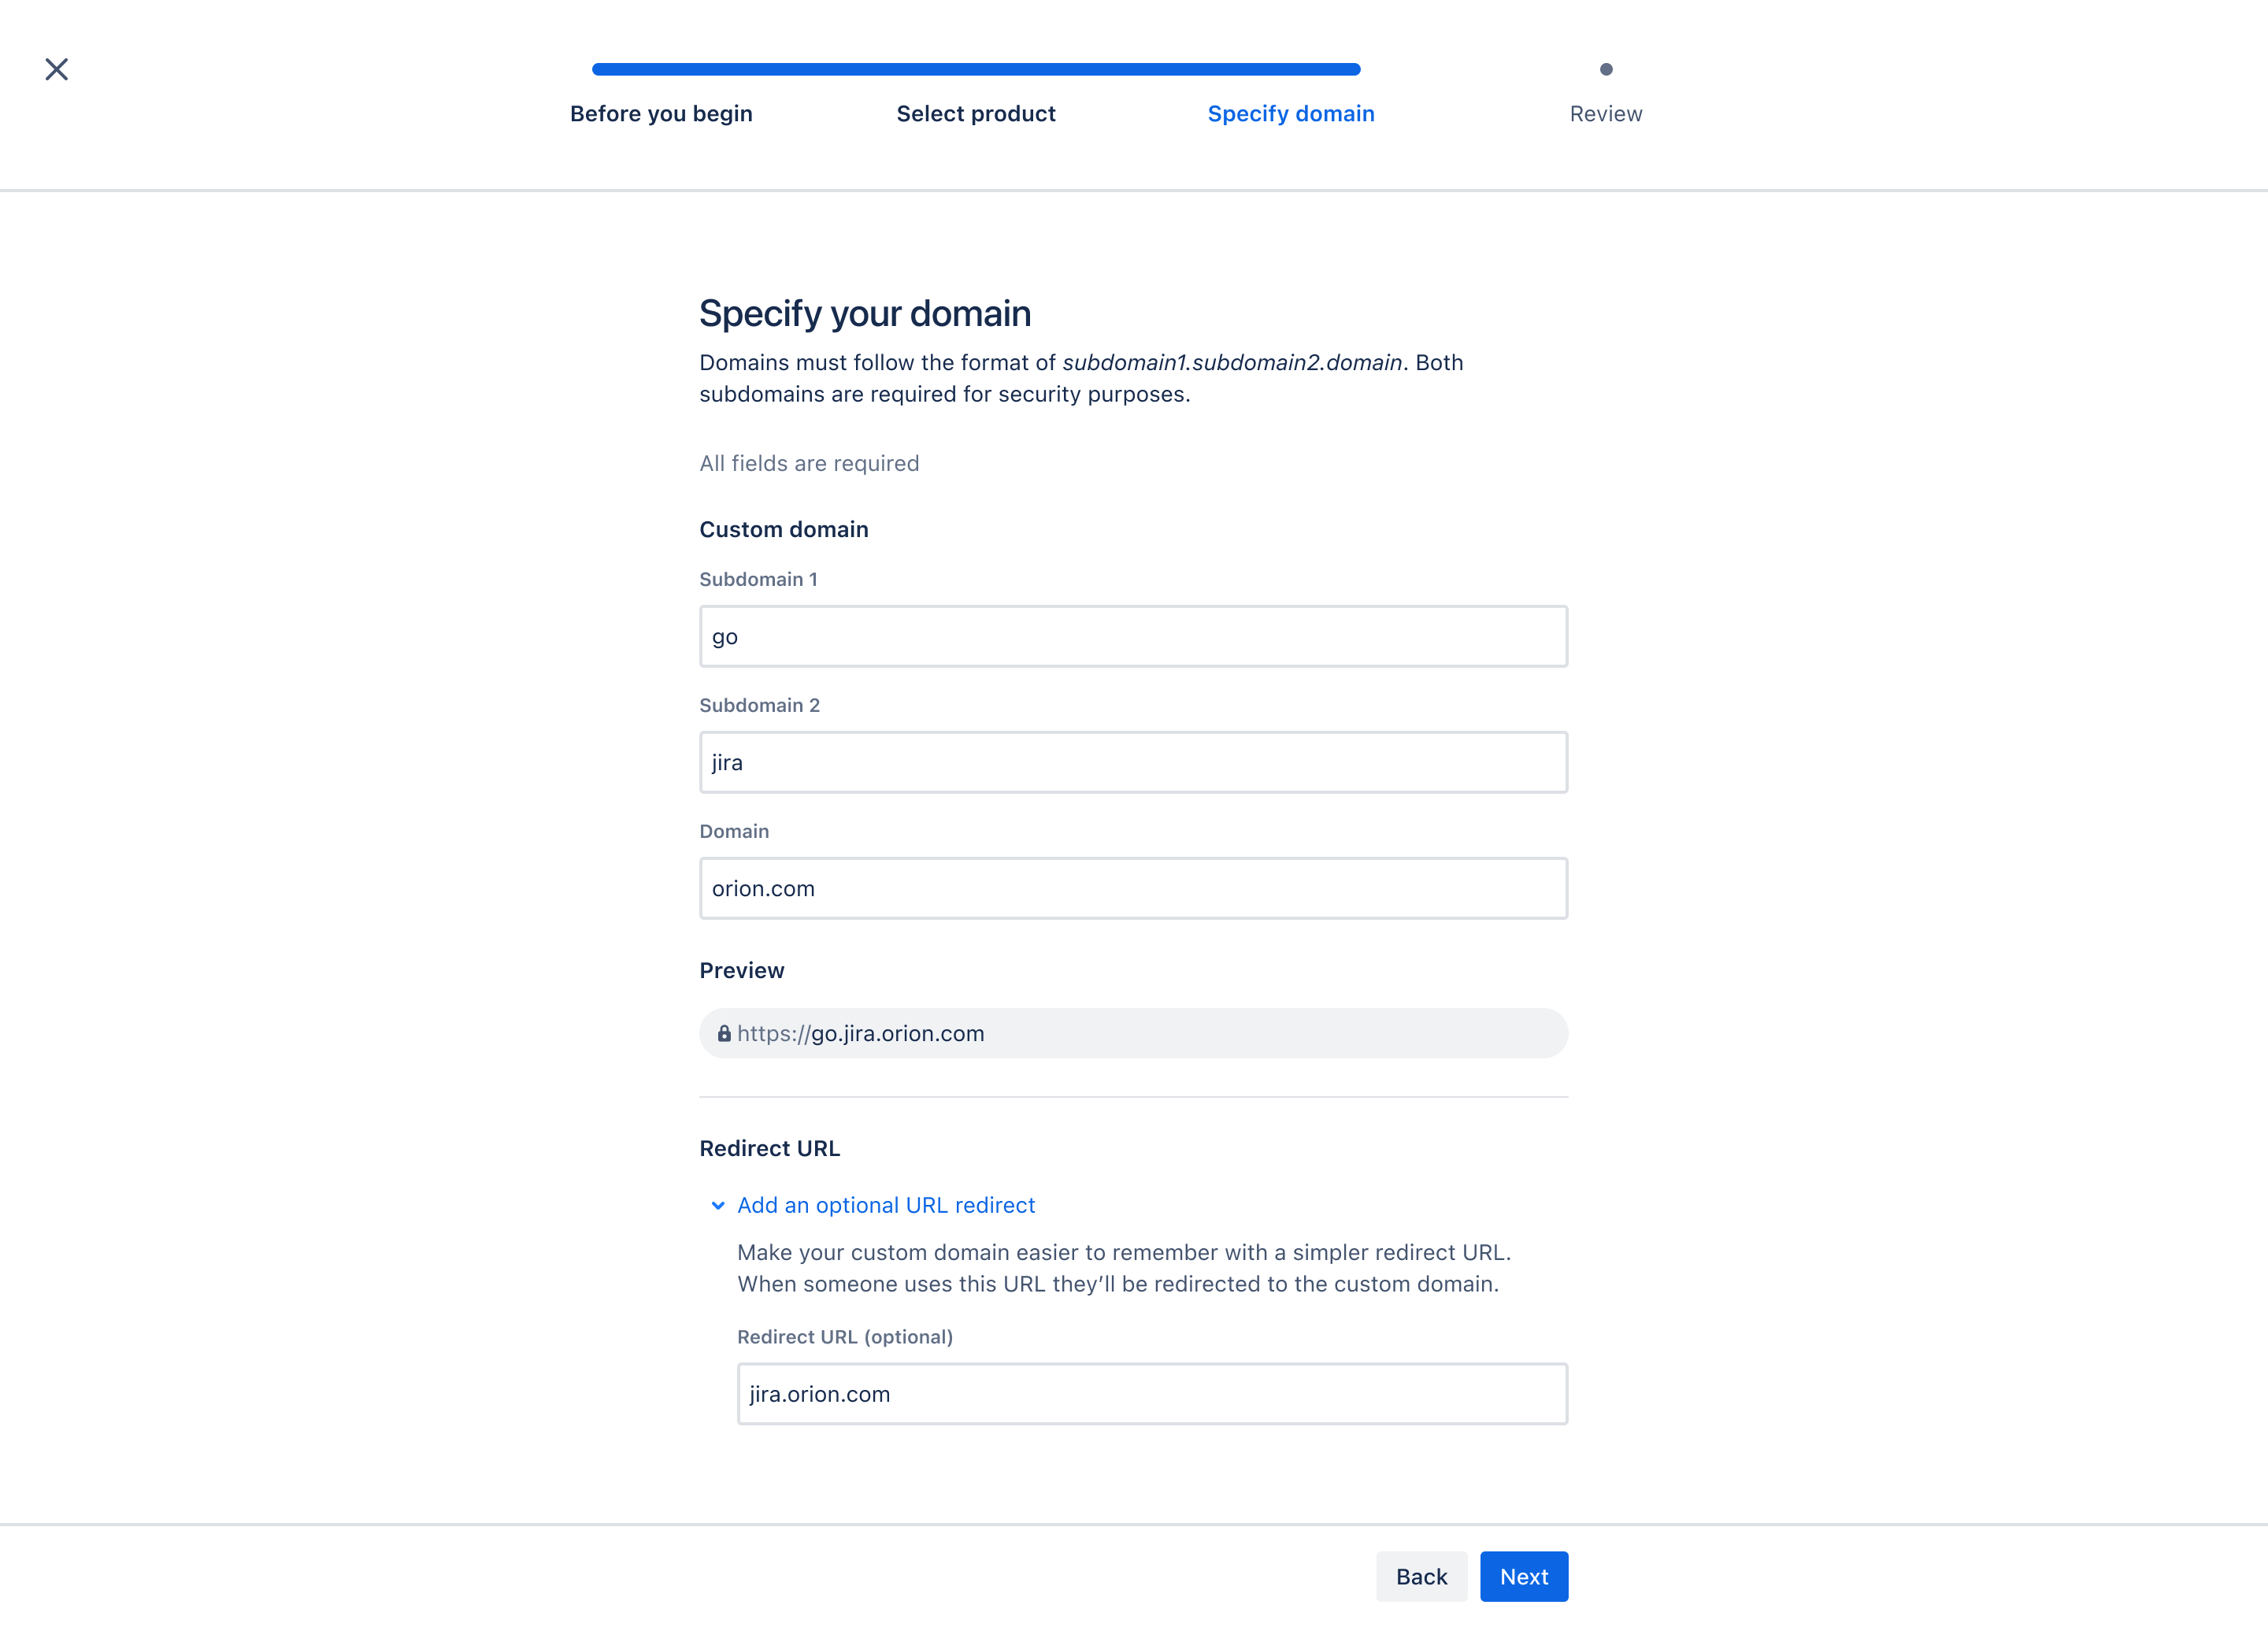
To help us keep your site secure and protect you from man-in-the-middle attacks, your custom domain must follow the pattern
<subdomain>.<subdomain>.<domain>. For examplehttps://customer.support.acme.com.We create a unique SSL certificate for each fully qualified domain name. You can’t bring your own certificate at this time.
You’ll be able to add an optional redirect, if you want to be able to share a shorter URL with your team or customers. For example,
https://help.acme.com. This URL will redirect to your custom domain.Your original URL will continue to work when a custom domain is activated. However, when you try to access the original URL, you will be redirected back to your custom domain.
If you choose to deactivate your custom domain at any point, it will redirect to the original URL.
If the configuration is deleted or the app is unassigned from the custom domain, the custom domain won’t fallback to the default URL.
You must be on a Premium plan to configure a custom URL for internal use of Jira Service Management.
If you’re not able to update your DNS, you can still change the subdomain of your app URL. Learn how to change a product URL subdomain
Who can do this? |
Step 1: Request a custom domain
To request a custom domain:
Go to Atlassian Administration. Select your organization if you have more than one.
Select Apps > App URLs.
Select Add custom domain. This is only visible if you have an eligible app.
Review the Before you add a custom domain page, and select Next.
Select which app you want to access from your custom domain.
Follow the prompts to specify your domain. You’ll need to enter two subdomains, and a domain.
Enter a Redirect URL. This is optional.
Review changes and select Create domain.
It can take about 30 minutes to generate the required DNS records. You’ll get an email when they’re ready, and the status will change to 'Provisioned’.
Step 2: Update your DNS provider
To confirm that you own the domain you requested in the previous step, you’ll need to add the DNS records we created in your DNS provider.
We’ll send you an email when the records are ready.
To access the DNS records:
Go to Atlassian Administration. Select your organization if you have more than one.
Select Apps > App URLs.
Select the Custom domains tab.
For the domain you want to set up, select More Actions () > Show details.
Copy all of the DNS records, and add them to your DNS provider.
The process for updating your DNS depends on your DNS provider. We recommend you refer to the documentation for your provider for details. Here’s a high-level summary of the steps.
To add the DNS records to your DNS provider:
Log in to your DNS provider.
Navigate to the DNS management area.
Add a new record.
Choose CNAME when prompted for the type of record.
Complete the required fields for the record, such as the HTTP name and value.
Save the changes, and wait for them to propagate. This can take a few hours depending on the DNS provider and TTL settings.
If your DNS uses CAA records to limit which Certificate Authorities can issue certificates for your domain, you will need to add a record for
amazon.comor the certificate we created for your custom domain will be blocked.
Once we detect the records in your DNS, the status will change from ‘Provisioned’ to 'Inactive’. You can choose when to activate the domain and start using it to access your help center.
If the status is still Provisioned (we haven’t detected your DNS records) after 60 days we’ll delete the custom domain request. If this happens, you can add the domain again.
Step 3: Activate your domain
Once the status of the domain changes to 'Inactive’, it’s ready to activate.
To activate your domain:
Go to Atlassian Administration. Select your organization if you have more than one.
Select Apps > App URLs.
Select the Custom domains tab.
For the domain you want to activate select More Actions () > Activate domain.
Your team will now be able to access Jira family of apps, Jira Service Management help center, and Confluence from the domain you specified, or from the redirect URL if you specified one.
The original URL (known as the fallback URL) will continue to work. When your custom domain is active, you will be redirected back to your custom domain when you try to access the fallback URL.
If you’re unable to activate your domain you may see an Error status. When the status changes to Error, we’ve detected different DNS records and you won’t be able to activate your domain. To fix this, enter the correct DNS record, then run the DNS records check Troubleshoot custom domain problems
Edit a domain
If you want to change the domain, you’ll need to remove the old domain and request a new one. You can’t edit a custom domain.
You can change which app the domain applies to in the details view.
To change the assigned app:
Go to Atlassian Administration. Select your organization if you have more than one.
Select Apps > App URLs.
Select the Custom domains tab.
For the domain you want to activate select More Actions () > Show details.
Select Remove beside the assigned app.
Select Assign then choose an app from the list.
Select Save.
The custom domain will now point to the app instance you selected.
Was this helpful?