Azure DevOps を Jira に連携する
Azure DevOps アカウントを Jira に接続すると、デプロイと開発のパイプラインを通ってリリースされる作業をチームが Jira で追跡できるようになります。デプロイ、ビルド、開発の情報は、チームの Jira 作業項目、Jira ボード、デプロイ タイムライン、開発ダイアログ、リリース機能から入手できます。Jira とのデプロイ統合の詳細については、こちらをご確認ください。
Azure DevOps for Jira を接続するには、以下が必要です。
Jira サイト管理者の権限。
[アクセス レベル] を [基本 ] に設定した Azure DevOps 組織へのアクセス権。
Jira に接続する Azure DevOps スペースの管理者権限
Azure DevOps アカウントを Jira に接続する
Azure DevOps for Jira (公式) Marketplace アプリをインストールする
Jira スペースのサイドバーから、[アプリ]、[その他のアプリを探す] の順に移動します。
Azure DevOps for Jira を検索します。タイトルに「Official」が付いているバージョンを選択します。
[アプリを入手] > [今すぐ入手] の順に選択します。
アプリをインストールしたら、「今すぐ設定」を選択します。その後、Azure DevOps アカウントと組織を接続するように求められます。
Azure DevOps アカウントと組織を接続する
Azure DevOps アカウントを接続するには、Microsoft アカウントにサインインして、要求される権限を受け入れる必要があります。
設定画面で、[続行] を選択します。
新しいタブが開き、Microsoft のサインイン ページが表示されます。資格情報を入力して、Jira に接続したい Azure DevOps アカウントにサインインします。
次に、Microsoft は Jira にデータを送信する許可を求めます。[承認する] を選択します。
Azure DevOps アカウントが接続されると、Jira に接続できる組織のリストが表示されます。リンクしたいすべての組織で [接続] を選択します。
お使いの Microsoft アカウントに複数の Azure DevOps テナントへのアクセス権があり、間違ったテナントを使用して接続した場合に別の Azure DevOps テナントに切り替える方法は次のとおりです。
Azure DevOps で OAuth を有効にする
Jira にデータを送信する前に、Azure DevOps 組織で OAuth を有効にする必要があります。OAuth がまだ有効になっていない組織に接続すると、OAuth を有効にする必要があるというメッセージが Jira に表示されます。
[Go to Azure DevOps (Azure DevOps に移動)] を選択します。
Azure DevOps 組織の設定で、[セキュリティ]、[ポリシー] の順に移動します。
[Application connection policies (アプリケーション接続ポリシー)] で、トグルを使用して、[Third-party application access via OAuth (OAuth によるサードパーティ アプリケーション アクセス)] および [SSH authentication (SSH 認証)] をオンにします。
Azure DevOps で CI/CD パイプラインをセットアップする
Azure DevOps for Jira アプリが認識するデプロイ イベントを Azure DevOps でトリガーするには、次の方法があります。
デプロイ ジョブ
クラシック リリース パイプライン
デプロイ ジョブを使用してデプロイ イベントをトリガーする
デプロイが YAML パイプラインの一部である場合は、デプロイ ジョブを使用してデプロイ イベントをトリガーできます。Azure DevOps for Jira アプリによって、パイプラインを介して実行されるデプロイ ジョブごとにデプロイ イベントが作成されます。アプリでは、テストの実行やモジュールのインストールなどの他のジョブをデプロイ イベントとは見なしません。
各デプロイ ジョブは、パイプラインの個別のステージに配置する必要があります。ジョブの環境名は、Jira 作業項目、ボード、デプロイ タイムラインのデプロイ情報にある対応する環境名にマッピングされます。
こちらはデプロイ ジョブがあるパイプラインのステージの例です。
- stage: 'development'
    displayName: 'Dev Deployment'
    jobs:
      - deployment: Deploy
        pool:
          vmImage: 'ubuntu-latest'
        environment: dev
        strategy:
          runOnce:
            deploy:
              steps:
              - download: current
                artifact: www
この例では、パイプラインには dev 環境へのデプロイ ジョブがあるステージが含まれています。こちらは Jira で環境名 dev のデプロイにマップされます。
クラシック リリース パイプラインを使ってデプロイ イベントをトリガーする
Azure DevOps のクラシック リリース パイプラインを使用してデプロイ イベントをトリガーできます。
この方法を使用するには、トリガー アーティファクトを追加するときに [Source type (ソース タイプ)] として [ビルド] を選択します。
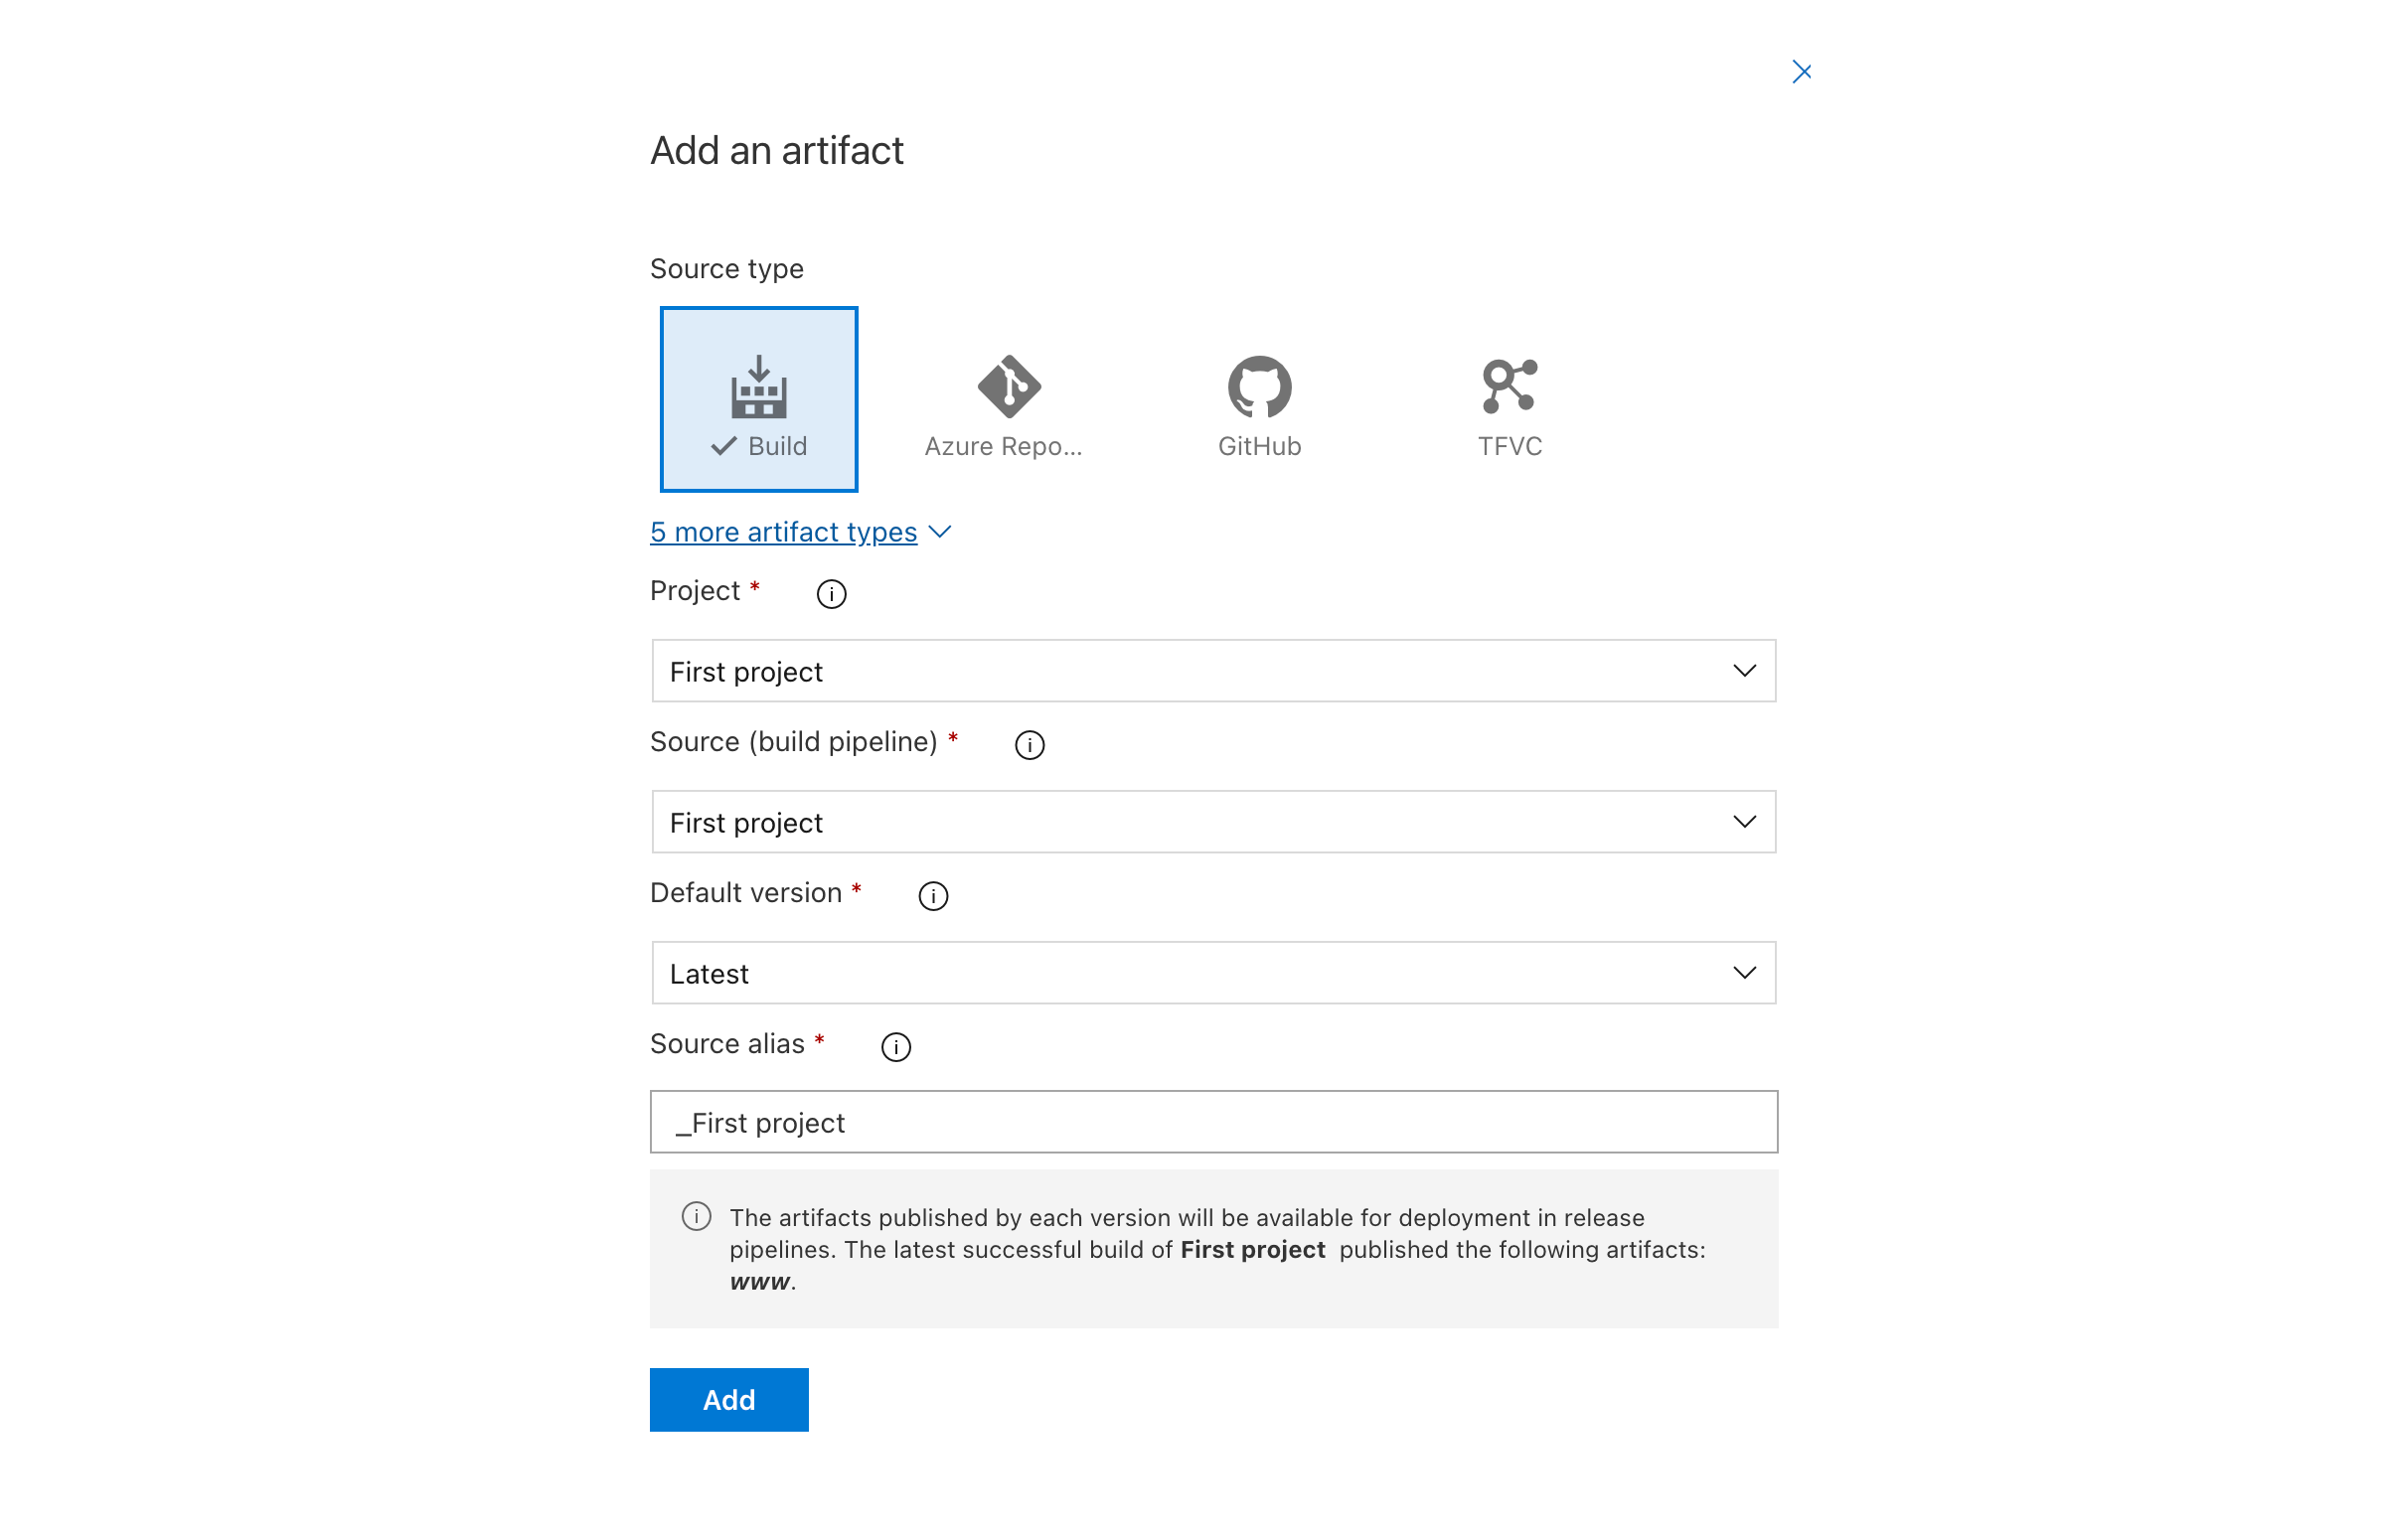
それぞれのデプロイにはそれぞれのステージが必要です。ステージ名は、Jira 作業項目、ボード、デプロイ タイムラインのデプロイ情報内の対応する環境名にマッピングされます。
デプロイ イベントには、アプリがデプロイされた環境の名前が含まれます。Jira 作業項目に環境の詳細を表示するには、Jiraは、その環境が development、testing、staging、productionのいずれであるかを認識する必要があります。環境の名前に基づいて、Jira は環境を推測してデプロイ イベントをマッピングしようとします。たとえば、dev という名前の環境へのデプロイは、development 環境と見なされます。
他の環境名 (英語以外の環境名など) を使用すると、Jira ではこれらが未定義の環境として表示されることがあります。これを解決するには、.jira/config.yml という名前で次の内容を含むファイルをリポジトリのメイン ブランチに追加して、カスタム環境を指定できます。
deployments:
  environmentMapping:
    development:
      - "dev*"
      - "Entwicklung"
      - "desenvolvimento"
      - "дев"
    testing:
      - "testes"
      - "Test"
      - "TST-*"
      - "тест"
    staging:
      - "Pre-Prod"
      - "STG-*"
      - "staging"
    production:
      - "Produktion"
      - "produção"
      - "продакшн"
      - "PROD-*"
この例では、「STG-2」という名前の環境へのデプロイは Jira で staging 環境へのデプロイとしてマップされ、「Produktion」という名前の環境へのデプロイは Jira で production 環境へのデプロイとしてマップされます。
Jira では、development、testing、staging、production の 4 つの有効な環境に最大 10 個の glob パターンを指定できます。
作業項目キーを使用してデプロイ イベントを Jira にリンクする
チームの開発アクティビティを Jira にリンクするためには、コミット メッセージ、ブランチ名、プル リクエストに Jira 作業項目キーを含める必要があります。リンクされたブランチ、コミット、またはプル リクエストでデプロイが実行されると、Jira 作業項目、ボード、デプロイ タイムラインにデプロイ情報が表示されます。開発作業での作業項目の参照の詳細については、こちらをご確認ください。
アプリでは、パイプラインのリポジトリ内に直接追加されたキーのみがリンクされます。他のリポジトリのキーは認識されません。
開発情報を Jira 作業項目にリンクする
Azure Repos で作成されたブランチ、コミット、プル リクエストをリンクするには、チームの開発アクションに Jira 作業項目キーを含める必要があります。
リンクする Jira 作業項目のキー (「JRA-123」など) を探します。このキーは Jira の複数の場所で確認できます。
ボードでは、作業項目キーはカードの下部に表示されます。
詳細では、作業項目キーがページ上部のナビゲーションに表示されます。
ブランチ名に作業項目キーを含めて、リポジトリで新しいブランチをチェックアウトします。たとえば、
git checkout -b JRA-123-<branch-name>のようにします。変更をブランチにコミットする際は、作業項目キーをコミット メッセージで使用して、それらのコミットを Jira 作業項目の開発パネルにリンクします。たとえば、
git commit -m "JRA-123 <summary of commit>"のようにします。プル リクエストを作成する際は、プル リクエストのタイトルか説明に作業項目キーを使用します。
ブランチをプッシュすると、Jira 作業項目に開発情報が表示されます。開発作業での作業項目の参照の詳細については、こちらをご確認ください。
12 か月間非アクティブ期間が経過したら、Azure DevOps で OAuth を再度有効化する
データ同期に必要な OAuth トークンは、その期間内に Azure DevOps から Jira にデータが同期されなかった場合、12 か月ごとに期限切れになります。トークンの有効期限が切れると、Azure DevOps データを Jira と同期できなくなります。
新しい OAuth 更新トークンを取得することで、データ同期を再開できます。
新しい OAuth リフレッシュ トークンを取得するには、次の手順に従います。
[アプリ] > [アプリを管理] の順に選択して、Azure DevOps for Jira の設定ページに移動します。
サイドバーの [Azure DevOps for Jira] で、[設定] を選択してログインします。
ログインすると、新しい OAuth トークンが自動的に生成され、Azure DevOps と Jira の間のデータ同期が復元されます。
Azure DevOps for Jira を Microsoft Entra ID で認証する
Microsoft は Azure DevOps OAuth プラットフォームを廃止予定です。正確なサポート終了日は発表されていませんが、2026 年に予定されています。すべてのアプリで認証に Microsoft Entra ID を使用する必要があります。Azure DevOps OAuth プラットフォームの廃止については、Microsoft のブログをご確認ください。
この変更は、サポート終了日の前後を問わず、Azure DevOps for Jira から Azure DevOps 組織への接続に影響します。カットオフ前は、アプリは通常どおり動作します。ただし、Microsoft Entra ID で適時に認証することで、Azure DevOps への接続がアクティブのまま維持され、中断することなく Jira にデータが表示され続けます。
サポート終了日以降、その時点までに Azure DevOps for Jira が Microsoft Entra ID で再度認証されていない場合、Azure DevOps への接続は非アクティブになります。Azure DevOps からのデータは、アプリが認証されるまで Jira に表示されなくなります。カットオフ日以降に作成されたデータはバックフィルされませんが、認証が完了するとすぐに新しいデータが Jira に表示されるようになります。
Jira サイト管理者である場合は、Microsoft Entra ID で Azure DevOps for Jira を認証する必要があります。その際には、Azure DevOps で OAuth を有効にしていることを確認してから、認証を完了してください。
Microsoft Entra ID で認証するには、次の手順に従います。
Jira で、サイドバーから [アプリ] を選択します。次に、[その他のアクション] (···)、[アプリを管理] の順に選択します。
サイドバーの [Azure DevOps for Jira] で [設定] を選択します。
アトラシアンの管理の [接続済みアプリ] ページにリダイレクトされた場合は、[Take me there (移動する)] を選択します。次に、Azure DevOps for Jira (公式) を検索し、その他のアクション アイコン (···) を選択してから、[開始する] を選択します。
構成ページで、[Authorize with Microsoft Entra ID (Microsoft Entra ID で認証)] を選択します。
プロンプトに従って認証を完了します。
認証後、既存の組織は自動的に再接続されます。利用可能な場合は、新しい組織を接続することもできます。
お困りですか?
この内容はお役に立ちましたか?