Connect to the Atlassian Data Lake
The Analytics app gives you access to the Atlassian Data Lake. Now it’s easier than ever to pull your app data together into a single place, then visualize that data into insightful dashboards that help drive your business decisions. More about the Atlassian Data Lake.
You must be an organization admin to create connections to the Atlassian Data Lake.
You can create up to ten connections to the Data Lake. If possible, only create multiple connections if you need to restrict access to sensitive data. Consider best practices for creating Data Lake connections.
Start the connection process
First connection
If you’ve just added the Analytics app to your organization, you’ll need to create the first Data Lake connection before you jump into Analytics. The process starts right away, so go to the next section to learn more about the app selection step.
Haven’t added Analytics yet? Learn how to add it to your organization.
Subsequent connections
If you’ve already created the first Data Lake connection, do the following to add a new Atlassian Data Lake connection:
Select Data sources from the sidebar.
Select Add data source > Atlassian Data Lake.
This begins the process for connecting to the Atlassian Data Lake.
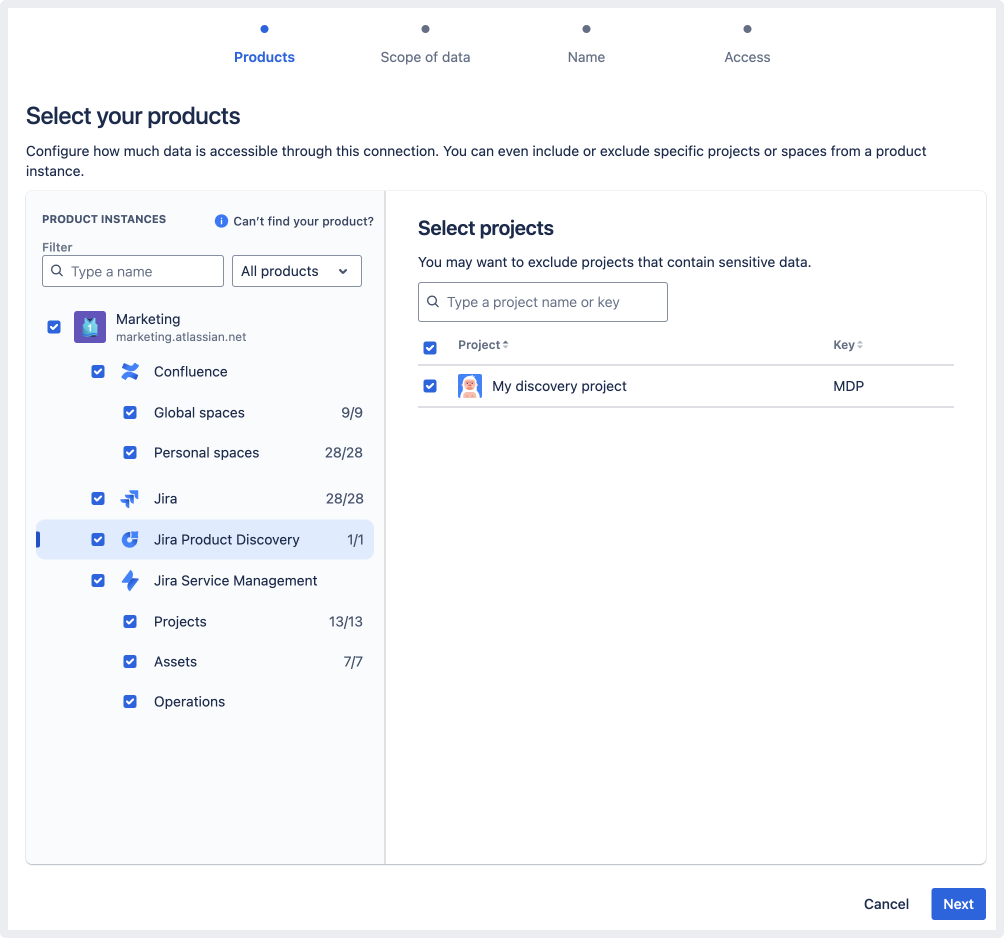
Select your apps
Only data for Jira, Jira Service Management, Jira Product Discovery, Confluence, Talent, Focus, Goals, and Atlassian Projects are available in the Atlassian Data Lake at this time. Data for more apps are coming soon.
All the data for your Cloud apps data is available in the Atlassian Data Lake, so you should see all your organization’s apps listed in this step, including apps with non-Enterprise plans. Each app you select will give you access to a set of tables and columns that you’ll use to query your app data. More about the data model of the Data Lake.
Sandbox sites will appear in the app selection, but the data may not be immediately available to query. Contact support if you want to include sandbox site data.
The number of app instances you select affects how much data becomes accessible through this connection. Refine the amount of data even further by including or excluding specific projects from your selected app instances.
Keep in mind that site admins and app admins of selected apps will get an email notifying them that the data is available through this connection.
Select your scope of data
The scope of data refers to the types of data that will be accessible through this connection. This applies to all the apps you selected in the previous step.
There are two scopes you can choose from:
All data
Limited data
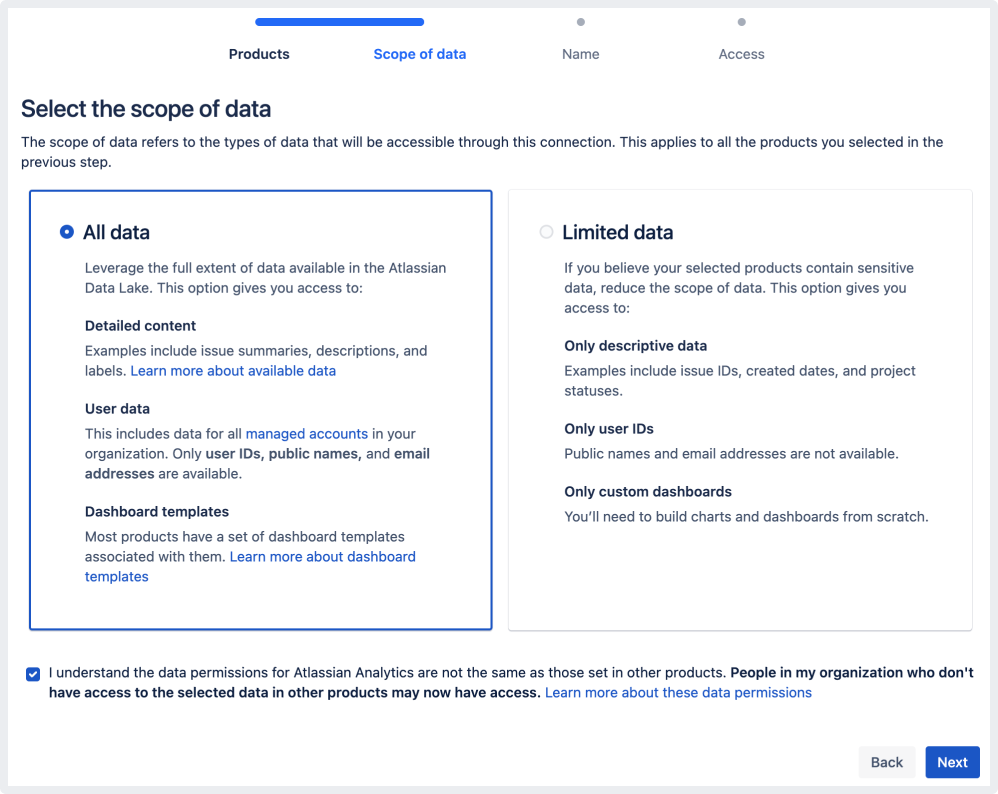
All data
When you select All data, you get access to everything available in the Data Lake:
Detailed content — This includes data you and your team provide in open text fields like work item summaries, descriptions, and labels.
User data — Access user IDs, public names, and email addresses for all accounts in your organization.
The people you share this connection with will be able to query all data you make accessible from it.
Depending on the apps you select, Analytics provides dashboard templates to give you an idea of how you can use your app data in Analytics. Read about dashboard templates.
Limited data
If you believe your selected apps contain sensitive data, select Limited data to reduce the scope of data to:
Only descriptive data — You’ll only have access to data like work item IDs, created dates, and project statuses.
Only user IDs — You won’t have access to public names and email addresses.
Selecting limited data also means you won’t get dashboard templates; you’ll need to build charts and dashboards from scratch.
Acknowledge the difference in data permissions
The data permissions you’ve set in other Atlassian apps do not carry over to Analytics. Learn more about data permissions for the Atlassian Data Lake.
After you select your scope of data, read the acknowledgment statement, then select the checkbox. By selecting it, you acknowledge and understand the difference in data permissions between the Analytics app and other Atlassian apps. Select Next to continue.

Name your data connection
The display name you provide here will appear in the list of your connected data sources and wherever this connection is referenced throughout Analytics. Give the connection a unique name—something that will make it easier to identify the type of data accessible from it.
You can edit this name later in this connection’s data source settings. Learn more about data source settings.
Create the connection
Select Create connection. There’s potentially a lot of data to pull in, so it may take a couple minutes for us to create your connection.
If you have any Atlassian apps with a Cloud Enterprise plan, you can also connect third-party data sources then blend your Atlassian data with your third-party data for richer insights.
Add people to the connection
After your connection is created, you can optionally add people to it if you already know who needs to query its data or manage the connection going forward. Learn more about data source permissions.
If you want to add people to the connection later, you can always do so from its data source settings. Learn how to manage data source access.
Now you and anyone else with access to the connection can start creating dashboards with your Atlassian data.
Was this helpful?