Configure the layout of the work item
You can set the visibility and order of fields for a space's work types. These fields will show up in the order you’ve set in the work item. The fields available to you for each work type are defined in the global screen configuration for viewing the work type. As a Jira admin, you can add or remove fields for a work type.
You must either be a Jira or space admin to configure the layout of the work item. More about space roles in company-managed spaces.
What is the layout of a work item?
Choosing which fields appear on your team's work items, and which of those are most important, can help your team get more done in less time. If there are a few fields you fill out for every bug, for example, it makes sense that those fields are always visible and probably somewhere towards the top of the work item If you're a space administrator, you can set up the work item for your space in the way that works best for your team.
Layout settings are for individual spaces. You can't share layout settings between spaces right now.
In the layout of the work item, you’ll see a list of fields in a few different categories: description fields, context fields, hide when empty fields, and hidden fields. Here’s how fields in each of these categories appear when viewing a work item’s details:
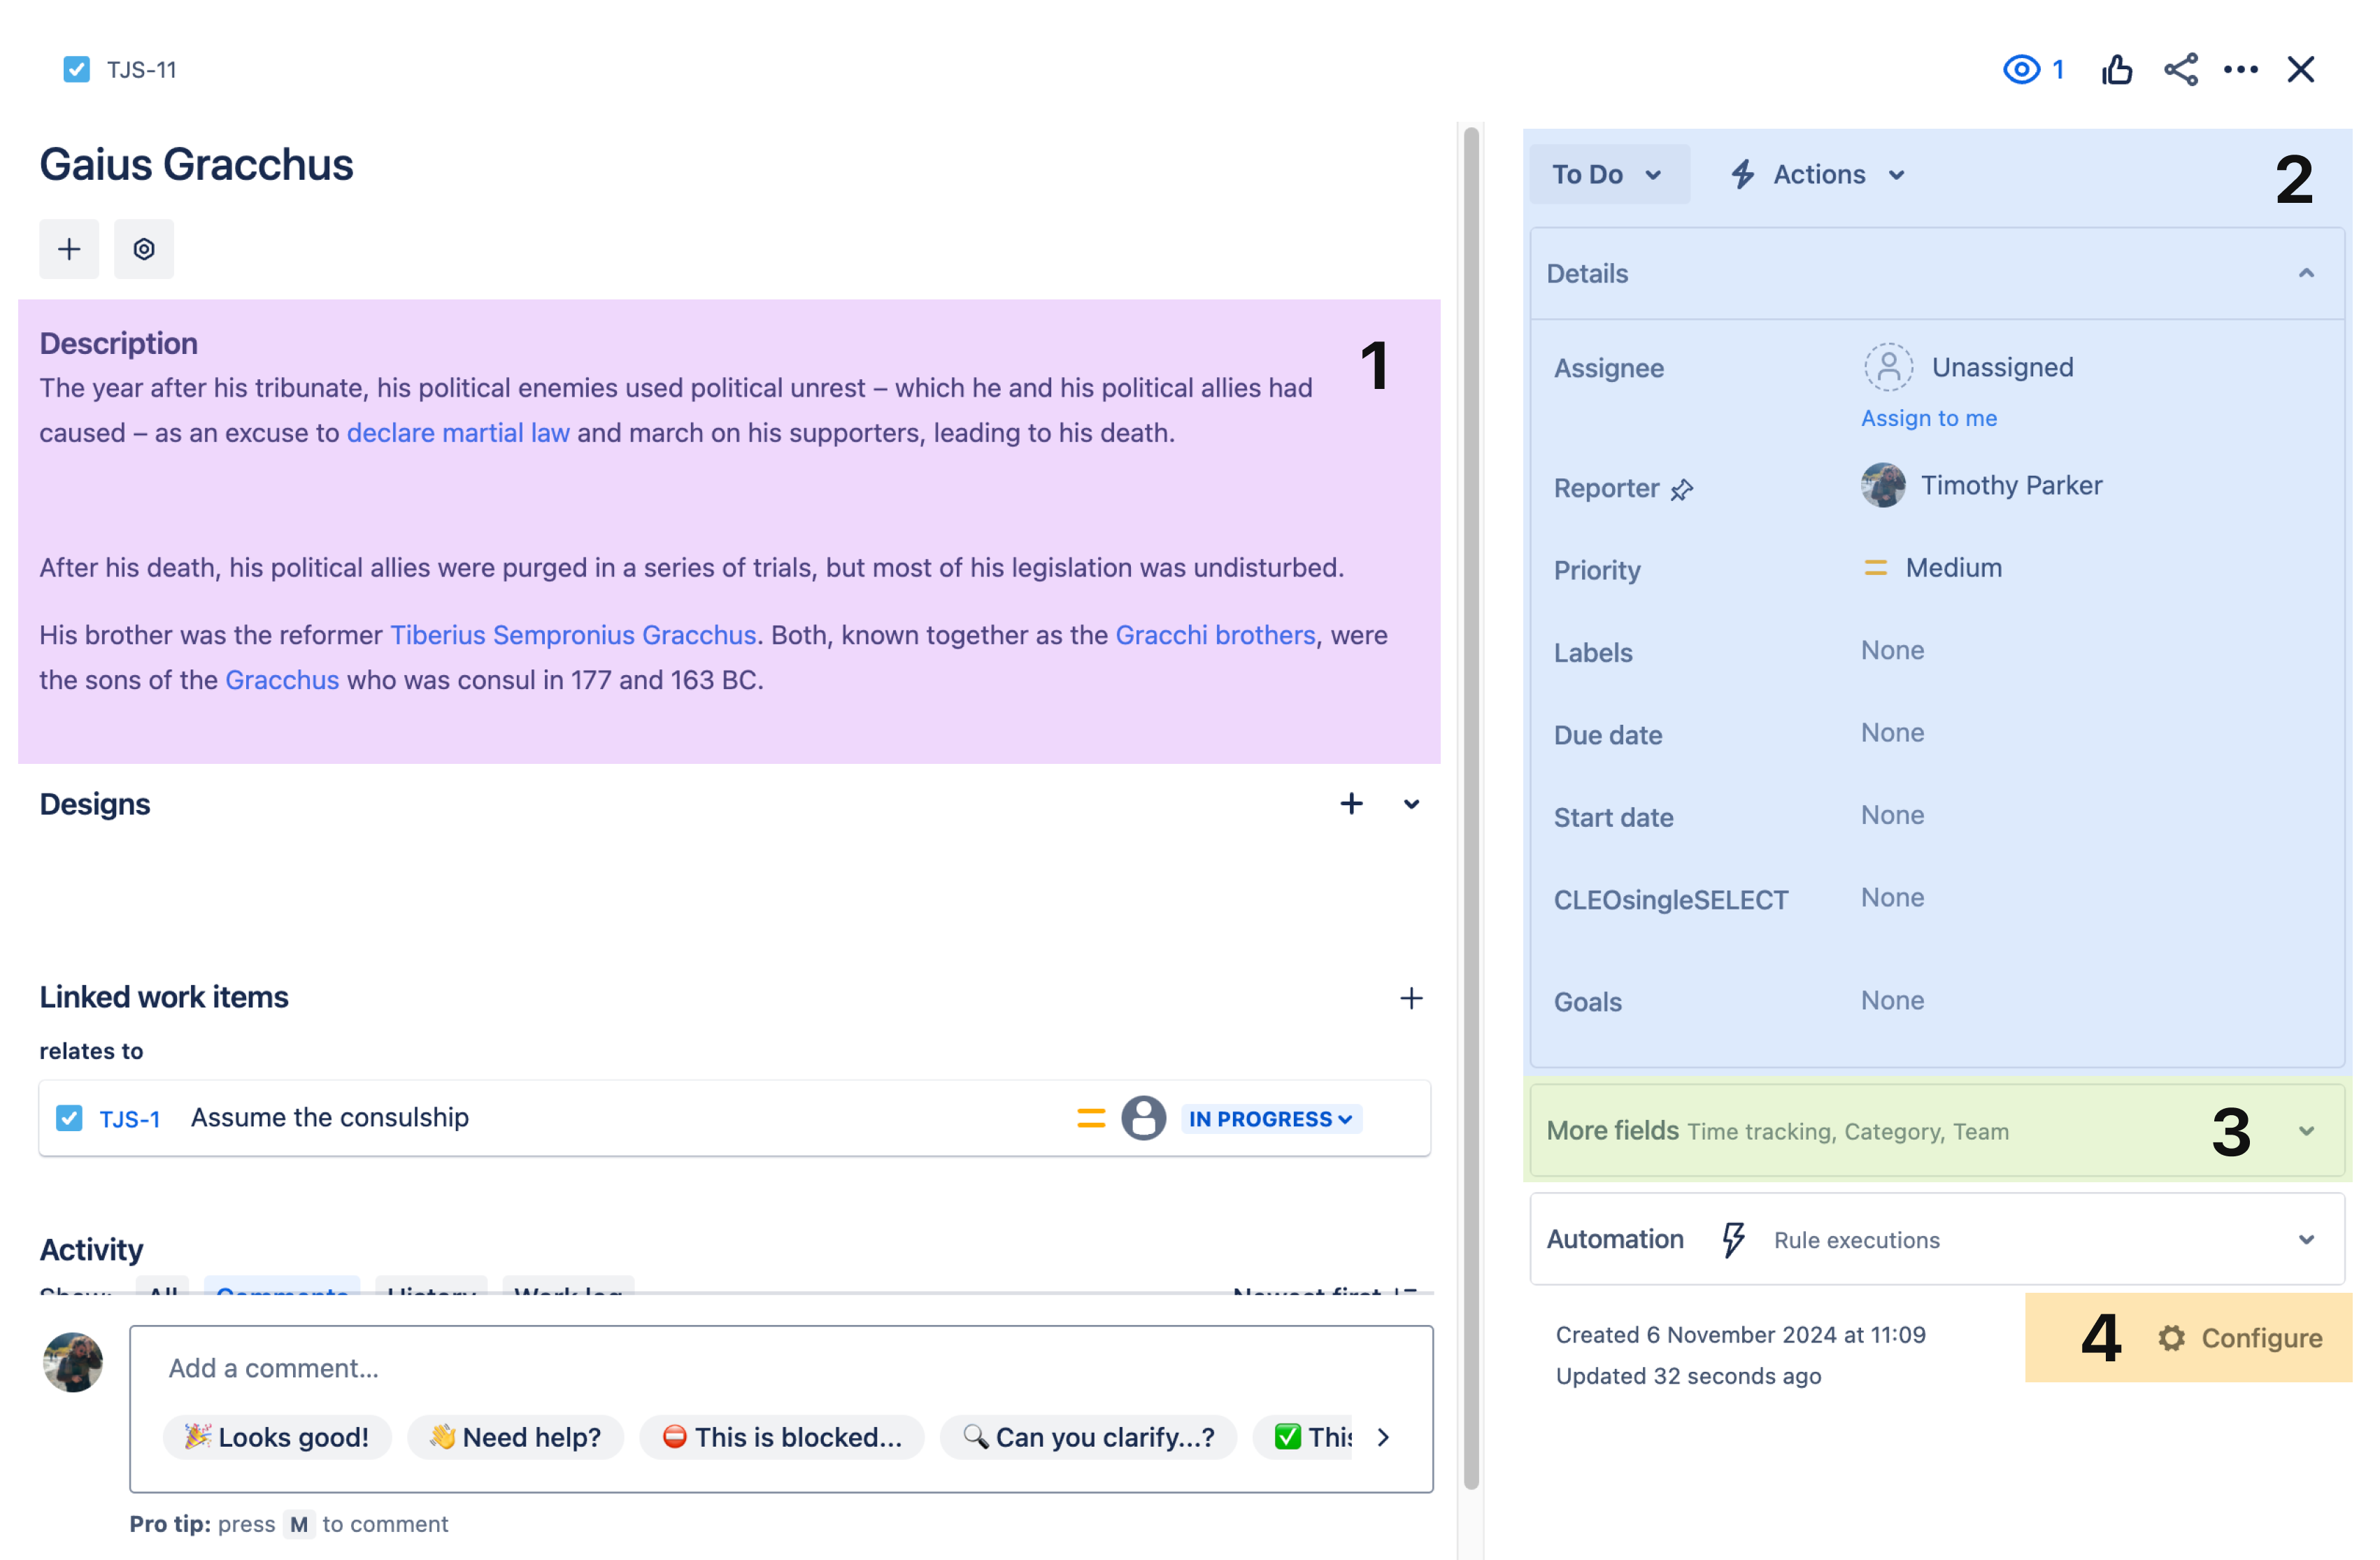
Description fields: Since this section is the first place users look when they open a work item, your most important fields should be configured here.
Field tabs: If the layout's screen is configured with more than one tab, they'll show up here.
Context fields: Fields above the hide when empty line in configuration appear here in the Details group. Each user can pin their most important context fields into the Pinned fields group depending on what works for them.
More fields: Fields under hide when empty are placed in this group when they don't have a value. When they have a value, they'll appear in the Details group.
Configure layout of the work item: Click Configure to change the position and visibility of fields in the work item. Find out about configuring the field layout in the work item.
Fields in the layout of a work item
You can drag and drop fields into different sections when you configure the layout of a work item.
Your Jira admin creates fields across your Jira site. And, they make those fields available to space admins through Jira's admin settings and space configuration schemes. More about how Jira admins create fields.
Space admins can configure how these fields look in their spaces by setting up their layout.
Description fields
This section usually appears on the left side of the work item (or at the top in a single-column layout). Since this is the first place users look when they open a work item, put your most important fields here. If your layout's screen is configured with more than one tab, the other tabs will appear in this section. Only Jira admins can configure tabs (space admins can't change the order of the fields displayed in the tab). More about configuring a screen's tabs and fields.
Context fields
This section normally appears down the right side of the work item (or at the bottom in a single-column layout) in the Details and More fields groups. Context fields usually contain secondary information that your team might need to sort, filter, or report on work items. Each user can customize context fields to work for them by pinning their most used ones to the top of a work item in the Pinned fields group. More about pinning fields.
Hide when empty
The context fields section has a divider you can use to sort always-important fields from sometimes-important ones. Fields above the hide when empty are shown in the Details group and those below the line are hidden under the More fields group when they don't have a value. When a field in the More fields group has a value, it moves to the Details group.
Fields
This section is for fields that you don't want to appear on the work item at all. Use the search bar in this section to find and add fields to the work item. To add fields, use the search bar in this section and drag them into the Description or Context field sections.
To remove fields from the layout of the work item, you can drag fields to this section or in the field more menu select Remove field.
Customize the layout of the work item
Customizing the fields that appear on your team’s work items can help your team resolve requests faster. For example, if there are a few fields that need to be filled out for every work item, then it makes sense for those fields to be visible and somewhere towards the top of the work item.
Each space has its own layout. You can’t share layout settings between spaces right now. See how to add fields that don't appear in the layout screen.
You must either be a Jira or space admin to configure the layout of the work item. More about space roles in company-managed spaces.
To view or edit the layout of your space’s work types:
Next to the name of your space in the sidebar, select More actions (•••), then Space settings.
Select Work items, then Layout.
Find the work type(s) whose layout you want to view and select Edit work item layout. You’ll see the work item layout for a screen that is configured for the space. Find out more about screens.
Drag and drop fields to move them to a different section. Fields in the hidden section won’t be visible in the work item, but will still be connected to the work type(s).
Select Save changes.
Select a work item in the space you’ve set up the layout for. The fields you’ve configured in the layout of the work item for the space will show up in different sections in the work item. More about work items.
If a group of work types—tasks and subtasks, for example—use the same view work item screen, which they do by default, you'll configure the fields for those work types all together as a set.
Reuse fields in the layout of the work item
You can reuse fields from other work types and spaces and won’t have to create these fields for every space. Search for fields that were recently created and/or used in other work types and spaces and use the fields in the current space.
You can only reuse fields with global contexts. Find out about global contexts.
To search for and reuse fields:
Next to the name of your space in the sidebar, select More actions (•••), then Space settings.
Select Work items, then Layout.
Find the work type(s) whose layout you want to view and select Edit work item layout. You’ll see the work item layout for a screen that is configured for the space. More about screens.
Search for fields using the search bar on the right under Fields. Alternatively, select a field from Suggested fields, which contains a list of all work items that were recently created, or are used in other work types of the space.
Drag and drop fields to move them to a section on the left.
Select Save changes.
After you’ve dragged a field to one of the sections on the left, you can go to field configuration from the layout of the work item.
Was this helpful?