Get started with Jira
New to Jira? Check out our guides for new administrators and users.
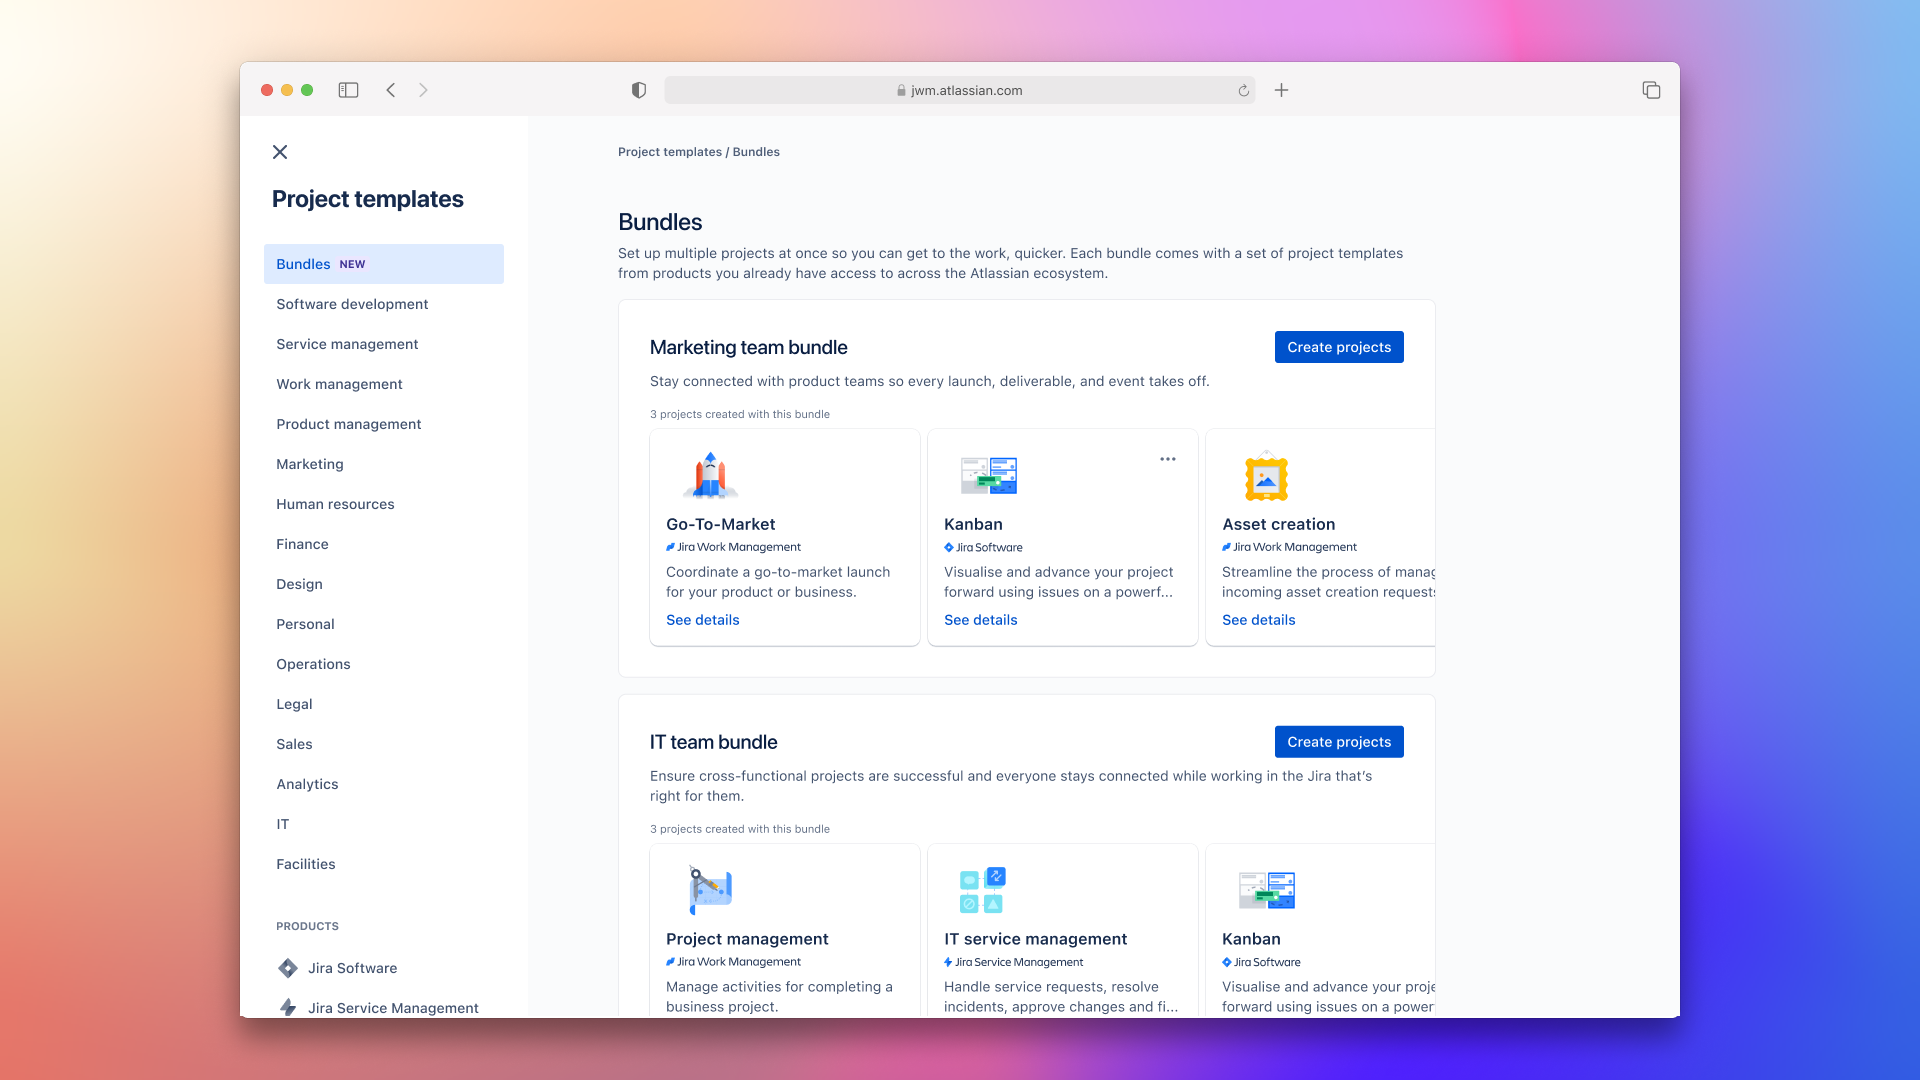
With bundles, you can now effortlessly create between 2 to 6 projects at once, streamlining your project creation process and minimizing the need for repetitive manual tasks. Whether you're working in Jira, or Jira Service Management, bundles guarantee a smooth project creation experience.
Choose from two pre-set bundles: the Marketing or the IT team bundle. But if these don't fit your requirements, you have the flexibility to customize and create your own bundle.

There are a few ways you can create a bundle, one way is to:
Select the plus icon + in the project sidebar
Choose More templates from the dropdown
Select Bundles
Another way to create a bundle is to:
Select Projects > Create project in the top navigation bar
Select Bundles
Certain Jira Service Management templates exclusively support either company-managed or team-managed projects. If you choose one of these templates as part of a bundle, all projects within it will adopt the selected project type. To alter the project type, exclude the corresponding Jira Service Management template from your bundle.
Company-managed templates:
IT Service Management
Customer Service Management
Team-managed template:
IT Service Management (Essentials)
Select Create projects
On the Review projects in your bundle screen
Rename a project. Select (Edit) to name the projects in your bundle
Choose their project type, and update the access settings. The project type and access you choose will apply to all of the projects in your bundle.
Note: While other details can be edited and updated later from the project settings, the project type can’t be changed later. If you wish to do so, you’ll need to create a new project. More about project types and changing project types
Jira Service Management project templates default to open channel access, which can only be modified from the project's settings later.
Select Create 3 projects
While we’re creating the projects in your bundle, make sure you leave the page open. It should only take a couple of minutes. Once we’re done, we’ll take you to the board view of your first project.
Select Build a bundle
Use the Select project templates button to choose 2-6 project templates for your custom bundle.
Use the template selector to search, select, and remove templates from your bundle. Once you are satisfied with the selection of templates in your bundle hit Confirm.
Next, add names for projects, choose their project type, and update the access settings.
To rename a project. Select (Edit) to name the projects in your bundle
Choose their project type, and update the access settings. The project type and access you choose will apply to all of the projects in your bundle.
Note: While other details can be edited and updated later from the project settings, the project type can’t be changed later. If you wish to do so, you’ll need to create a new project. More about project types and changing project types
Jira Service Management project templates default to open channel access, which can only be modified from the project's settings later.
Select Create projects
While we’re creating the projects in your bundle, make sure you leave the page open. It should only take a couple of minutes. Once we’re done, we’ll take you to the board view of your first project.
Avoid clutter and maintain efficient collaboration by inviting team members to projects that align with their roles and responsibilities to improve focus, engagement, and overall productivity on projects across your organisation.
Foster transparency and alignment across your organization by sharing release dates across business and software projects. Create a unified roadmap and make sure that stakeholders are well-informed about key timelines. Establishing a common understanding of project milestones means teams can work collaboratively towards shared goals, improving coordination and collaboration. More about surfacing software team releases in business team calendars
To make things easier for you, we’ll add all the projects in your bundles to the Shortcuts view in the horizontal navigation. Use these shortcuts to quickly navigate between projects within your bundle, without losing momentum. Reducing time spent on navigating between your projects and products means you can focus more on the work at hand. More about shortcuts
Get a more holistic view of your projects by linking issues across different projects within your bundle. Creating dependencies ensures that the progress of one issue influences the timeline or execution of another, promoting better coordination and efficiency, and preventing siloed efforts. Teams can understand dependencies, letting them plan and execute projects more collaboratively. Tracking dependencies also helps to identify potential bottlenecks early on, allowing for proactive rather than reactive problem-solving. More about how to link issues
Was this helpful?