Get started with Jira
New to Jira? Check out our guides for new administrators and users.
Before you begin
In order to create issues in your business project, you’ll need the create issue permission.
Learn more about project permissions for your company-managed project.
Learn more about project permissions for your team-managed project.
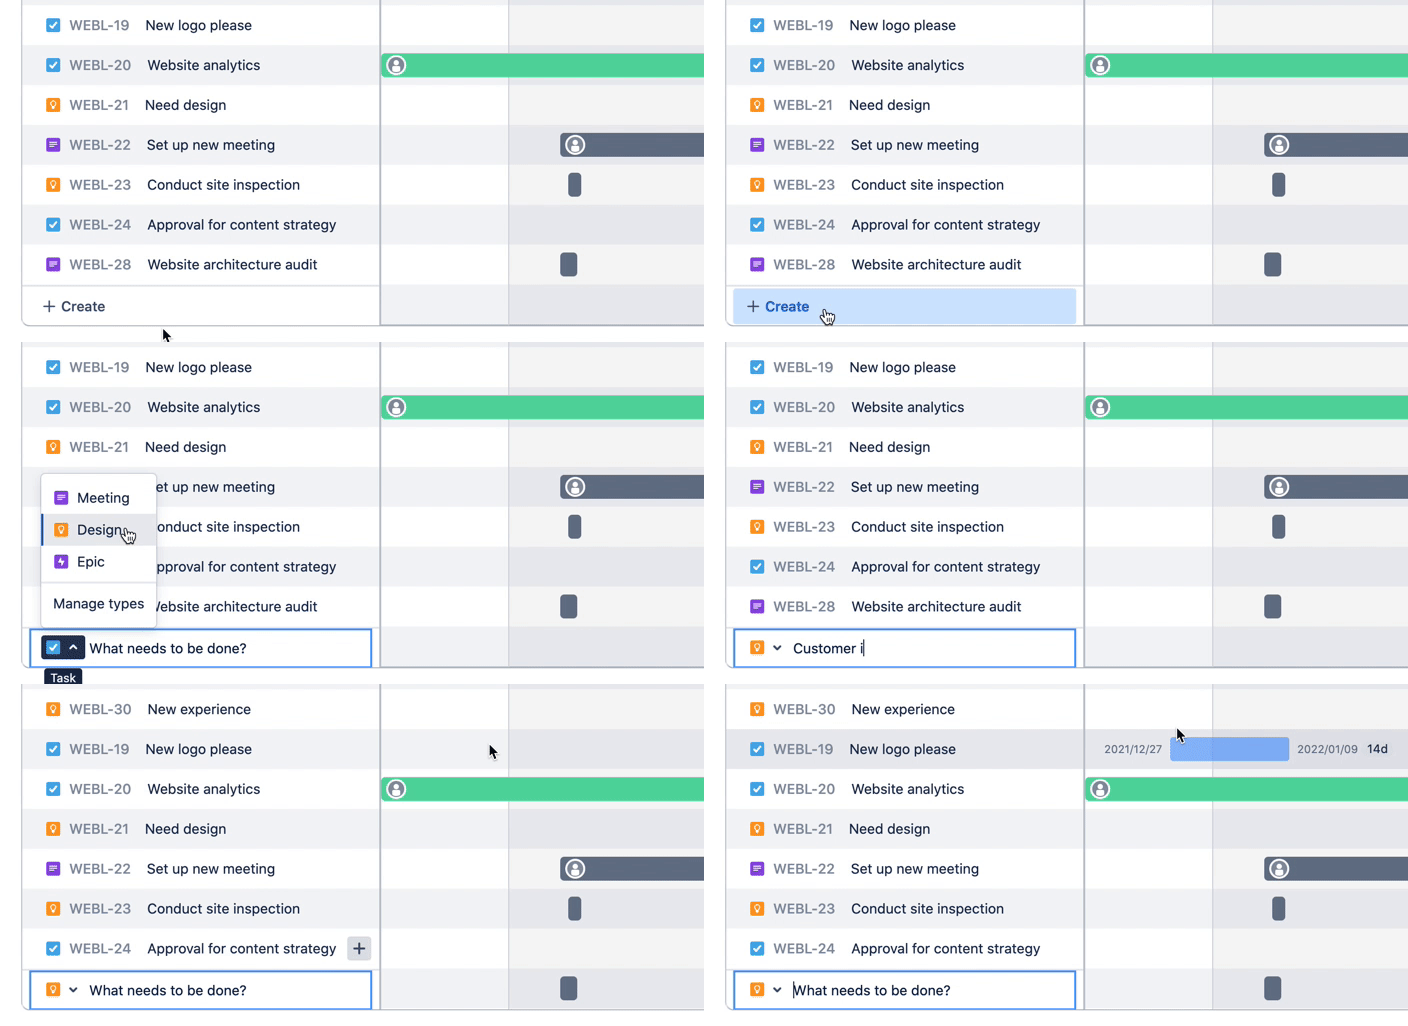
There are two ways you can create a new issue from the timeline view. Creating an issue will add it to the timeline, as well as all other views in your project. Here’s one way of creating an issue:
Select the + Create button at the bottom of the timeline. A text field will appear.
Give your issue a name.
Choose which type of issue you’d like to create from the dropdown (if your project has more than one issue type). All issue types associated with your business project will be included, except those that require a parent issue.
Press enter on your keyboard to create your issue.

Another way to create an issue from the timeline is to:
Hover your cursor in between the two issues you want to create a new issue between.
Select Create (+).
A text field will appear. Start typing to give your issue a name.
Press enter on your keyboard to create your issue.
Learn how to create an issue anywhere in Jira.
An issue can have child issues that can be assigned and tracked individually. If you have a task with a related subtask, that task would be considered a parent issue while the subtask would be a child issue. Similarly, a task could be a child issue of an epic.
To create a child issue from the timeline view:
Select Create child issue ( + ) in the row of the issue you’d like to create a child issue for.
Enter a summary of what needs to be done for this child issue.
Select enter on your keyboard to create the task, or escape to cancel.

From the timeline, you can change the parent issue of a child issue by dragging and dropping it underneath a new parent issue.

Otherwise, to change the parent issue of a child issue:
Open the child issue.
Select the issue type icon in the top-left corner next to the issue key of the parent issue.
Select a new parent issue for your child issue.
Was this helpful?