Update a work item's details
You can store a huge amount of information in the fields on a Jira work item, in both in-built and custom fields (which you create yourself). Things like the assignee, labels, priority, and due date can all be important factors that decide when and how you move a work item forward and resolve it. These work item details also help you categorize and search for the work item later.
Update basic details
There's no trick to updating work item details — open a work item and select the field you'd like to update. There's also no need to save when you edit work item details, as whatever you enter is saved as soon as you click or tap away from a field (unless you select escape to discard a change).
Rovo can action some work item updates for you. For example, you could ask Rovo to update all your assigned work from To Do to In Progress, add comments, or update summaries, descriptions, assignees, and more. Open Rovo Chat and enter /update-work-items to try it out. Some fields may not yet be supported.
Get AI-suggested updates from Loom meetings
In addition to updating fields yourself, or using /update-work-items in Rovo Chat, Jira can suggest work item updates based on your Loom meetings. When you connect a Loom meeting to a Jira space, Rovo analyzes the meeting transcript and prepares suggested changes, such as:
re-assigning a work item
changing the priority or status
updating the description
adding a comment
Suggested updates are shown only to the person who recorded or owns the Loom meeting. You’ll see a Rovo nudge on a connected Jira board, where you can review the suggestions and choose whether to accept or discard them.
How to connect Loom meetings to Jira
Description and context fields
Work items in Jira have two main sections — the description fields section and the context fields section.
Description fields
These are multiline rich text fields that help you describe the work item in detail. You can add text, code, images, tables, and more to these fields. The description fields section usually appears in the left, larger section of the work item, or at the top in a single column layout. Fields like the built-in Description and Environment fields can appear in this section, along with other multiline custom fields you add to your work items.
Context fields
These fields add information that helps sort and categorize work items. They appear to the right of the work item, or below the description fields in a single column layout. Fields like Assignee, Reporter, Labels, and more appear in this section.
"Show more" and hide when empty
Some fields are more important than others, and you'll update some fields more often than others. You can configure the layout of your work items to make sure important fields are always visible while others are hidden until you need them. When configuring your work item’s field layout, fields you put in the Hide when empty section won't appear on the work item until you add a value to them. To view and edit those fields when viewing a work item, select Show x more fields at the bottom-right of the work item.
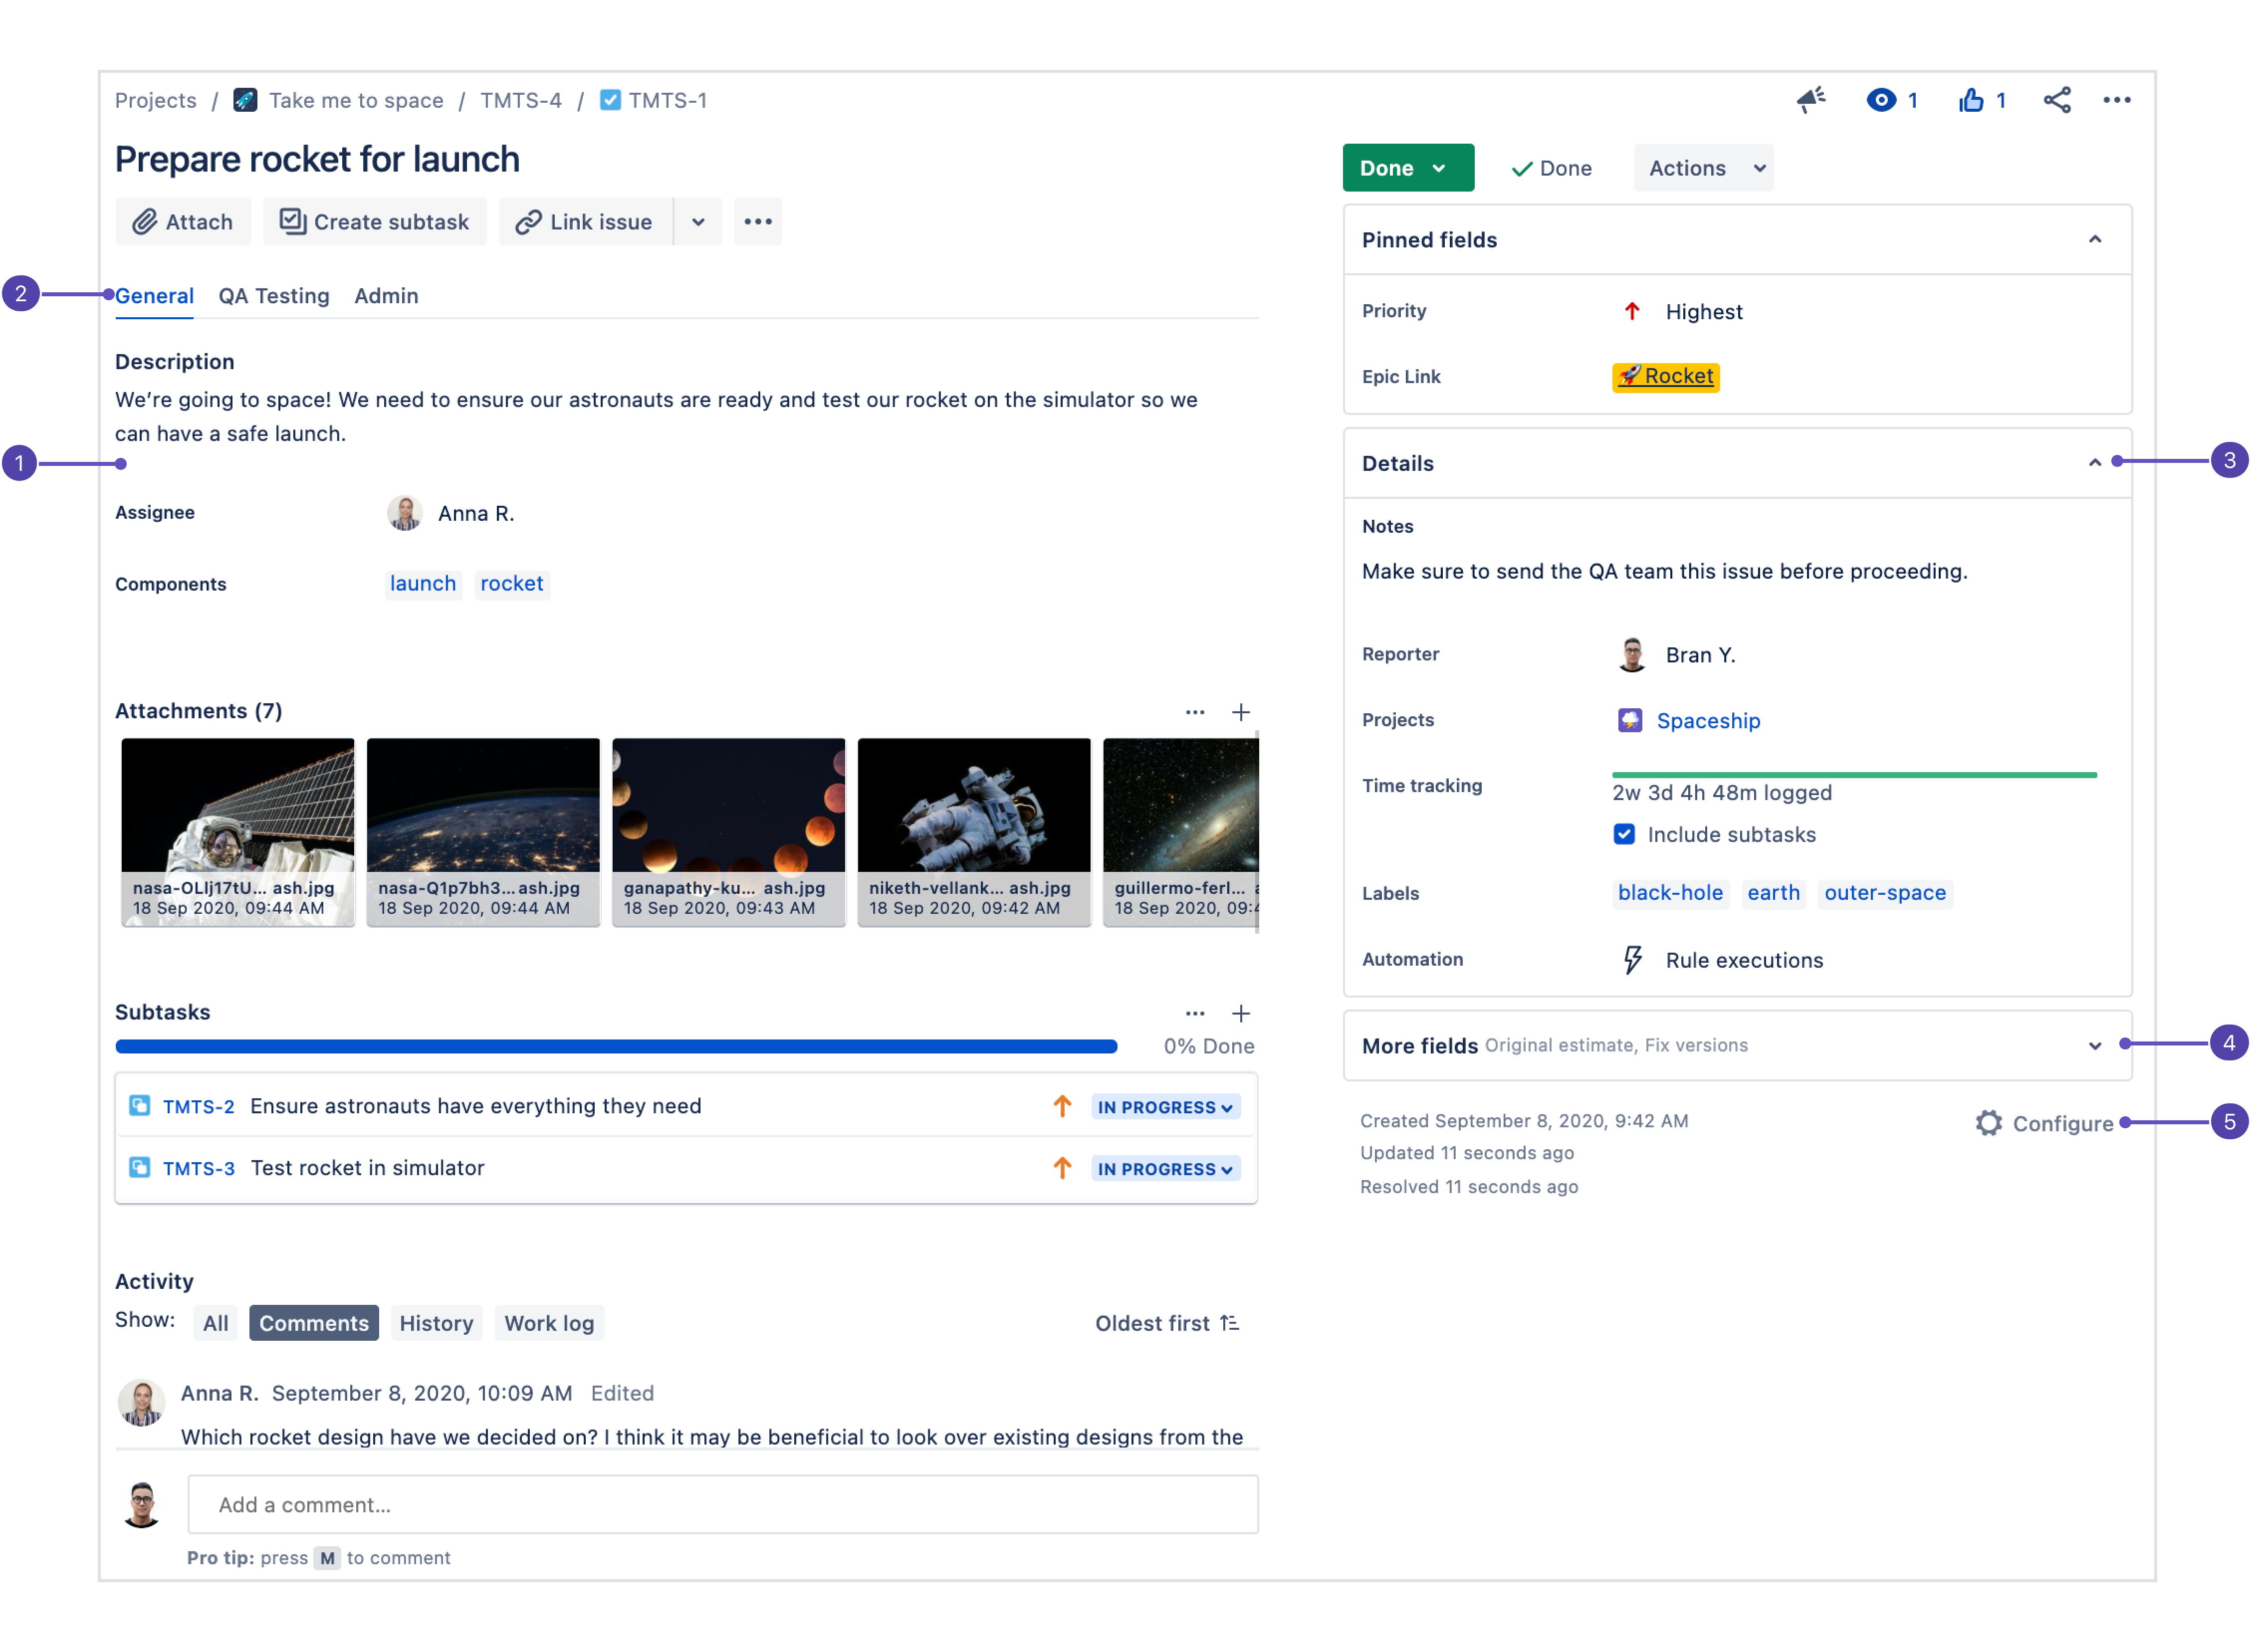
Description fields: Since this section is the first place users look when they open a work item, your most important fields should be configured here.
Field tabs: If the work item layout's screen is configured with more than one tab, they'll show up here.
Context fields: Fields above the hide when empty line in configuration appear here in the Details group. Each user can pin their most important context fields into the Pinned fields group depending on what works for them.
More fields: Fields under hide when empty are placed in this group when they don't have a value. When they have a value, they'll appear in the Details group.
Configure work item layout: Select Configure to change the position and visibility of fields in the work item.
Add or change the parent work item
To add a parent work item to your work item:
Open the child work item.
Select Add parent in the top-left corner. Depending on the work types available in your space, this may appear differently, for example, Add epic.
Select a parent work item.
To change the parent work item of your work item:
Open the child work item.
Select the work type icon in the top-left corner next to the work item key of the parent work item.
Select a new parent work item for your child work item.
In the timeline and list views, you can also change a work item’s parent by dragging and dropping it underneath a new parent work item.
Change the work type
If you create a work item but realize later that it's the wrong type (a bug instead of a task, for example), choose the work type symbol at the top-left of the work item and select a new work type. You can use the same process to convert a work item to a subtask.
Log and track time
Jira admins can enable or disable time tracking for their entire Jira site. They can also control who has permission to log time. If you don’t see the time tracking field in your space, contact your Jira admin for help. Read more about configuring time tracking.
Jira comes with in-built time tracking, so you and your team can log the amount of time you spend working on a work item and use the information for reporting and planning.
To log time:
Select More actions (•••) then Log work (or select the time tracking field).
Enter the time spent, select when the work was started, and optionally complete any other fields
Choose Save.
Time tracking panel: Shows the time logged so far, and time remaining. Select anywhere on the panel to log time.
For more, read about logging time on work items. If you and your team use time tracking regularly, you can configure the layout of your work items so that time tracking is always visible.
You can perform this action with your keyboard via Jira’s command palette. Use command + K (for Mac) or Ctrl + K (for Windows) to open the command palette while you’re in Jira. Read more about Jira’s command palette
App content and field tabs in glances
Glances show content from apps from the Atlassian Marketplace that display information from external sources and add extra functionality. Field tabs also appear as glances along with other work item details.
What's a glance?
A glance is a panel that appears alongside the contextual information about a work item (on the right side when viewing a work item in the full-page view). When the glance is collapsed, like when you first open a work item, you get a glance at what's inside — a truncated list of fields or summary information from the app.
When you click the glance its content expands to cover the details section of the work item. In the case of field tabs, this lets you see and edit the values in the fields within the glance. For apps, you can interact with the app when it's expanded.
Here's an example of how field tabs appear:
Field tab name
Fields in the tab
And here's what the glance looks like when it's expanded:
Glances for apps appear above Show more in the work item details section. Glances for field tabs can be above or below the Show more link. If you're a space admin and would like to change the position of a field tab, open a work item and select More actions (•••), then Configure. Take a look at Configure field layout in the work item for more information on field layout in the work item.
Categorize work items with labels
Labeling helps you categorize and search for work items. When viewing a work item, click on the Labels field in the work item details or press L and start typing to add a label. If there are existing labels, Jira will suggest them as you type.
You can click a label to see a list of all work items with that label.
Add the Labels Gadget to your dashboard to quickly find work items with labels relevant to you and your team.
Was this helpful?