Link Jira to Atlassian apps using OAuth 2.0
This page refers to application links between Atlassian apps only. For more info about links to third-party apps, check out OAuth 2.0 (3LO) apps
Application links (sometimes called applinks) allow you to connect Jira to external applications or to other apps within the same environment, including Atlassian Government environments.
The most common integration is with Confluence. This integration lets you connect Confluence pages to Jira work items, creating links between work items and documentation. For example: Work item A from Jira space Bear depends on work item B from Jira space Honey.
You can connect Jira with any Atlassian Data Center app, or Jira and Confluence.
Links between Jira and Confluence in the same organization are automatically generated, so you don’t need to manually create them.
To connect an Atlassian application using OAuth 2.0 you will need to:
Configure incoming and outgoing links on the application that will display the links.
Configure incoming and outgoing links on the application that the links are coming from.
During configuration, you’ll move between applications. You can save your changes as you go.
You must have the following to do the things described on this page.
Role: App admin
Permission: Administer spaces
Configure incoming OAuth 2.0 links
Once you configure an incoming link, you’ll receive a Client ID and Client secret. You’ll need these details to set up outgoing links and complete the integration.
Start with the application where you want the links to appear.
Go to Jira settings, then Apps.
Select Application links.
Select Create link.
Enter the Application URL of the Atlassian app you're linking to. Select Next.
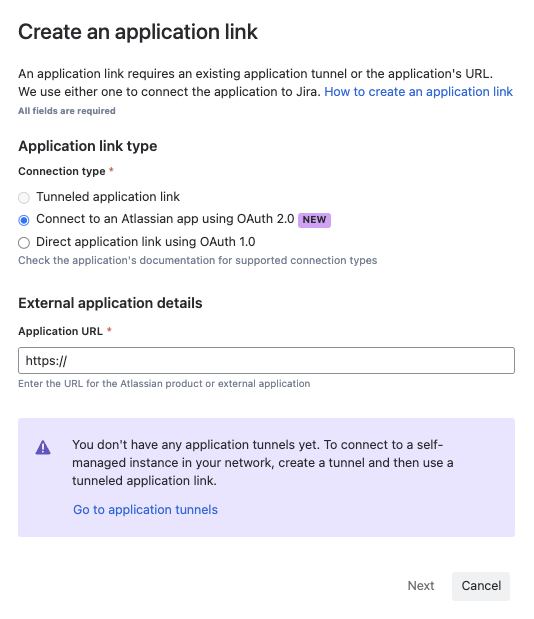
The URL must be accessible from your network, so you might need to configure your firewall to allow incoming connections.
Tunnelled application links are not supported with OAuth 2.0 application links, so direct access is necessary for the integration to work.
Creating application links for Cloud to Data Center
If the remote application doesn’t support OAuth 2.0 you'll be notified.
If the application URL is different from the Display URL, confirm and adjust as needed. Then, select Continue to review the connection details.
Review the details of the link you're about to create. If all is good, select Continue.
Choose Save or copy your outgoing OAuth 2.0 Client ID and Client secret.
Repeat these steps in the application that the links will come from. The steps are the same for Confluence.
You’ve configured the incoming links. This means your application can now send requests to the application that the links will come from.
Now you need to configure the outgoing links, so your original application can get the links sent back!
Configure outgoing OAuth 2.0 links
After you configure the outgoing links, your applications will be connected.
In the application that you want the links to appear, go to Jira settings, then Apps.
Select Application links.
Go to Configure OAuth client details.
Enter the Client ID and Client secret you saved while configuring your incoming links in the other application.
Select Connect to set up the two-way communication between the applications.
Connect Cloud to Data Center using OAuth 2.0 links
If you’re linking from an Atlassian Data Center application, enter the Redirect URL. You can find this URL on the Create outgoing link page in the Data Center app.
Select which OAuth scope you want to enable for the application where links are coming from.
More information about OAuth 2.0 scopes for Jira Data Center incoming links
More information about OAuth 2.0 scopes for Confluence Data Center incoming links
Was this helpful?