Trello Planner
Trello カレンダーによって、ボードのタスクや、Trello の受信トレイにキャプチャしたタスクを完了する時間をスケジュールします。
カレンダーでは、ボードのすぐ横にカレンダーを表示して、やるべきことを完了する時間を確認できます。
カレンダーへのアクセス方法
ナビゲーション バーで、ボードとカレンダーの表示を切り替えると、カレンダーにアクセスできます。
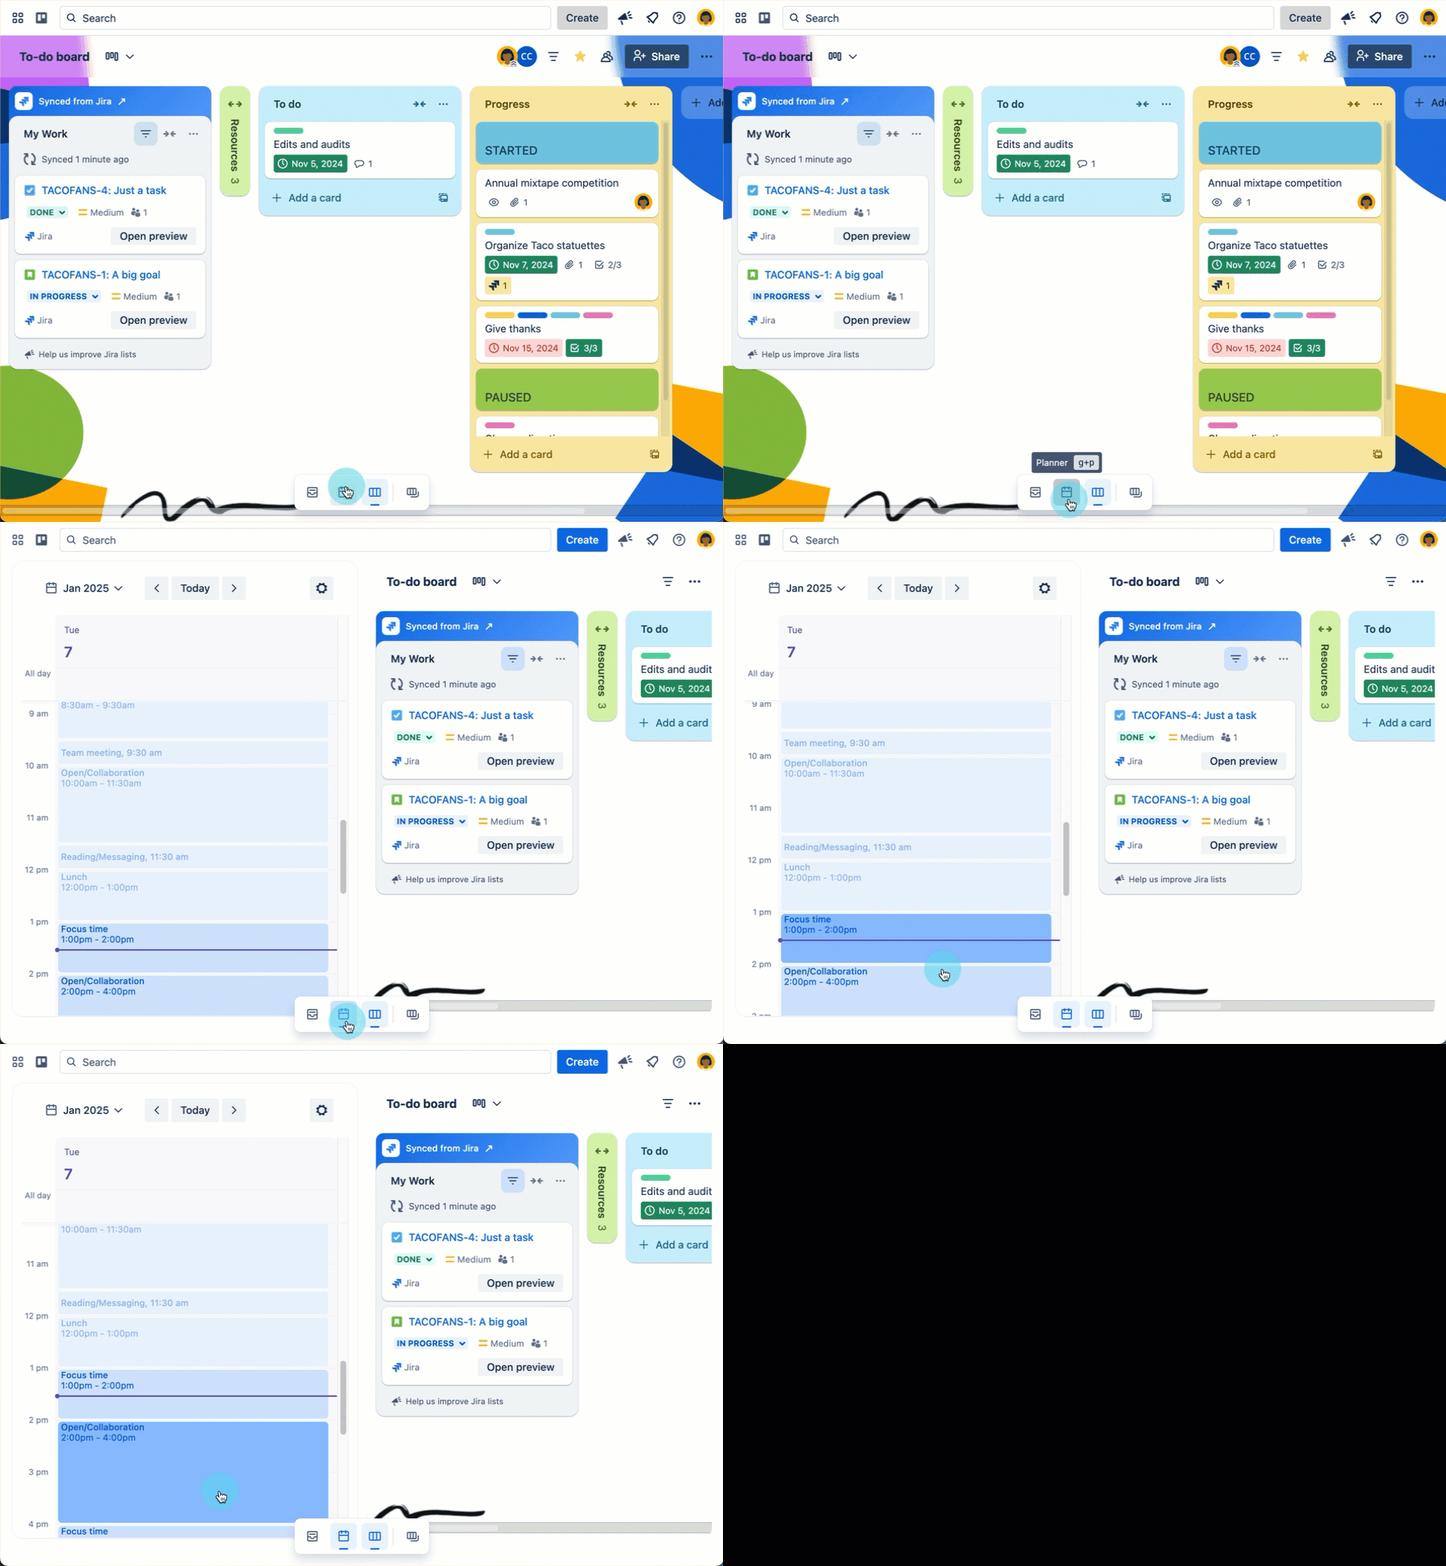
g+p キーボード ショートカットでも、カレンダーの展開や折りたたみを実行できます。
g > p の順に押します。最初に 2 つ目のキーを押しても、ショートカットはトリガーされません。
プランナーは、ブラウザ ウィンドウのサイズに応じて、1 日、3 日、または 7 日間のカレンダー イベントを自動的に表示します。
各パネルのサイズを変更して、カレンダーのサイズをカスタマイズすることもできます。
カレンダーをプランナーに接続する
プランナーを Google アカウントに接続するには、次の手順に従います。
任意の Trello ボードを開き、ナビゲーション バーからプランナーを開く
[カレンダーを接続] を選択する
カレンダーの種類を選択し、手順を進めて Trello にそのカレンダーを表示する
カレンダーのアカウントを接続すると、プランナーにイベントが表示されます。
Google Calendar and Microsoft Outlook Calendar are supported.
Connect multiple accounts in Planner
You can connect multiple calendar accounts in Planner to manage both personal and work schedules. You can connect up to 10 Google or Microsoft Outlook accounts to Planner.
To connect your Planner with another account:
Open any Trello board, then open your Planner from the navigation bar.
Select Settings (), then choose Add account.
Select a calendar type and follow the prompts to allow Trello to access that calendar.
The default account will be used for scheduling if no specific calendar is selected. You can choose which account to set as your default. To change your default account, go to Manage accounts in the planner settings.
表示するカレンダーを選択する
When you first connect your calendar, you’ll only see the default calendar from Google. To show or hide other calendars from your connected Google account:
プランナーを開く
[カレンダー] メニューを選択する。1 日表示では、このオプションは [設定] () > [接続されたカレンダーを表示] にあります。
プランナーに表示するカレンダーを選択する
How Planner shows cards with due dates
Cards with due dates will automatically appear in your Planner when:
The card is on a personal board (a board where you are the only member) and has a due date set.
The card is on a shared board, is assigned to you, and has a due date set.
From Planner, you can mark a due-date card as complete, open the card to edit its details, or drag it into a time slot to schedule focus time. Scheduling focus time does not change the card's due date.
Filter due-date cards in Planner
You can filter due-date cards on your Planner:
In Planner, select the Menu (…).
Select Filter due cards shown.
Choose which cards you want to appear.
You can filter due-date cards using these options:
Cards on personal boards: Show due-date cards from boards where you are the only member.
Cards assigned to me :Show due-date cards from all cards assigned to you.
Both options are turned on by default.
For more control, you can also filter cards from specific boards:
In Filter Due cards shown, select More.
Search for a board and select Add.
Choose one of the following options for the selected board:
Show all cards.
Show cards assigned to me.
Don’t show cards from this board
カレンダーにフォーカス タイムを追加する
カレンダーの空いている時間帯に、ボードや受信トレイのカードをドラッグ アンド ドロップして、1 枚のカードの予定を立てます。または、後でカードをリンクできるように、空のフォーカス タイムを追加します。
空のフォーカス タイムを追加するには、次の手順に従います。
カレンダーを開いて、時間帯を選択します
開始時間と終了時間を選択します
[保存] を選択します。
Trello で作成したフォーカス タイム イベントは、接続されているカレンダーに表示されます。
カードをフォーカス タイム イベントとリンクする
カードをフォーカス タイムにリンクするには、任意のフォーカス タイム イベントに対して、受信トレイまたはボードのカードをドラッグ アンド ドロップします。カードの場所は変更されず、受信トレイまたはボード内に引き続き表示されます。フォーカス タイムには、複数のカードもリンクできます。
フォーカス タイム イベントにカードを追加しても、カードには期限が追加されません。また、カードに期限が設定されていても、その期限は更新されません。
カードのリンクはカレンダーにのみ表示されます。接続されているカレンダーには表示されません。
フォーカス タイム イベントからカードのリンクを解除する
フォーカス タイムからカードのリンクを解除するには、次の手順に従います。
カレンダーを開き、フォーカス タイム イベントを選択して開きます
カードのタイトルにカーソルを合わせて、[イベントからカードのリンクを解除 ()] を選択します。
フォーカス タイム イベントは引き続きカレンダーに残ります。
カレンダーでフォーカス タイムを削除する
カレンダーでフォーカス タイム イベントを削除する方法は 2 つあります。
カレンダーでイベントを選択して、[このイベントを削除 ()] を選択します
Google Calendar でイベントを直接削除します
Schedule focus time with AI
Use AI to suggest focus time for cards in Planner.You can review the suggestions before adding them to your connected calendar.
始める前に
Connect a Google Calendar or Microsoft Outlook calendar to Planner.
Make sure AI features are enabled for your Workspace.
Use Trello on the web or desktop. Smart Schedule isn't available on mobile.
Note that Smart Schedule is available to Standard, Premium, and Enterprise users.
Schedule selected cards
Open a board and select one or more cards.
Select Schedule focus time from the card's quick-edit menu.
Open a board and select one or more cards.Review the suggested focus time in Planner.
Select Accept or Decline for each suggestion, or select Schedule All.
Accepted suggestions are added as focus time to your Planner and connected calendar. Declined suggestions are discarded and don't change the card's due date.
Plan your day
Open Planner.
Select the Planner menu (•••), then select Plan My Day.
Review the suggested focus times.
Accept or decline individual suggestions, or select Schedule All.
Turn on daily suggestions
Proactive Smart Schedule can suggest focus time automatically each day.
Open your profile and select AI Settings.
Turn on Proactive Smart Schedule.
Open Planner to review the daily suggestions.
Accept or decline individual suggestions.
Customize suggestions with Planner Rules
Planner Rules help you control which cards Smart Schedule considers and when it schedules focus time. In AI Settings, add rules for:
Card sources — Choose which boards Smart Schedule pulls cards from. You can select your Inbox and up to one additional board.
Card preferences — Specify which types of cards to schedule (for example, only cards due in the next five days or cards with a specific label).
Scheduling preferences — Set your working hours, preferred focus-time length, or days to avoid (for example, no scheduling on weekends).
To set up a rule:Open your profile and select AI Settings.
Under Add rule, Type your preference in plain language.
Use the card rules to choose which cards to smart-schedule. Use Scheduling preference rules to decide when you prefer they be scheduled.
[ルールの追加] を選択します。
この内容はお役に立ちましたか?