Plan your Cloud migration
Documents to help you prepare to migrate your Atlassian Server or Data Center products.
The option to ‘Migrate all data at once’ will be discontinued
In September 2024, we’ll discontinue the migration option to 'Migrate all data at once'. For migrators who are actively using this option, we'll continue to support it and maintain its current functionality until September 2024. For more information on this announcement, read our Community post.
We recommend that all customers use the ‘Choose what to migrate’ option. This option is designed to be flexible to meet the unique needs of scaling organizations. How to choose what Jira data to migrate
This option lets you migrate all data at once, without having to select specific items. You can migrate all projects, users and groups, customers, and apps using this option.
Looking for information on assessments?
Before you migrate data, you should complete assessments available in the assistant:
Complete these steps:
Check what can be migrated with this option. Learn more
Update the assistant and allowlist required IPs and domains. Learn more
Complete the pre-migration checklist to prepare your environment. Learn more
Pre-migrate users, groups, and attachments to reduce downtime. Learn more
Make sure your Jira database user only has permissions and access to Jira schemas. Learn more
This option requires an empty cloud site. You can:
delete existing projects from Jira Cloud. Learn more
start with an empty cloud site or we’ll give you an option to overwrite existing data in your cloud site. You’ll be required to create a backup for Jira Cloud (within the last 14 days) before overwriting data.
Permissions:
To migrate, you need to be a system admin in the source instance, and organization admin in the destination cloud site.
Testing:
When using the option to migrate all data at once, Teams in Advanced Roadmaps are migrated differently for sandboxes and production environments. To prevent any incidents, we recommend using a production instance for testing Teams migration with this option. Note: when migrating Teams to a production instance, it may take some time (a few hours in some cases) for the Teams to show up post-migration.
Good to know:
If you have Jira Align connected to your Jira instance, you need to complete additional steps before you migrate. Learn more
This option doesn’t support merging duplicated users (an automatic fix from ‘Assess and prepare users’). Learn more
This option requires that you use REST API when updating links to Jira issues or Confluence pages after the migration. Updating links directly from admin.atlassian.com isn’t supported. Learn more
To create a migration plan:
Open the Jira Cloud Migration Assistant.
Select Create new migration.
On the Connect to your cloud site screen, provide the following data:
Screen | Fields |
|---|---|
|
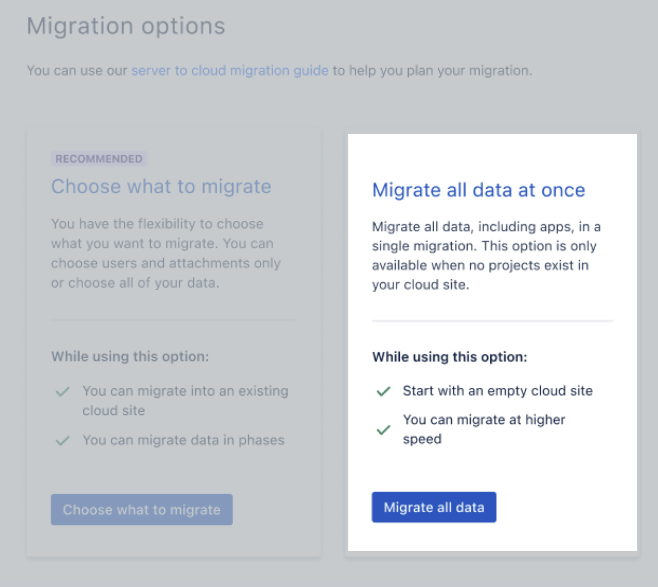
4. On the Migration options screen, select Migrate all data at once.

Once you’re done, check for errors in your migration. Learn how to check for errors in your migration
We have a number of channels available to help you with your migration.
For more migration planning information and FAQs, visit the Atlassian Cloud Migration Center.
Have a technical issue or need more support with strategy and best practices? Get in touch.
Looking for peer advice? Ask the Atlassian Community.
Want expert guidance? Work with an Atlassian Partner.
Support for Atlassian Server products ends in February, 2024. Learn more about the Server end of support timeline.
Was this helpful?