Send alerts to Opsgenie
Use webhooks and Jira Automation to send alerts to Opsgenie. About Jira Automation
Who can do this? |
Step 1: Create a new API integration in Opsgenie
In Opsgenie you can create an API integration either in Settings or in a team. In this example we’ll create the integration for a team. How to create an API integration in Opsgenie
To create a new API integration in Opsgenie:
In Opsgenie, navigate to your team and select Integrations.
Select Add integration.
Search for the API integration.
Name your integration, for example Atlassian
Alerts, and assign it to a team.
Select Continue.
Make a note of the API key, you’ll need this in a later step.
Step 2: Create a Jira automation rule
You can create the automation rule as a global rule, or in a Jira project if you’re not a Jira administrator. In this example we’ll create the rule in a project.
To create an automation rule in Jira:
In Jira, navigate to a project.
Go to Project settings > Automation.
Select Create rule.
Search for the Incoming webhook component.
Select Add Component. You won’t be able to configure the webhook until the next step.
Select THEN: Add an action.
Search for the Send web request component.
Enter the web request details, including the Opsgenie API URL and API key. Refer to the table below.
Save your changes to the Send web request component.
From the Turn on rule menu, select Save rule without enabling.
When prompted, give your rule a name and Save.
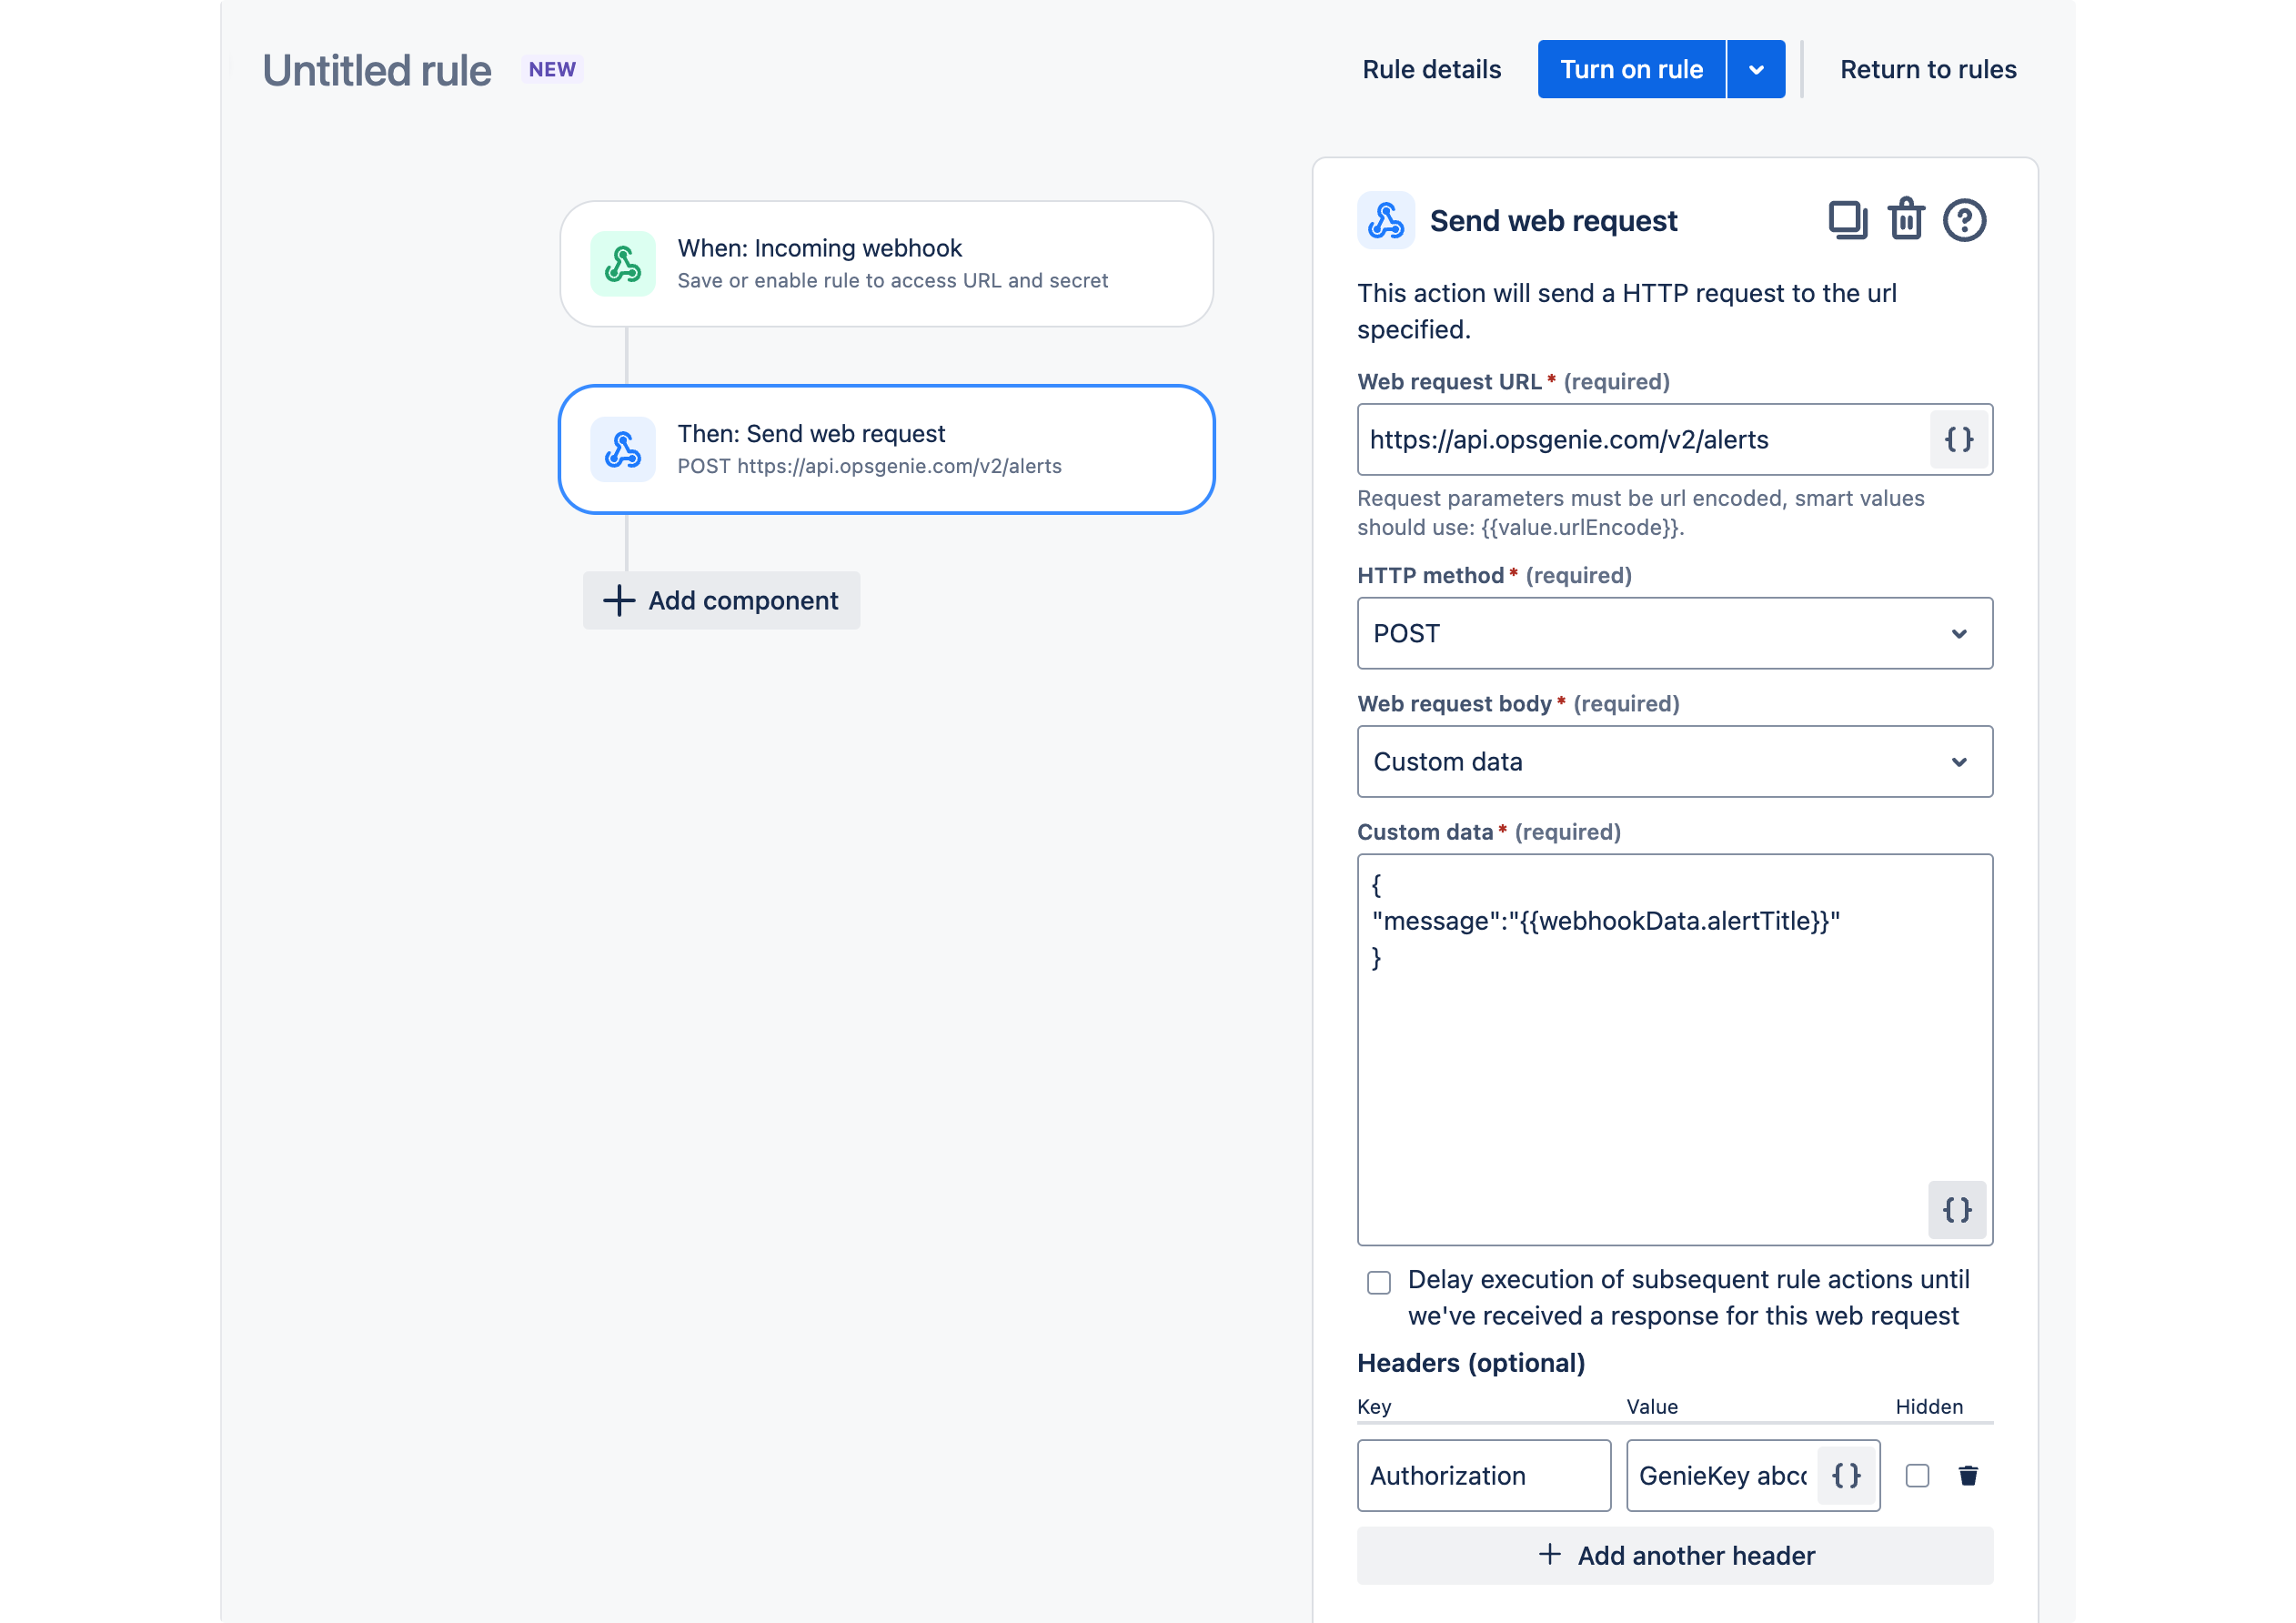
Web request details
Use the following information to configure the web request.
Web request URL |
|
|---|---|
Headers | Add an |
HTTP method | POST |
Web request body | Custom data |
Custom data | You can include data from the webhook payload in the Opsgenie alert. For example, you could include the alert title, as follows. {
"message":"{{webhookData.alertTitle}}"
}This is a simple example. You can use any of the attributes in the webhook payload and map them to Opsgenie fields. |
Step 3: Get the automation webhook URL
To get the webhook URL:
In Jira, go back to your automation rule and select the Incoming webhook trigger.
Copy the Webhook URL and Secret. You’ll need this in the next step.
Select No issues from the webhook when asked how to execute the automation rule.
Save your changes to the Incoming webhook component.
Enable the rule whenever you’re ready.
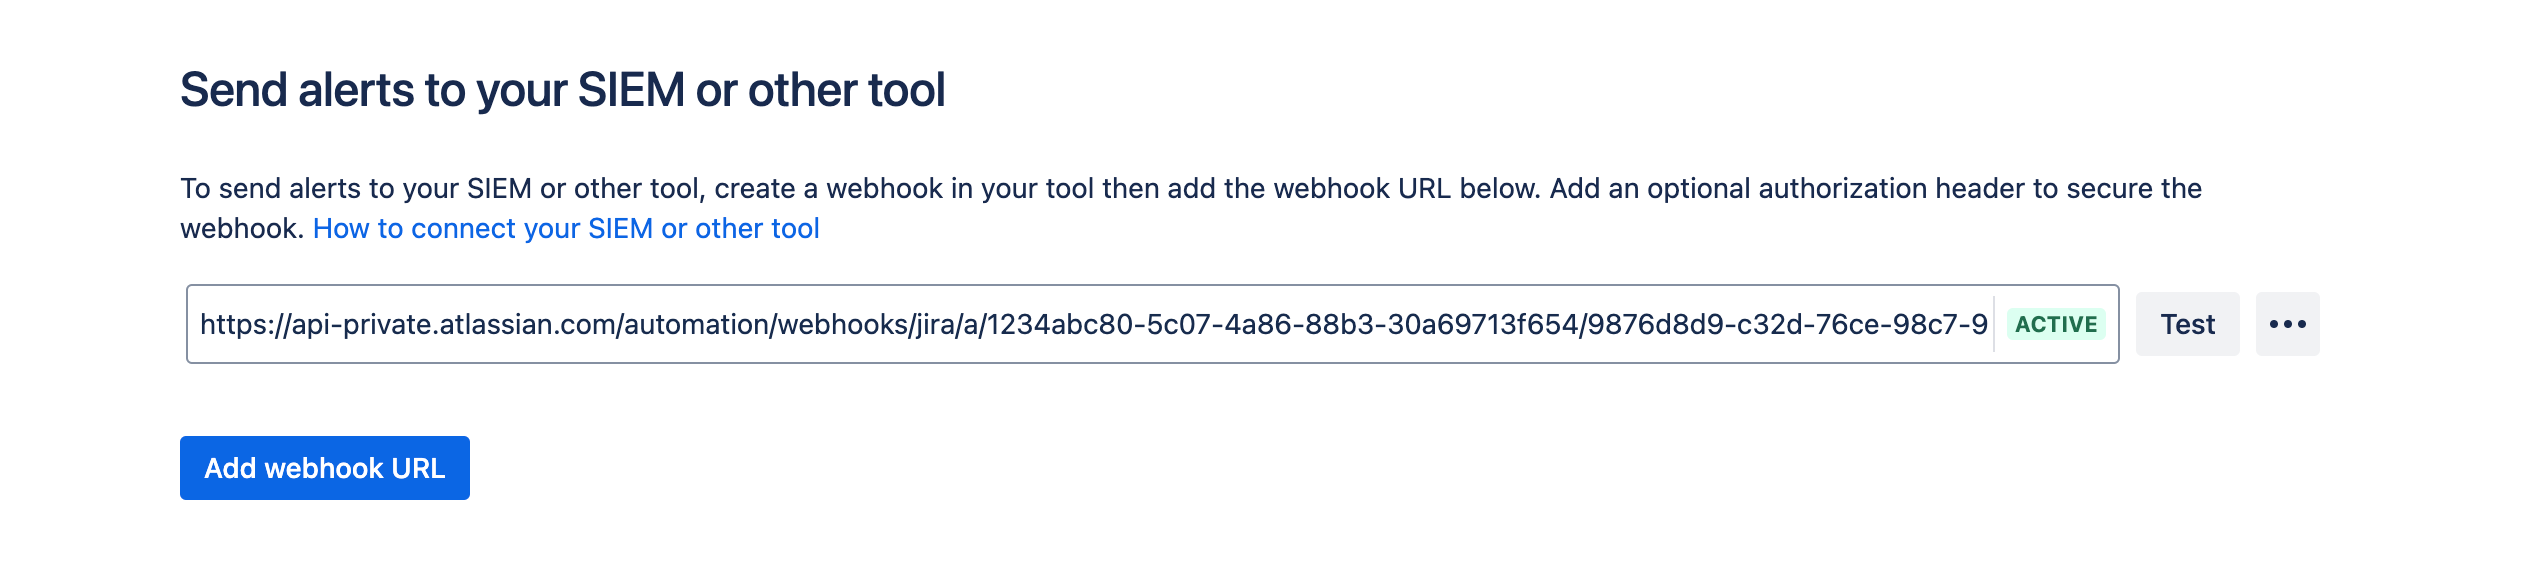
Step 4: Add the webhook URL to Guard Detect
To add the webhook URL:
In Guard Detect, go to Integrations > SIEM webhooks.
Select Add webhook URL.
Paste the Webhook URL you copied from Jira and Save.
Select More actions (…) > Add authorization header.
Paste the Secret you copied from Jira and Save.
Step 4: Configure the automation rule to create an issue
In Jira, go back to your automation rule and select THEN: Add an action.
Search for the Send web request component.
Enter the web request details, including the Opsgenie API URL and API key. Refer to the table below.
Save your changes to the Send web request component.
Name your automation rule and select Turn it on.
Step 5: Send a test alert
To send a test alert:
In Guard Detect, go to Integrations > SIEM webhooks.
Select Test next to the webhook for this integration.
If the integration is working you should see a new alert for your Opsgenie team.
What data is sent to your tool?
It’s important to know that once you set up an integration you will be sending alert data to the third party tool of your choosing. We send the alert title, description, and context which can include:
The name of the actor and their profile picture
The name of the subject, which can be a person or an entity (such as a space, project, or policy)
The site URL or page URL where the activity happened.
We respect the visibility settings in the actor’s Atlassian Account profile. If the actor has chosen not to share their profile picture with their Atlassian organization, we respect that setting.
You should make sure that it’s appropriate for this data to be shared with your third party tool before setting up the integration.
Was this helpful?