ID プロバイダーからのユーザーのプロビジョニングと同期
ID プロバイダーでユーザーとグループに変更を加え、その情報を Atlassian 組織に同期させます。
Atlassian Guard Standard に登録すると、ID プロバイダーを接続してカスタマーのシングル サインオンを設定できます。
任意の ID プロバイダーを使用できますが、一部の機能は選択された ID プロバイダーでのみ使用できます。アトラシアンがサポートする ID プロバイダーをご確認ください。
別のプロバイダーを使用している場合でも、カスタマーの SAML シングル サインオンを設定できます。
利用しているユーザー管理エクスペリエンスを確認する
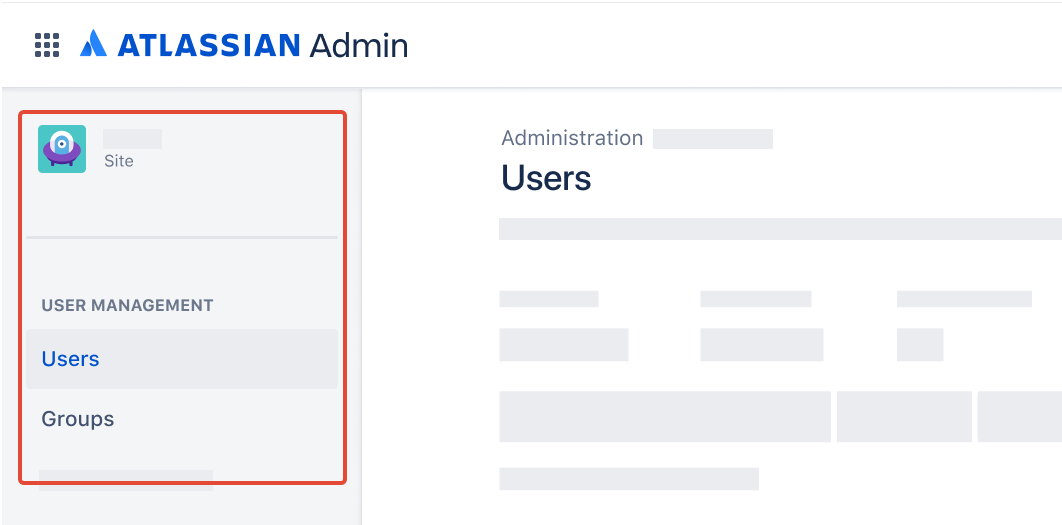
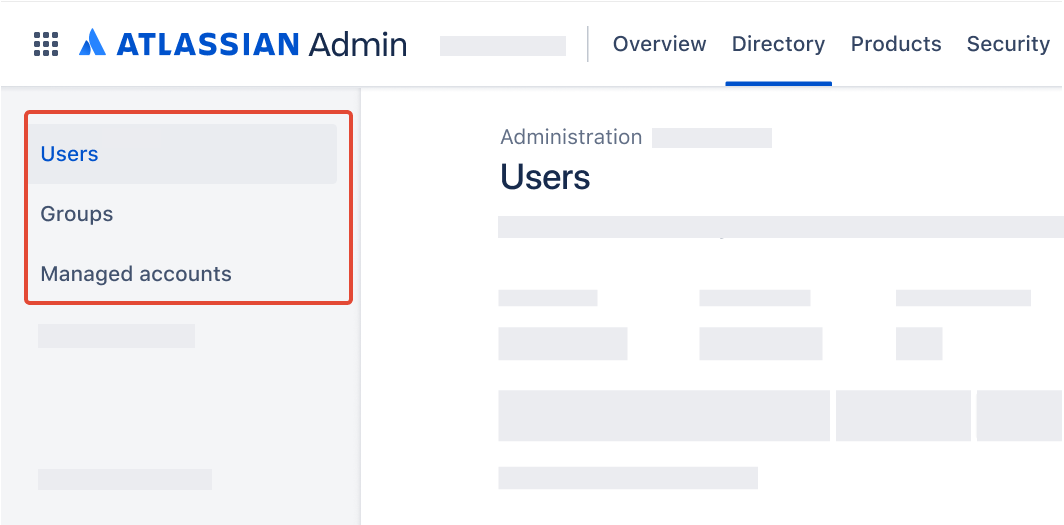
確認するには、admin.atlassian.com で所属組織にアクセスし、[ディレクトリ] タブを選択します。ここに [ユーザー] と [グループ] の各リストがある場合は、一元化されたユーザー管理を利用しています。一元化されたユーザー管理の詳細
こうした変更内容は、以下のサポート ドキュメントに記載されます。
オリジナル | 集中型 |
サイト管理者または組織管理者として、[ユーザー] は [Product site (製品サイト)] の下で確認できます。  | 組織管理者として、[ユーザー] は [ディレクトリ] タブで確認できます。  |
参考情報
ポータル限定カスタマーの ID プロバイダーを選択します。
admin.atlassian.com に移動します。複数の組織がある場合は、組織を選択します。
[製品] を選択します。
[サイトと製品] で、ID プロバイダーを接続するサイトを選択します。
[Jira Service Management] で [ポータル限定のカスタマー] を選択します。
[(その他のオプション)] > [ID プロバイダー] の順に選択します。
ご利用のセットアップをサポートする ID プロバイダーを選択します。
ID プロバイダー ディレクトリに名前を付けます。
プロンプトに従ってセットアップを完了します。
ポータル限定カスタマーの ID プロバイダーを選択します。
admin.atlassian.com で、ご使用のサイトの [管理] に移動します。複数のサイトの管理者や組織管理者であった場合、サイトの名前および URL をクリックすることで対象のサイトの管理領域を開くことができます。
[Jira Service Management] を選択します。
[] (その他のオプション) > [ID プロバイダー] の順に選択します。
ご利用のセットアップをサポートする ID プロバイダーを選択します。
ID プロバイダー ディレクトリに名前を付けます。
プロンプトに従ってセットアップを完了します。
この内容はお役に立ちましたか?