Select Approvers automatically based on a field value in Jira Forms
Platform Notice: Cloud Only - This article only applies to Atlassian apps on the cloud platform.
Summary
Currently, there is no option to use the Form field directly with Jira Workflow or with Jira Automation, but we can automate Jira Service Management approvals based on form field values.
Form fields can't be referenced directly by Jira Workflow or Automation. The workaround: link the form field to a regular Jira custom field (which captures the value), then drive the Approver selection off that custom field.
Solution
Configuring Forms
You can link a Form field with a Jira Custom field and use it to capture the value from Forms. Then use Automation to set the Approver field based on the value of this custom field.
Below are the detailed steps for this solution:
For illustration purposes, we are using the Select List (single-choice) custom field. You can opt to choose a different field that suits your requirements.
Phase 1 — capture the value: create/choose a custom field of the same type as the form field, set its context + default values, then link it to the form field (choose Replace Choices when prompted).
Phase 2 — drive the approval: in the workflow linked to the request type, edit the Approval step so the Approver is set based on the custom field's value (via Automation).
Create a Form and a Custom field, set context and default values in the Custom field, and link it to the Form Field
Create a Form and add all necessary fields to the Form.
Now, create a Custom Field or use the existing custom field of the same field type as created in the Form.
Add Context and Default values in the Jira custom field with the values that you want to see under the selected form field.
Open the Form and link the custom field with a form field. A warning pop-up will appear, and then select the option Replace Choices.
All the values selected in the Form field will now be automatically copied to the Linked Custom Field.
Configure the Approval step in Workflow and modify the Approver based on the values selected in the Jira Form field
Go to your Service project and open Workflow(Project Settings > Workflow).
Select the workflow that is linked to the required Request Type.
Edit the workflow and add the Approval step in the preferred Workflow Status.
Select the Number of Approvers and Approver Source.
Publish the Workflow and select No under Save a backup Copy and click on Publish.
Create the below Automation rule to set the approver based on values from the Linked Jira Custom Field
Navigate to Project Settings > Automation and create a Rule with the following components:
Trigger: Issue Transitioned (You can select another Trigger based on your requirements).
Add a Condition: IF, ELSE condition option.
Choose the Issue fields condition for the IF branch.
Under the IF branch, click on Add component, choose Add an Action, and select Edit Issue.
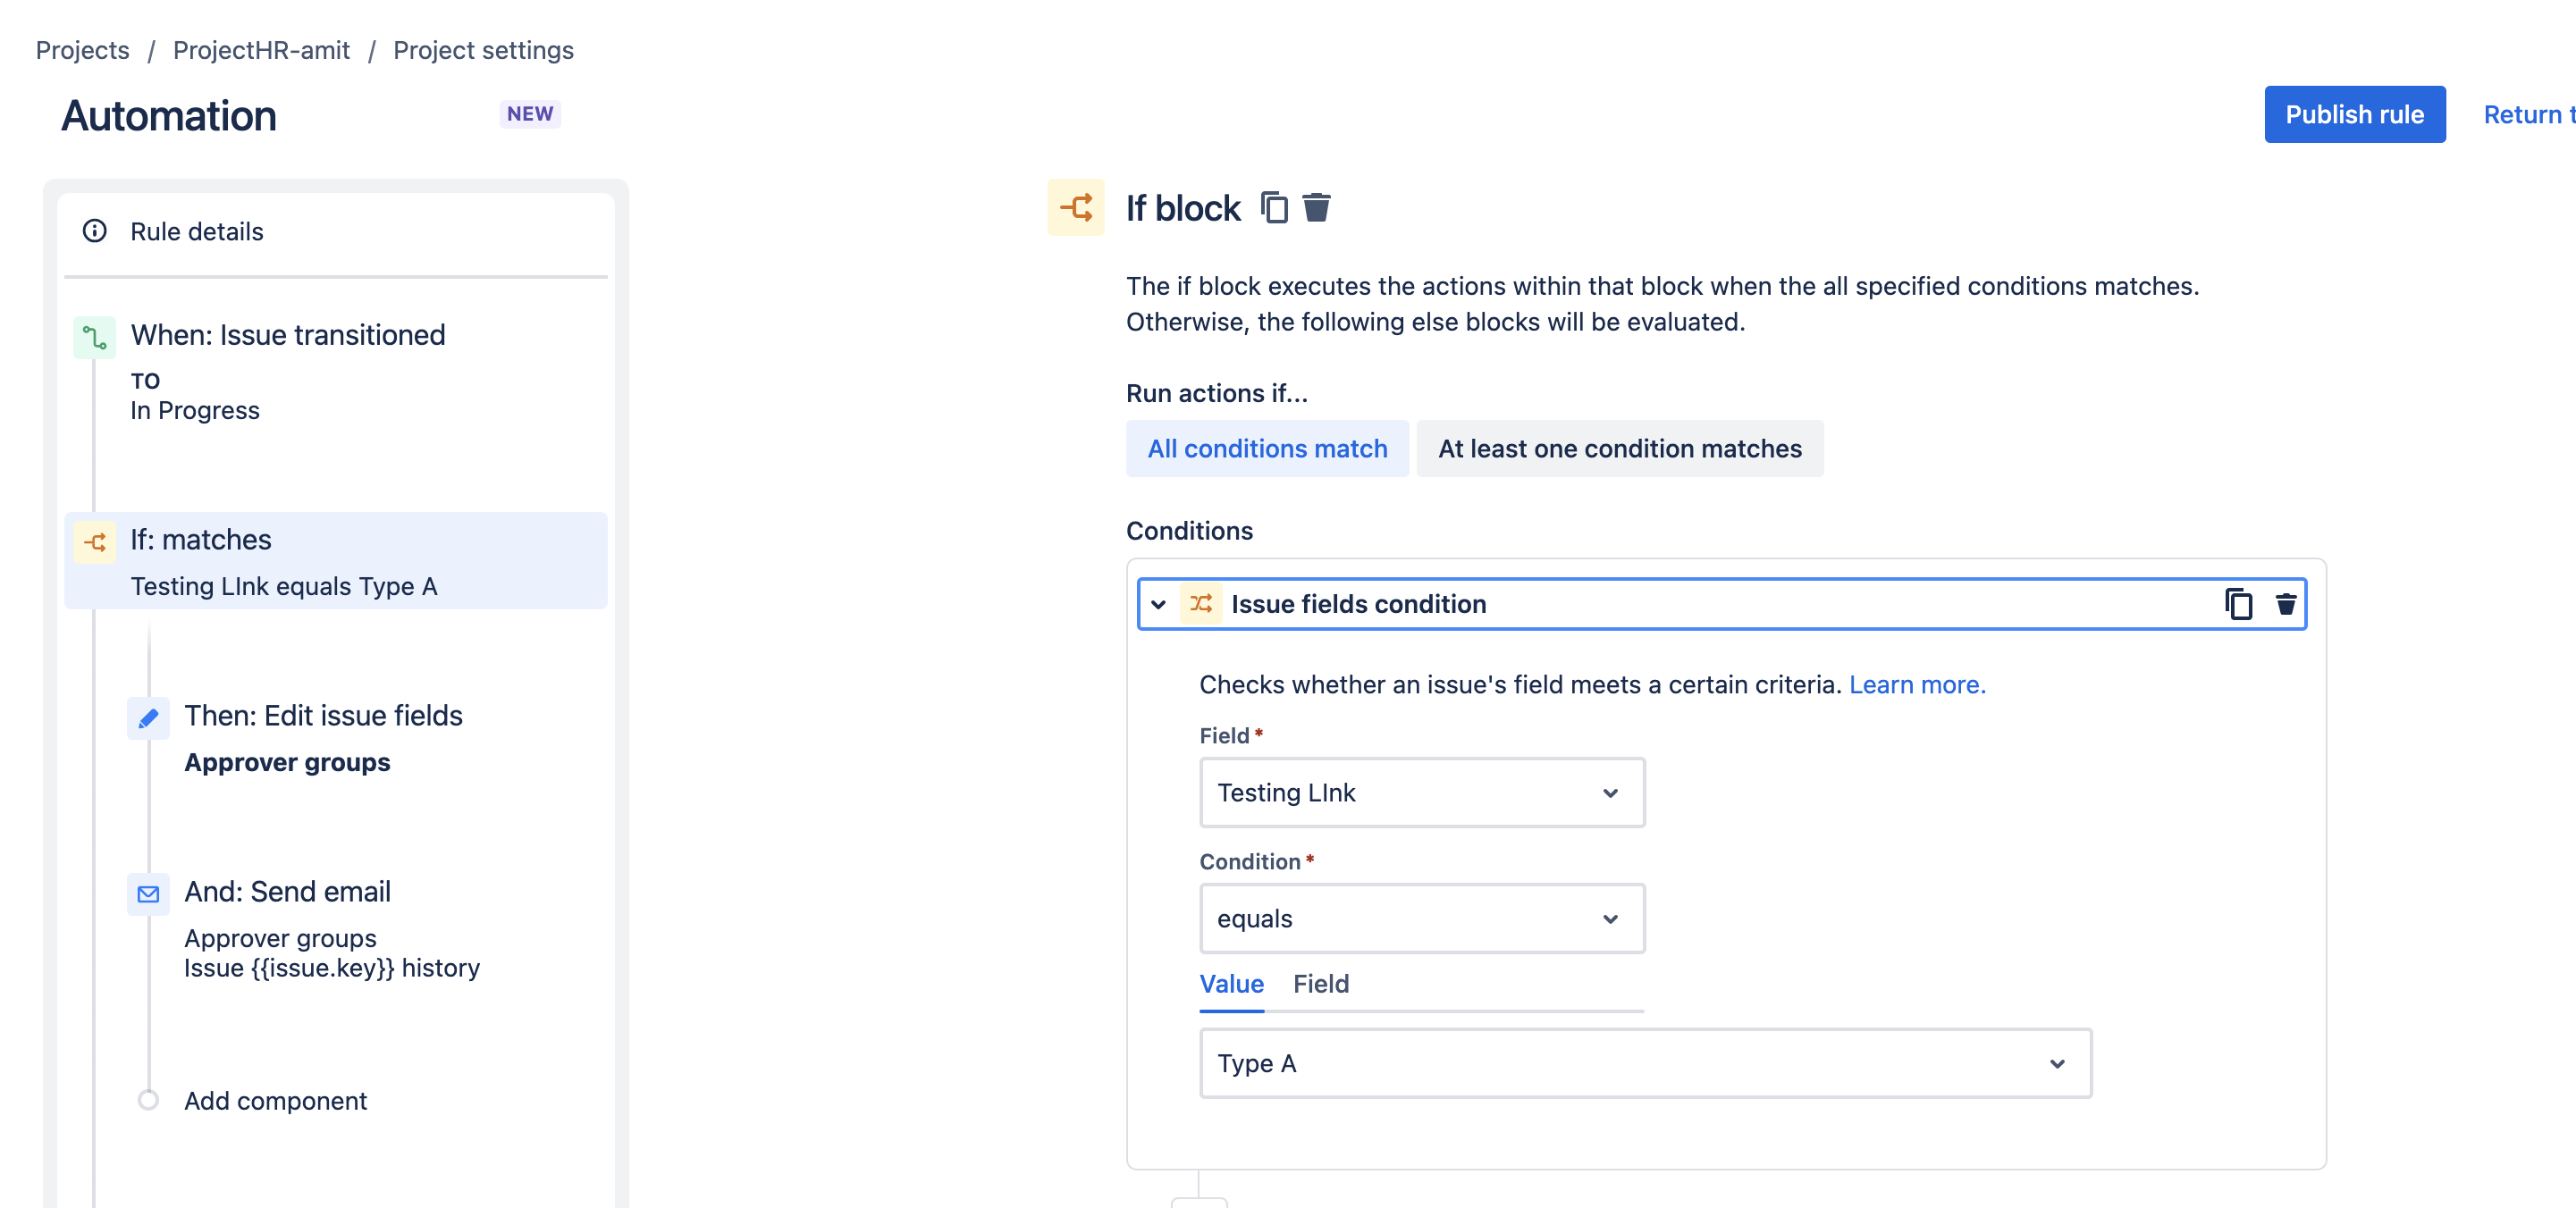
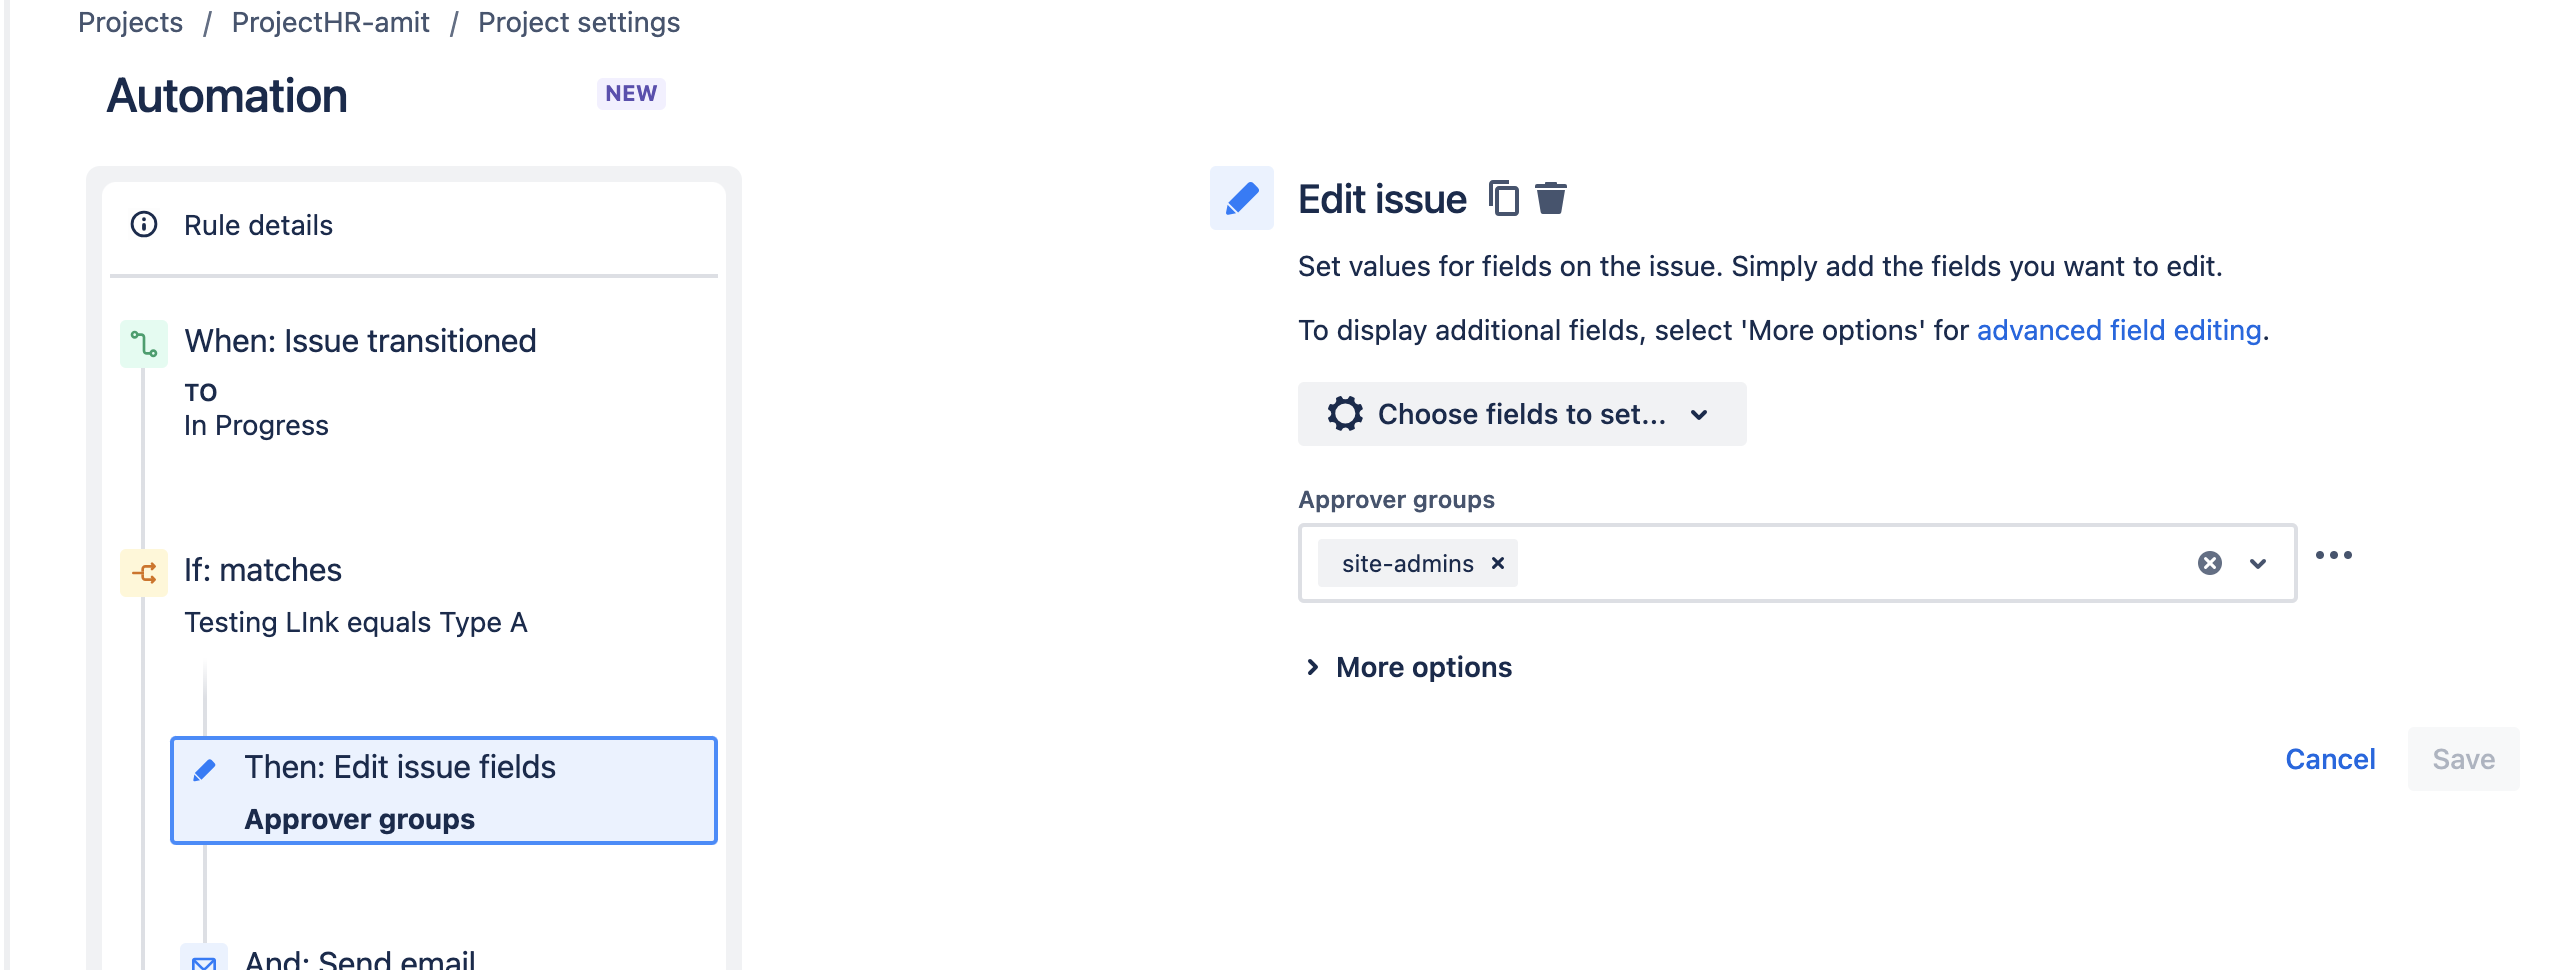
You can also configure an additional action to send emails to the Approvers with the Send email action like below:
XXXXX Approval was requested for the ticket {{issue.key}}, {{issue.summary}}
You will receive an email shortly to approve this request. Please see the comments below.
Comment: {{issue.comments.last.body}}
Commented By: {issue.comments.last.author.displayNamel?
At: {{issue.comments.last.created.jiraDate}
Thank you
Additionally, you add multiple IF-ELSE branches for different values of the field and set the Approvers field accordingly.
To confirm it works as expected, submit a portal request, select each form value, and confirm the correct approver is set on the resulting issue.
If you need further support with this, please feel free to contact support via the Atlassian Support Portal.
Was this helpful?