Examples for relative date variables
Platform Notice: Cloud and Data Center - This article applies equally to both cloud and data center platforms.
Support for Server* products ended on February 15th 2024. If you are running a Server product, you can visit the Atlassian Server end of support announcement to review your migration options.
*Except Fisheye and Crucible
Summary
Relative date variables allow you to generate a custom, dynamic date that can be used anywhere you would enter a date value. This convenient variable eliminates the manual process of updating a date value over time as it dynamically updates with the correct date according to the variable selected.
Relative date variables can be used as parts of other variables, in your queries, in a Visual SQL step, and even in chart titles. This article has several examples of how relative date variables can be used within Atlassian Analytics.
Solution
1. Use relative date variables in filters
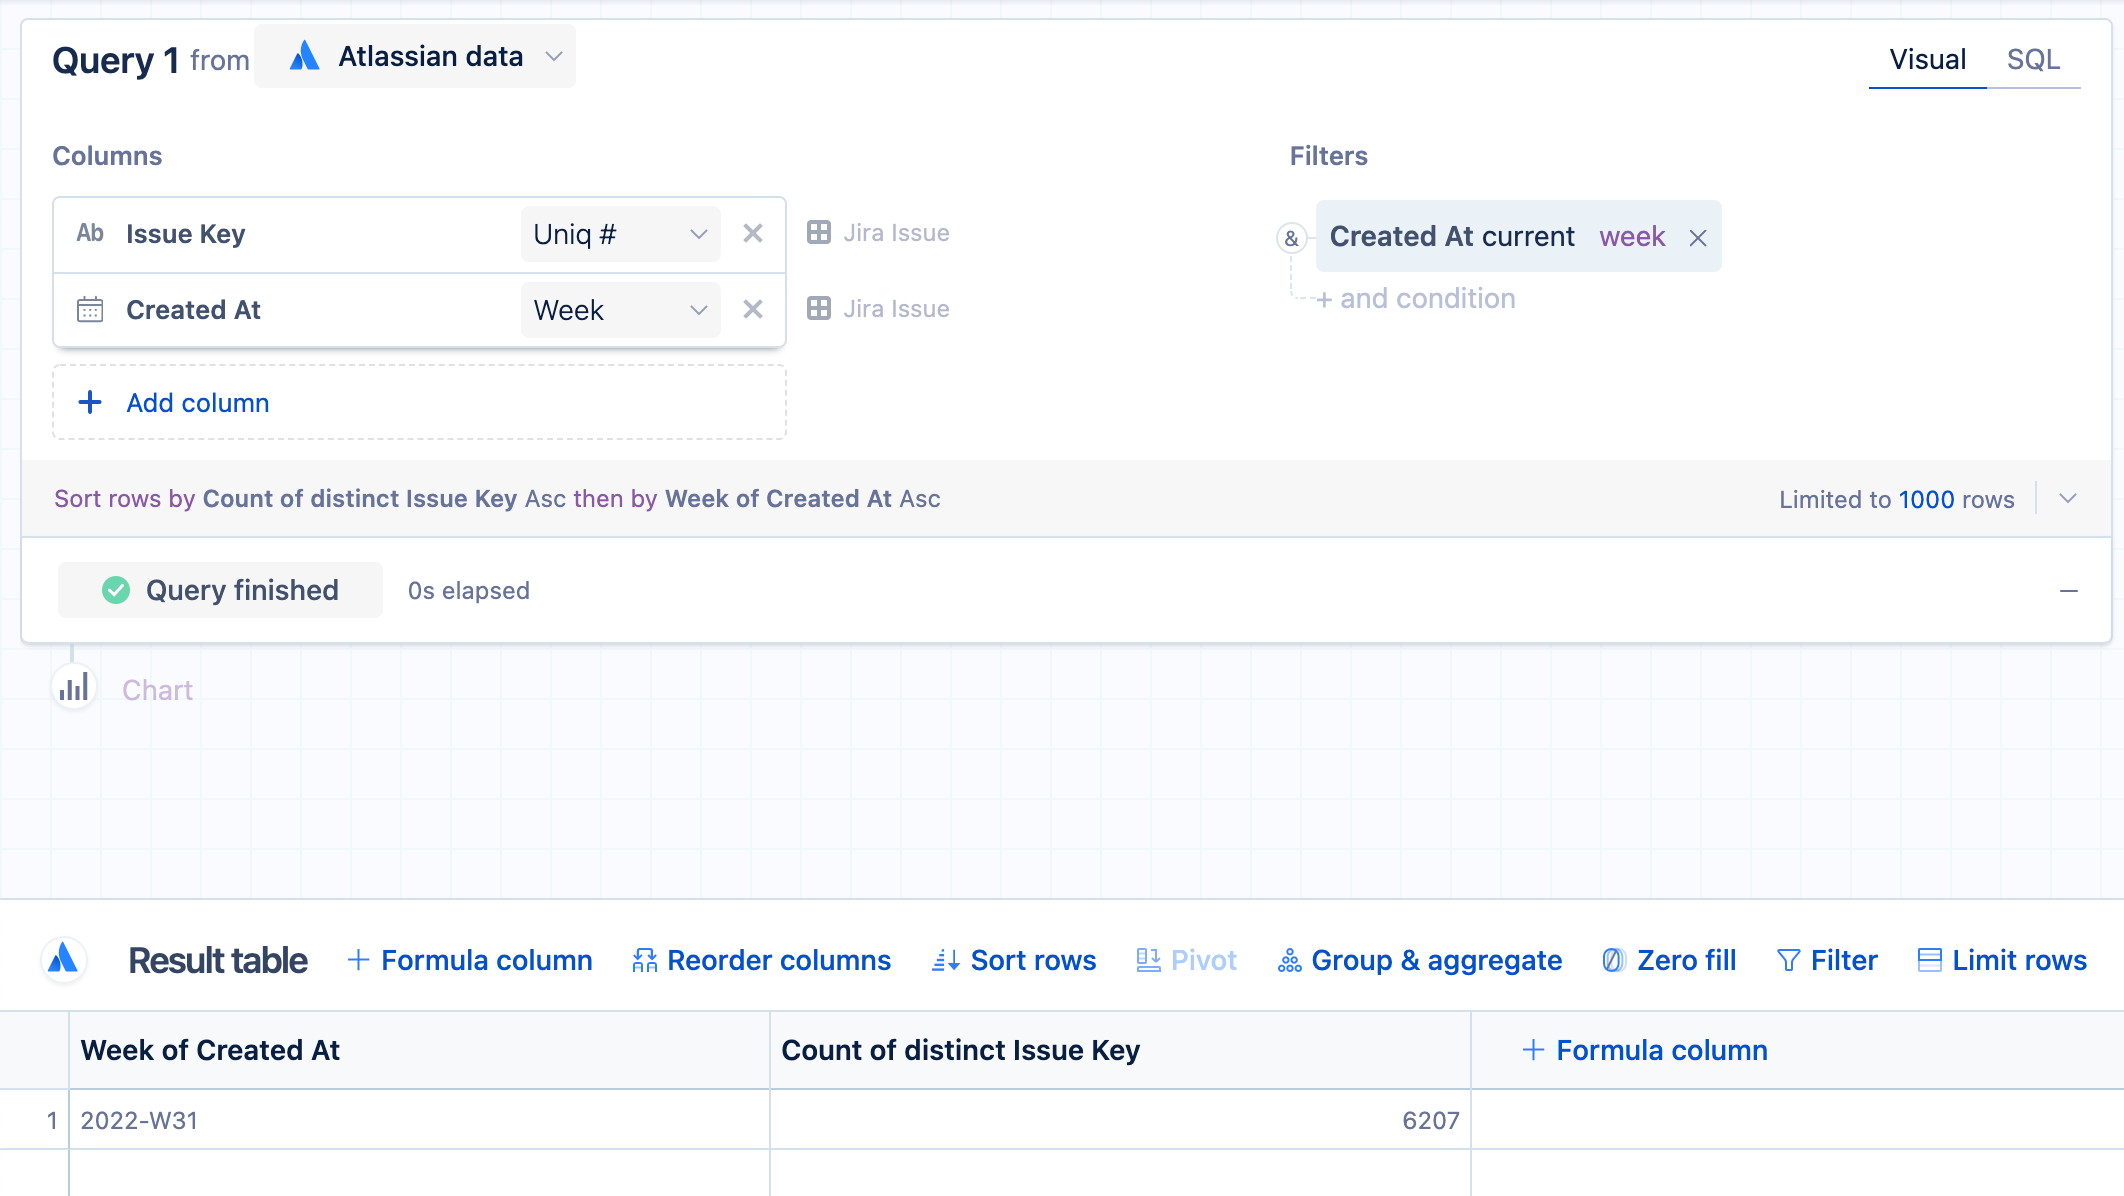
In this example, we create a chart to compare the issues created this week to the previous week’s using the Atlassian Data Lake.
Create a query to get the number of issues created in the current week:
From the Jira issue table, add the Created at and Issue key columns to the “Columns” section.
Change the aggregation of the “Created at” column to Week.
Add the Created at column to the “Filters” section of the query and use the current week filter operator.
Select Run query.
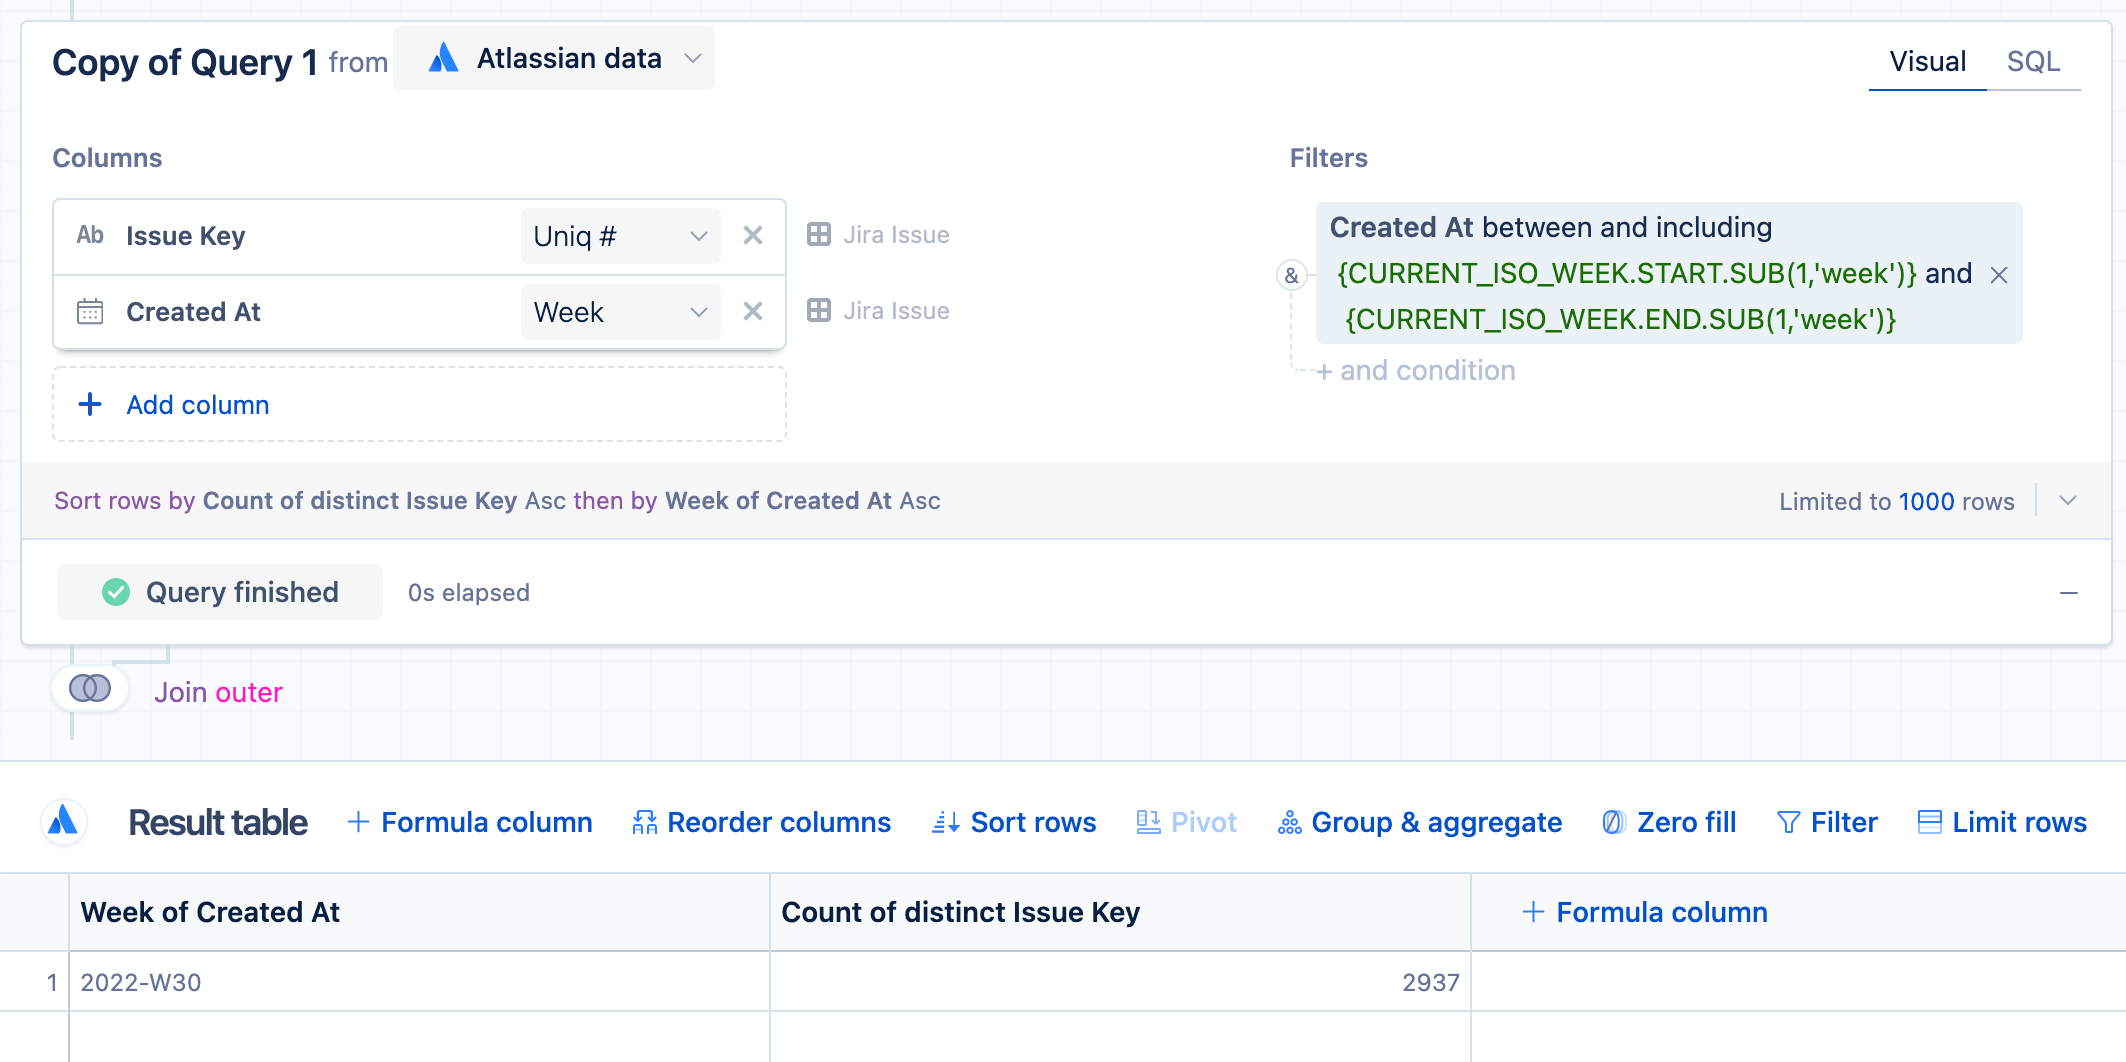
Create a copy of Query 1. For this second Query, we want to change the date range to be the previous week instead of the current week. To do this:
Change the filter operator to between and including.
Use
{CURRENT_ISO_WEEK.START.SUB(1,'week')}for the start date and{CURRENT_ISO_WEEK.END.SUB(1,'week')}for the end date.{CURRENT_ISO_WEEK.START}and{CURRENT_ISO_WEEK.END}are relative date variables, and we apply theSUB()datetime function to subtract one week from the start of the week and one week from the end of the week. As a result, we get the previous week’s data.
Select Run query.
Edit the “Join” step below the Copy of Query 1 and change the join type to Union. Select Save to apply the join change.
Now, reorder the rows so the previous week is first followed by the current week. To do this, sort the rows of the “Created at” column to Sort rows by ascending.
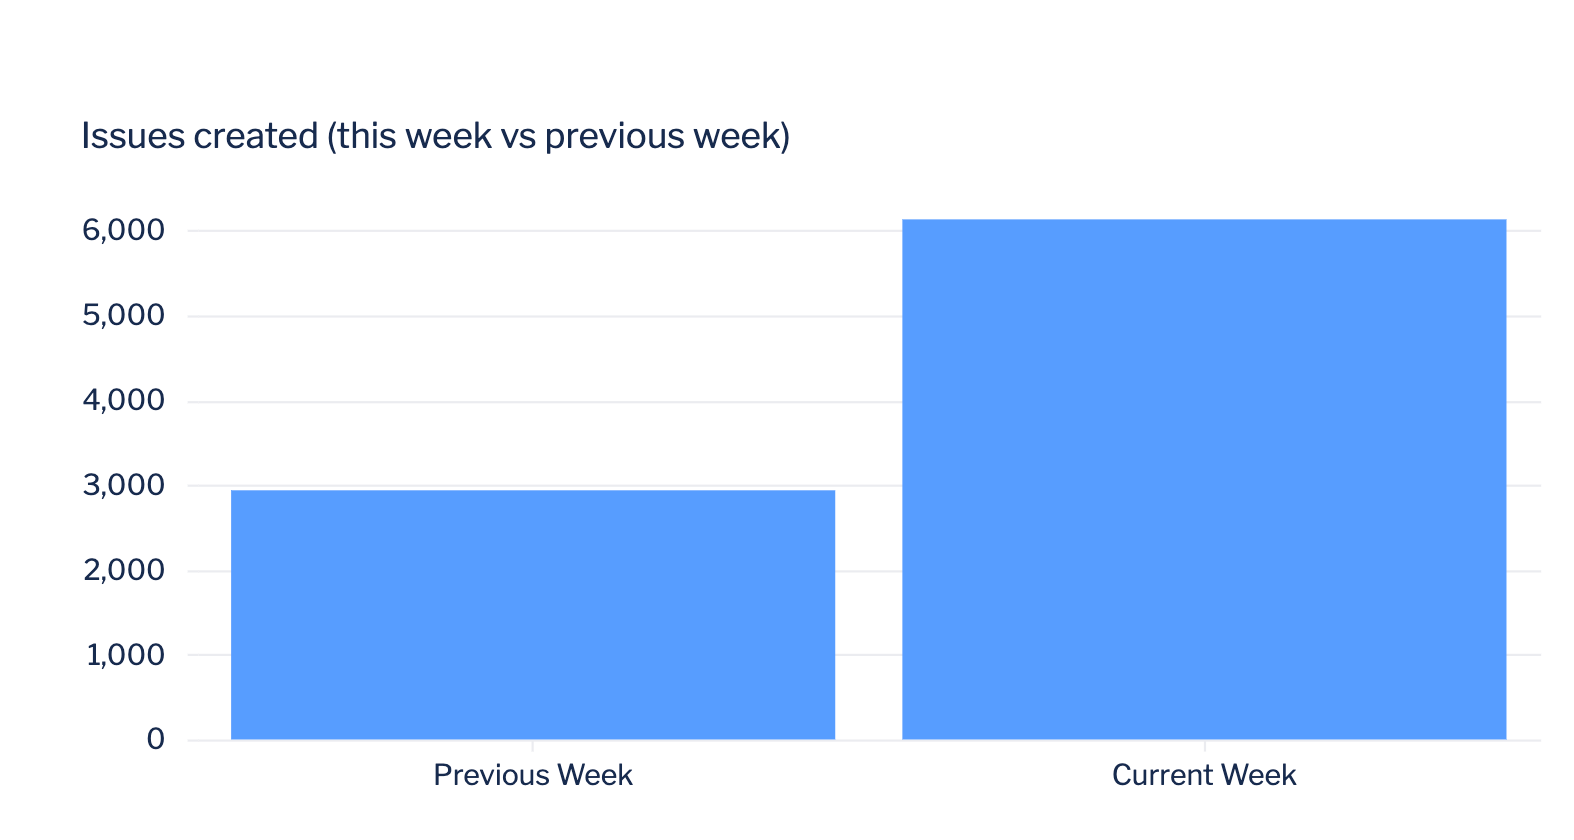
Now you can customize your chart as needed. For this example, we found the bar chart to be the best visualization of this data, but feel free to select a different chart type! Select Save to dashboard when you’re finished.
If you want your chart to display “Current Week” and “Previous Week” like this example, you can add an “Apply formula” step with the following custom formula to automatically rename the weeks.
CASE WHEN "Week of Created At" = STRFTIME('%Y-W%W','now') THEN 'Current Week' ELSE 'Previous Week' END2. Create dynamic chart titles using relative date variables
You may want your chart titles to reflect certain dynamic or changing values such as today’s date or a variable’s current value. You can do this by integrating these variables directly into your chart’s title.
For example, you could dynamically update today’s date in a chart title by using the {TODAY} variable directly in the title.
New issues: {TODAY}
It can also reflect the current value of one of your variable controls. For example, the chart below includes new users between dates selected in the "Calendar" control named CALENDAR. As the date values of the “Calendar” control could change, you can use the start and end date of the “Calendar” control in the chart title so that it always reflects the selected date range.
{CALENDAR.START} - {CALENDAR.END}
3. Turn relative date variables into timestamps
Relative date variables are, as you would guess, simply dates. If you want to use these variables to perform calculations with datetime values, you need to put them in a timestamp format. To do this, you can use a custom formula to append ' 00:00:00' to the variable to turn it into a datetime data type. Note the necessary space in front of the 00:00:00!
For example, to turn the {TODAY} variable into a timestamp, you’d enter the following in your custom formula:
{TODAY} || ' 00:00:00'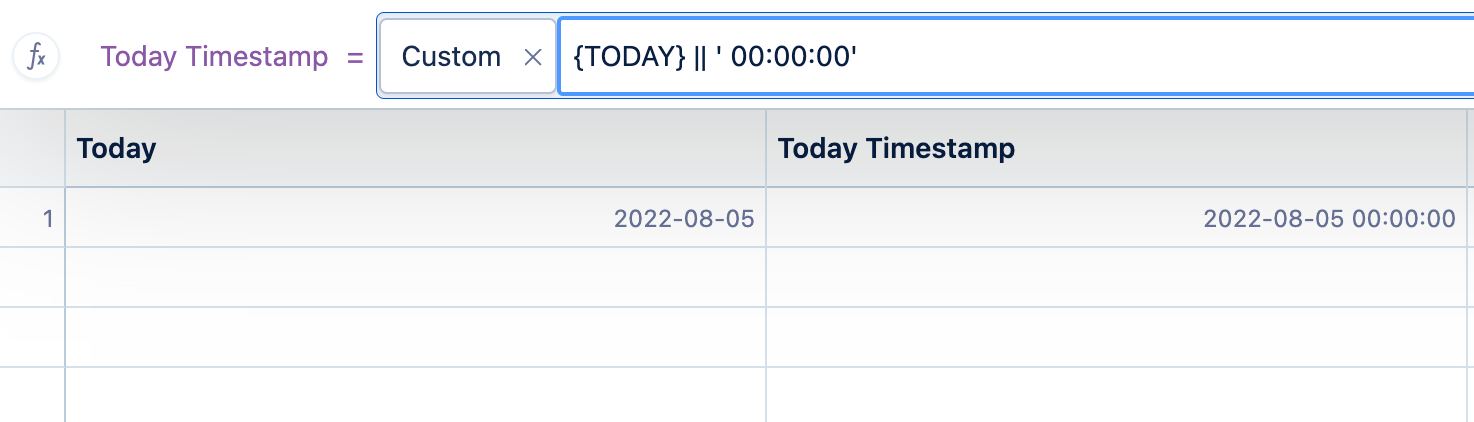
Was this helpful?