Automate information sending in JSM Forms on Cloud
Platform Notice: Cloud Only - This article only applies to Atlassian apps on the cloud platform.
Summary
Use Jira automation to send forms via email, as direct form sending in notifications isn't supported.
Solution
Send Forms for licensed users or customers
Forms can't be sent directly in notifications, so you attach the form's PDF via Automation. The method differs by recipient:
Licensed users — the REST-API attachment-link workaround works (they can authenticate to download).
Customer accounts — must receive the PDF via a public comment (they can't use the API link).
Licensed users
For licensed users with internal access to the space, we can use the workaround described in the following document:
Please note that the smart value used in the above workaround uses our REST API to send the Attachment, so it is necessary to have internal permissions and authentication to use it. In other words, it sends the API URL of the attachment, hence only licensed users will be able to use the link and download the attachment.
Customer accounts
You can send the PDF form to customer accounts using steps different from those for licensed users. This article explains how to send attachments to customers using an automation rule:
To ensure attachments are visible to users, they must be included in a public comment. When a form is added to a request and the Save a PDF version of this form each time it's resubmitted option is enabled in Form settings, the form is saved as an attachment rather than a comment. To address this, use an automation action to add a public comment with the attachments.
The automation rule will look similar to the one shown in the screenshot below:
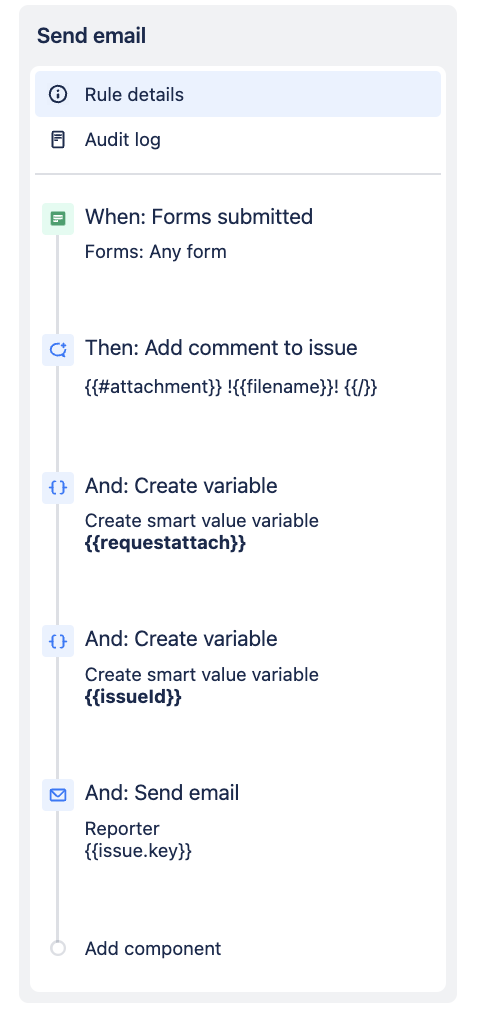
Enable Save a PDF version of this form each time it's resubmitted under Space settings > Forms > [form] > Settings.
Then, create a rule that adds a public comment with the form attachment (private comments won't reach customers).
1. Open the service space > Space settings > Automation > Create rule.
2. As a trigger, select Forms submitted and, if necessary, the desired form > Save.
3. Select New action > Comment on issue > Add the following smart value:
{{#attachment}}
[^{{filename}}]
{{/}}
4. In the Comment visibility, select Share with customer > Save.
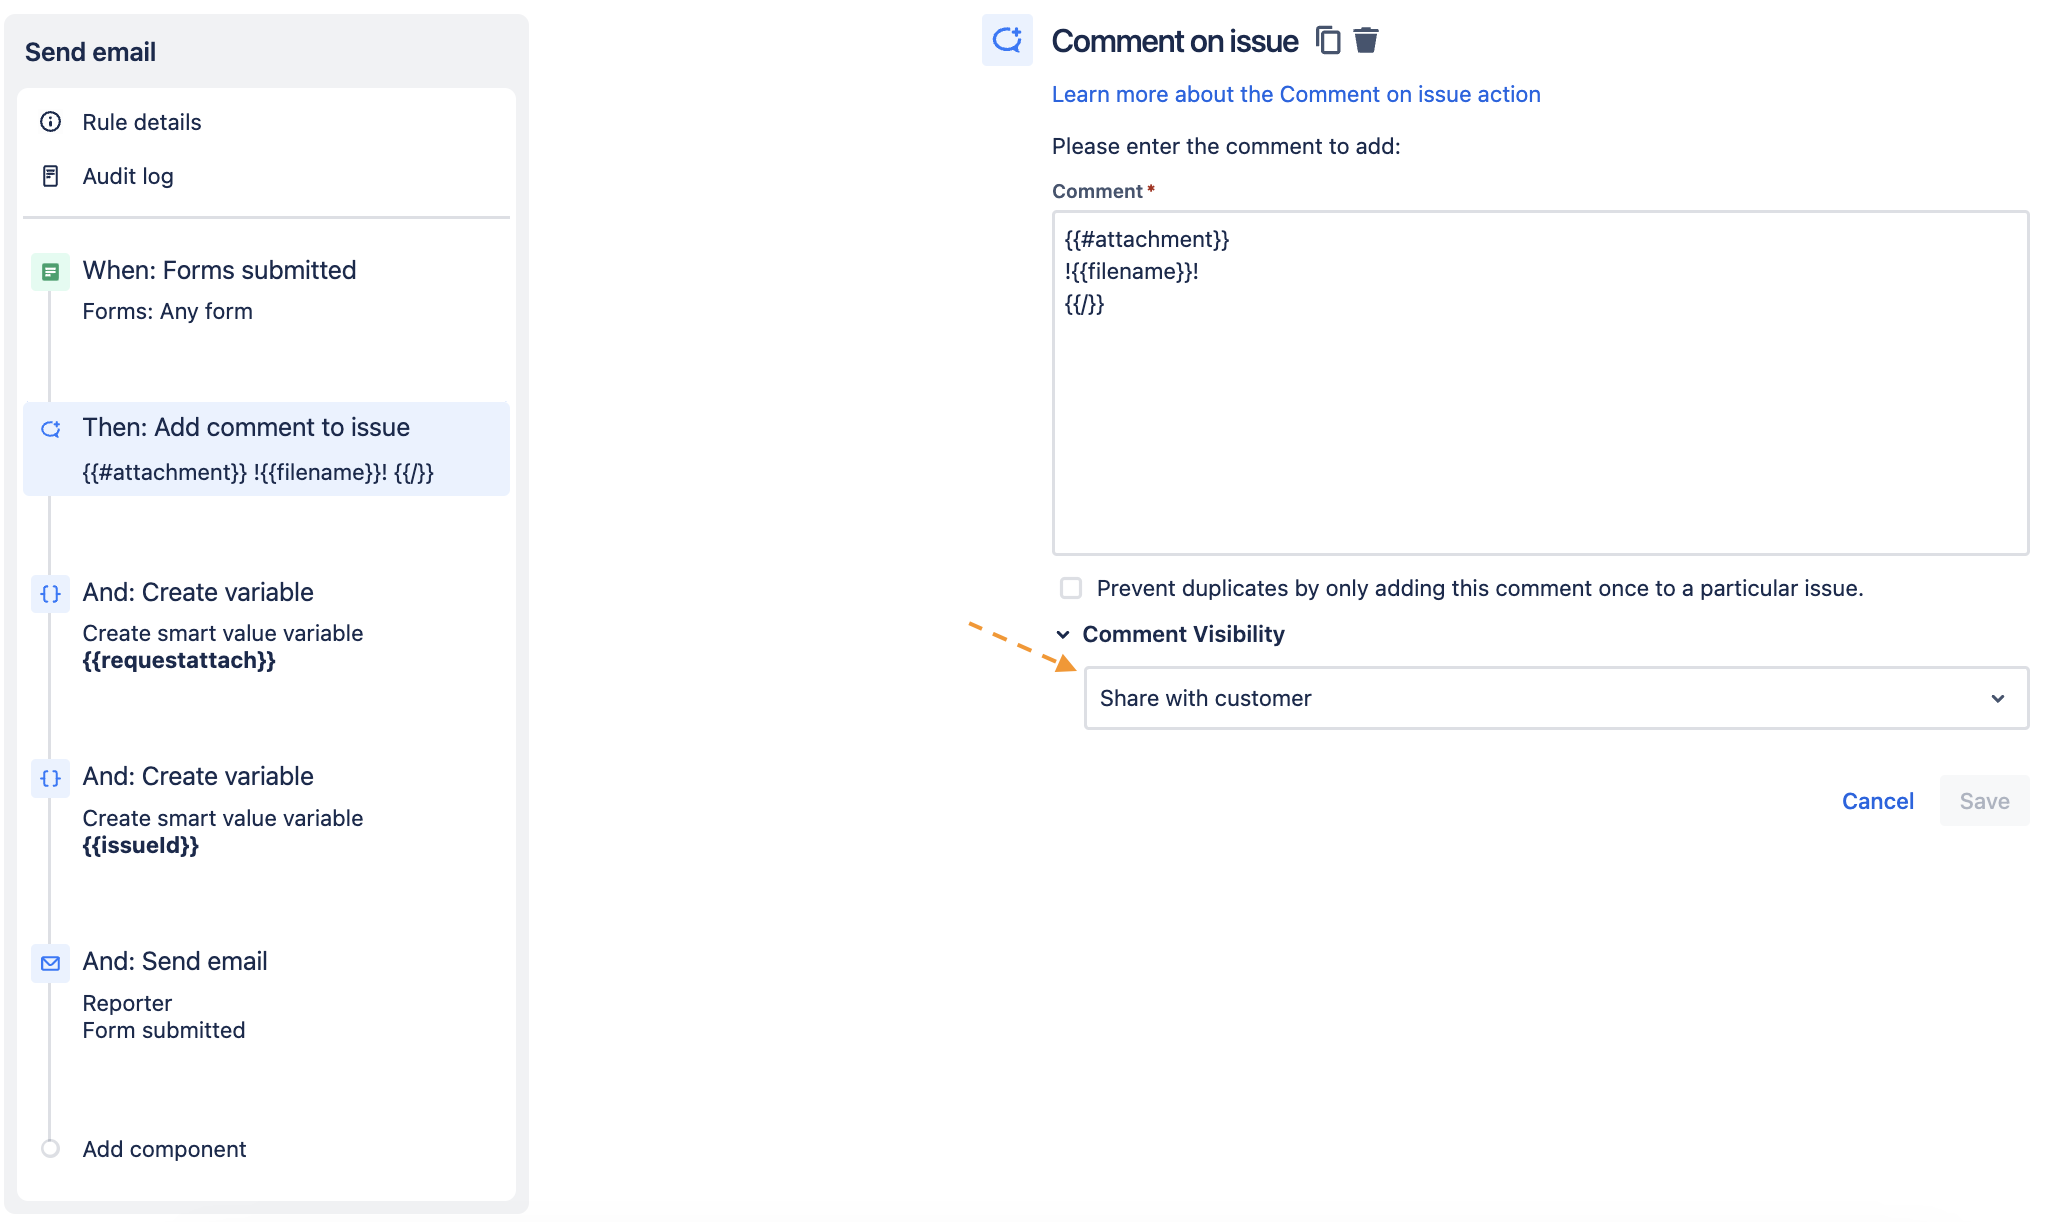
5. Select New action > Create a variable (e.g., {{requestattach}}) with the following structure:
<ul>
    {{#issue.attachment}}
    <li>
        <a href="{{content.replaceAll("(.*)(rest\/api\/2\/.*\/)(\d{5,})","$1servicedesk/customershim/secure/attachment/$3/")}}{{filename}}?fromIssue=replaceme">{{filename}}</a>
    </li>
    {{/issue.attachment}}
</ul>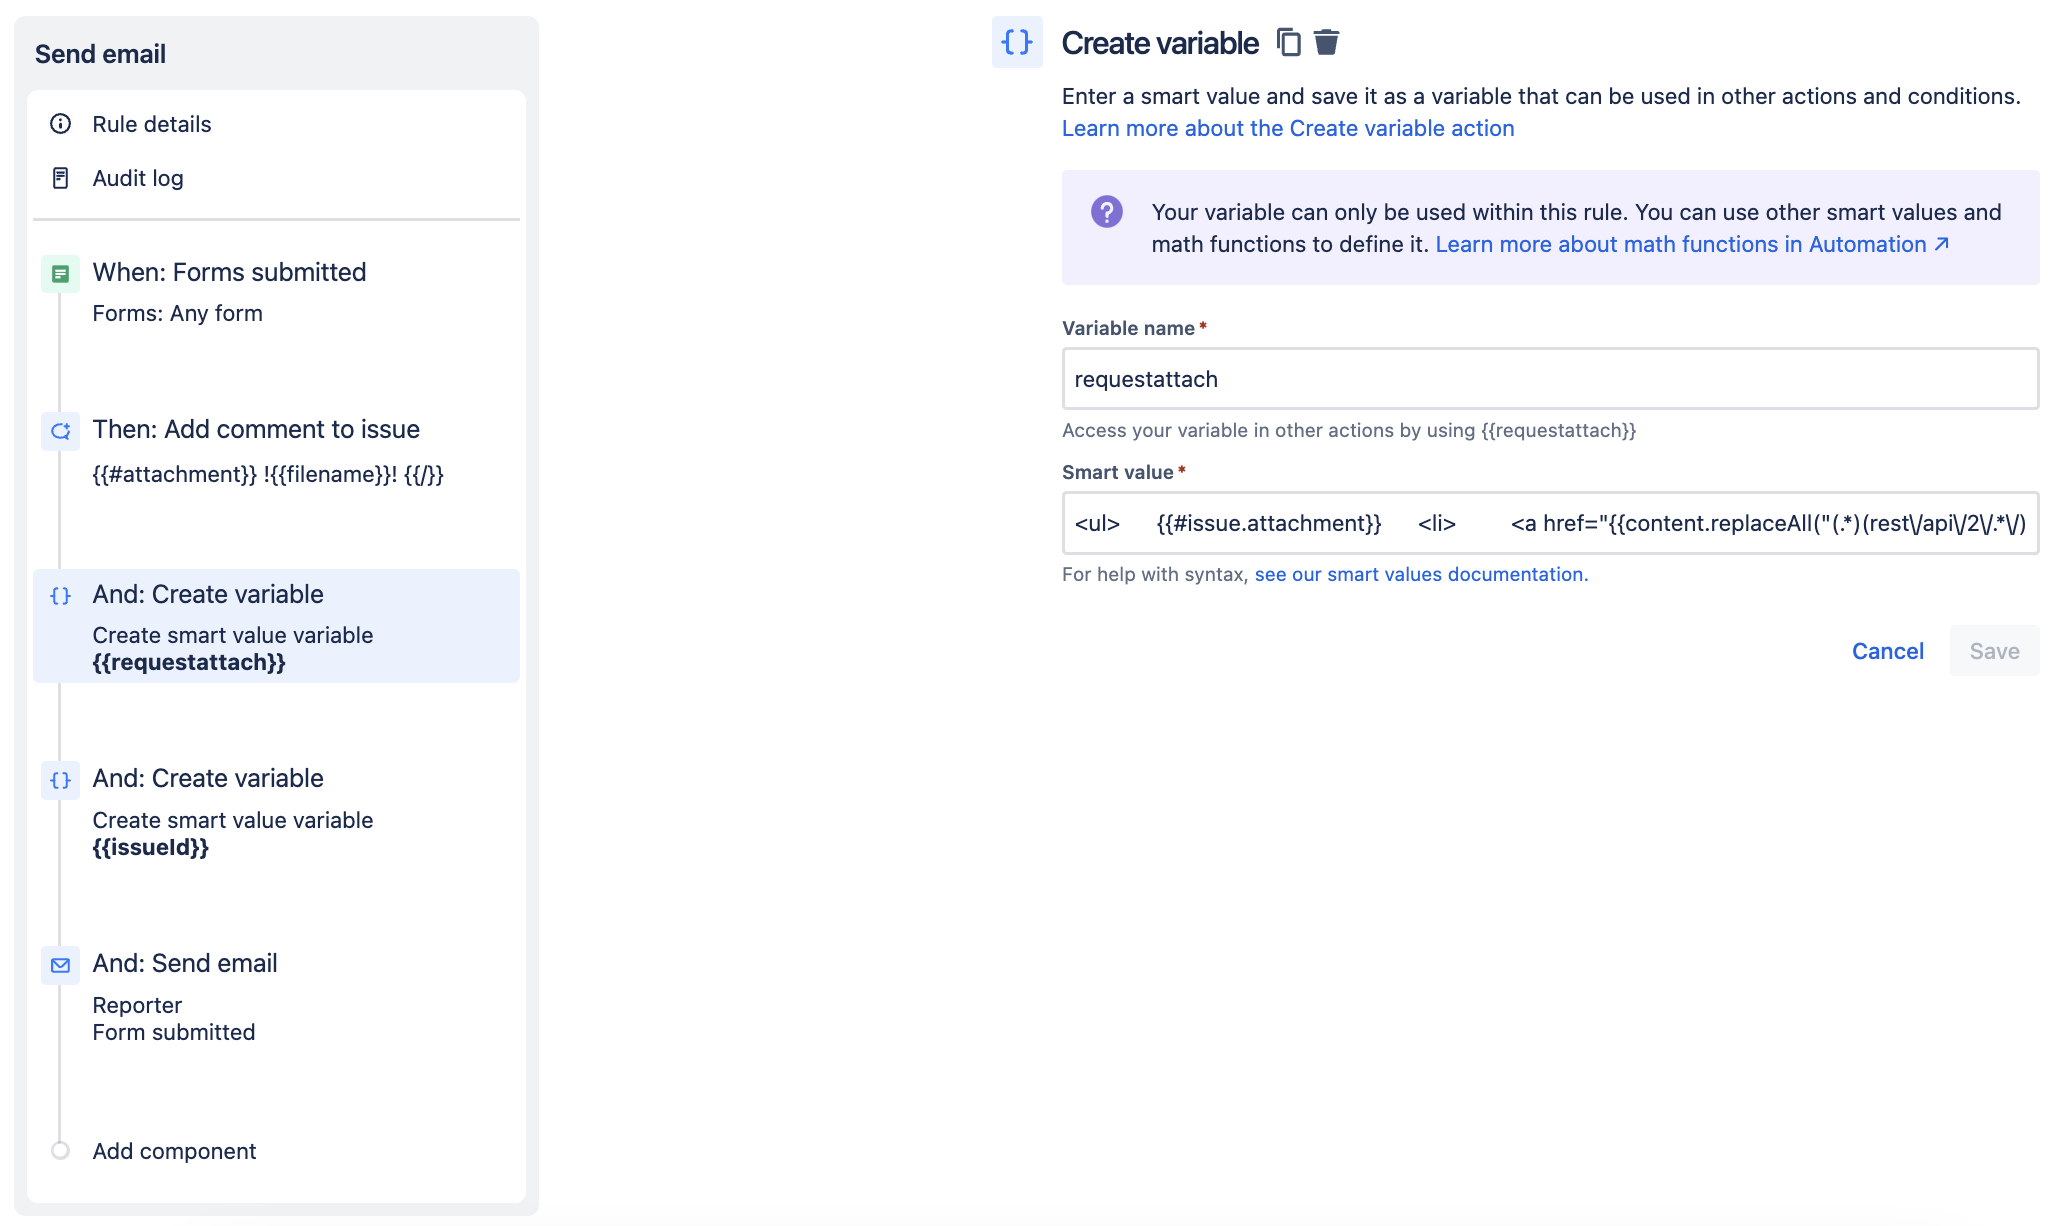
6. Click on Save > New action > Create a variable (e.g., {{issueId}}) with the following structure:
{{issue.id}}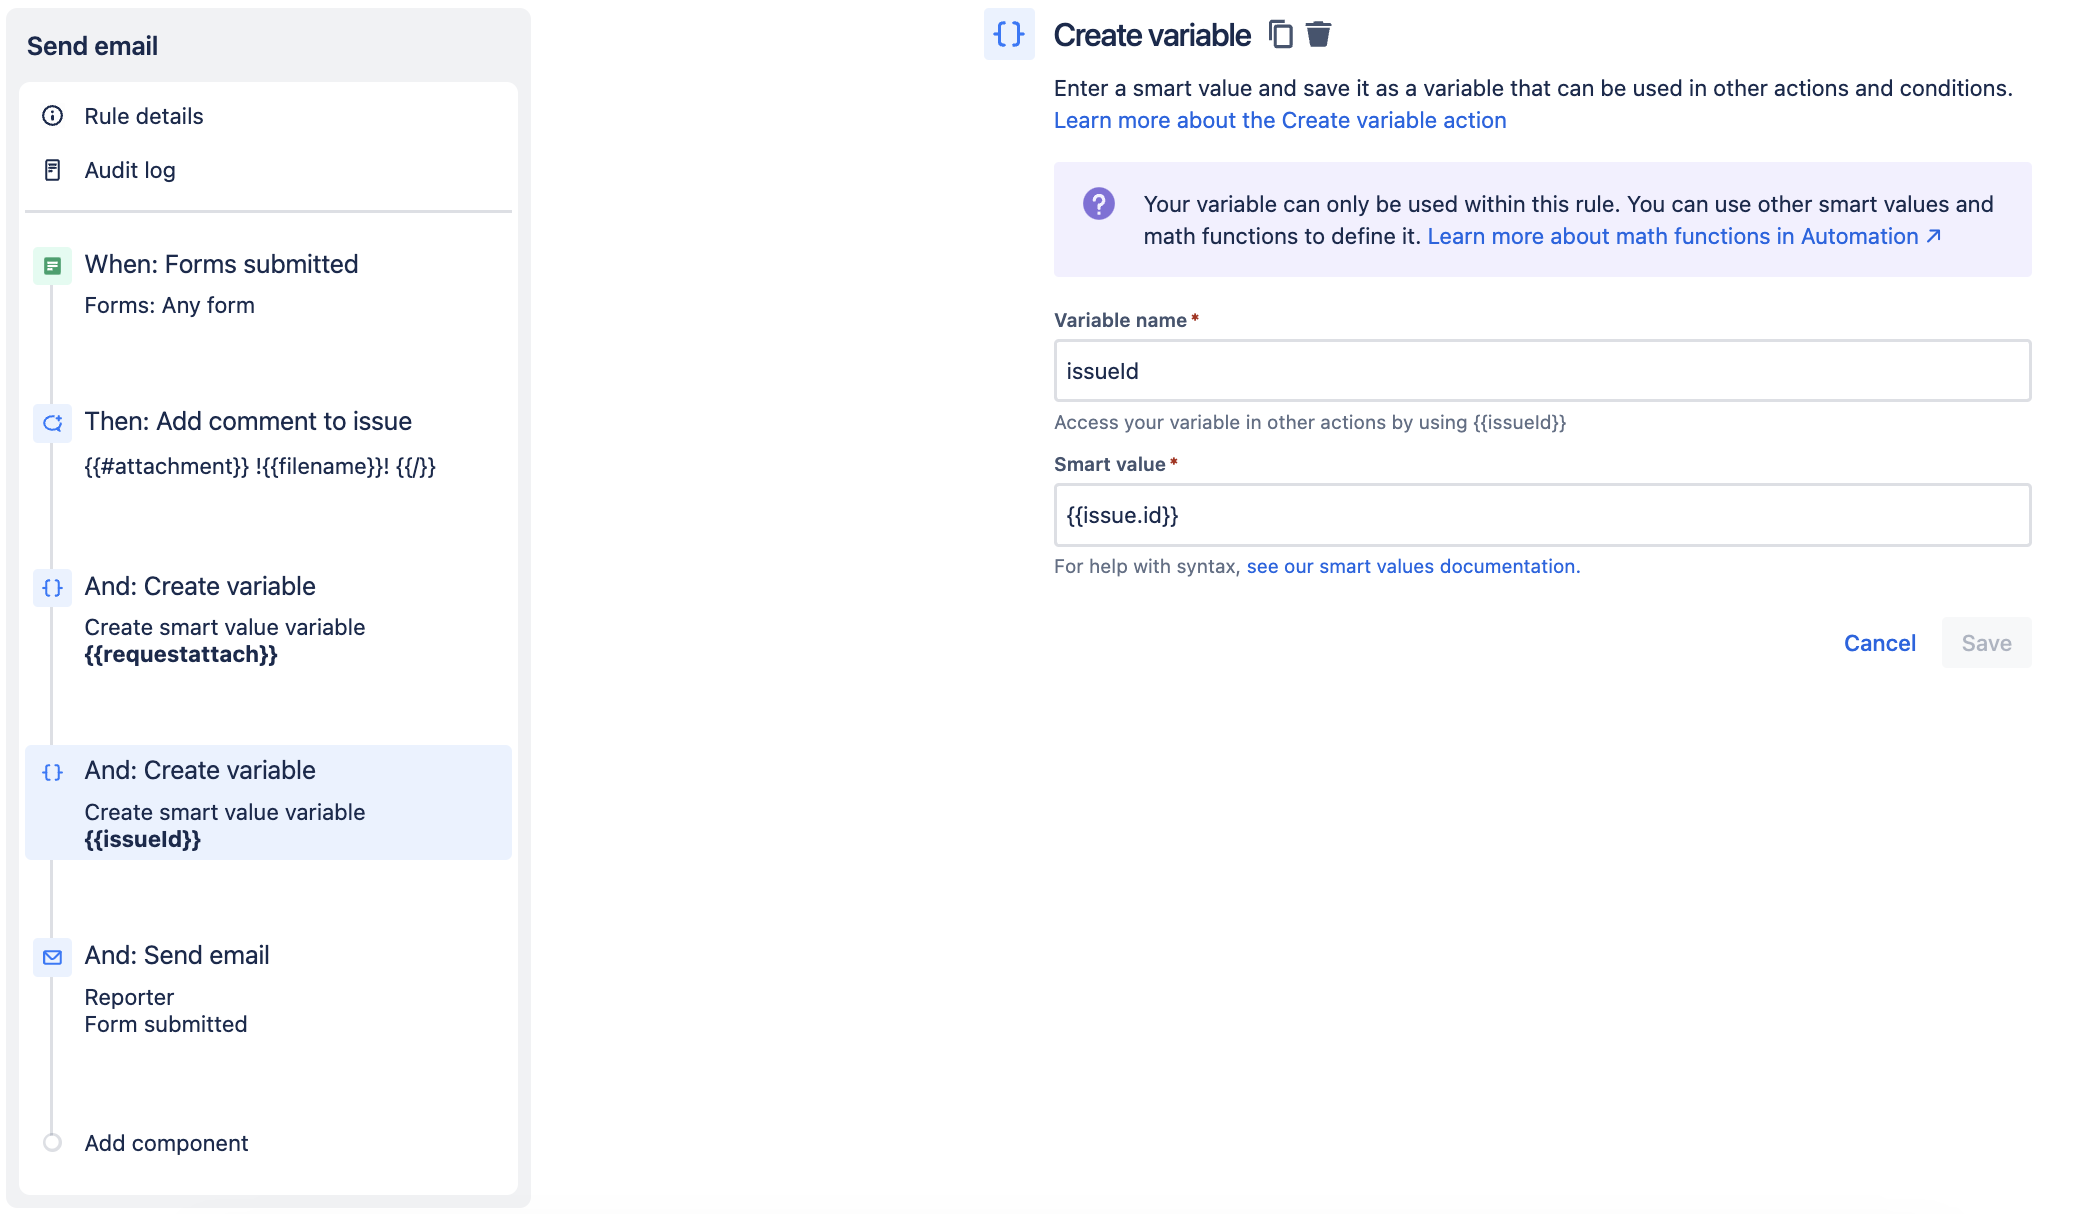
7. Click on Save > New action > Send email > Enter the desired information in the To and Subject fields. In the Content, add the desired information and call the variable with the following function to replace the replaceme text with the second variable issued:
{{requestattach.replace("replaceme",issueId)}}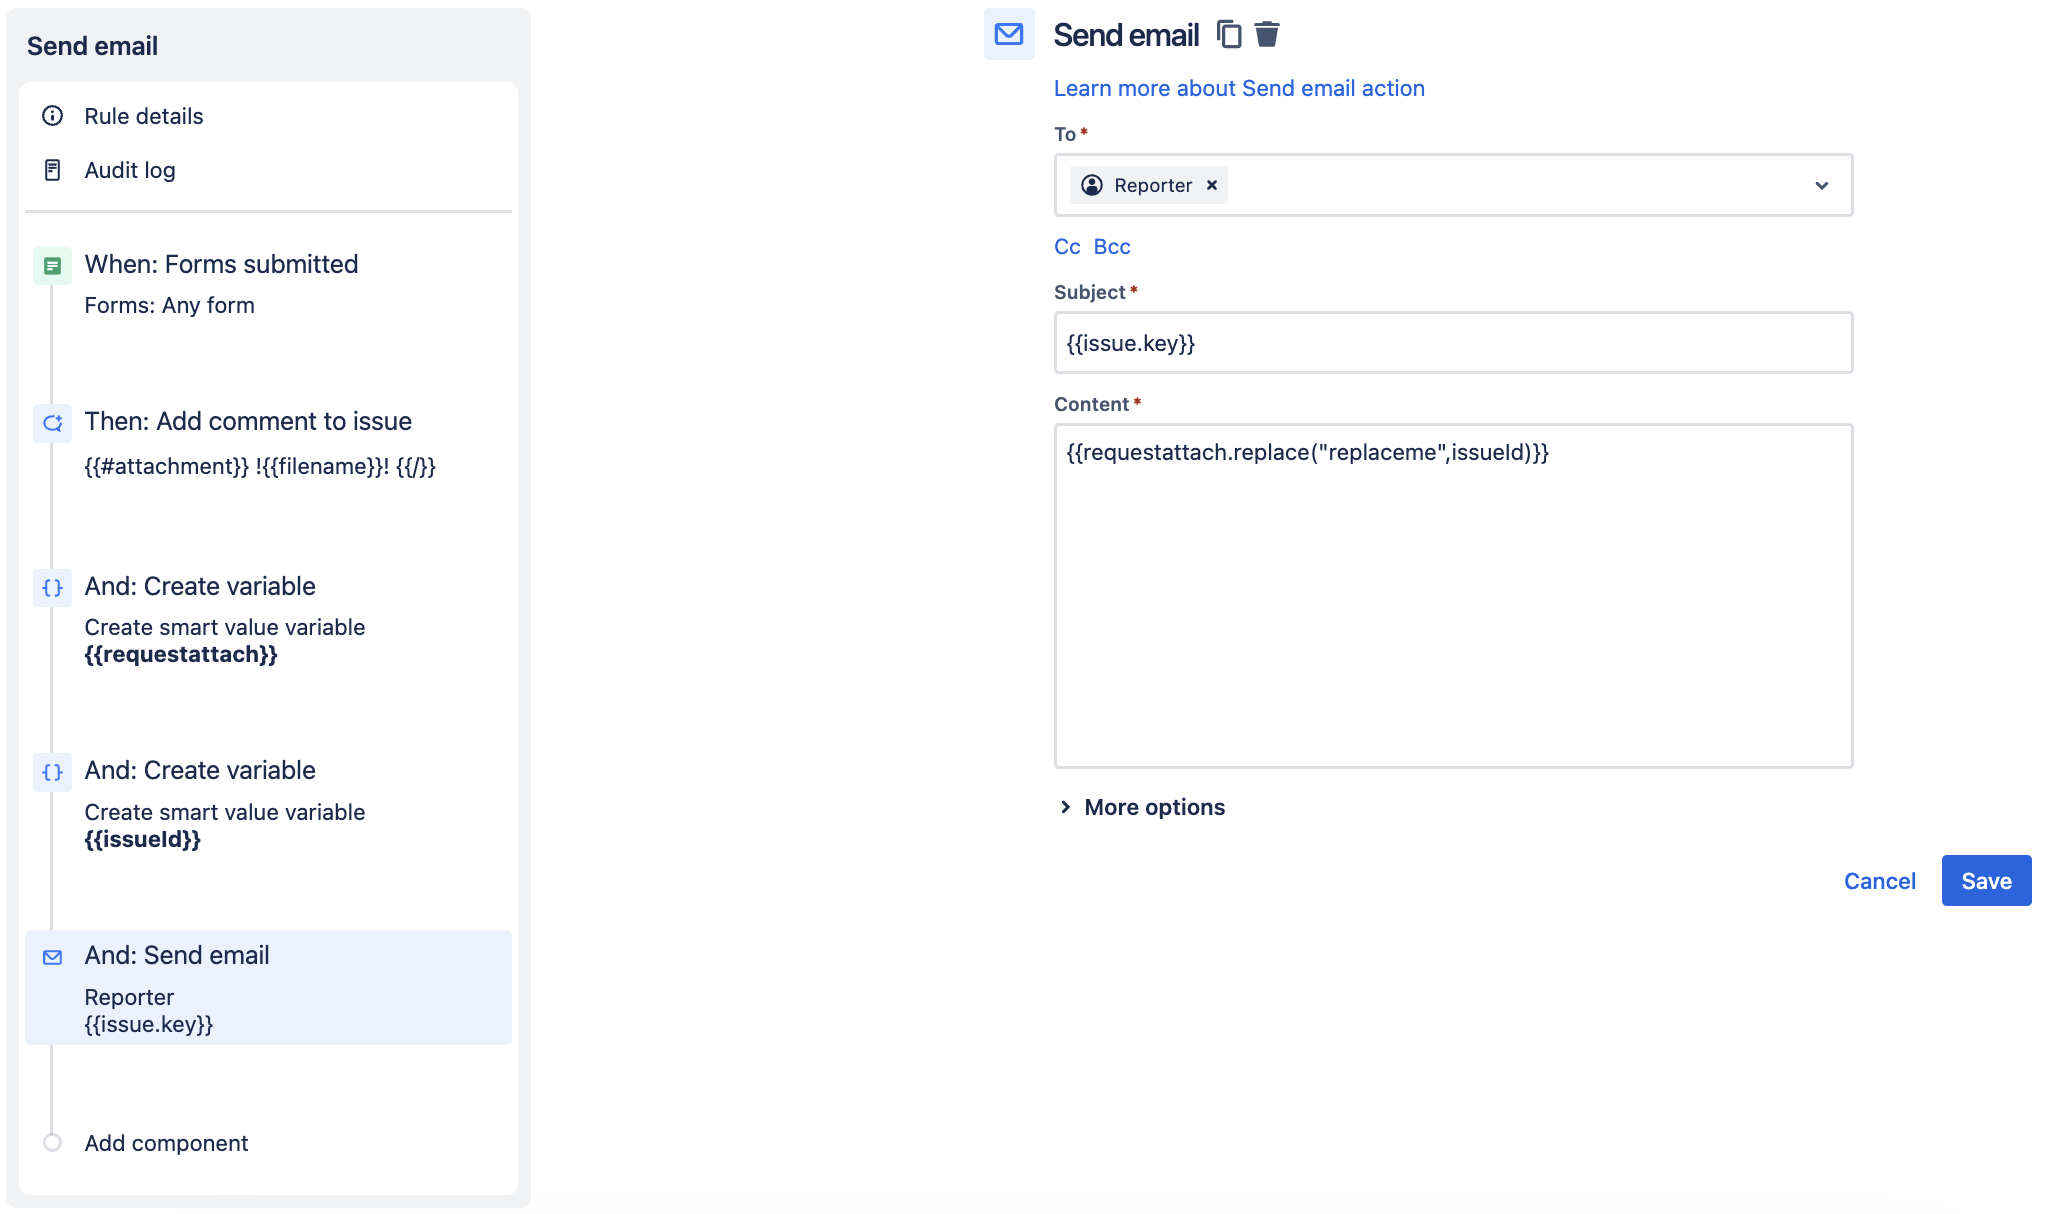
Customers must see the respective attachments on the request on the Portal to open the attachment links. This means:
The customer must be authenticated in the Portal.
They also must be able to see the request where the attachment pertains to on the Portal by being:
Reporter.
Request Participant.
Member of an Organization the ticket is being shared with.
If you identify a "Comment body can not be empty!" error during rule execution, add a "Re-fetch issue data" action after the initial trigger.
Last but not least, the attachment should be visible to the customer through a comment in the request.
Licensed users and Customer accounts
We can also send form information using smart values:
First alternative:
We can link the form field to a Jira field and use the Jira field in the automation rule:
Then, create the automation rule and add the smart values associated with these Jira fields to the Content (under the Send email action in the automation). More details on how to find the smart values can be found in this document: Jira smart values - issues.
Open the space > Space settings > Automation > Select Create rule.
Select the desired trigger > Save.
Select New action > Send email > In To, type the email address you want to send the notification, a user picker field, or a group.
Fill in a Subject and Content, and add the smart values associated with Jira fields to them.
Second alternative:
We can also use Forms smart values in the automation rule:
1. Open the space > Space settings > Automation > Select Create rule.
2. Select the desired trigger > Save.
3. Select New action > Send email. In the To, type the email address you want to send the notification to, a user picker field, or a group.
4. Fill in a Subject and Content, and add the smart values associated with Form fields to them.
Also, please note that we have a feature request asking for the ability to send form information in the notifications, as we can see below:
Related documentation
Was this helpful?