How to use the Approval Completed trigger with workflows that have multiple approval steps?
Platform Notice: Cloud Only - This article only applies to Atlassian apps on the cloud platform.
Summary
The Approval completed trigger (JSM-only) fires after every approval step. In a workflow with more than one approval step, a rule on this trigger runs repeatedly — once per step — unless you add a condition to scope it.
Solution
Scenario
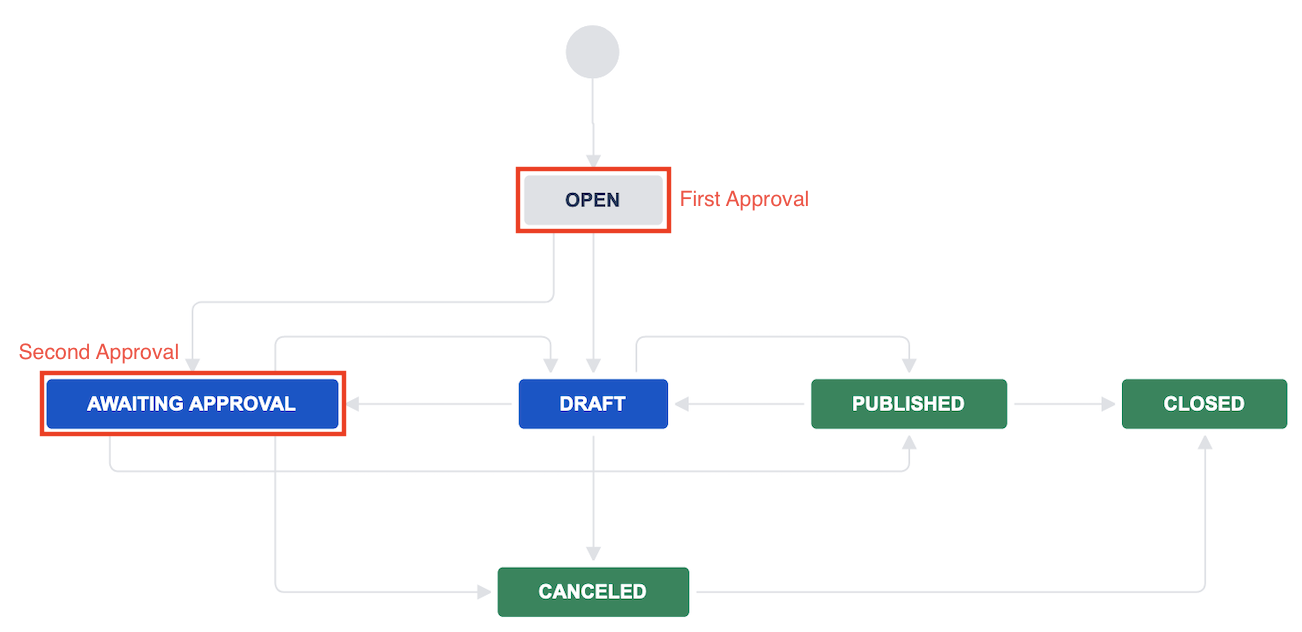
Let's consider a Jira Service Management Project that has two levels of approvals (each one requires a single approval):
Initial Validation - First Approval Step
Secondary Approval - Determined depending on the issue characteristics
To support the above scenario, we have two custom fields to determine the approver of each step - Approver 1 and Approval 2 - both single-user fields. In this example, we will set the following behavior:
Approver 1 will be set by default; more on how to do that can be found on this page.
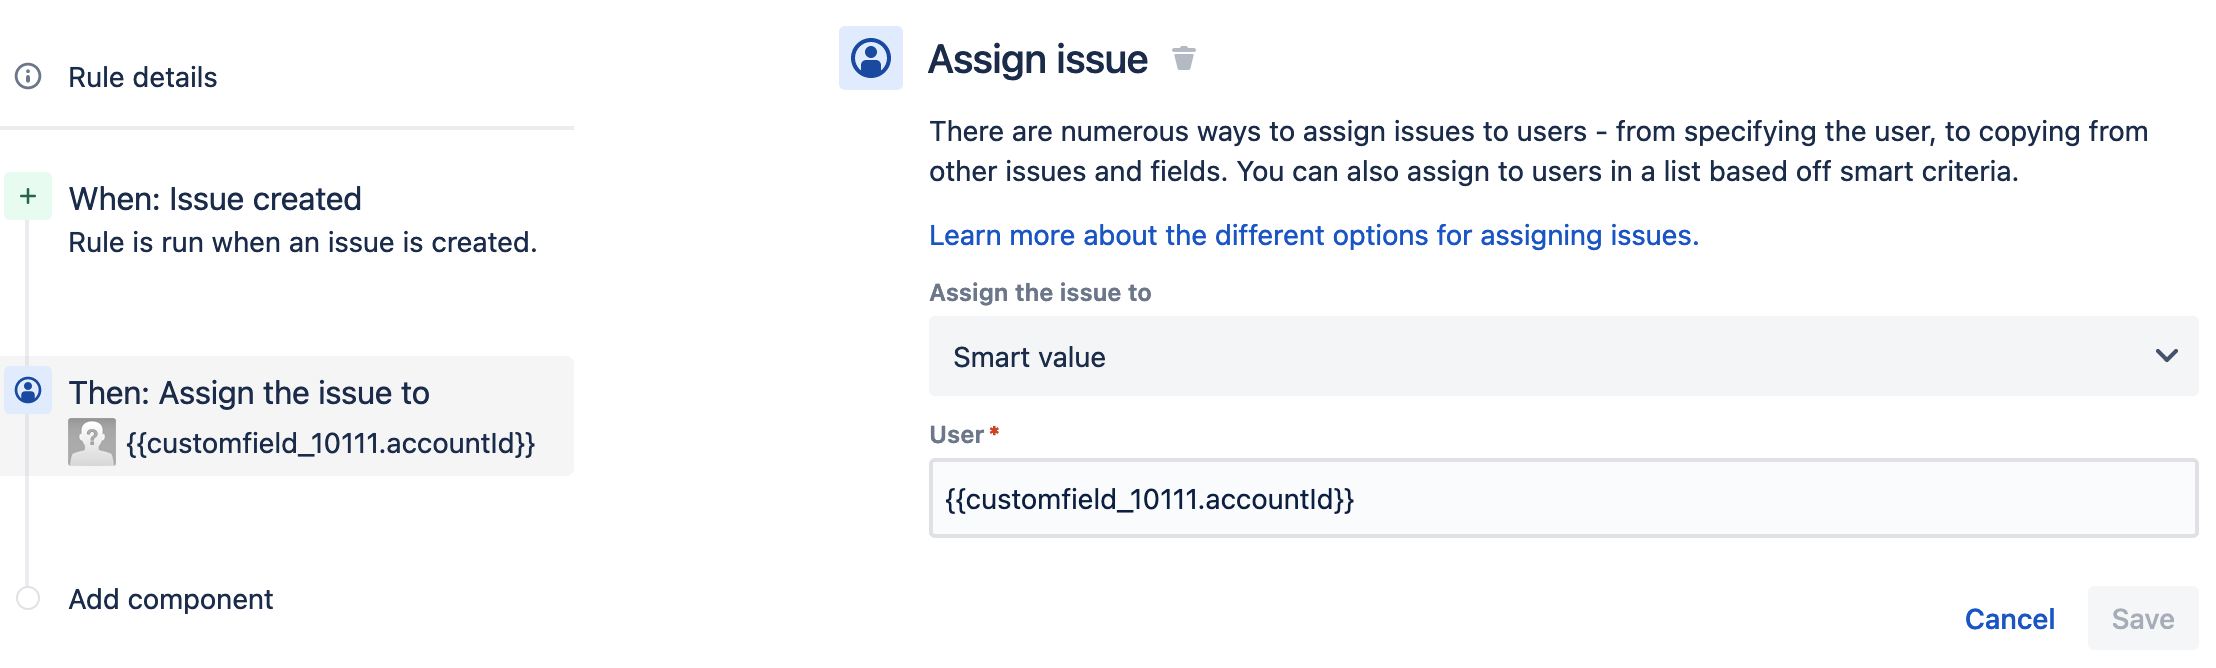
Upon ticket creation, Approver 1 will be set as the Assignee via automation.
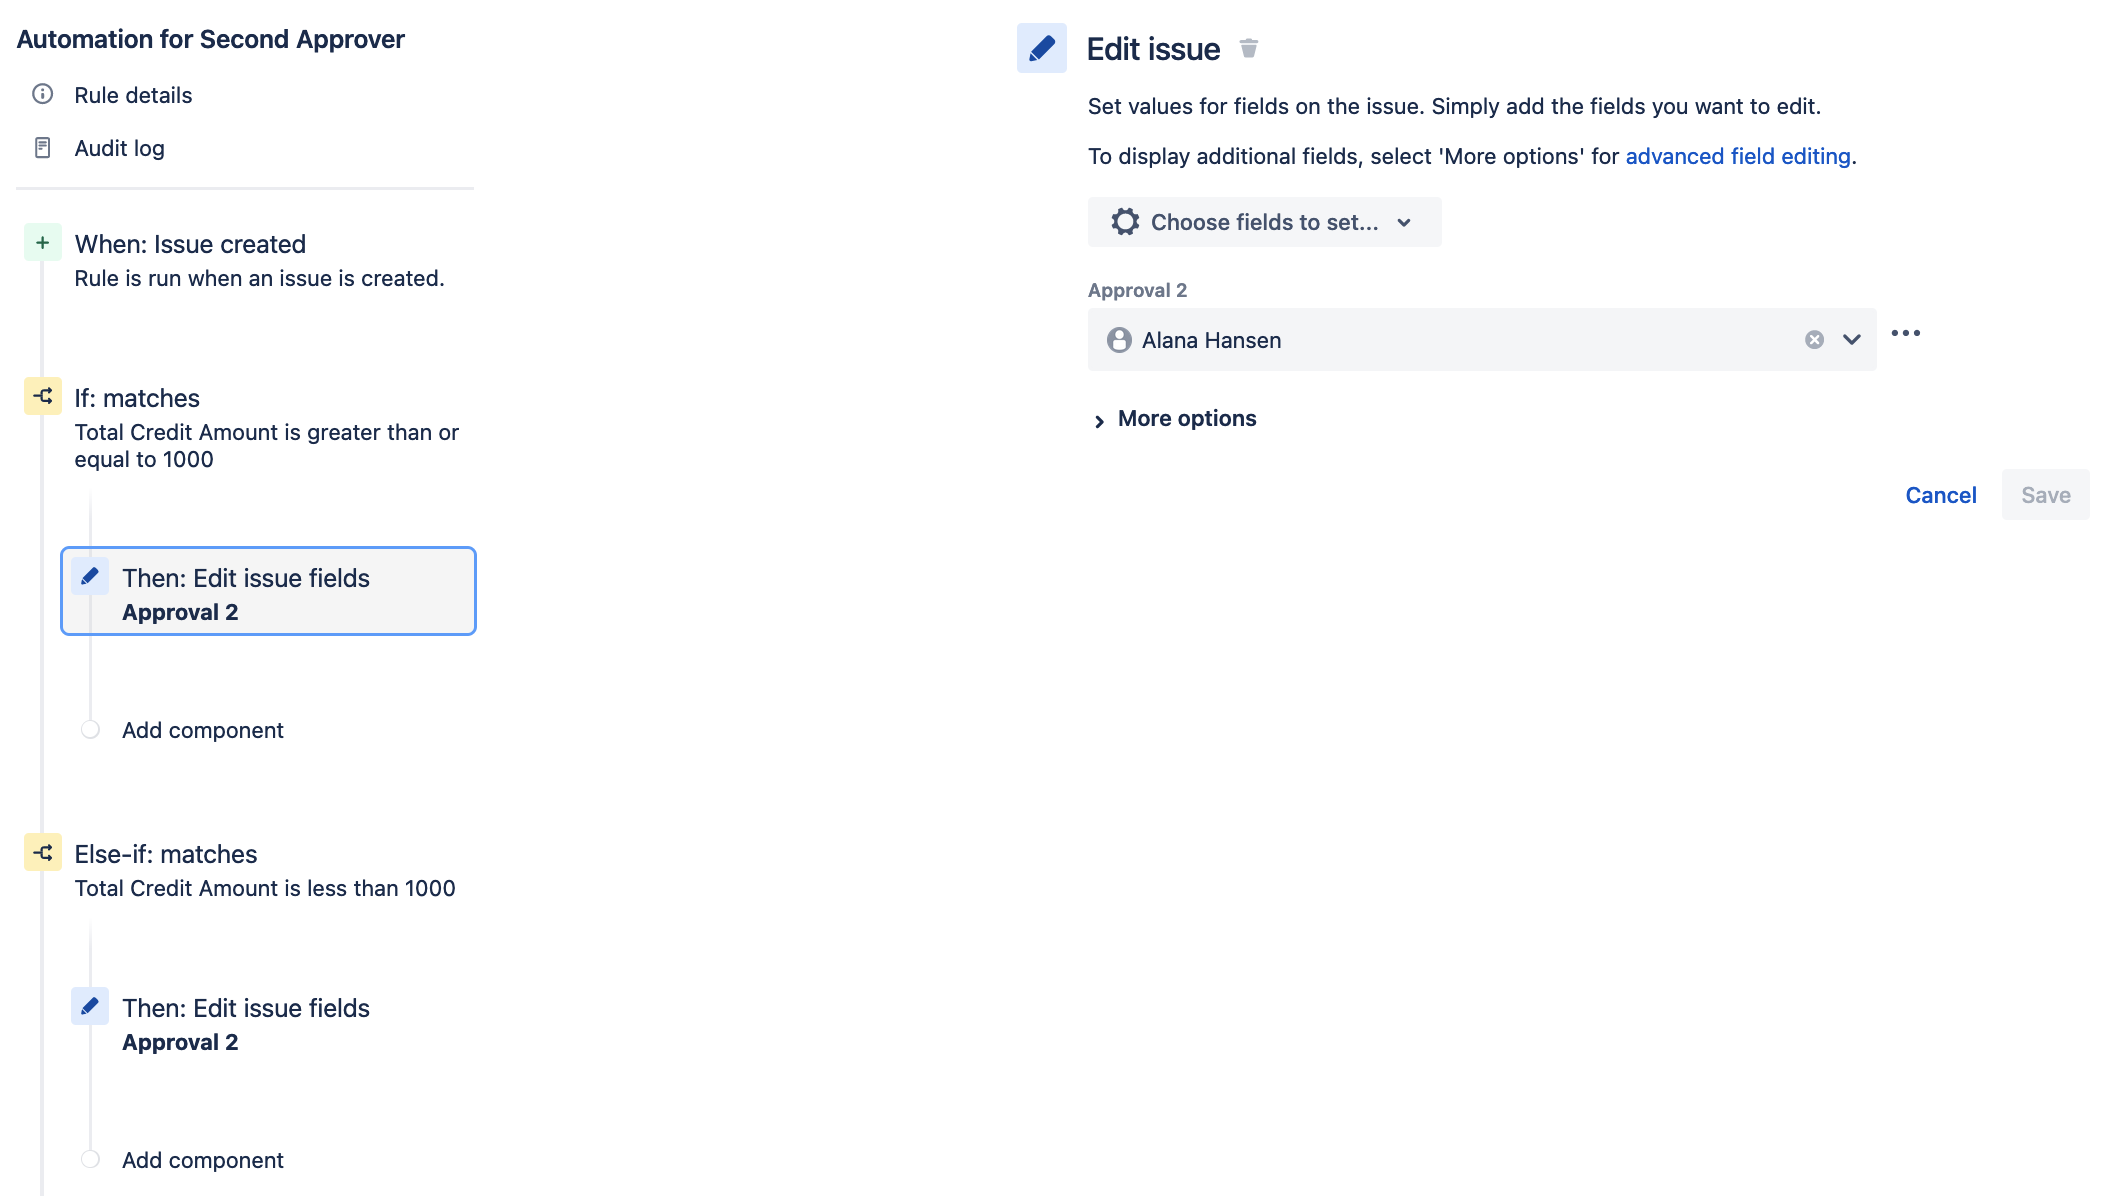
Approval 2 will be set based on the value of a custom field named Total Credit Amount - using automation
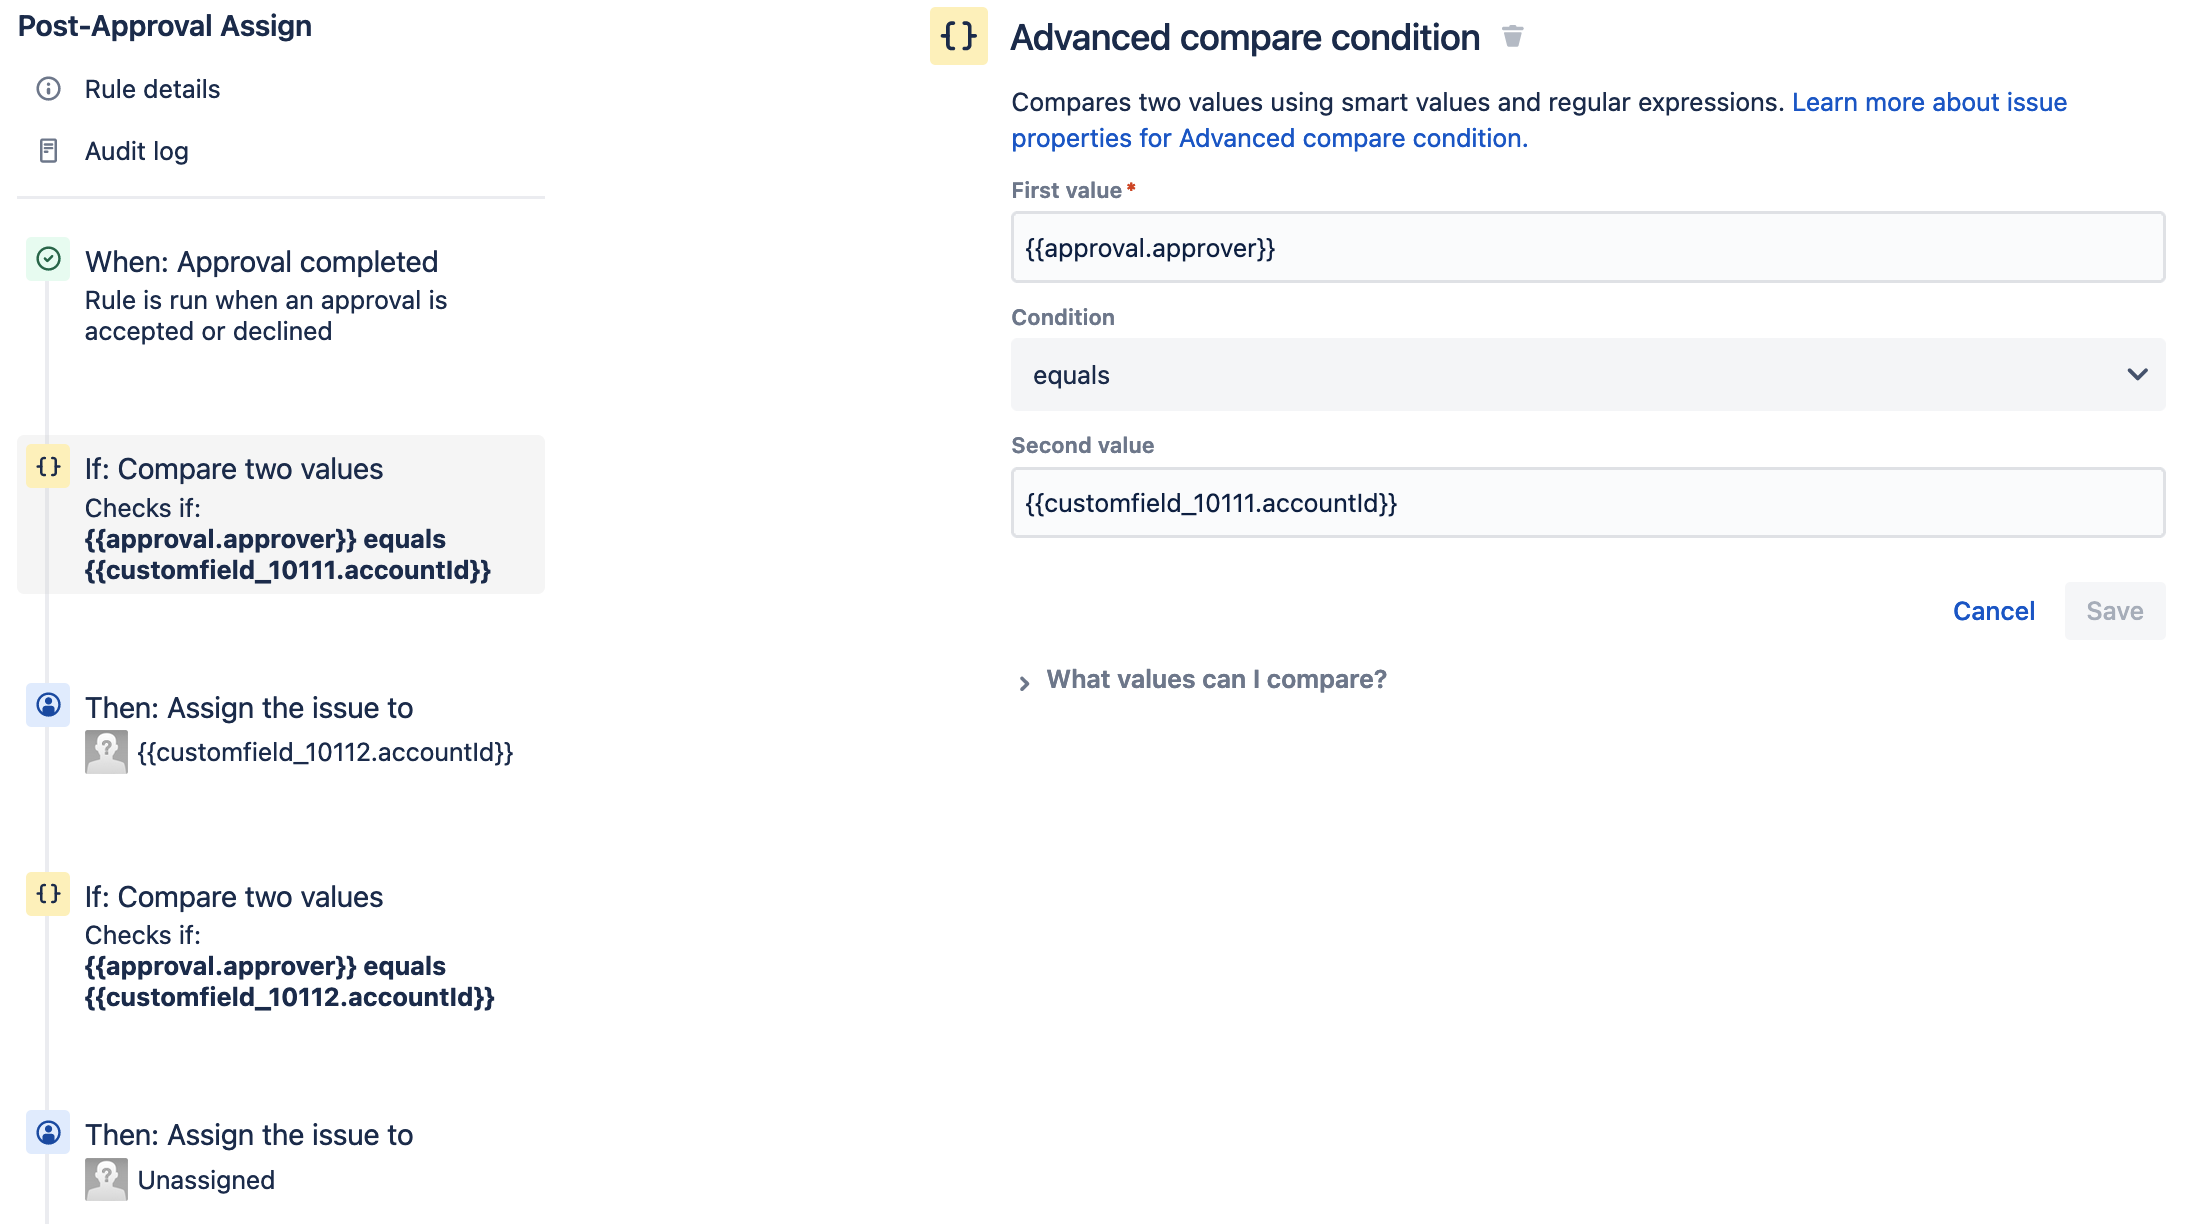
Once the first approval is completed, Approval 2 will be set as the assignee - using automation
Once the second approval is completed, the ticket will go back to Unassigned - using automation
Sample Workflow:
Issue Created Automation
Once the issues are created, we will have two automations triggered, in this example:
Field Approver 1 = customfield_10111
Field Approval 2 = customfield_10112
To find the custom field IDs in your environment, please use this reference page: How to find id for custom field(s)?
Setting Approver 1 as the Assignee
Issue created trigger
Assign issue action
Assign issue to = Smart value
User =
{{customfield_10111.accountId}}
Determining Second Approval
Issue created trigger
If/Else condition - to validate the appropriate approver
Edit issue actions
Pick the Approval 2 field from the drop-down and select the user
Approval Completed Automation
If the first approval is completed, assign the issue to the second approver
If the second approval is completed, set the issue to unassigned
Set the rule as:
Approval Completed trigger
Add an Advanced Compare condition as
First value =
{{approval.approver}}Condition = equals
Second value =
{{customfield_10111.accountId}}
Assign issue action
Assign the issue to = Smart value
User =
{{customfield_10112.accountId}}
Add an Advanced Compare condition as
First value =
{{approval.approver}}Condition = equals
Second value =
{{customfield_10112.accountId}}
Assign issue action
Assign the issue to = Specify user
User = Unassigned
Note: The above are examples of how the smart values can be used to accomplish different behaviors for specific approvals; the rules above can be changed and adapted to accommodate the specific needs of your environment.
Scope the rule with smart values
To run the rule only after the intended approval step, add a condition that checks an approval smart value — for example, gate on the specific approver field or approval step name. This prevents the rule from executing on every approval completion.
For the exact smart value fields available, refer to:
Test with both approval paths
Trigger the workflow through each approval branch (approved and declined) and confirm the rule executes only at the intended step. Check the automation audit log — you should see a single execution, not one per step.
Reference Information
Was this helpful?