Querying Asset objects and their attributes
Platform Notice: Cloud Only - This article only applies to Atlassian apps on the cloud platform.
Summary
Using Assets in Jira Service Management, you can manage your assets and configuration items and their information.
This article explains how to create a table chart in Atlassian Analytics that shows your asset objects and their attributes, including those that reference other objects.
Solution
First query
Select Create > Chart > Custom chart from the global navigation to start in blank.
Add the following columns to your query:
The Key column from the Assets object table, and use the Group aggregation
The Name column from the Assets type attribute metadata table, and use the Group aggregation
The Attribute value string column from the Assets object attribute table, and use the Group aggregation
The Attribute value object ID column from the Assets object attribute table, and use the Group aggregation. This column contains the object IDs of the referenced objects in attributes.
Add a filter where the Key column from the Assets object table equals the key of the asset object(s) you want data for.
Verify that the Join path used in your query connects the Object ID column from Assets object attribute to Object ID from Assets object. This ensures that the attributes returned are for the main object, not the objects referenced in an attribute.
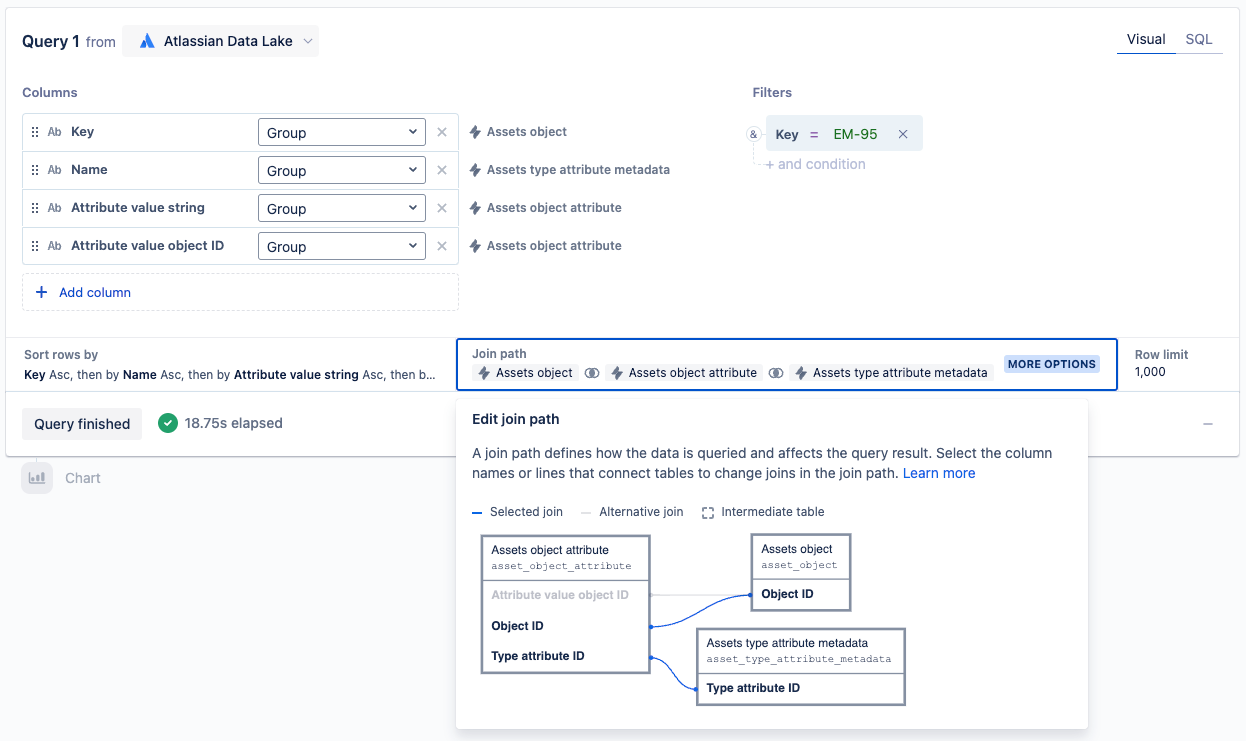
Select Run query.
Add a “Reorder” column step and move the “Attribute value object ID” column to the leftmost position. This column will join data with our second query.
Second query
Add a second query by selecting Add query and choosing New query.
In the new visual mode query, add the Object ID and Label columns from the Assets object table and use the Group aggregation for both.
Optionally, add a filter to narrow this query to objects that can be referenced in object attributes. For this example, my referenced objects are of a specific asset type, so we will add the Name column from the Assets type table and set it equal to the asset type.
Select Run query.
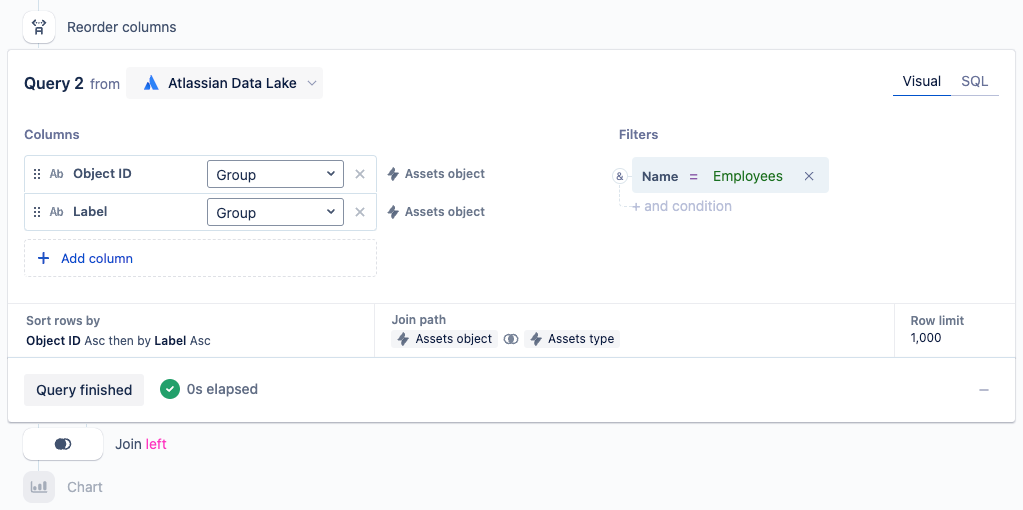
Select the new “Join” step and change the join type from “Outer” to “Left”. Doing a left join filters the results from the 2nd query so that only object names for referenced objects in the 1st query are returned.
Hide the Attribute value object ID column since it is no longer needed.
Optionally, rename the “Key” column to “Object”.
If the Attribute value object ID column doesn't return the expected referenced object details, confirm the Join path (step 4) is chained correctly when the reference itself points to another reference (e.g. Object → Location → Building) — each additional hop needs its own join step added to the visual mode query, not just the first-level reference.
Now you have a chart listing the asset object’s attributes and their values.
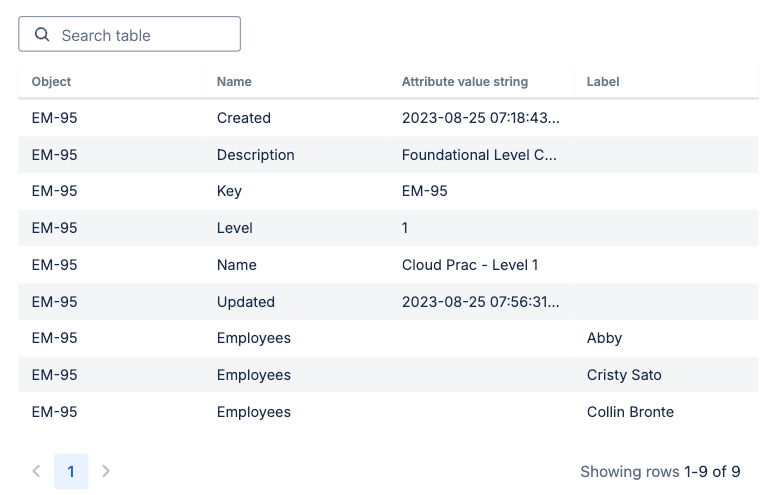
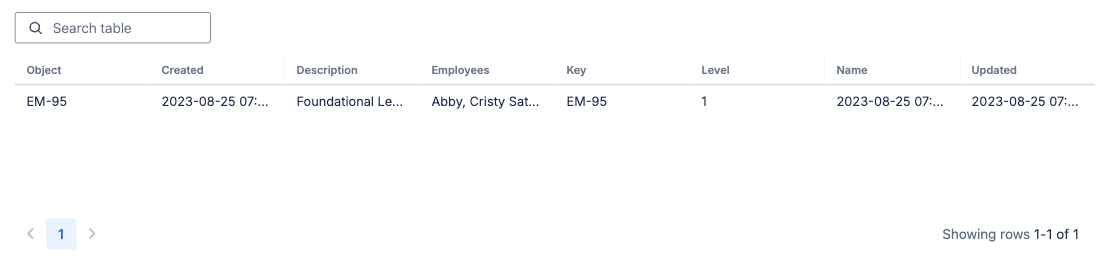
Displaying attributes as their own columns
You may want to display the attribute data from your asset object such that each attribute is its own column.
Building on the above example, we will add steps to further transform the data.
The Employees attribute references three objects, each listed in its own row. After the latest step, add a “Group & aggregate” step and change the aggregation for the “Label” column to Concatenate to combine the three objects into a single row, separated by a comma.
Optionally, add an “Apply formula” step for the “GROUP_CONCAT(Label)” column, select Custom as the formula type, and then paste the following formula:
REPLACE("GROUP_CONCAT(Label)", "," , ", "). This will add a space in between each comma-separated value.Given that the attribute values are in two columns, they can be merged into a single column.
Add an “Apply formula” step for the “Attribute value string column”, select Custom as the formula type, and then paste the following formula:
COALESCE("Attribute value string","GROUP_CONCAT(Label)"). This replaces null values with values from the “GROUP_CONCAT(Label)” column.Hide the “GROUP_CONCAT(Label)” column since it is no longer needed.
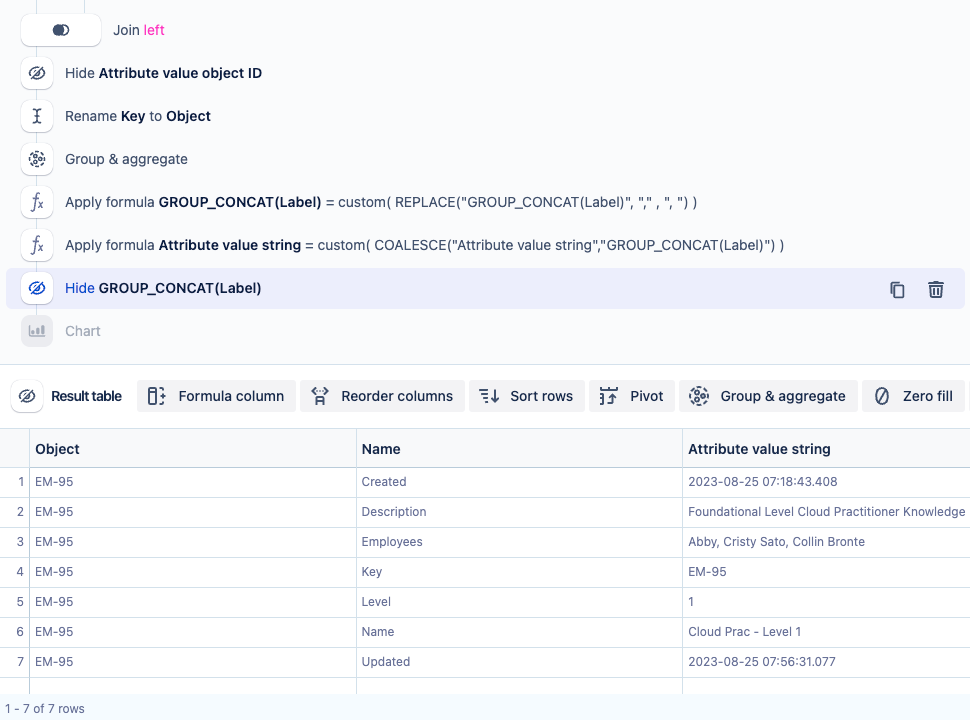
Lastly, add a “Pivot” step and change the aggregate duplicates by setting to Auto.
Now you have a chart listing the asset object’s attributes and their values in separate columns.
Was this helpful?