Create custom date buckets using a “Dropdown” control
Platform Notice: Cloud Only - This article only applies to Atlassian apps on the cloud platform.
A “Date bucket” control allows dashboard viewers to change the time buckets for any charts it’s connected to; however, you can’t directly limit the time bucket options. Instead, you can create a custom date bucket using a “Dropdown” control.
For this example, we’ll create a custom date bucket that excludes the “Minute” and “Hour” time buckets.
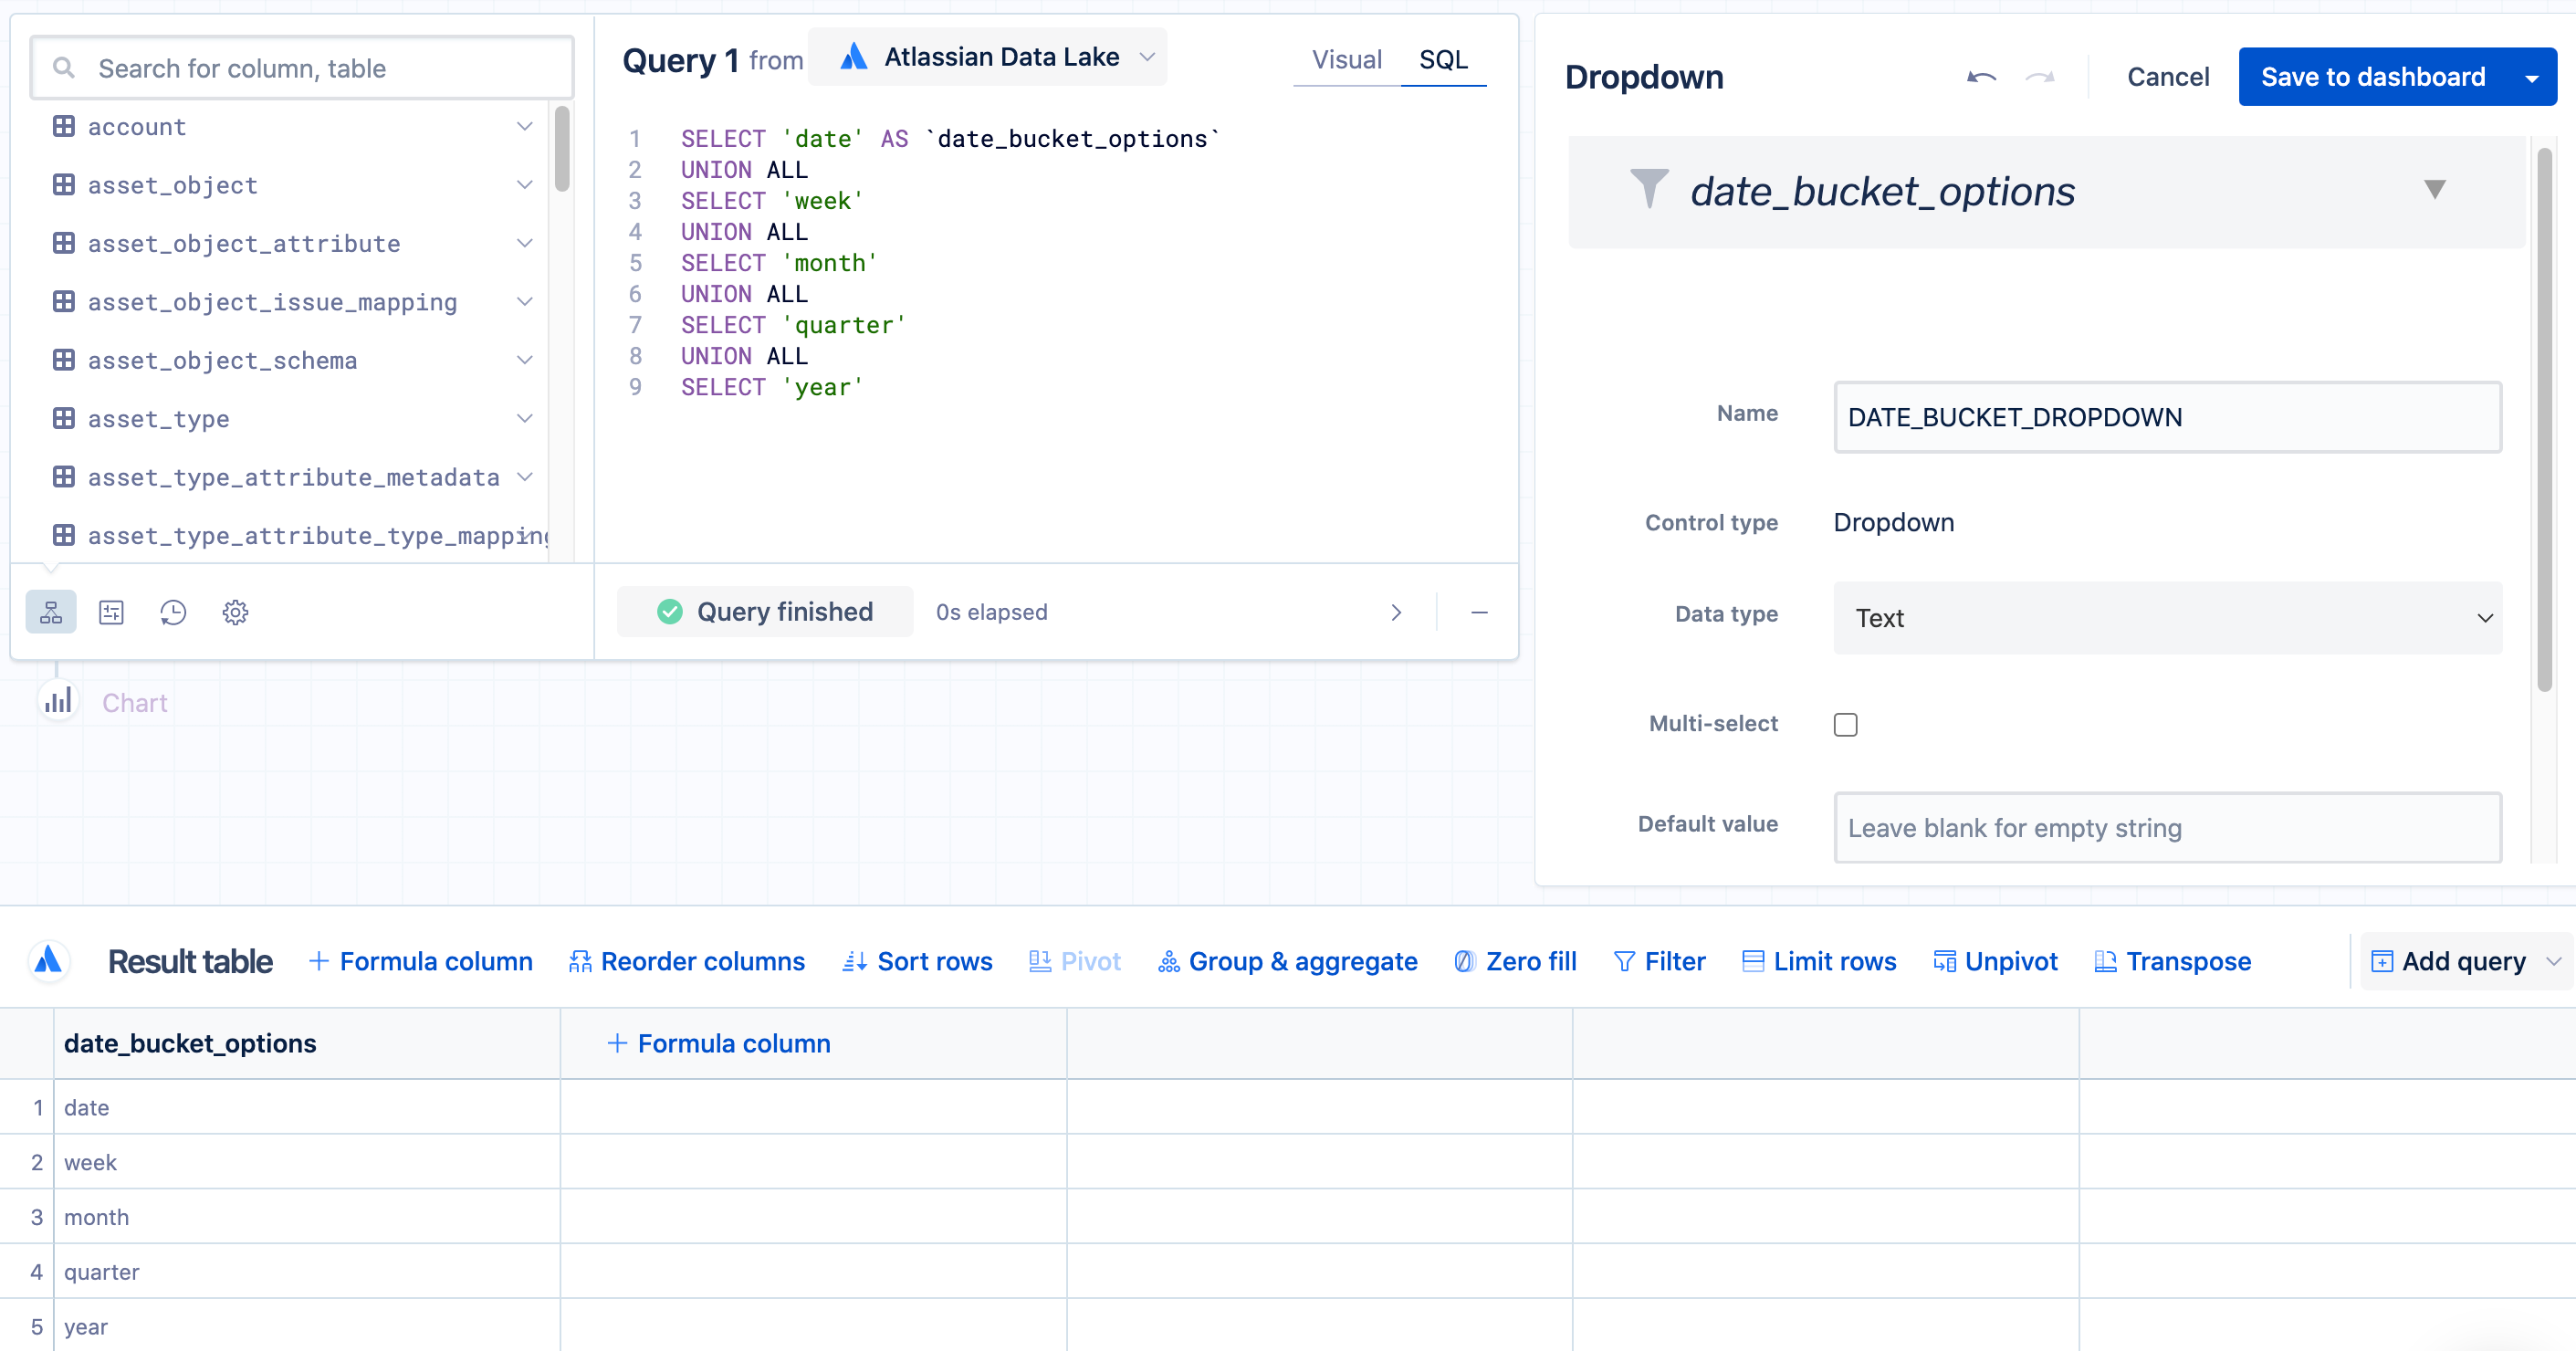
Create a “Dropdown” control with the hard-coded time bucket values you want to display. Any data source can be used, but in this example we will query the Atlassian Data Lake.
Here’s the SQL for excluding the “Minute” and “Hour” time buckets:
SELECT 'date' AS `date_bucket_options`
UNION ALL
SELECT 'week'
UNION ALL
SELECT 'month'
UNION ALL
SELECT 'quarter'
UNION ALL
SELECT 'year'
Give your “Dropdown” control a name and then select Save to dashboard. Make sure that the multi-select setting is unchecked for this custom date bucket.
Edit the chart you’d like to connect the custom date bucket to and ensure the date/datetime column in your query uses the Day time bucket.

Note: If you want to keep the “Minute” or “Hour” time buckets in your custom date bucket, your date/datetime column needs to use the “Second” time bucket for the control to work properly.
Use an “Apply formula” step on your date/datetime column, select Custom as the formula type, and create a
CASEstatement to specify how the values should be formatted based on the selected value in the custom date bucket.Here’s the
CASEstatement we’ll use for this example, with the column name “Created”:CASE WHEN {DATE_BUCKET_DROPDOWN}='date' THEN STRFTIME('%Y-%m-%d',"Created") WHEN {DATE_BUCKET_DROPDOWN}='week' THEN DATEPART("Created", 'year')||'-W'||((STRFTIME('%j', DATE("Created", '-3 days', 'weekday 4')) - 1) / 7 + 1) WHEN {DATE_BUCKET_DROPDOWN}='month' THEN STRFTIME('%Y-%m',"Created") WHEN {DATE_BUCKET_DROPDOWN}='year' THEN STRFTIME('%Y',"Created") WHEN {DATE_BUCKET_DROPDOWN}='quarter' THEN STRFTIME('%Y', "Created")||'-Q'||((DATEPART("Created", 'month')+2)/3) ELSE "Created" END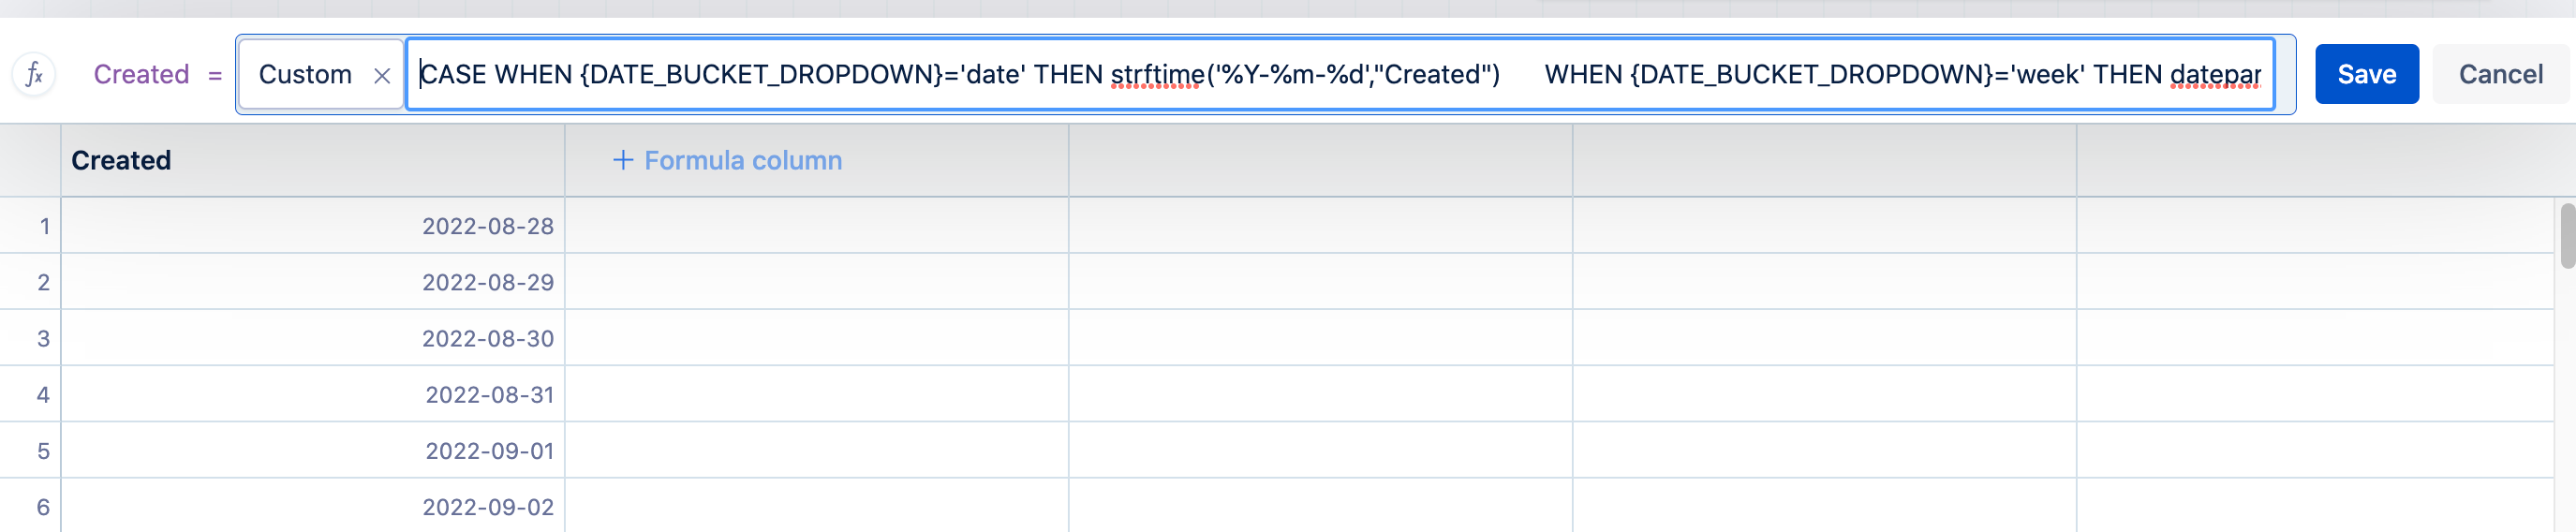
If you want to include “Minute” and “Hour”, check out the documentation for connecting a variable control outside of a query to get the
CASEtemplate for each time bucket.Add a “Group & aggregate” step to Group duplicate values of the dynamic date/datetime column and choose the appropriate aggregations for the remaining columns.
Optionally, rename your columns to something more meaningful and concise.
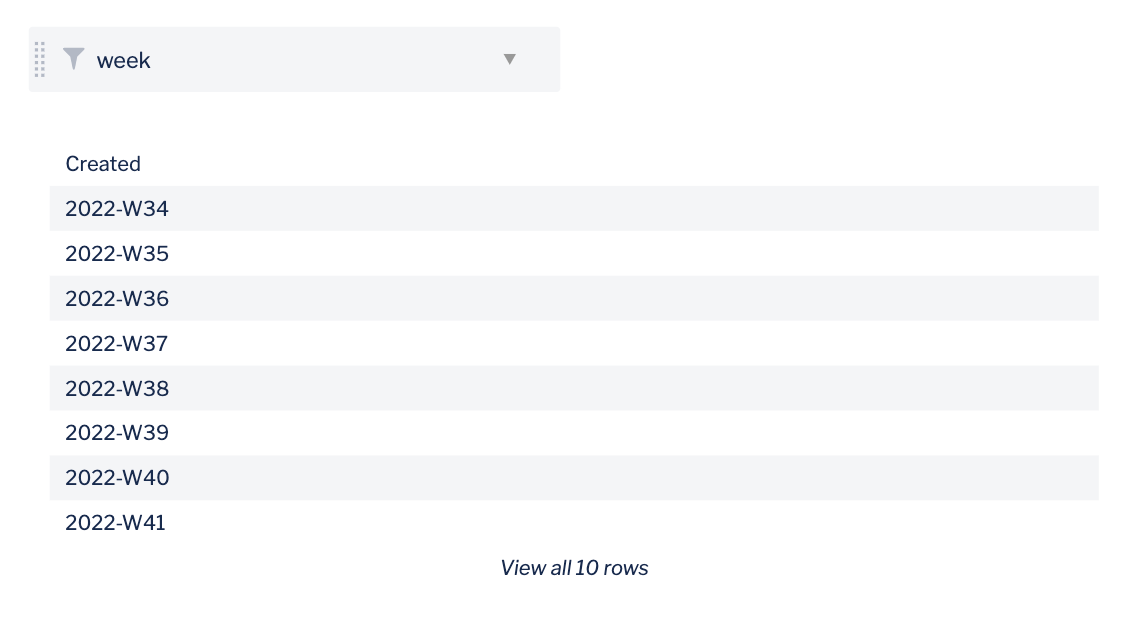
Save the chart, and you’re done! You’ve now created and connected your custom date bucket to your chart.
Was this helpful?