Bookmarks Column/Repository Browser Overview
Platform Notice: Data Center Only - This article only applies to Atlassian apps on the Data Center platform.
Note that this KB was created for the Data Center version of the product. Data Center KBs for non-Data-Center-specific features may also work for Server versions of the product, however they have not been tested. Support for Server* products ended on February 15th 2024. If you are running a Server product, you can visit the Atlassian Server end of support announcement to review your migration options.
*Except Fisheye and Crucible
Summary
This article should help users to understand the UI surrounding the Bookmark feature in SourceTree, and the different manipulations that can be done on the bookmarks:
Solution
Here's how to view and manipulate SourceTree Bookmarks:
For Windows
Viewing the bookmark column
Steps:
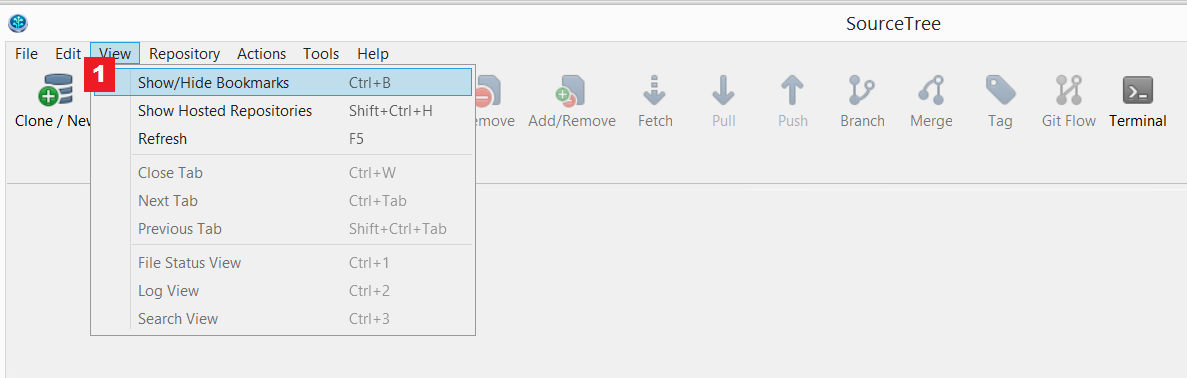
1. To show the Bookmarks column in SourceTree, simply click on View, and then click on Show/Hide Bookmarks
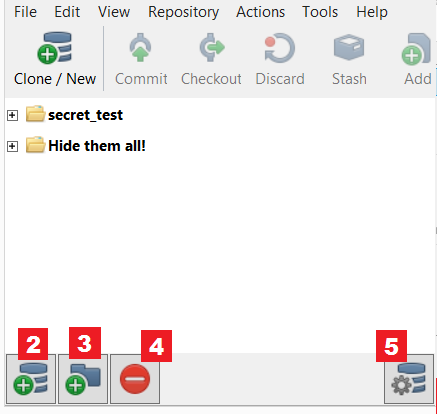
Here, you will be introduced to a few buttons:
2. Add Repository button, which has the same function as pressing a Clone/New button to allow you to:
3. Add Folder button
4. Delete button
5. Show Hosted Repositories button, which allows you to:
Manipulating bookmarks
Add Repository
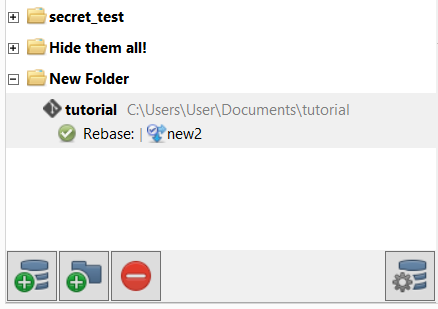
Once you add a repository into SourceTree either by cloning one from remote, adding an existing one, or creating a brand new one, there should be a repository that appears in the bookmark column:
Add Folder
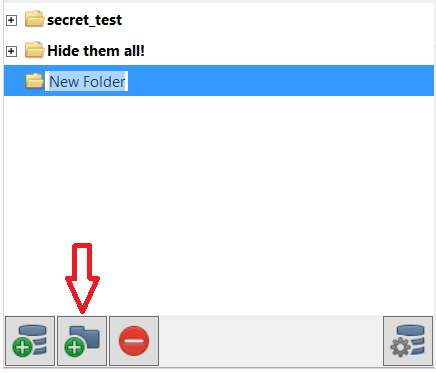
Clicking the Add Folder icon button will produce a new folder.
Moving a bookmark
You can drag around and rearrange bookmarks, and you can drag a bookmark into a folder:
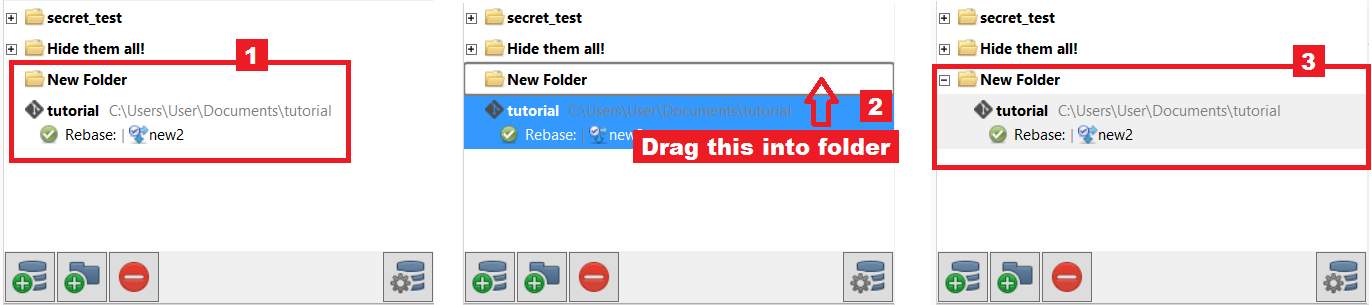
Steps:
Click and hold on to a bookmark.
Drag it into a folder
Now you'll see that the bookmark is now in the folder.
You'll also notice that you can show and hide the folder contents by just clicking the "+" or "-" sign of the folder respectively.
Delete bookmark
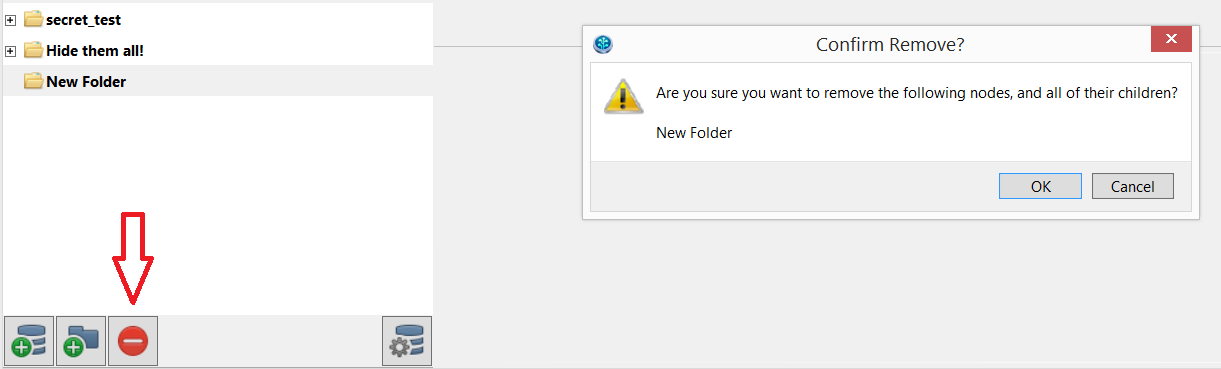
Steps:
Click on a bookmark.
Click on the Delete icon.
A pop-up window should appear to allow the user to confirm the delete.
Clicking OK will delete the bookmark for good.
For Mac
Viewing the Repository Browser
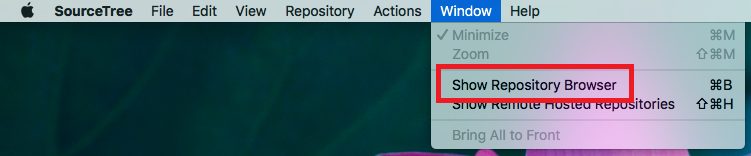
Steps:
To open the repository browser, you can:
Click on Window, and then click on Show Repository Browser
Click on the SourceTree app icon at the Dock.
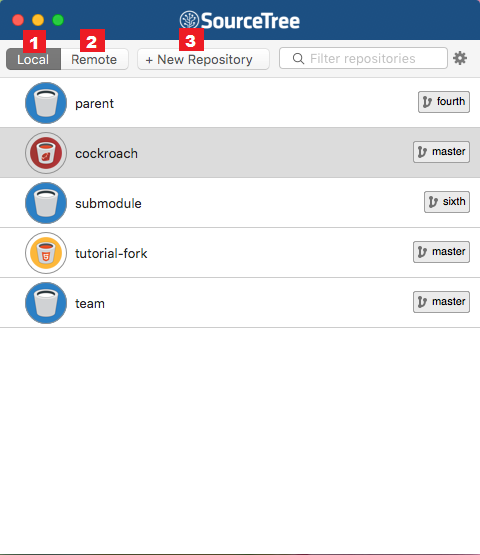
There are a few important buttons that comes along with the repository browser:
Local
This button allows users to view the list of their local repositories in SourceTree.
Remote
This button allows users to view the list of their remote hosted repositories in SourceTree
+ New Repository
Manipulating repository lists
By right-clicking the repository browser, users should be able to rename, delete a specific repository, as well as sort the repository list according to Name or Type.
Users can rearrange the list by just dragging the repository bookmark around, and create new groups to sort the list into a few groupings:
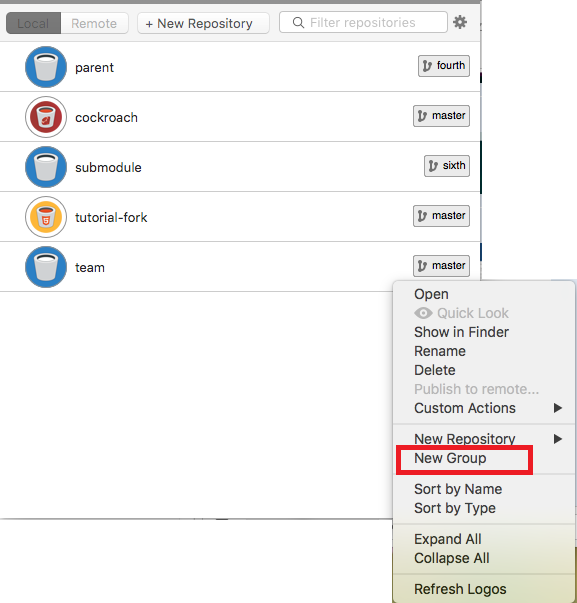
Steps:
1. Right click at the mouse
2. Click on New Group, and users can name it to anything they desire.
3. Drag a repository bookmark into the group:
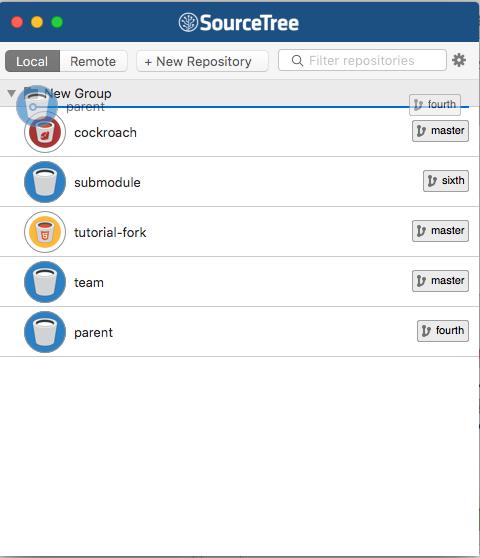
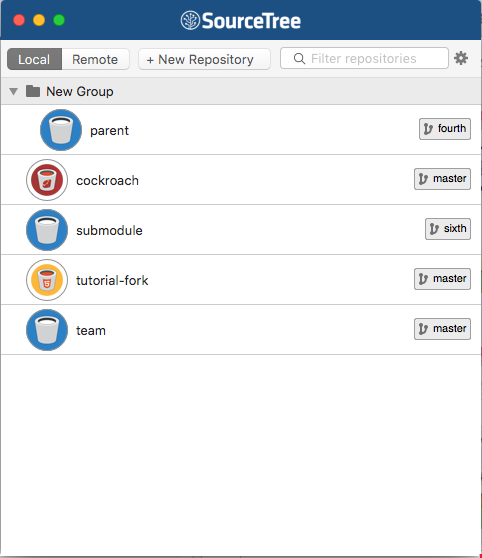
4. The repository bookmark is now listed within the new group that is just created.
Was this helpful?