Unable to get Affected Services field value in Jira CSV export
Platform Notice: Cloud Only - This article only applies to Atlassian apps on the cloud platform.
Summary
At present, it is not possible to export the value of the Affected services field in CSV exports. The exported CSV will only contain the associated ID for the field, which is not human-readable.
Please refer to the feature request: JRACLOUD-77404: Ability to export affected services for issue data.
Copy Affected services value to custom field with automation
If a separate custom field contains the value of Affected Services, then Jira can successfully export this value to CSV. In order to keep the separate field in sync with Affected Services, you'll want to setup an automation rule that will copy the value if it ever changes.
In the steps below, you will create two rules. One rule copies the value whenever there is a change to the Affected services field. The other rule is a manual trigger rule to copy the value for all pre-existing tickets, and will only need to be run once.
Automation for all newly updated tickets
Create a new custom field or use an existing one
Under Project settings > Automation, create an automation with the trigger Field value changed
Select the Affected Services field
Track Any changes to the field value
Track All work item operations
Add the Edit work item action
Choose the newly created field from step 1
Set the value to
{{Issue.Affected Services}}>Save
In the screenshot example below, the destination custom field's name is Test.
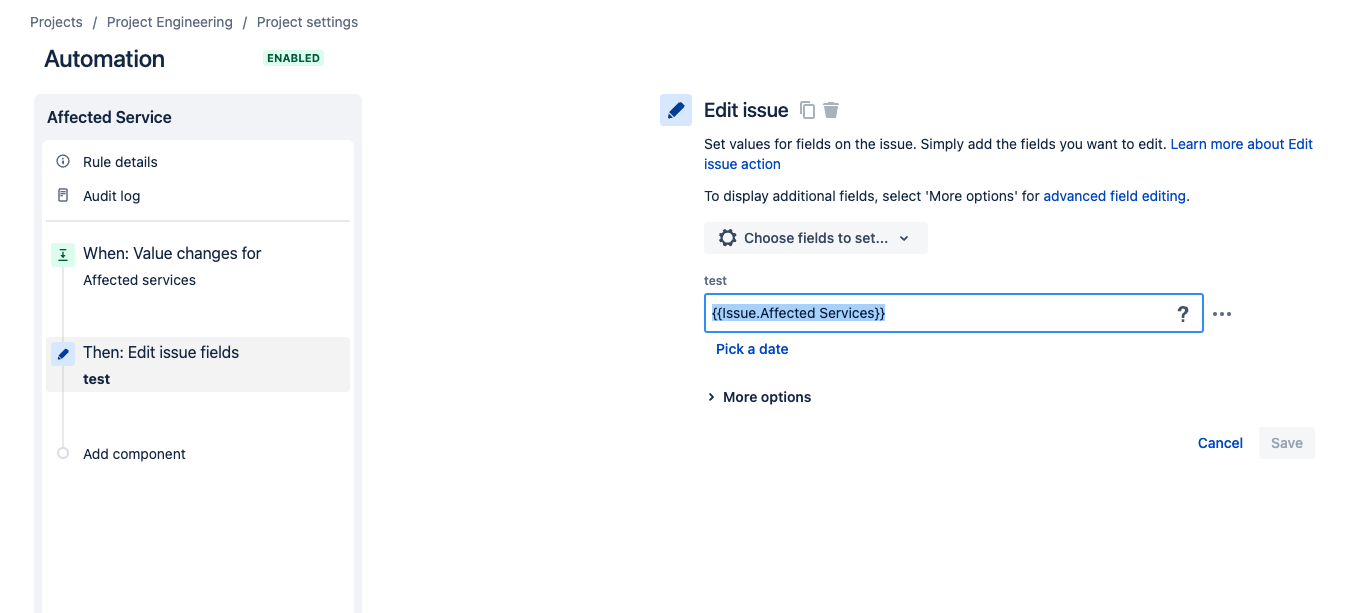
Once enabled, this rule will copy the value of Affected services to the Test custom field every time Affected Services is edited.
Manual trigger to copy the field on existing tickets
For existing tickets:
Use the Manual trigger
Add an If condition with the JQL
"Affected services" is not EMPTYAdd the same action from the previous rule (Step 3 in Rule 1)
Run the rule manually, wait until it's complete and disable this rule
If you want to learn more, please refer to the below documentation:
Was this helpful?