Set Jira project issue key counter to a custom starting number
Platform Notice: Cloud Only - This article only applies to Atlassian apps on the cloud platform.
Summary
By default, issue keys start from 1 in a new Jira project (for example: ABC-1). You might want the issue key number to start from a different place (for example: ABC-901).
Solution
Set the beginning project key number using a CSV import
You can achieve this by using the CSV import feature in Jira to map the issue key to your desired number. If you wish to have issues start at issue key 901 (ABC-901), you need to import an issue with an issue counter immediately before the expected issue key.
In this case, you'd import an issue with the key 900 (ABC-900).
This action can not be reverted
Always use 1 number below your expected beginning issue key (if you want your issues to start at 901, import at 900)
If the destination project has already some existing issues, you should not set the issue key/number in the CSV file below the pre-existing issue keys -- You can use any issue key/number after your latest issue key
Create the CSV file
Below is an example of the most basic fields you need to fill while creating a new issue via CSV import.
Please note that if you have any required custom fields on your project's Create Issue screen, those fields must also be added to the CSV file.
Issue type, Summary, Priority, issue key
Task, Testing, Major, Project_key-xx
Import your created CSV file
Select ⚙️Settings > System
In the Import and Export section, select External System Import
Select CSV and choose your CSV source file
Leave the Use an existing configuration fileoption unchecked if you do not have a configuration file or if you want to create a new one
Expand the Advanced section to change the file encoding (UTF-8 by default) and CSV delimiter if needed
Select Next
Use the Import to Project dropdown to select the project you want to make this change to, and select Next
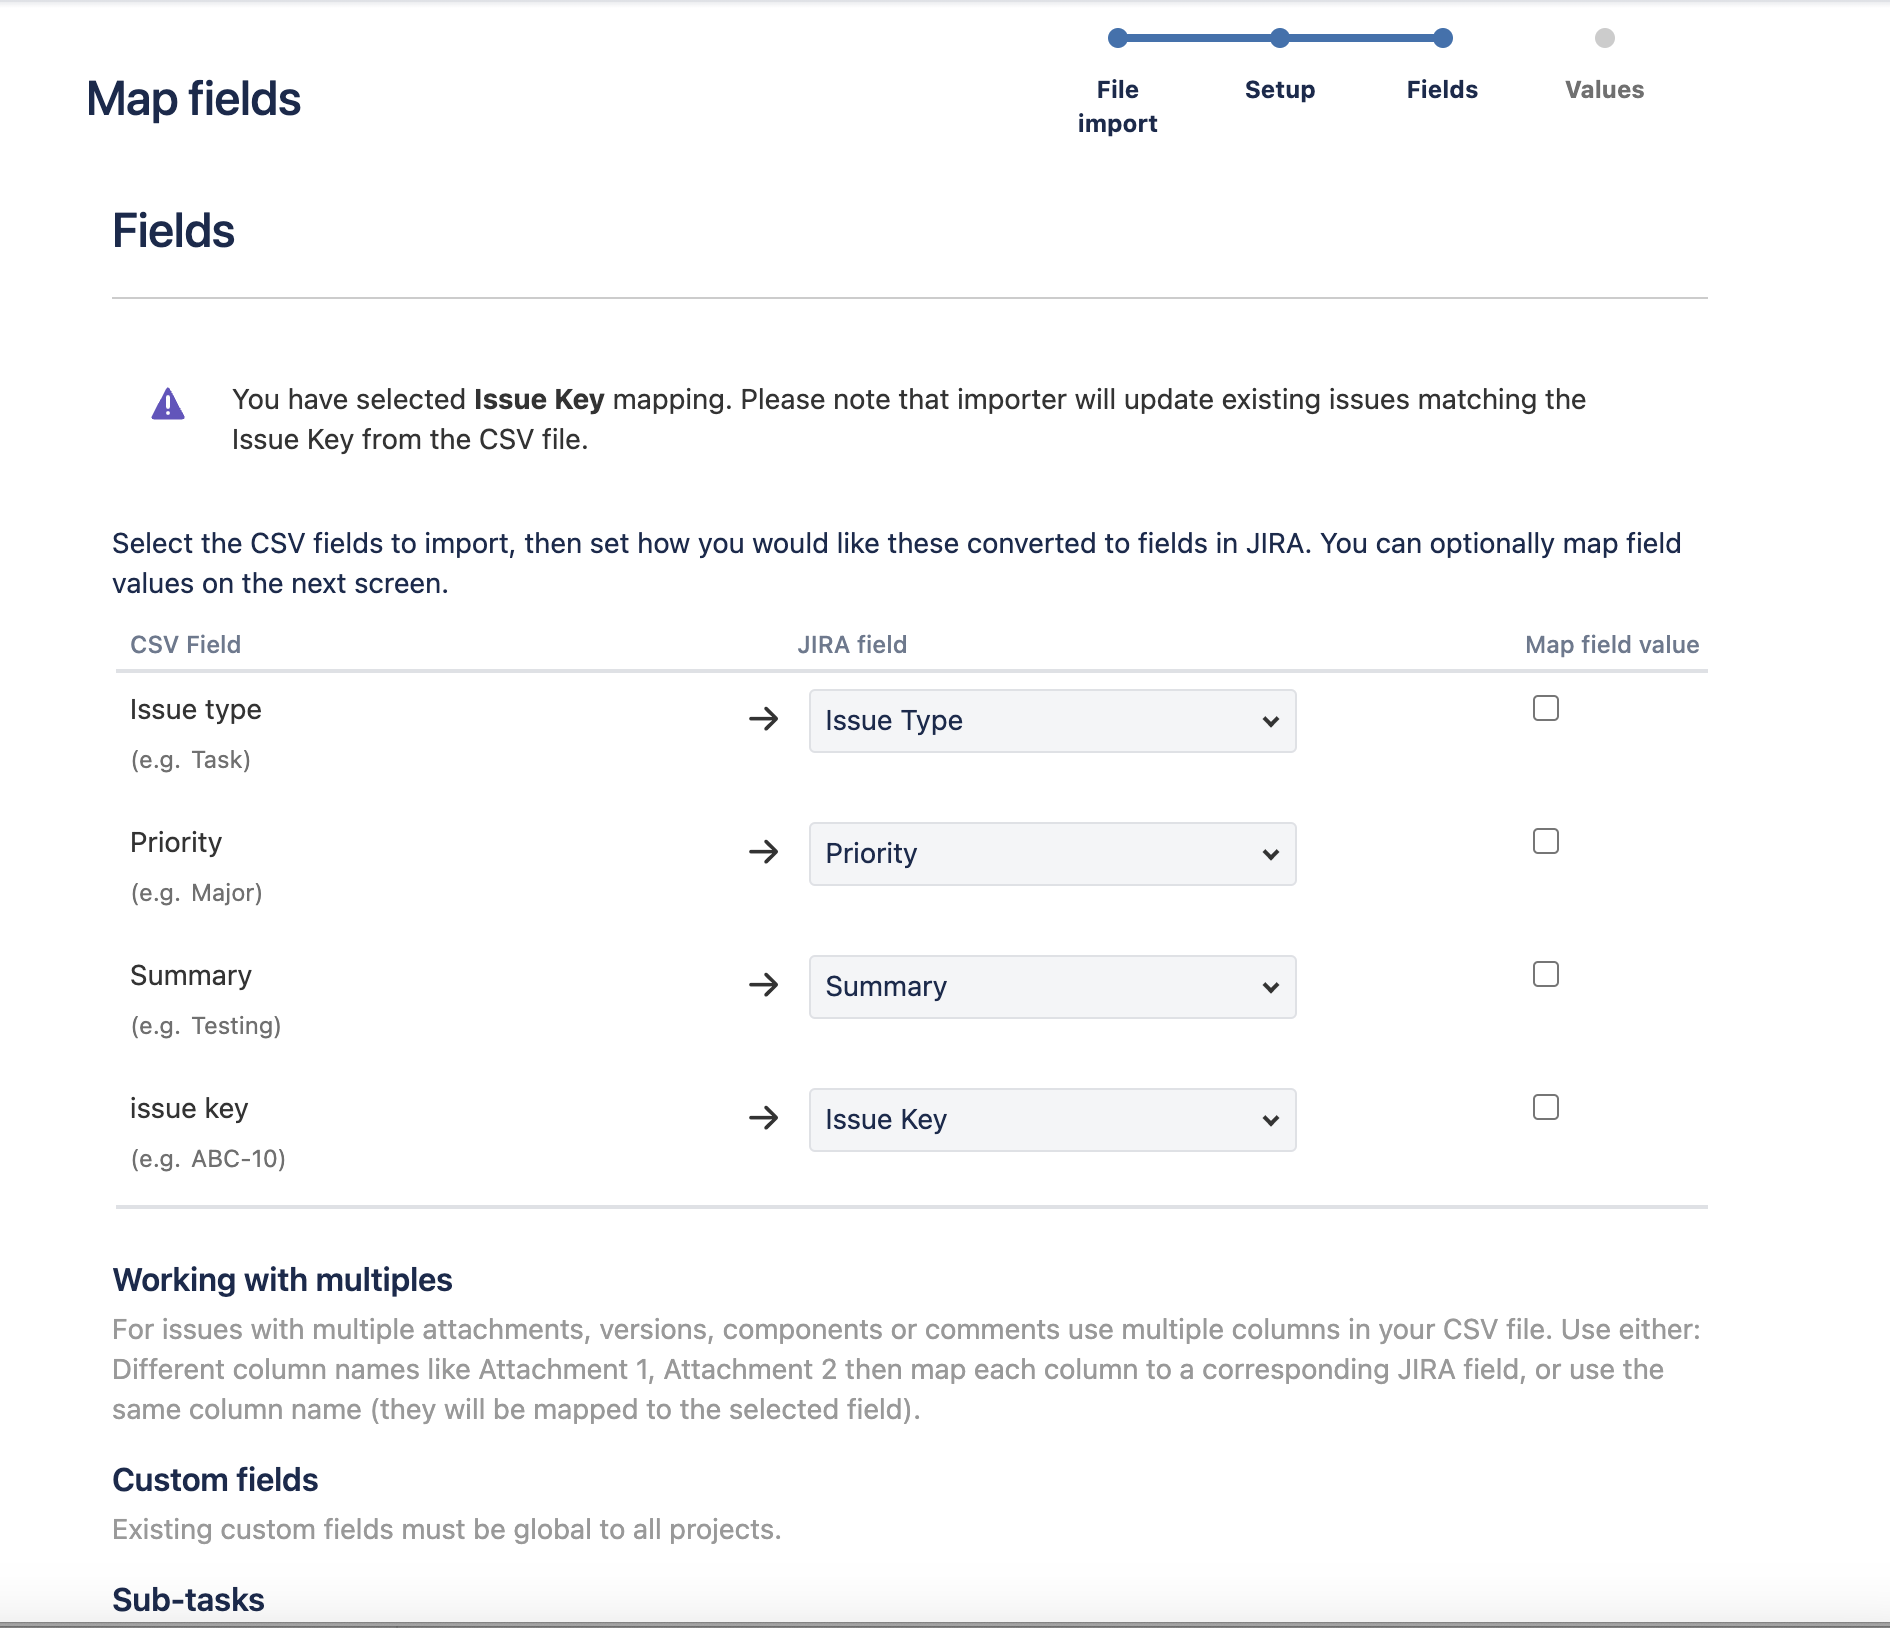
Map all the fields to the appropriate fields in Jira, and select Next
Once the field mapping is done, your results should look like the following screenshot:
Select Begin Import
When you return to your selected project, you'll see a new issue with the issue key you selected in the CSV file. You can delete the issue if you wish.
The next newly created issue in this project will start with the issue key immediately following your imported issue key.
To learn more about CSV import, refer to our documentation on Importing data from a CSV file.
Was this helpful?