Measure Time to first response SLA for reopened issues in a JSM project
Platform Notice: Cloud Only - This article only applies to Atlassian apps on the cloud platform.
Summary
This article explains how to configure your project so that the SLA Time to First Response restarts when a customer reopens a ticket. This allows you to measure the SLA for reopened requests in your service project.
Solution
When an issue is reopened, the Time to resolution SLA is reset by default. However, the Time to first Response SLA is not.
Reset the SLA when the request is reopened
Navigate to Service Project > Project Settings > SLA.
Locate the SLA Time to first response and click Edit.
Add Resolution: cleared under Start counting conditions.
Update the workflow to clear the Resolution
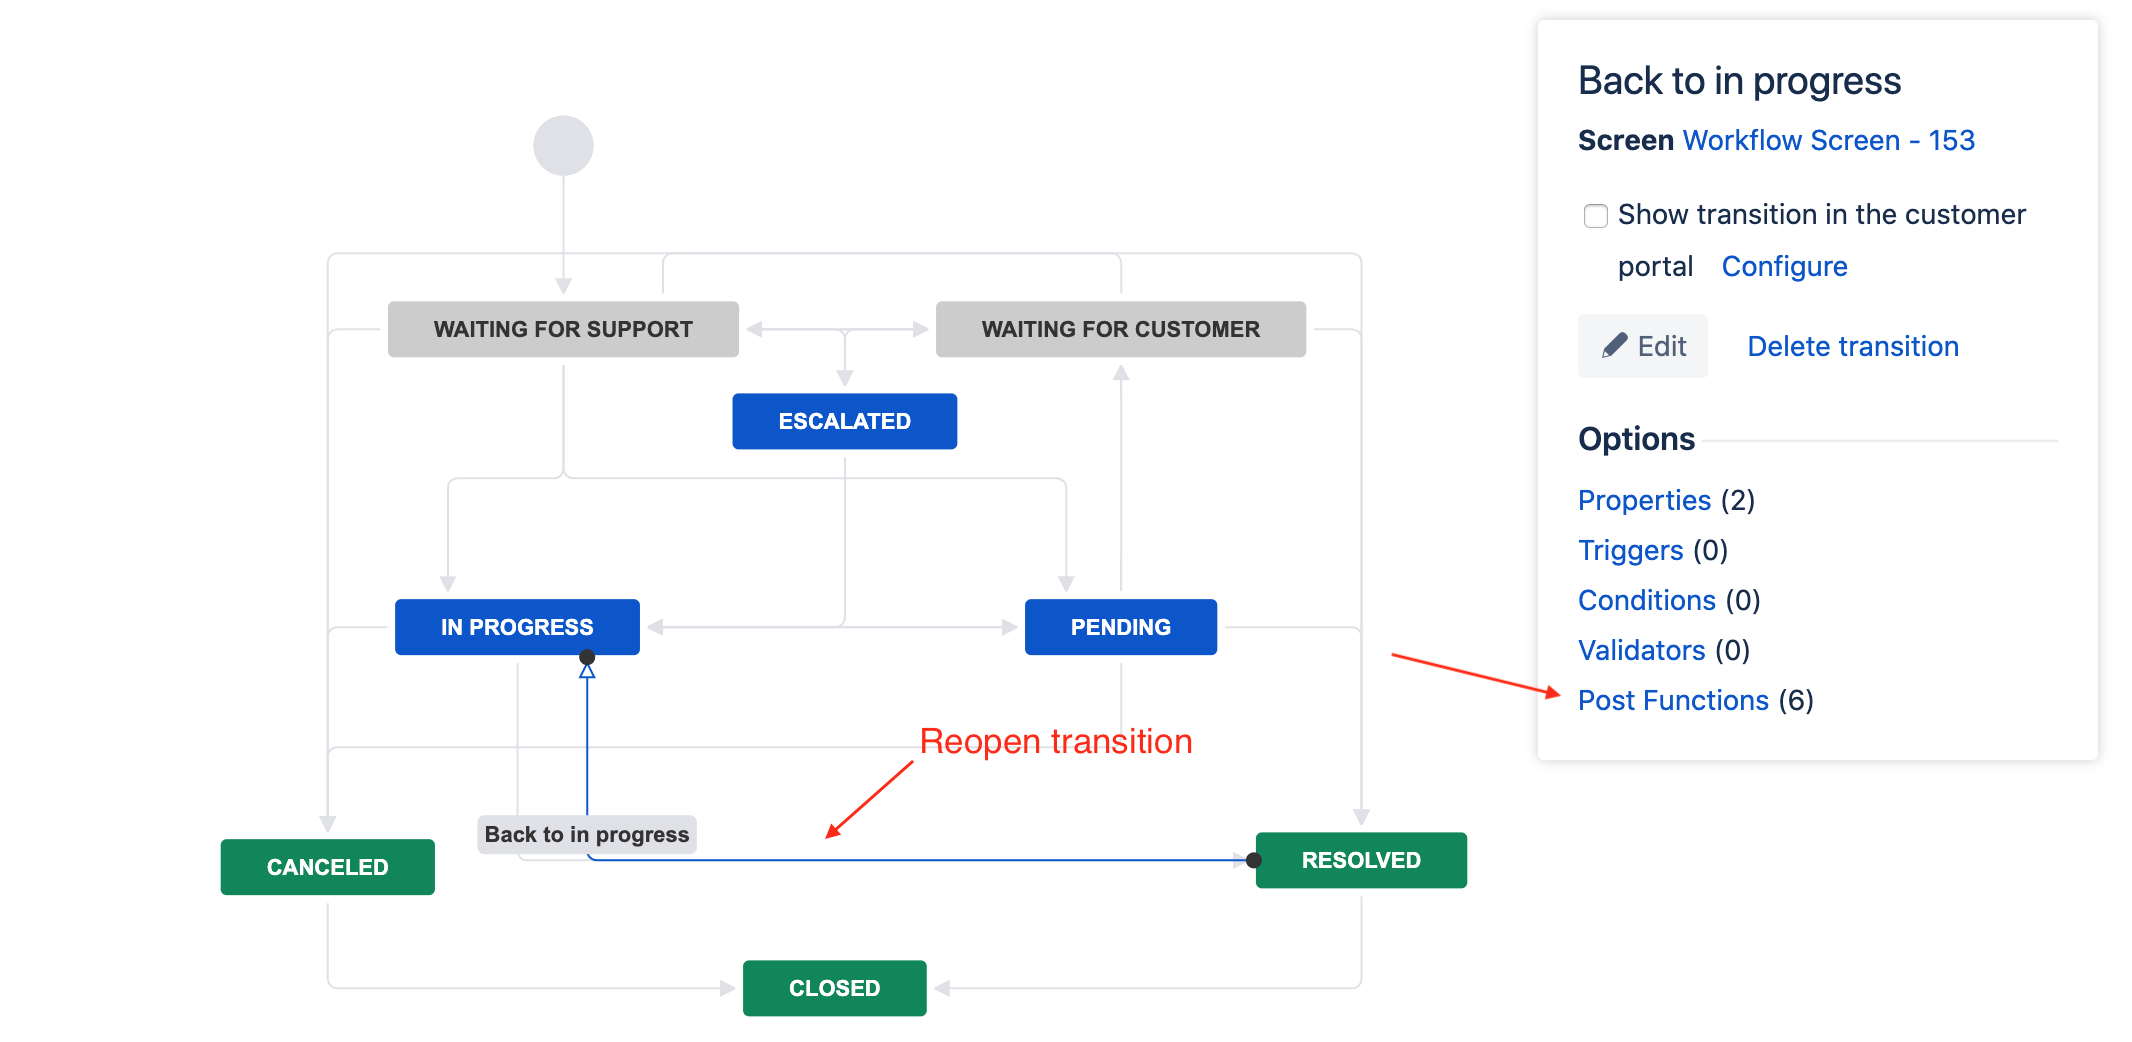
In the workflow, make sure that the transition to the status that reopens the request has a post-function to clear the Resolution field.
If you don't have a reopen transition
Go to the Project Settings > Workflow.
Copy the name of the desired workflow.
Navigate to
https://<YourSite>.atlassian.net/jira/settings/issues/workflowsLocate the desired workflow > Click on More actions (•••) > Copy.
On the copied workflow, add the new transition to reopen requests. Refer to Use work item workflows for assistance.
Skip to steps 3-6 in the section below.
If you already have a reopen transition
Go to the Project Settings > Workflow.
Edit the desired workflow.
Click the transition arrow between the closed status and the status that reopens requests.
Navigate to Post Functions, then click Add Post Function.
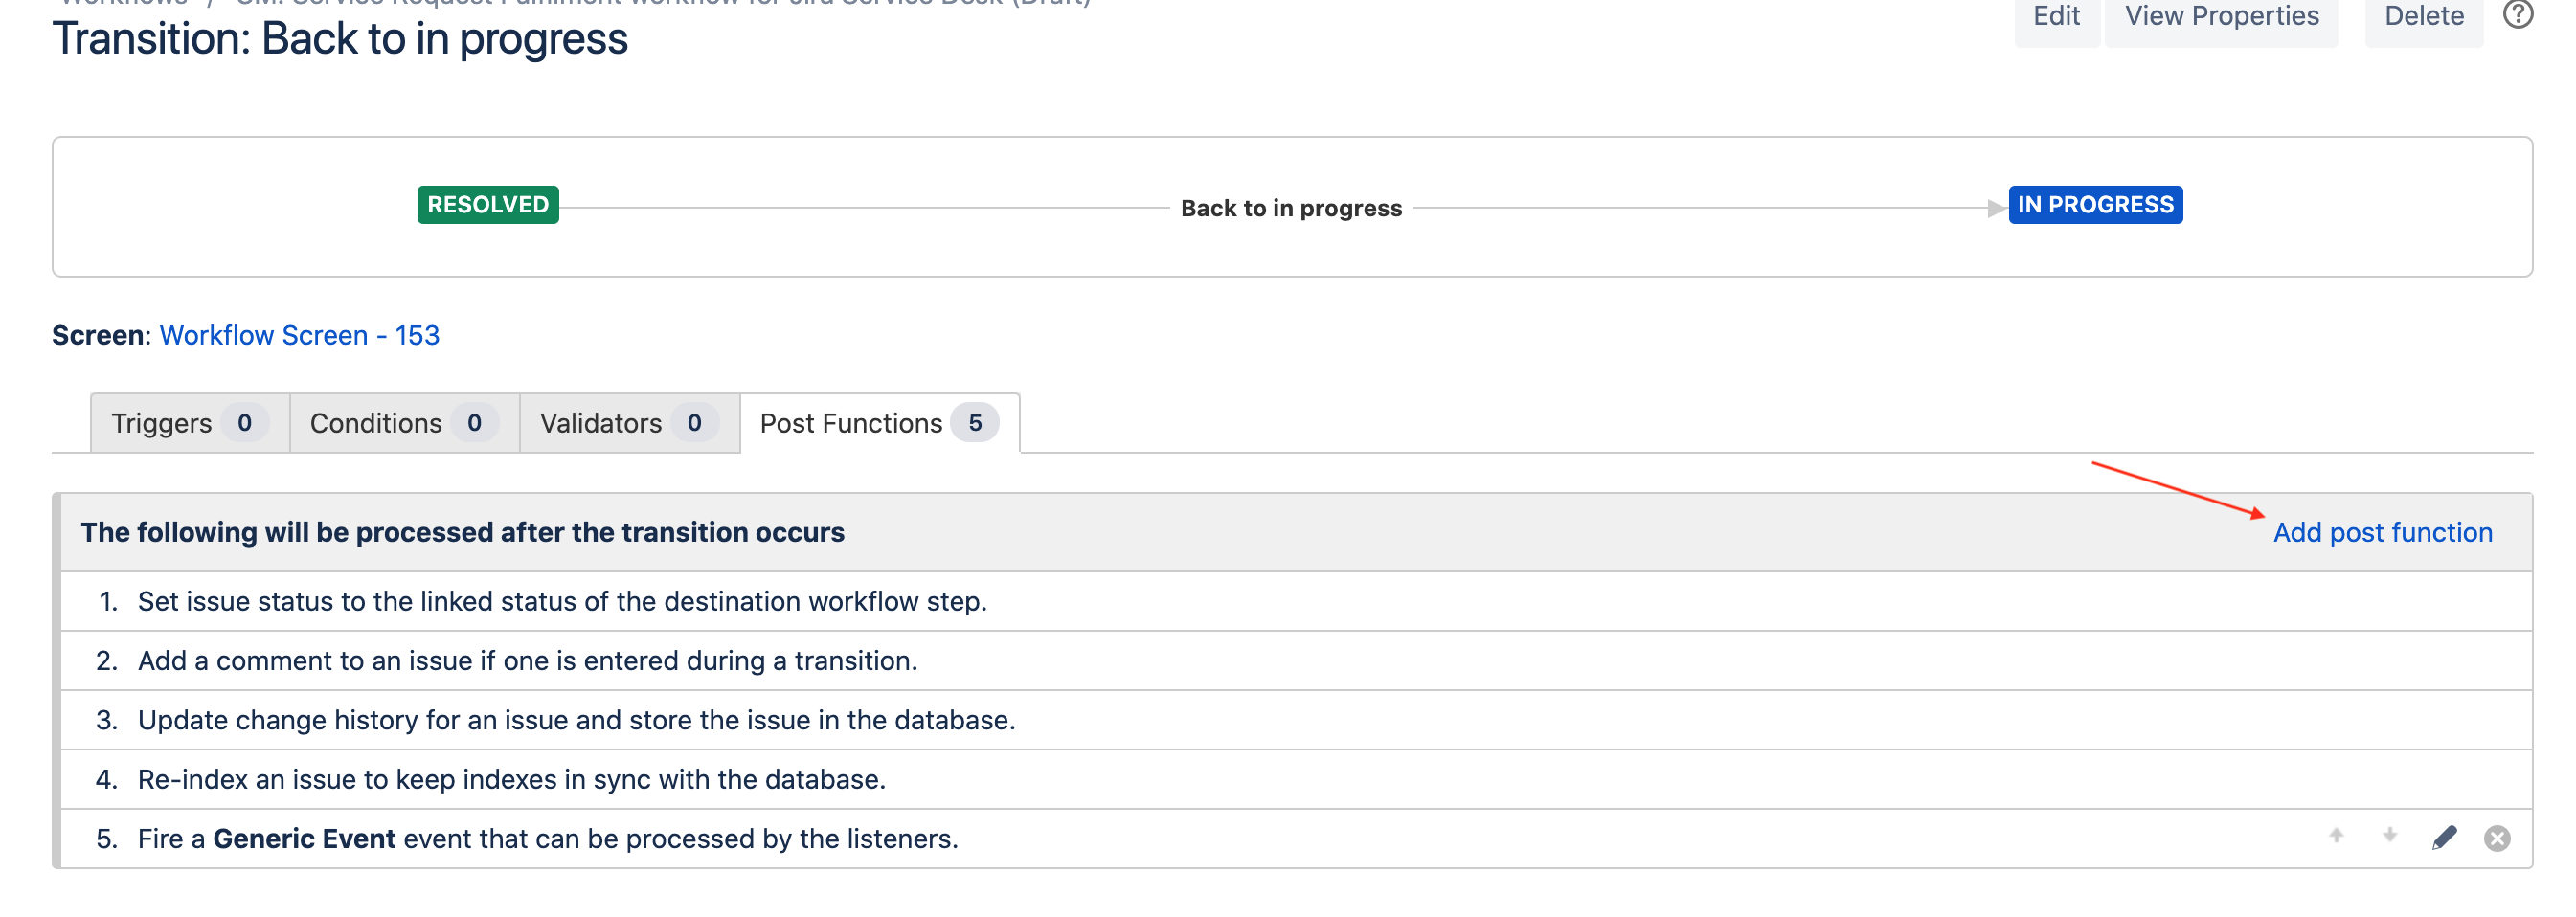
Add the Clear Field Value event as a post function.
Select the Resolution field and click Add.
Publish the updated workflow.
Was this helpful?