How to upload avatars on Assets objects using REST API
Platform Notice: Cloud Only - This article only applies to Atlassian apps on the cloud platform.
Summary
This article makes use of Assets internal APIs, which might sometimes experience changes without prior notice, and their functionality may not always be guaranteed. Only our Assets official API is supported. Feel free to explore and use them, but please be mindful and cautious while doing so.
Learn how to upload avatars on Assets objects using REST API.
Solution
This involves two steps:
Upload the avatar first by specifying a UUID that you will generate on your own. When an avatar is uploaded successfully, the response returned will contain the server UUID.
Then, use this server UUID with the Create/Edit object REST API, which will create/update the object successfully with the uploaded avatar.
Use the steps below to upload an avatar to an object:
Step 1 - Upload the Avatar
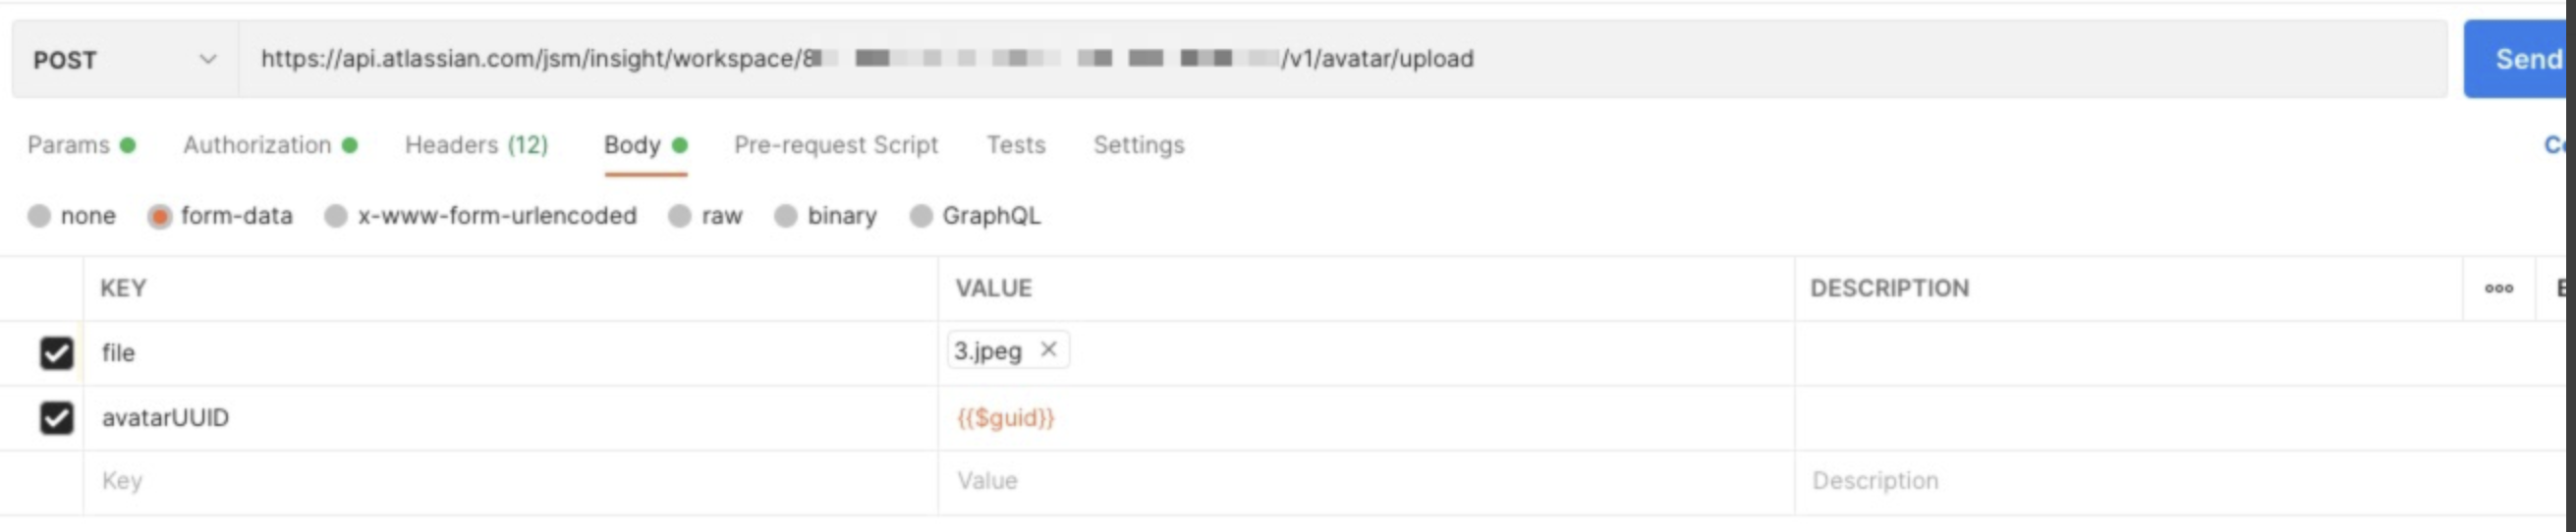
First, do a POST to the following internal endpoint to upload the avatar: /jsm/assets/workspace/{workspaceId}/v1/avatar/upload
Use the following URL to find the workspace ID for Assets in your site: https://<YOURSITE>.atlassian.net/rest/servicedeskapi/assets/workspace
This endpoint accepts multipart/form-dataas the body type and expects the following fields:
rlabs-insight-object-avatar: This is where you specify the file that contains your avatar
avatarUUID: You can use an online UUID generator to generate a UUID, or if you are using Postman, you can use $guid, which will generate the UUID for you.
objectTypeId: Use the object type ID as an integer number.
The request should be similar to:
Upload avatar
curl --request POST 'https://api.atlassian.com/jsm/assets/workspace/{workspaceId}/v1/avatar/upload' \
--header 'Accept: application/json' \
--header 'Content-Type: application/json' \
--header 'X-Atlassian-Token: no-check' \
--header 'Authorization: Basic <emailaddress:API token>' \
--form 'rlabs-insight-object-avatar=@"<yourfile>"' \
--form 'avatarUUID="<Client generated UUID>"'  \
--form 'objectTypeId="<object Type ID>"'
You can also use Postman to send this request, which will look as below:
If the call is successful, you will receive a 201 response, and the server UUID will also be returned. The response with look like:
201 Response
{
    "workspaceId": "<yourworkspaceID>",
    "avatarUUID": "d9dd0d72-3347-4a5b-8bd9-e3ffb33fbbe8",
    "url16": "https://api.atlassian.com/jsm/assets/workspace/<yourworkspaceID>/v1/avatar/d9dd0d72-3347-4a5b-8bd9-e3ffb33fbbe8/preview_16.png",
    "url48": "https://api.atlassian.com/jsm/assets/workspace/<yourworkspaceID>/v1/avatar/d9dd0d72-3347-4a5b-8bd9-e3ffb33fbbe8/preview_48.png",
    "url72": "https://api.atlassian.com/jsm/assets/workspace/<yourworkspaceID>/v1/avatar/d9dd0d72-3347-4a5b-8bd9-e3ffb33fbbe8/preview_72.png",
    "url144": "https://api.atlassian.com/jsm/assets/workspace/<yourworkspaceID>/v1/avatar/d9dd0d72-3347-4a5b-8bd9-e3ffb33fbbe8/preview_144.png",
    "url288": "https://api.atlassian.com/jsm/assets/workspace/<yourworkspaceID>/v1/avatar/d9dd0d72-3347-4a5b-8bd9-e3ffb33fbbe8/preview_288.png"
}
Step 2 - Associate the Avatar with the object
You can then use this server avatarUUID in your Create object/Edit object REST API call to upload the avatar on the object as shown below:
{
  "objectTypeId": "2",
  "attributes": [
    {
      "objectTypeAttributeId": "11",
      "objectAttributeValues": [
        {
          "value": "Uploading avatar"
        }
      ]
    }
  ],
  "avatarUUID": "d9dd0d72-3347-4a5b-8bd9-e3ffb33fbbe8",
  "hasAvatar": true
}
This will associate the uploaded avatar with the object.
Related documentation
Was this helpful?