How to set up a Windows user with minimal permissions for connecting to remote hosts in the Assets Discovery tool
Platform Notice: Cloud and Data Center - This article applies equally to both cloud and data center platforms.
Support for Server* products ended on February 15th 2024. If you are running a Server product, you can visit the Atlassian Server end of support announcement to review your migration options.
*Except Fisheye and Crucible
Summary
In certain scenarios, administrators may prefer to create a dedicated administrator account for use in the Discovery tool's Credentials tab. This account is use to connect to remote hosts.
The default Windows administrator account possesses enhanced privileges compared to a newly created local administrator account. As a result, a local administrator account lacks the necessary permissions to run WMI scans.
Environment
Assets Discovery tool
Remote host using Windows OS
Solution
Configuration overview
The Assets Discovery tool scans remote Windows hosts via WMI using the credentials you supply in the Credentials tab. A brand-new local admin account lacks the WMI rights the default administrator has, so scans fail. This article grants a dedicated low-privilege user exactly the rights WMI scanning needs — via the Performance Monitor Users group, WMI Control, and Component Services (DCOM).
In remote Windows OS instances, the following steps are required:
Create a Windows user account
Add the above user to the 'Performance Monitor Users' Group
WMI Control (
wmimgmt.msc) — grant the group Execute Methods, Enable Account, and Remote Enable on bothRoot/CIMV2andRoot/DEFAULT. This authorizes the WMI queries for the scan runs.Run wmimgmt.msc
Right-click WMI CONTROL (Local) > Properties > Security Tab
Navigate Root/CIMV2 > Security Button
Add the 'Performance Monitor Users' Group
Grant 'Execute Methods', 'Enable Account' and 'Remote Enable' to 'Performance Monitor Users' Group > Click OK
Navigate Root/DEFAULT > Security Button
Add the Performance Monitor Users Group
Grant 'Execute Methods', 'Enable Account', and 'Remote Enable' to 'Performance Monitor Users' Group > Click OK
Component Services (
dcomcnfg) — grant the group Remote Access (Access Permissions) and Remote Activation (Launch and Activation Permissions). This allows the scan to reach WMI via DCOM.Run 'dcomcnfg'
Navigate to 'Component Services' > 'Computers'
Right click 'My Computer' > Properties > COM Security Tab
Click "Edit Limits" for Access Permissions
Add the 'Performance Monitor Users' Group
Grant 'Remote Access'
Click "Edit Limits" for Launch and Activation Permissions
Add the 'Performance Monitor Users' Group
Grant 'Remote activation'
Navigate to 'Component Services > Computers > My Computer > DCOM Config'
Right-click 'Windows Management and Instrument' > Properties > Security Tab
Click "Edit" For Launch and Activation Permissions
Add the 'Performance Monitor Users' Group
Grant 'Remote Launch' and 'Remote Activation'
Test
There are many steps above, and we can test whether the above works in two ways.
1st Method
The first way would be from the Discovery Tool itself:
Launch the Discovery Tool Application
Navigate to the Credentials Tab
If you don't yet have a Windows Credential, Create One with the ➕ Icon
Change the Type to Windows
Enter the Credentials created in Solution - Step 1
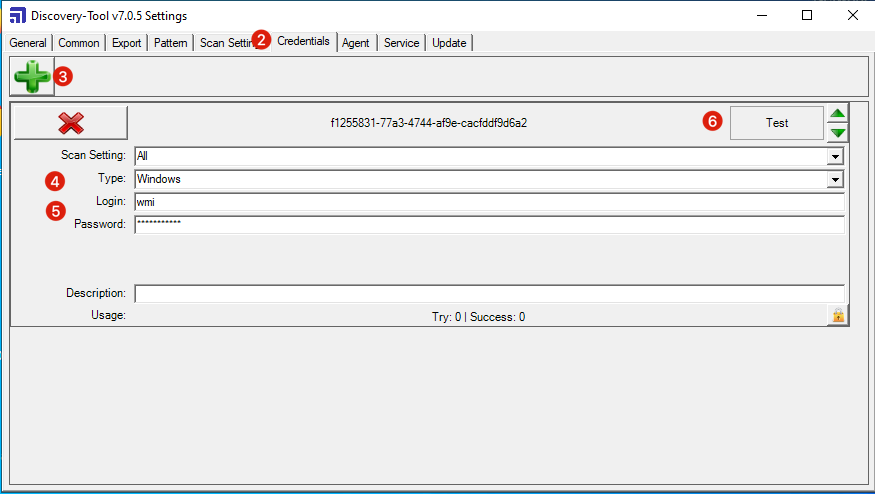
Click Test and Enter in the IP address of the remote host to be scanned.(You must use an IP address, Using a Hostname will result in an error).
The second way would be via PowerShell, which in addition to the WMI ports (TCP 135, WMI (DCOM) uses a randomly selected TCP port between 1024 and 65535) and also requires Port 5985 to be opened.
2nd Method
The 2nd way would be from the Discovery Tool Server:
Launch PowerShell ISE
Create a new script: File > New
Copy the below PowerShell Script:
$creds = Get-Credential -UserName "wmi" -Message "Provide Credentials for WMI Scanning"
$CN = Read-Host "Provide the Computer name or IP address"
Get-WmiObject -Namespace "root\cimv2" -Class Win32_Process -Impersonation 3 -ComputerName $CN -Credential $creds
Click the Run Script button (F5): Debug/Continue > Run/Continue
Provide the Credentials created in Solution - Step 1:
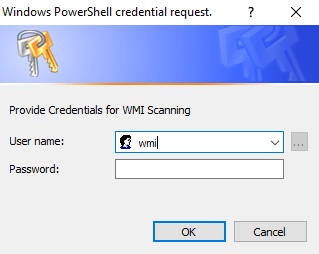
Provide the hostname of the remote host to be scanned.
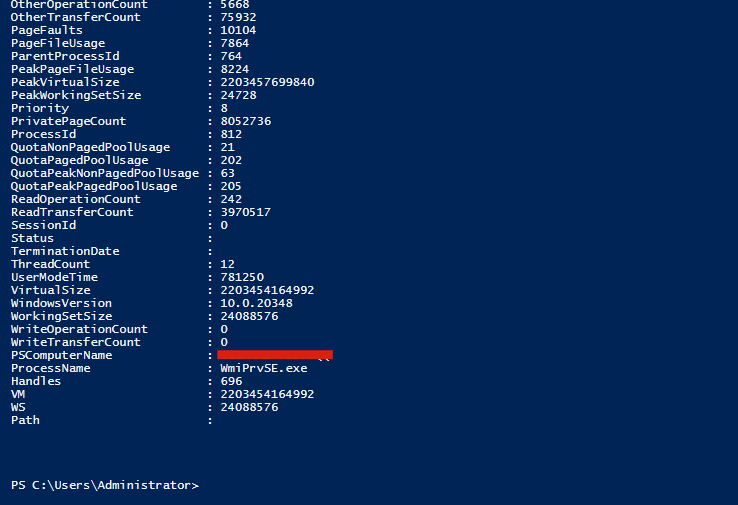
If everything was done correctly, you should see a lot of information on your Win32_Process, which should look like this:
Was this helpful?