Restricting Queue Access in JSM Cloud
Platform Notice: Cloud Only - This article only applies to Atlassian apps on the cloud platform.
Summary
This article presents a method for implementing access restrictions to queues by leveraging the Work Item Security Feature. Jira Service Management doesn't natively support restricting access at the queue level. This article documents a supported workaround using the Work Item Security feature.
Cause
At present, Jira does not natively apply issue security within queues. This article describes a workaround using a custom field, issue security levels, and Automation for Jira. The workaround does not hide the queues themselves; it restricts access to issues shown by those queues.
Solution
When assessing the workaround for this issue, it is essential to take the following factors into consideration:
Establish the presence of a distinct custom field for distinguishing Jira Service Management queues (e.g., "Categories" Custom Field).
Utilize the Work Item Security feature to assign security levels.
Implement Automation procedures to definitively assign security levels based on the custom field value.
Create Queue and Filter using Custom Field
Create a distinct custom field for identifying Jira queues. In this example, the field is a Select List (single choice) named Categories, with the options Authorized and Unauthorized.
Create one queue for each option and use the corresponding JQL filter:
Authorized`"Categories[Dropdown]" = Authorized`Unauthorized`"Categories[Dropdown]" = Unauthorized`
Keep the queue names aligned with the custom-field values so that the queue purpose is clear.
Create Work Item Security Scheme
Create two issue-security levels: Authorized and Unauthorized. In the example, add the Site Admins Group to both levels and add the Sample User only to the Unauthorized level. Also, retain the existing project-role requirement: add atlassian-addons-project-access to the security levels when using Automation for Jira to assign the Issue Security Level.
Use the existing navigation and controls to add a user, group, or project role: select Issues, under ISSUE ATTRIBUTES select Issue security schemes, open the scheme or its Security Levels link, locate the security level, select Add, choose the user, group, or project role, and select Add.
To add users to the respective security levels, please follow the steps outlined below:
Select > Work Items.
Under Work Item Attributes, select Work Item security schemes.
Click the scheme name or the Security Levels link in the Actions column.
Locate the appropriate security level and click Add link in the Actions column
Select the appropriate user, group or project role, then click the Add button.
Because this solution uses Automation to set the issue security level, add the project role (atlassian-addons-project-access) to each security level, and make sure that role has the "Assign Issue Security Permission" under Space settings. If this role is missing or lacks the permission, the automation rule will not be able to set the security level.
Automation to Assign Issue Security Based on Custom field Value
Go to Space Settings > Automation > Create flow
One could either configure an Automated Trigger or have a Manual Trigger to run from the Subtask Issue; as stated in automation triggers, for the purpose of this example, we will use the Work Item Created Trigger.
Add a Condition: If [ Categories = Unauthorized )
Then Edit Work Item Fields: Security Level = Unauthorized
You can setup multiple if-else conditions to accommodate various categories, and then assign the appropriate security levels based on these conditions.
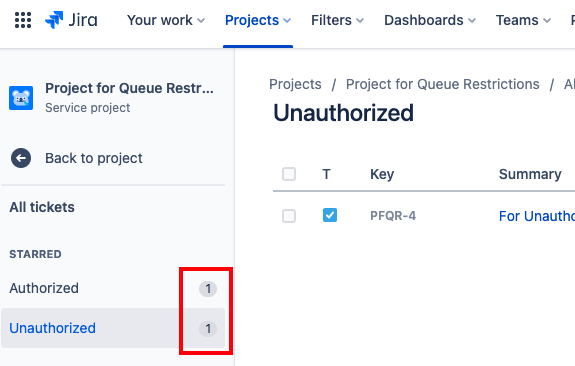
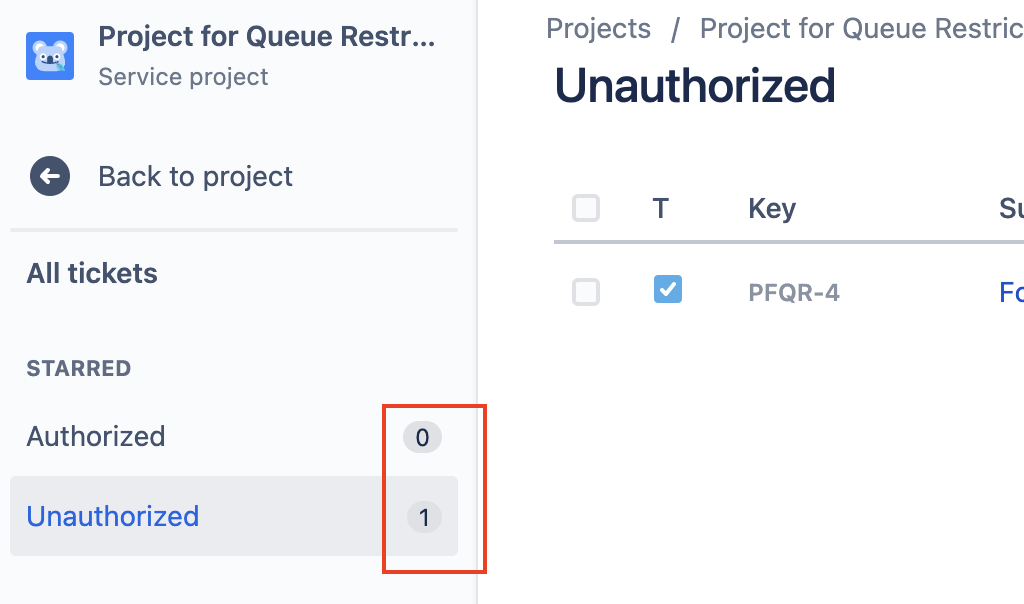
Sample View
View for Site Admins Group
View for Sample User
Was this helpful?