How to migrate issues with attachments using the CSV import in Jira Server and Data Center
Platform Notice: Data Center Only - This article only applies to Atlassian apps on the Data Center platform.
Note that this KB was created for the Data Center version of the product. Data Center KBs for non-Data-Center-specific features may also work for Server versions of the product, however they have not been tested. Support for Server* products ended on February 15th 2024. If you are running a Server product, you can visit the Atlassian Server end of support announcement to review your migration options.
*Except Fisheye and Crucible
Summary
When migrating issues from a Jira Data Center another Jira Data Center Instance using a CSV import, you might face some challenges with attachments. The purpose of this KB article is to explain how to include attachments during the CSV import.
Environment
Jira Server/Data Center on any version from 8.0.0, for the source and the target instances.
Solution
Explaining the difference between the 2 types of CSV import in Jira
⚠️ Firstly, it is important to note that there are 2 different CSV import functionalities in Jira:
The CSV importer that is accessible from Top Bar Menu > Issues > Import issues from CSV, and which is explained in the documentation Creating issues using the CSV importer
The CSV importer that is accessible only by Jira System Administrators via the page ⚙ > System > External System Import, and which is explained in the documentation Importing data from CSV
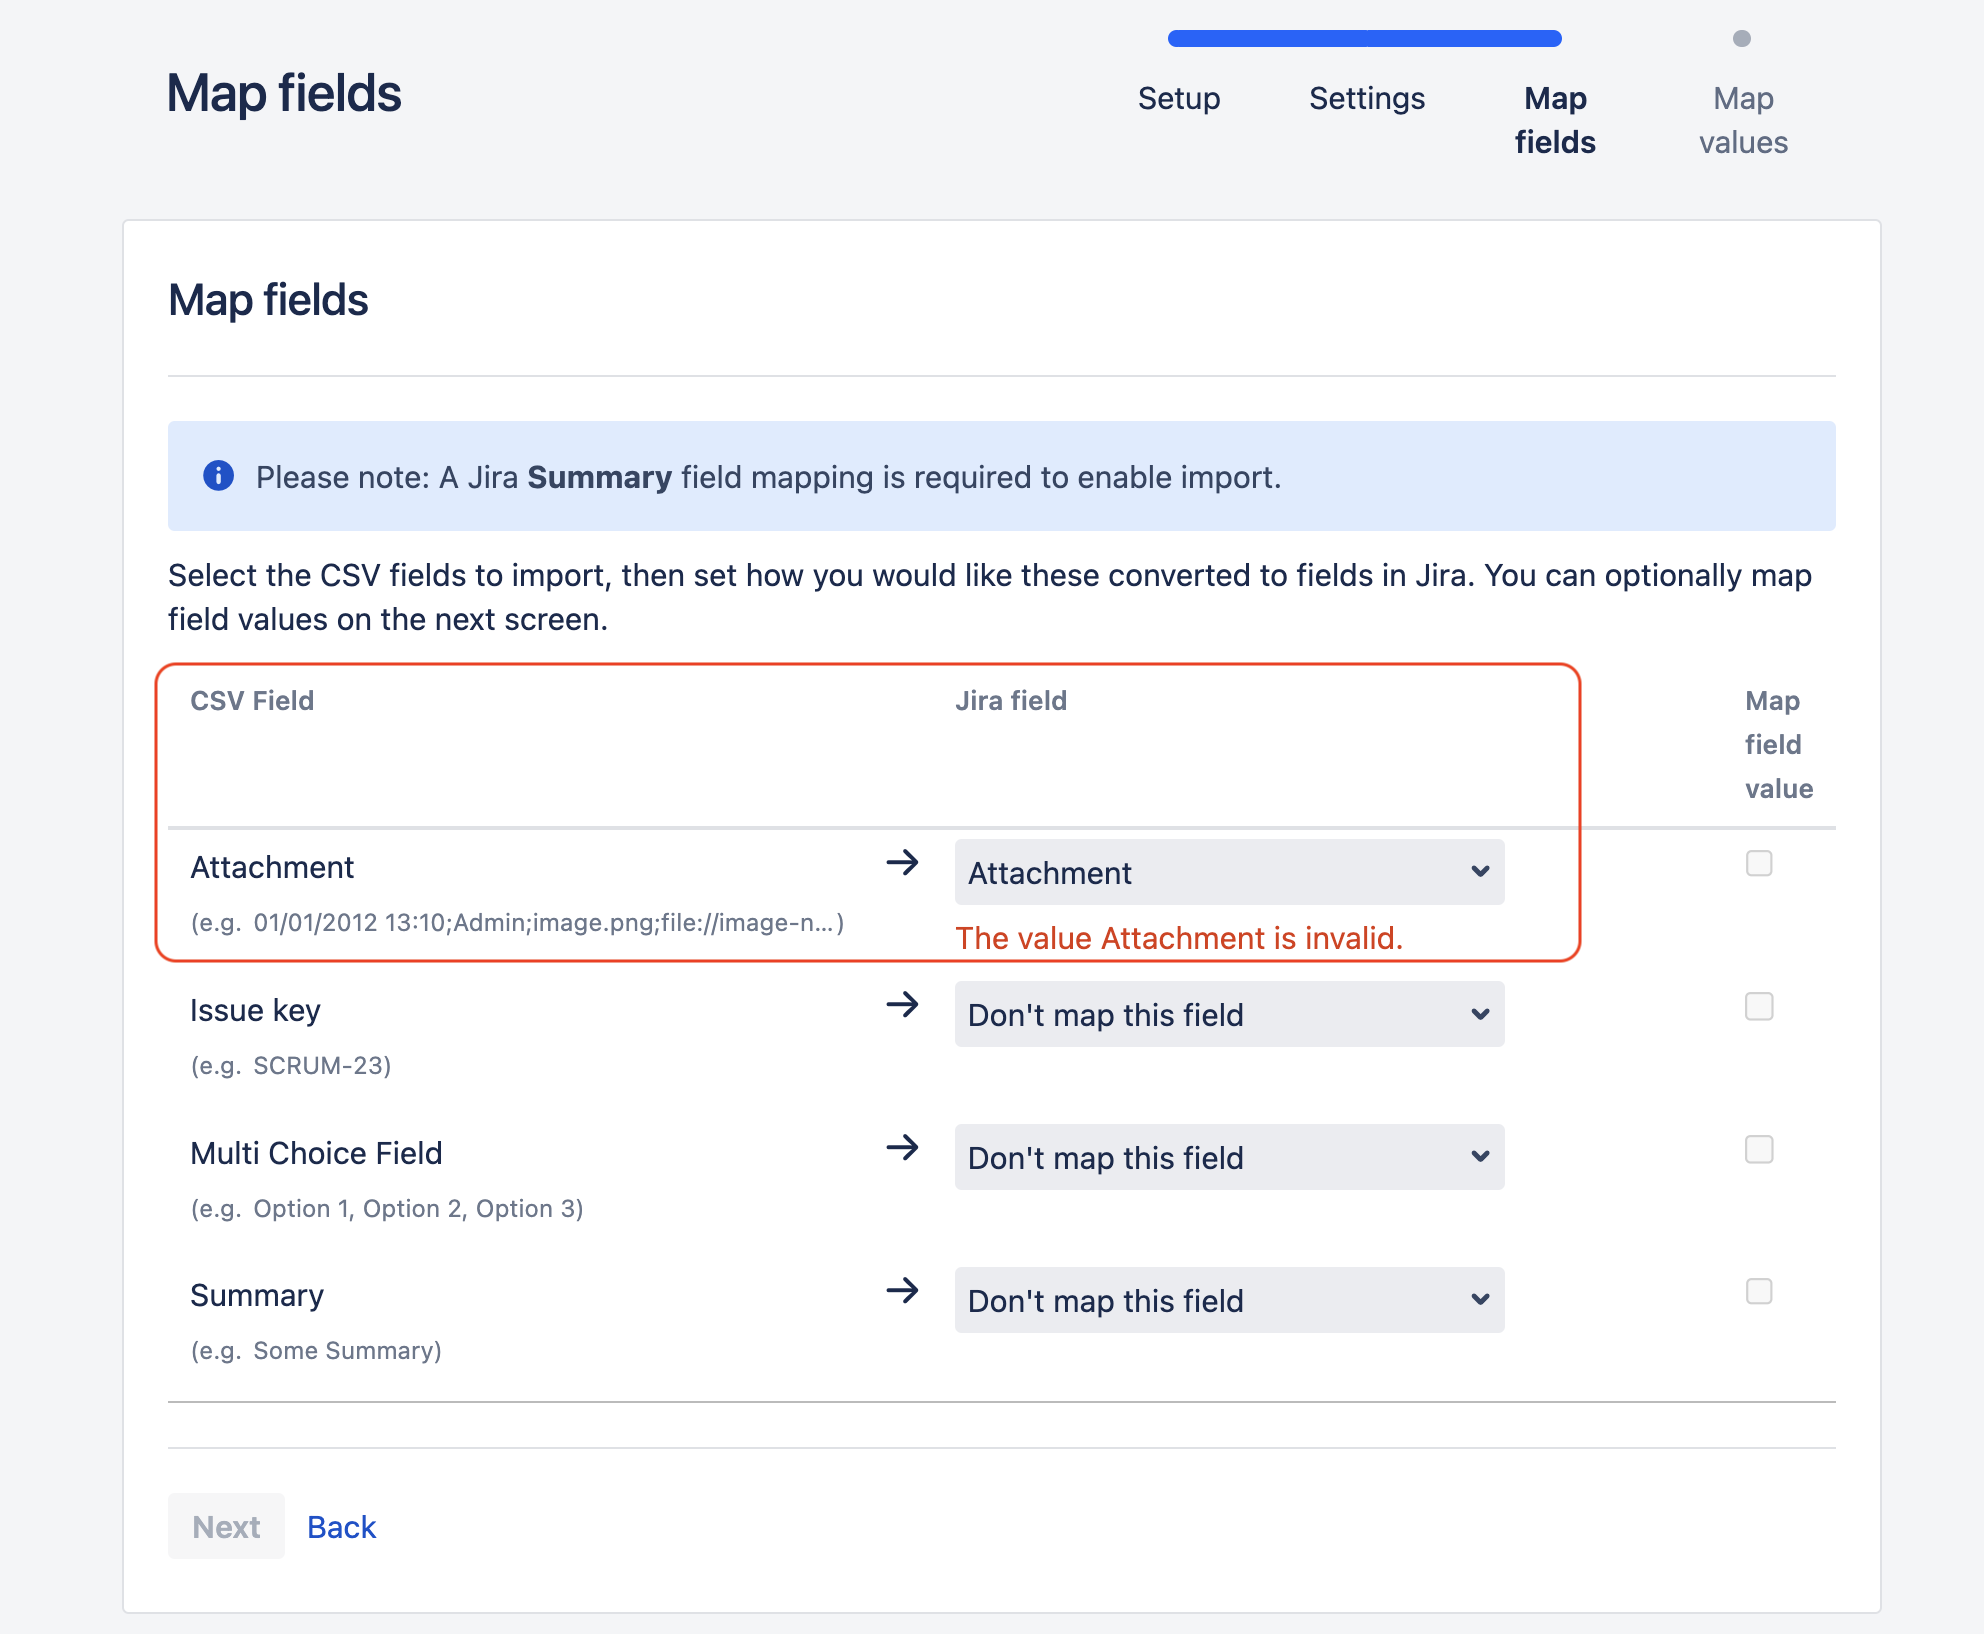
The only CSV importer that allows the import of attachments is the External System Import, which can only be accessed by a Jira System administrator. When using the other importer (the one accessible via Top Bar Menu > Issues > Import issues from CSV), it will not be possible to map fields from the CSV file to the attachment field: this field will not be selectable as illustrated in the screenshot below:
Steps to import attachments as part of the CSV import
Export the Issues from the source Jira instance
Create a CSV file with all the fields as shown below.
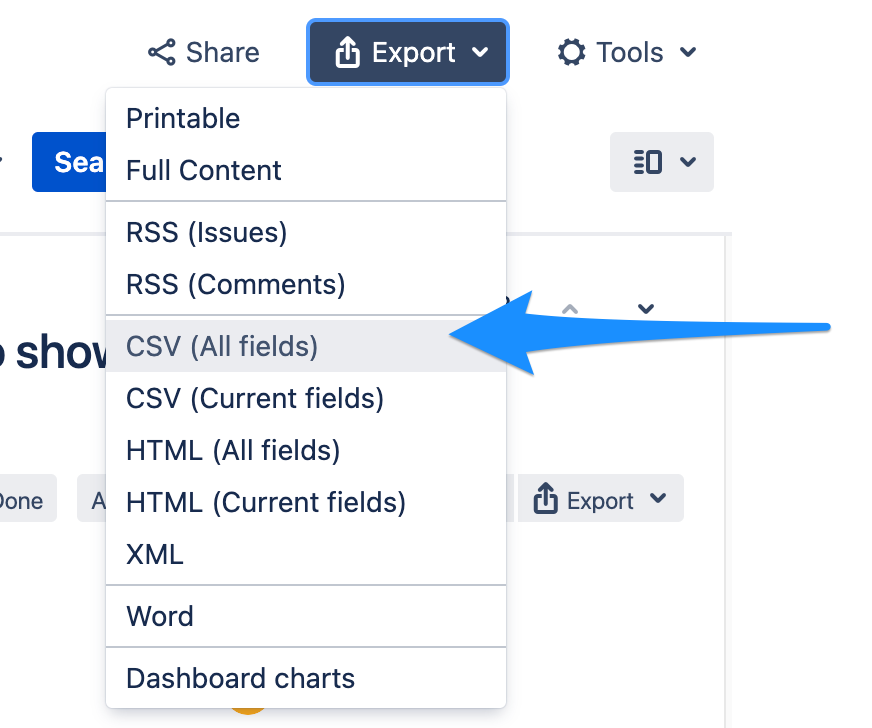
Do a Search of Issues and select the project you want to export.

Create an Export CSV (all fields) from the Search of the project you want to import.
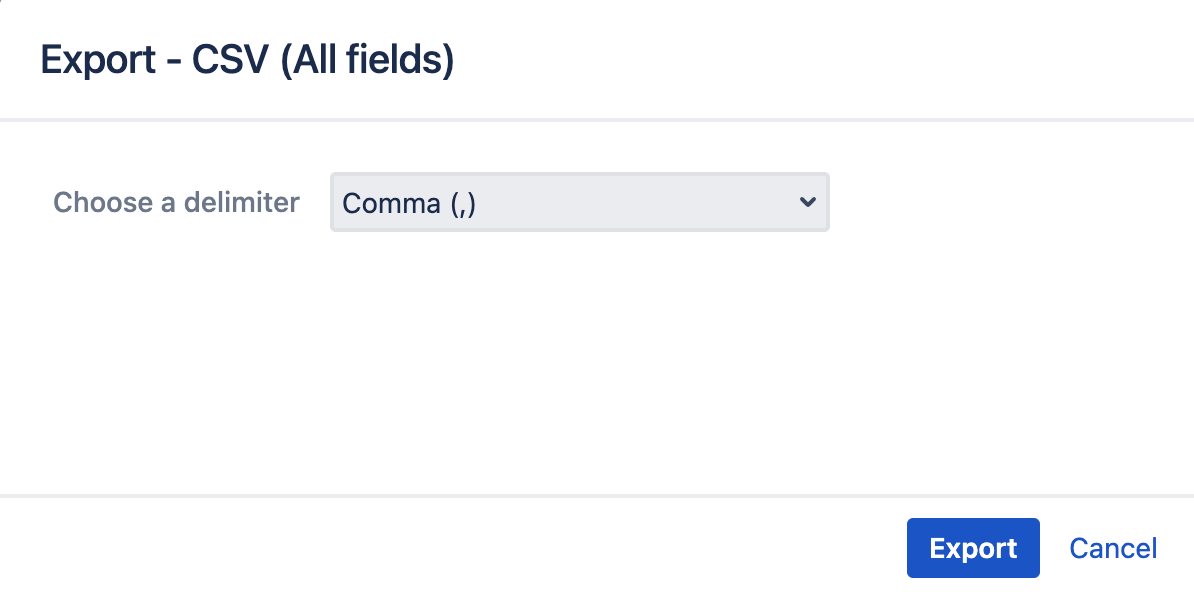
Then do Export after the last screen is been shown.
ℹ️ The Source instance should be able to be reachable from the target instance.
Import the Issues into the target Jira instance
Let's import the CSV file mapping all the fields.
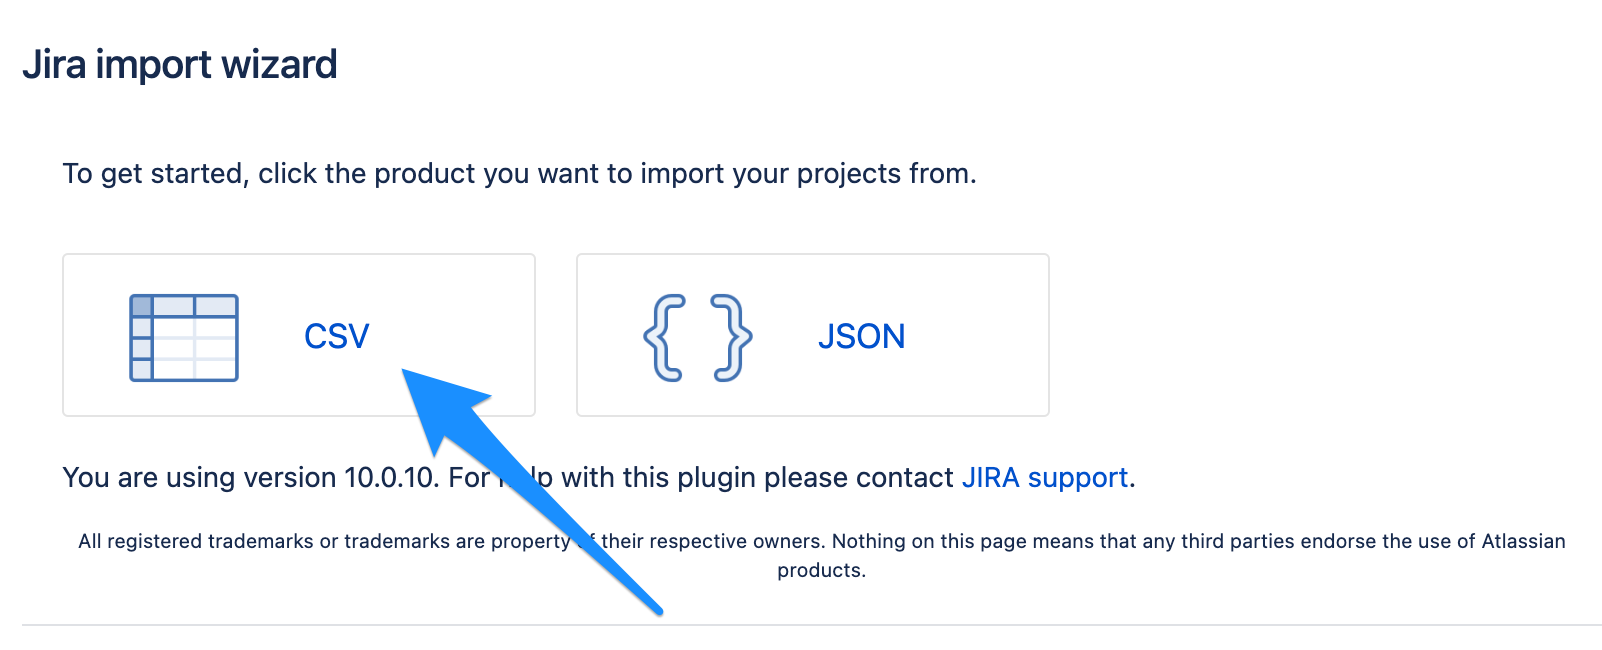
Go to Administration (Settings) > System > Import and Export > External System Import.
Select the type of format to import (in this case CSV)
Choose the File, and then click Next.
In this step either you select a new project or the defined by CSV meaning will try to create the project from the source.
Assign the Fields you want to map, in which you will map the Summary, Assignee, Project key, Project Name, Project Type, and Attachments
There will have a preview of the values, then click Import.
Workaround for attachments failing to be transferred
If the attachments transfer fail, please update the CSV file by following the workaround seen in the suggestion below: add a user and its password (from a user that is able to see the attachment) before the attachment entry in the file. The syntax may be as following (also seen in Jira cloud KB):
14/Feb/19 3:53 PM;admin;image.png;https://<JIRA-Server-Username>:<JIRA-Server-Password>@myjirasite.com/secure/attachment/10000/image.png With that, Jira will be able to transfer the data accordingly.
JRASERVER-72842 - Include syntax for credentials in csv attachment import
In Case the attachment was not migrated by this method, please contact Atlassian Support, with the next items:
Support Zip
CSV file for export.
Description of the situation.
Was this helpful?