How to Map Group ID from Microsoft Entra ID/Microsoft Azure AD to Jira Application Access Group Names
Platform Notice: Data Center Only - This article only applies to Atlassian apps on the Data Center platform.
Note that this KB was created for the Data Center version of the product. Data Center KBs for non-Data-Center-specific features may also work for Server versions of the product, however they have not been tested. Support for Server* products ended on February 15th 2024. If you are running a Server product, you can visit the Atlassian Server end of support announcement to review your migration options.
*Except Fisheye and Crucible
Summary
This article can be treated as a workaround for SAMLDC-77
Solution
Pre-requisite
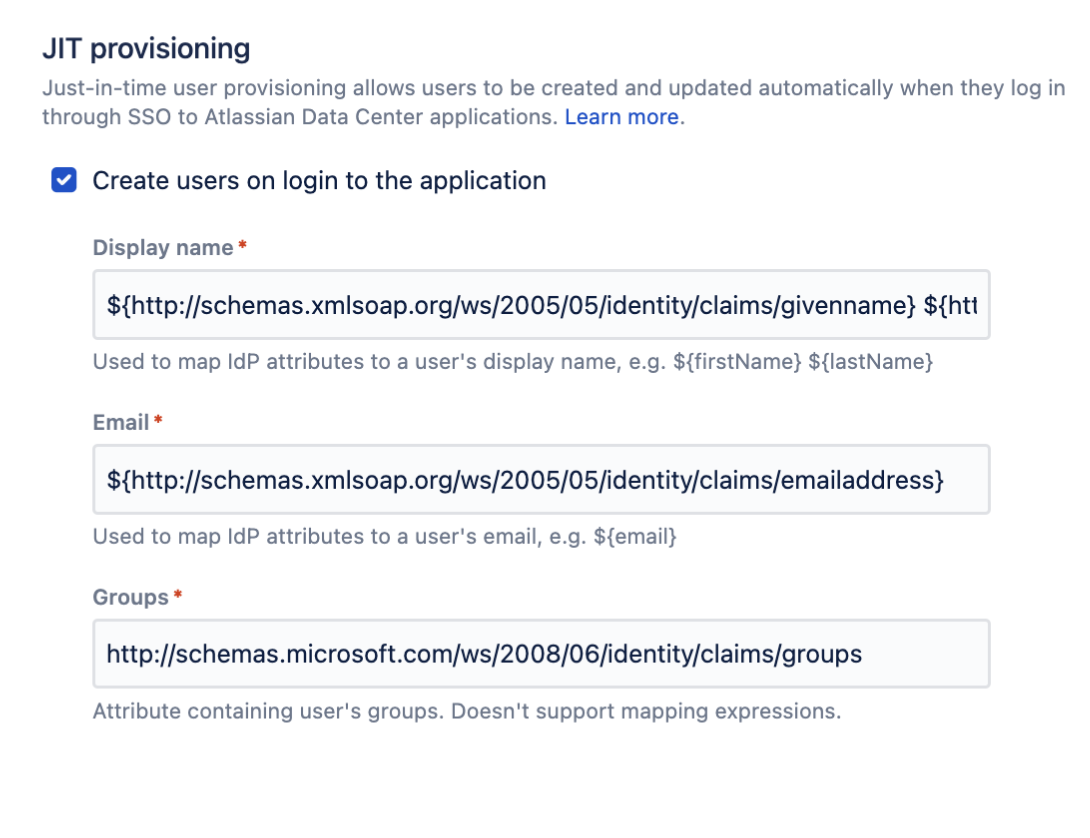
Jira is integrated with Microsoft Azure AD for SSO using SAML 2.0 and JIT provisioning is enabled as per
JIT provisioning is enabled as below so that Azure AD sends group the user is part of as part of the SAML response
https://confluence.atlassian.com/enterprise/jit-user-provisioning-1005342579.html
Problem
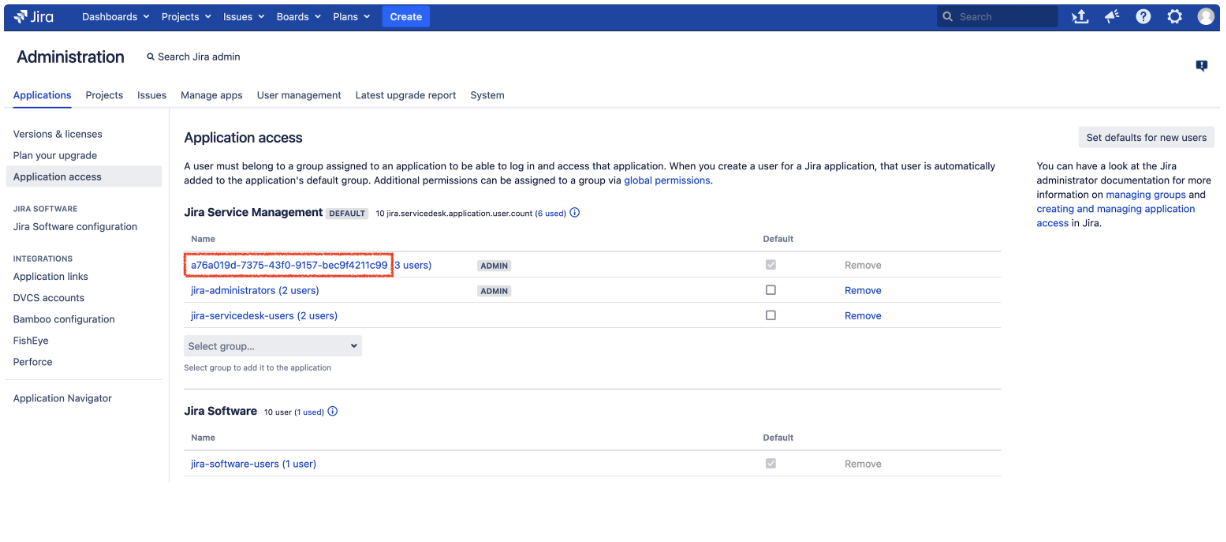
When JIT provisioning is enabled, Azure AD, by default, sends only the group ID (Azure Active Directory Group ObjectId) in the SAML response.
Example Response
...
<Attribute>
  <Attribute Name="http://schemas.microsoft.com/ws/2008/06/identity/claims/groups">
    <AttributeValue>a76a019d-7375-43f0-9157-bec9f4211c99</AttributeValue>
  </Attribute>
</Attribute>
...
By configuring this setup, you must grant Application Access to the Group ID “a76a019d-7375-43f0-9157-bec9f4211c99” provided in the SAML response for users to access Jira. This default behavior complicates the identification and management of group memberships.
Workaround/Solution
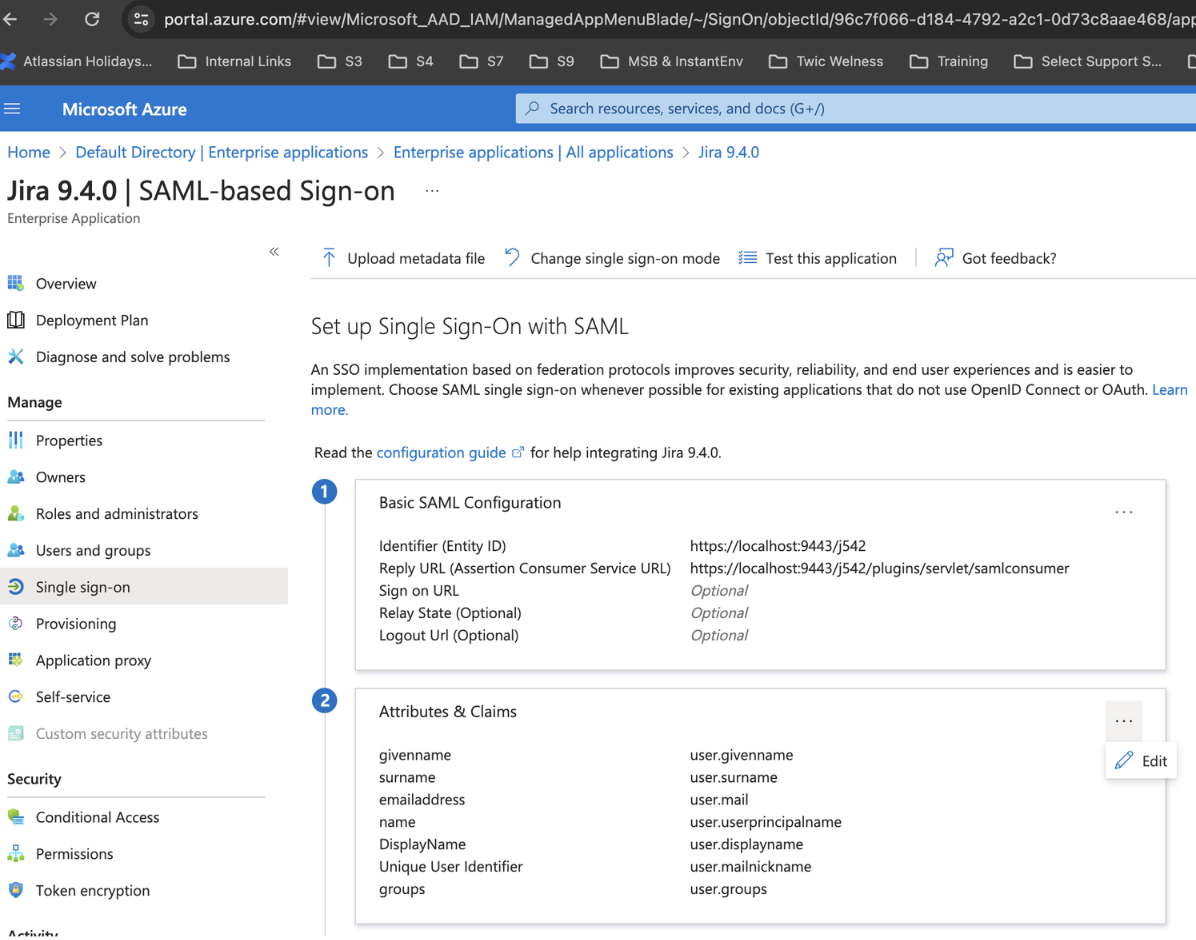
The Group ID can be mapped to the "Application Access" Group name in Jira as below on the Azure AD:
Navigate to the https://portal.azure.com/
Click on Microsoft Entra ID (Formely Azure Active Directory).
Select “Enterprise applications” and choose the respective SSO Application.
Navigate to “Single sign-on” and Edit the “Attributes and Claims”
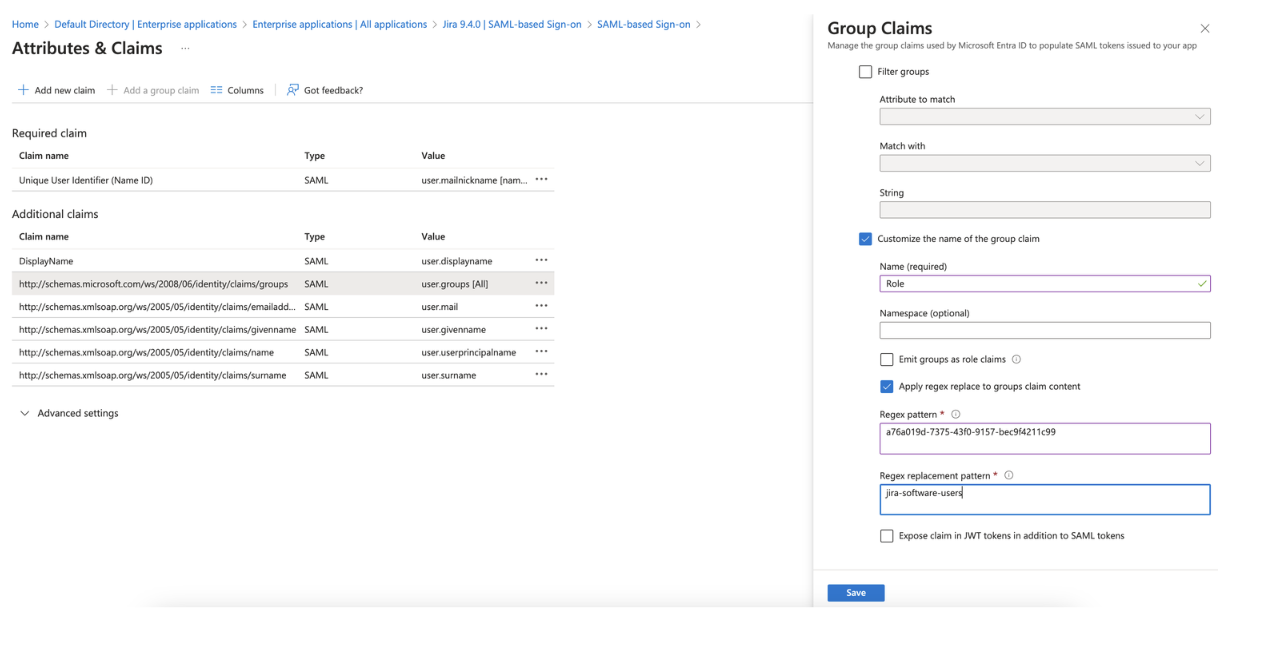
5. Select the Group Claim Attribute. The Claim name will be “http://schemas.microsoft.com/ws/2008/06/identity/claims/groups” . Then on the right window, select below configurations
Which groups associated with the user should be returned in the claim? - All groups
"Customize the name of the group claim": Check this box
“Name (required)” - Give any meaningful name for “Name (required)” (e.g., "Role")
"Apply regex replace to groups claim content" - Check this box
"Regex pattern": Pass the respective Group ID for mapping.
"Regex replacement pattern" - Pass the Application Access Group name (e.g., "jira-software-users") and click Save
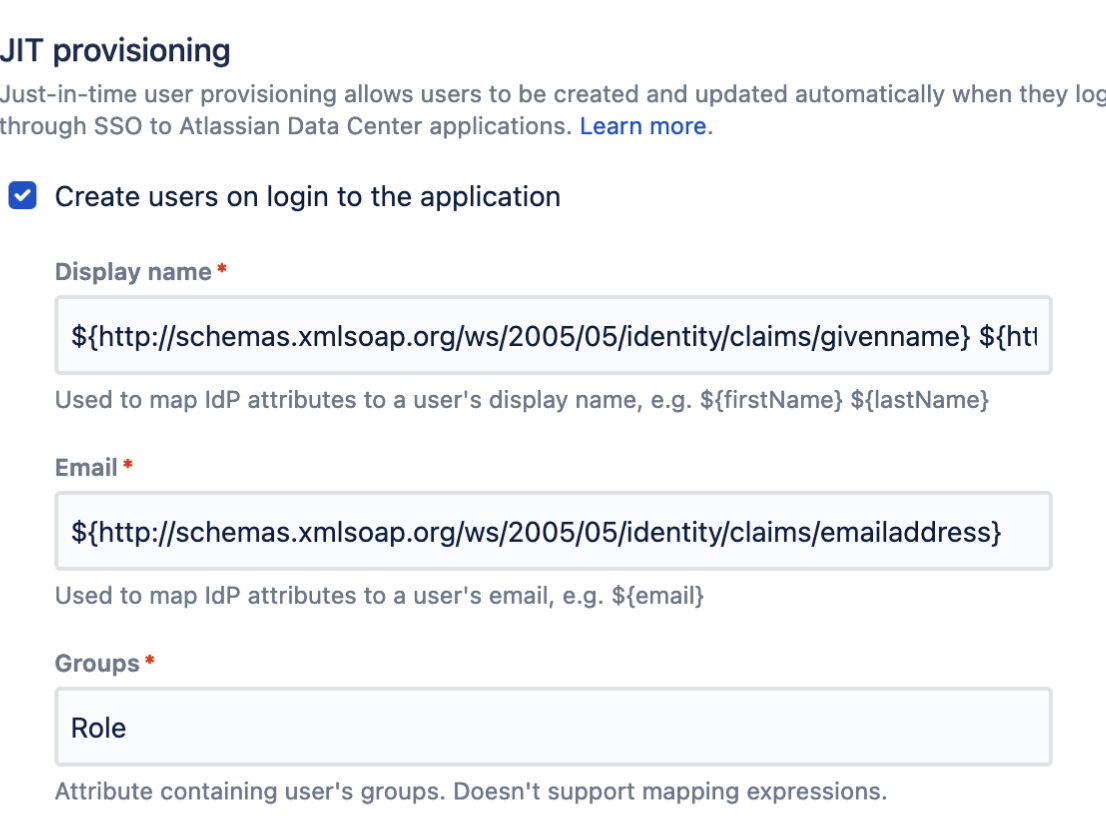
6. Return to the Jira Application, edit the SSO setup, and navigate to the JIT provisioning section.
7. Enter the "Groups" as "Role" (or whatever was set for Name as part of the Group Claim setup on Azure).
Now, when logging in to Jira with the SSO user, the Group will be sent as part of the SAML Response.
Example Response
...
<Attribute>
  <Attribute Name="Role">
    <AttributeValue>jira-software-users</AttributeValue>
  </Attribute>
</Attribute>
...Was this helpful?