How to edit Quantity attribute of Assets Objects using automation for Assets in Cloud
Platform Notice: Cloud Only - This article only applies to Atlassian apps on the cloud platform.
Summary
For Assets Automation, the Edit Object action can only be used for the Object trigger. JSDCLOUD-9964—Assets Automation: Add support for copying multiple values of Asset data using Automation is the feature request raised to allow the action to be used for another trigger, too. This article is the workaround for this limitation, which is editing the objects using the Send Web Request action and using the Insight REST API.
Environment
JSM Assets Cloud Premium
Scenario
Admin would like to update Object "Quantity" Attributes when Assets objects are selected in an Assets field in JSM issues. For example, when the user selects a Computer asset, the Quantity atribute is reduced by one.
Solution
Create Object Schema and Object type for Assets.
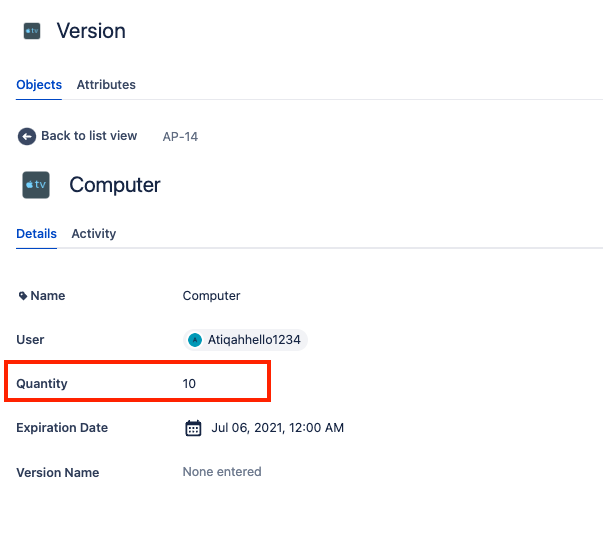
In the Assets object type, add Quantity attribute and update it with the quantity of the asset, for example, 10. Below is my example:-
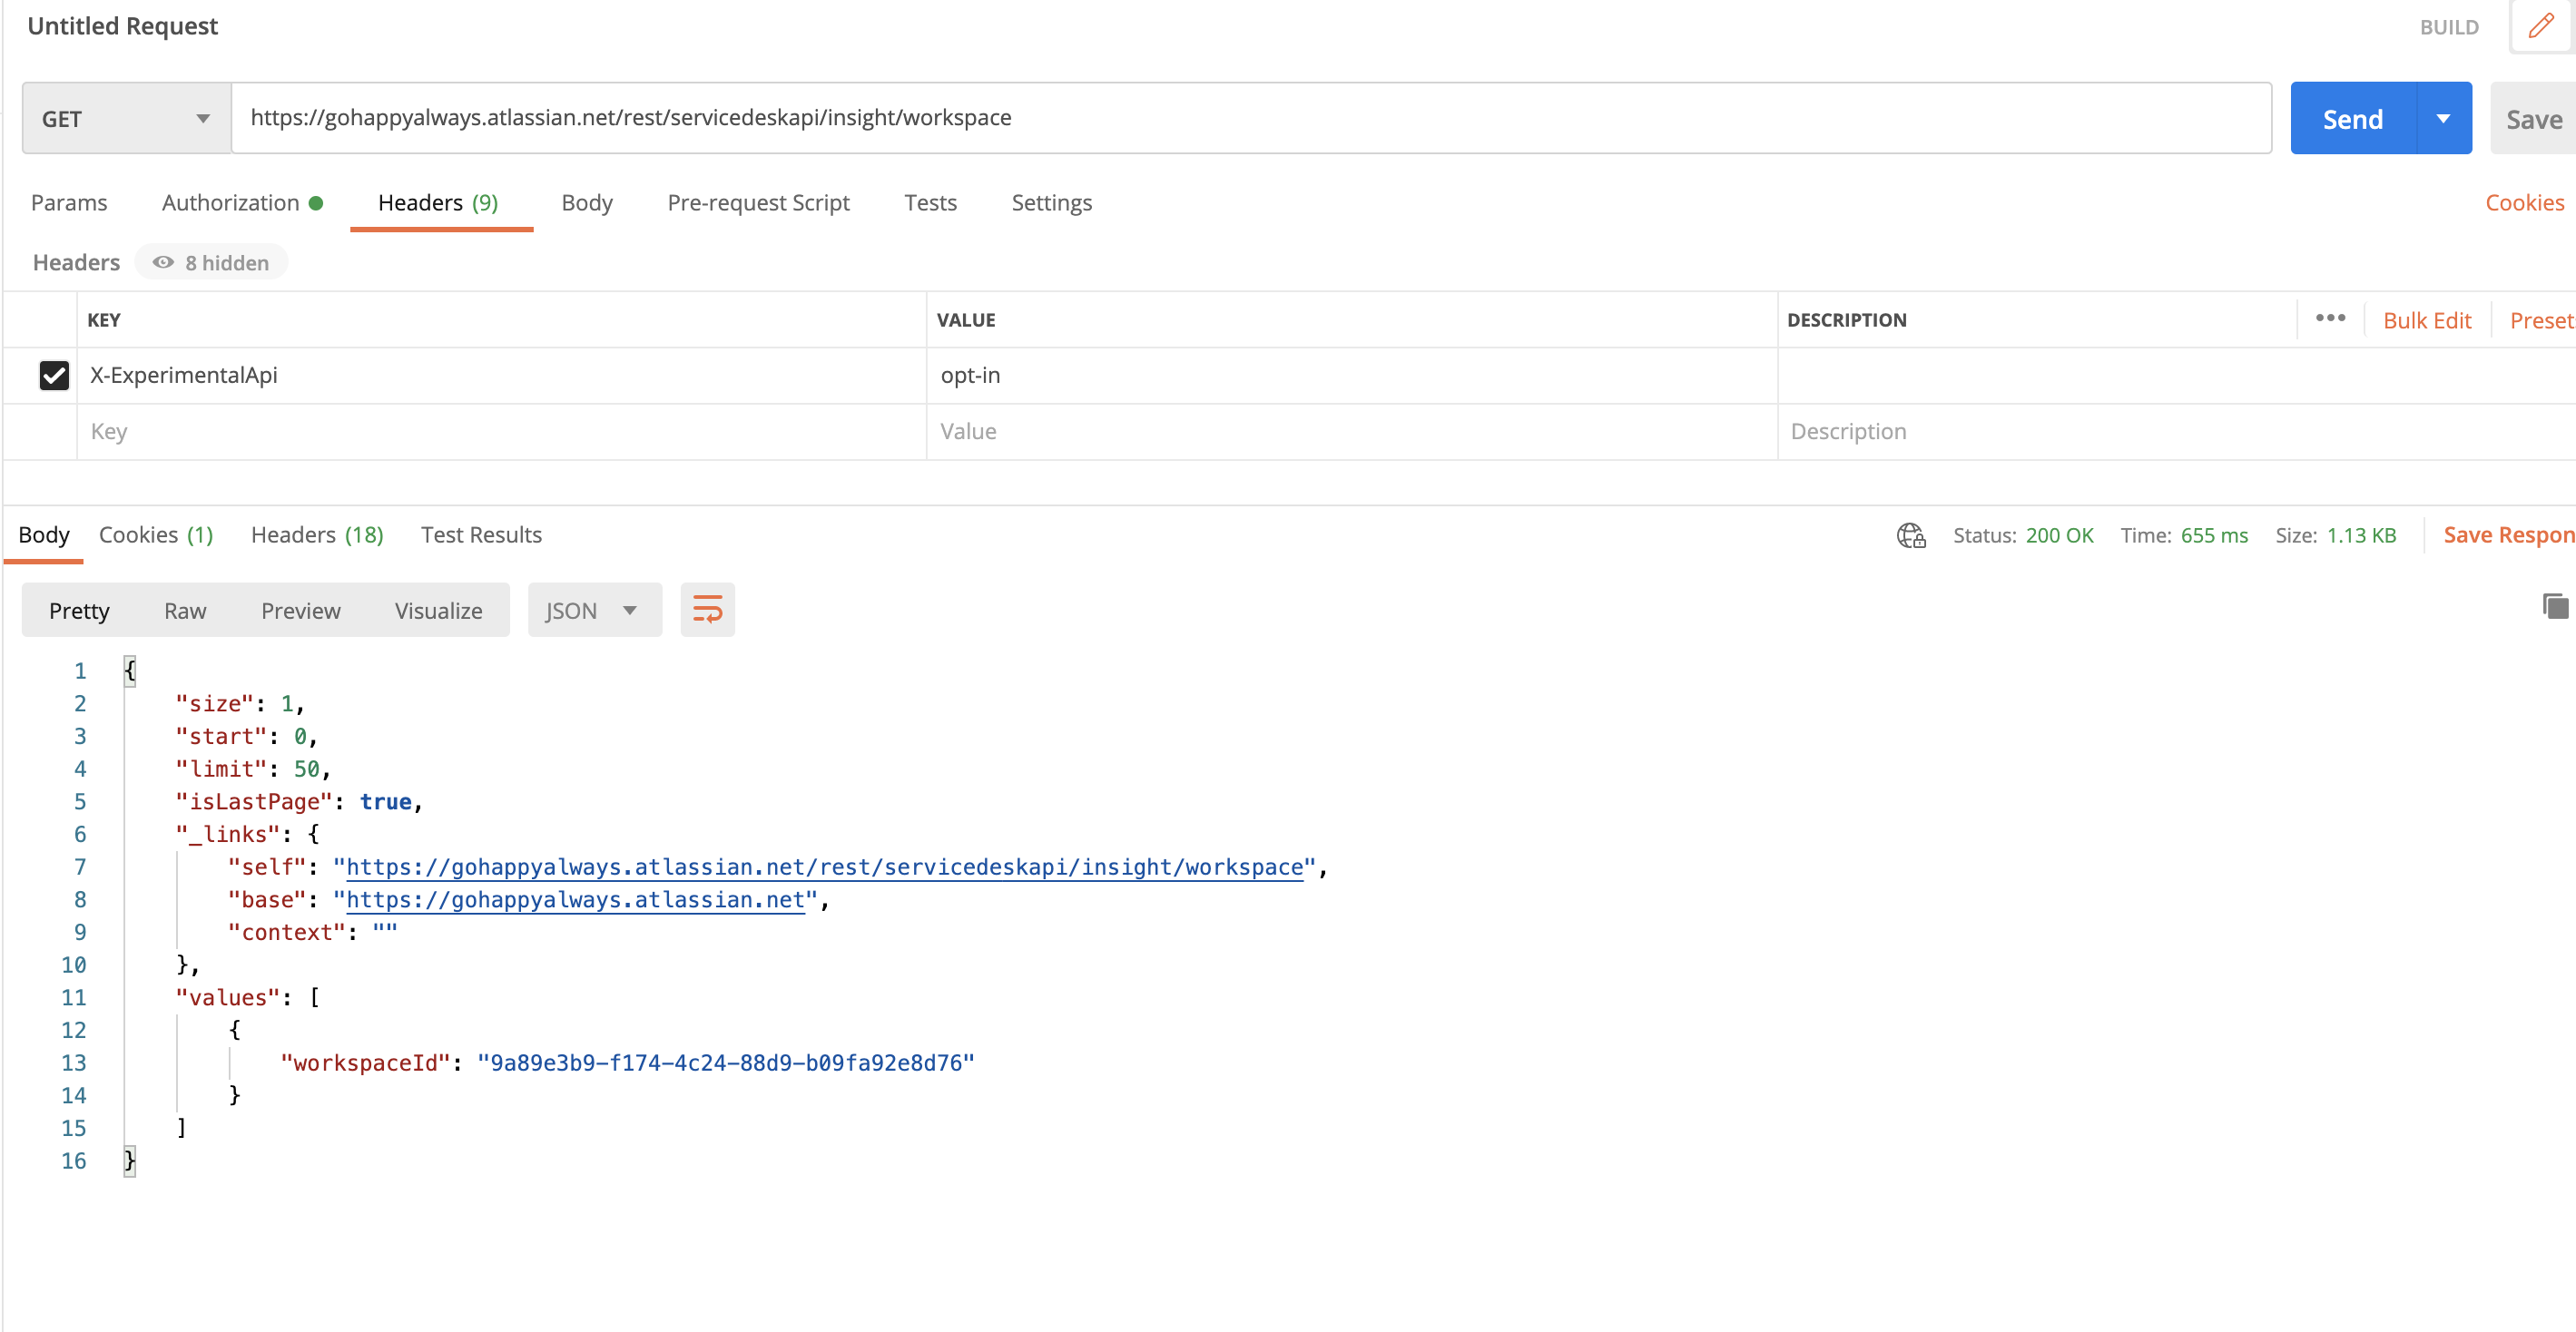
Find the Assets workspaceId , using query below using Postman . Save the workspaceId value for later
ℹ️ If you don't have API token, follow the steps in Manage API tokens for your Atlassian account .
https://<JSM Premium Site Name>.atlassian.net/rest/servicedeskapi/assets/workspace

Note that you will have to add the header X-ExperimentalApi : opt-in when calling this endpoint.
From Postman, it will look as below :-
Create Assets Custom field and add to JSM screen. For example, the name is Insight Assets.
Then, create automation as below:-
Choose Issue Created trigger
Then, add Re fetch issue data action
Then, add conditions to verify if the field is not empty.
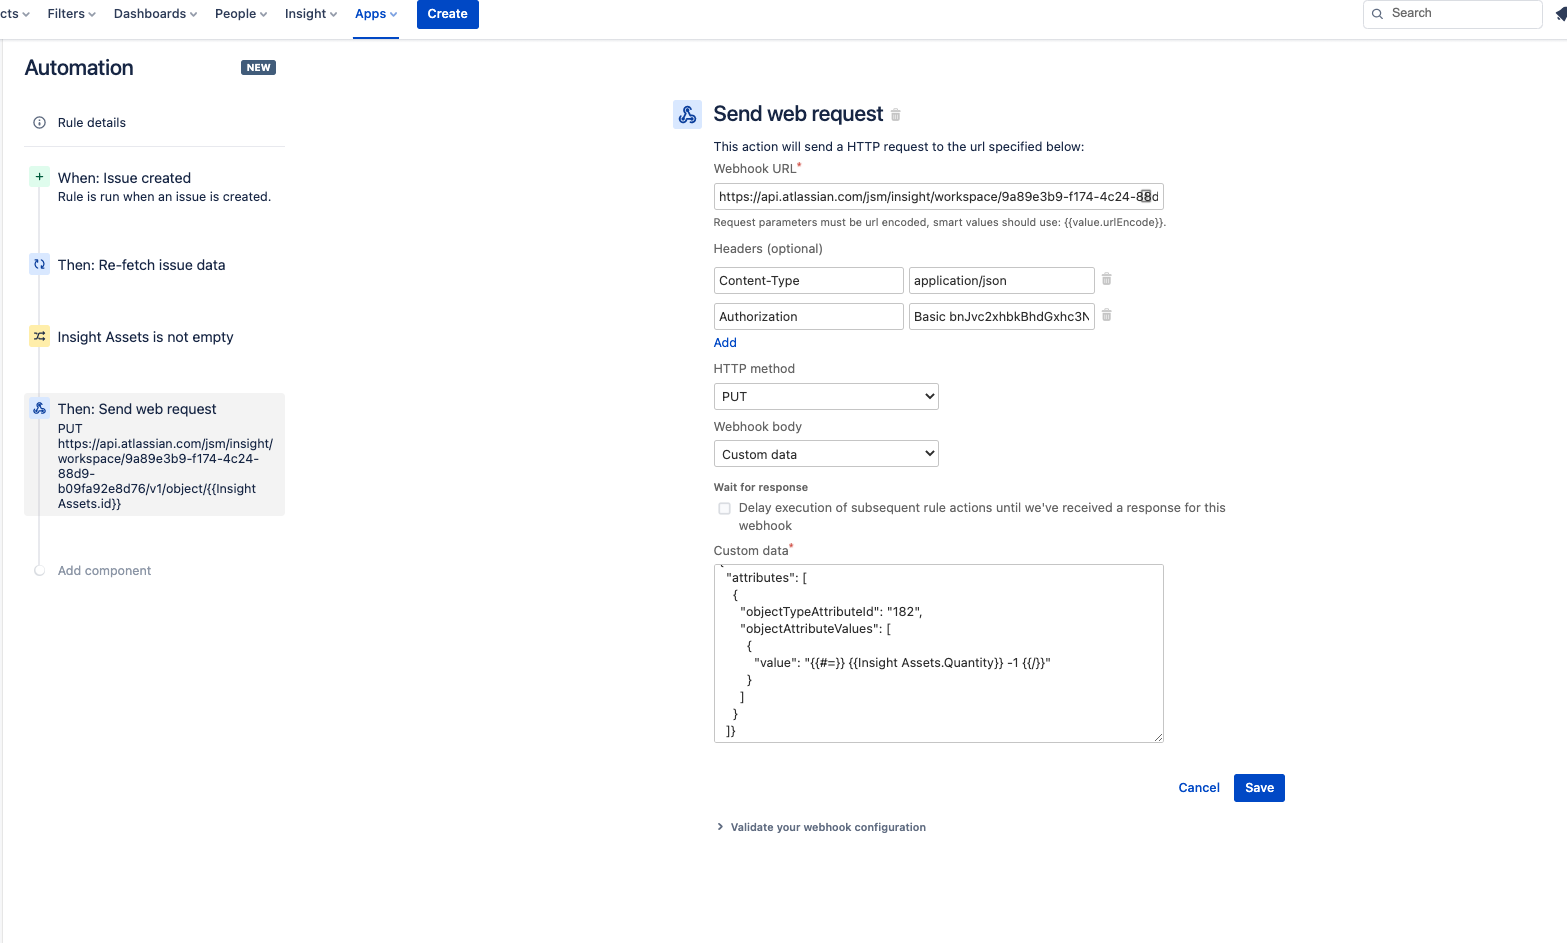
Then, add Send Web Request trigger.
Use the Webhook URL as below . Update the workspaceID and Assets field name accordingly:-
https://api.atlassian.com/jsm/assets/workspace/<key in the workspaceID>/v1/object/{{<Key in the Assets field name>.id}}Add the Headers as per screenshot:-
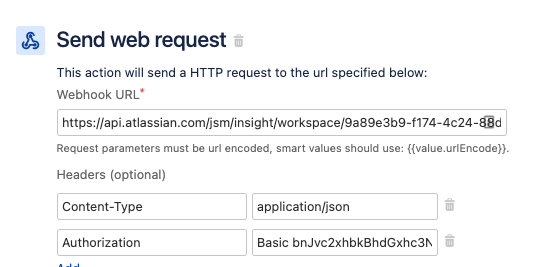
The Authorization header , after Basic , insert the "emailaddress:API Token" value that are encoded to Base64 . For example , if the value is "abc@test.com:123456" , paste it to the Base64 page and encode it.
Use PUT for the HTTP method and Custom Data for the webhook body.
Use the Custom data as below :-
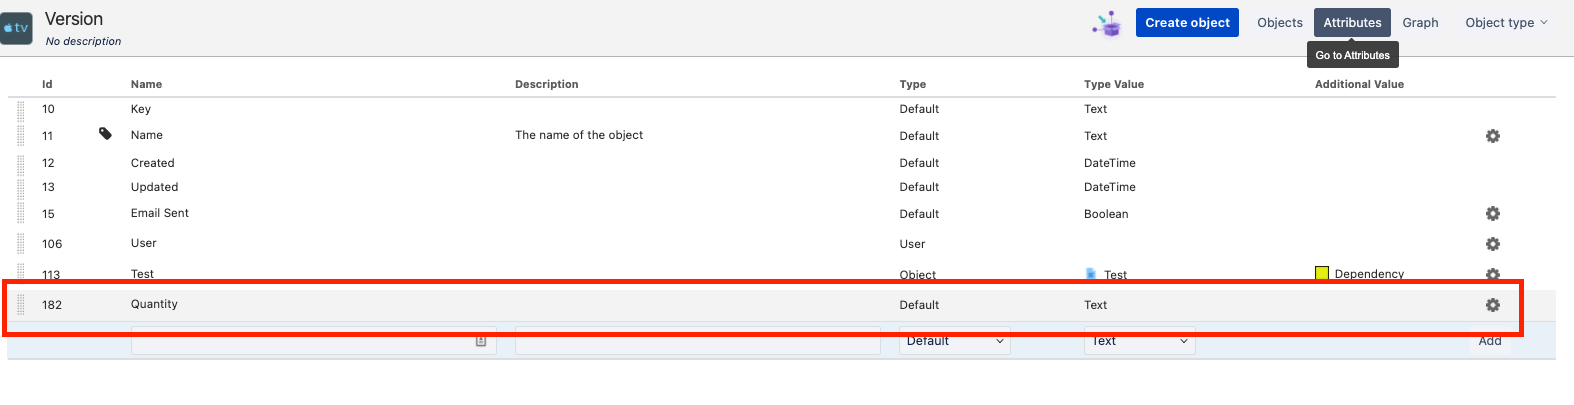
{
  "attributes": [
    {
      "objectTypeAttributeId": "<Attribute ID>",
      "objectAttributeValues": [
        {
          "value": "{{#=}} {{<Assets Field name>.Quantity}} -1 {{/}}"
        }
      ]
    }
  ]}
To get the Attribute Id , open Insight and go to Object Type > Attribute . The Id beside the Quantity name are the Attribute ID. Based on my example screenshot above , my id are 182.
Once done, Publish the workflow. It will look as screenshot :-
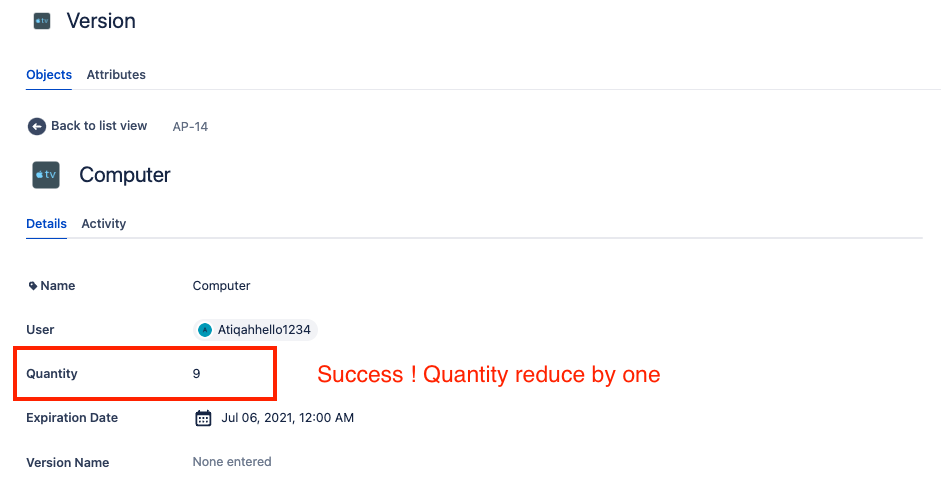
Lastly, the moment of truth. Test it
ℹ️
This automation also can be used to update attributes with other smart values or text. For example, value from another custom field. Feel free to explore the smart value at
Advance your rules with smart values
documentation.
Was this helpful?