Change the default issue type displayed on the Create Issue screen in Jira
Platform Notice: Data Center Only - This article only applies to Atlassian apps on the Data Center platform.
Note that this KB was created for the Data Center version of the product. Data Center KBs for non-Data-Center-specific features may also work for Server versions of the product, however they have not been tested. Support for Server* products ended on February 15th 2024. If you are running a Server product, you can visit the Atlassian Server end of support announcement to review your migration options.
*Except Fisheye and Crucible
Summary
The first time a user creates an issue in a Jira project, the default issue type will be used. This is a setting that can be controlled on the project level, and can be adjusted to suit your requirements.
⚠️ Please note that the default issue type setting only takes effect on the first time an issue is created in a Jira project
The next time the same user creates a new issue, the last issue type used will be displayed in the Create issue screen. That issue type will overwrite the default issue type configured in any project.
This behavior exists due to the bug JRASERVER-65439 and is fixed in Jira 9.10.0 and later.
What "default issue type" actually means:
The default issue type is set via two mechanisms in the issue type scheme: (1) selecting a value from the Default Issue Type dropdown, or (2) placing the desired issue type at the top of the scheme's ordered list. Both methods are covered below.
The setting is per-project, not per-user. There is no per-user override — all users in the project see the same default.
Sub-tasks cannot be set as the default issue type — the Default Issue Type dropdown only shows standard issue types.
The default only applies the first time a user creates an issue in a project — see the existing note below the procedure for full details and version-specific behaviour.
Environment
Jira Data Center on 8.0.0 or any higher version
Set default issue type in a project
In this example, we will be setting the default issue type to "Story."
Log into the Jira application as a Jira administrator
Select Projects from the Top Bar menu and choose the appropriate project
Select the ⚙cog icon at the bottom left corner, to show the Administration panel for the project
Select Issue Types from the Administration panel
Select Actions > Edit Issue Types
Locate the Default Issue Type field > Select the appropriate Issue type you would like to display as default
In this example, we will pick "Story."
Re-order the Issue Types for Current Scheme to place the Issue type you would like to display as default right on top of the order
You can drag and drop the boxes to re-order them
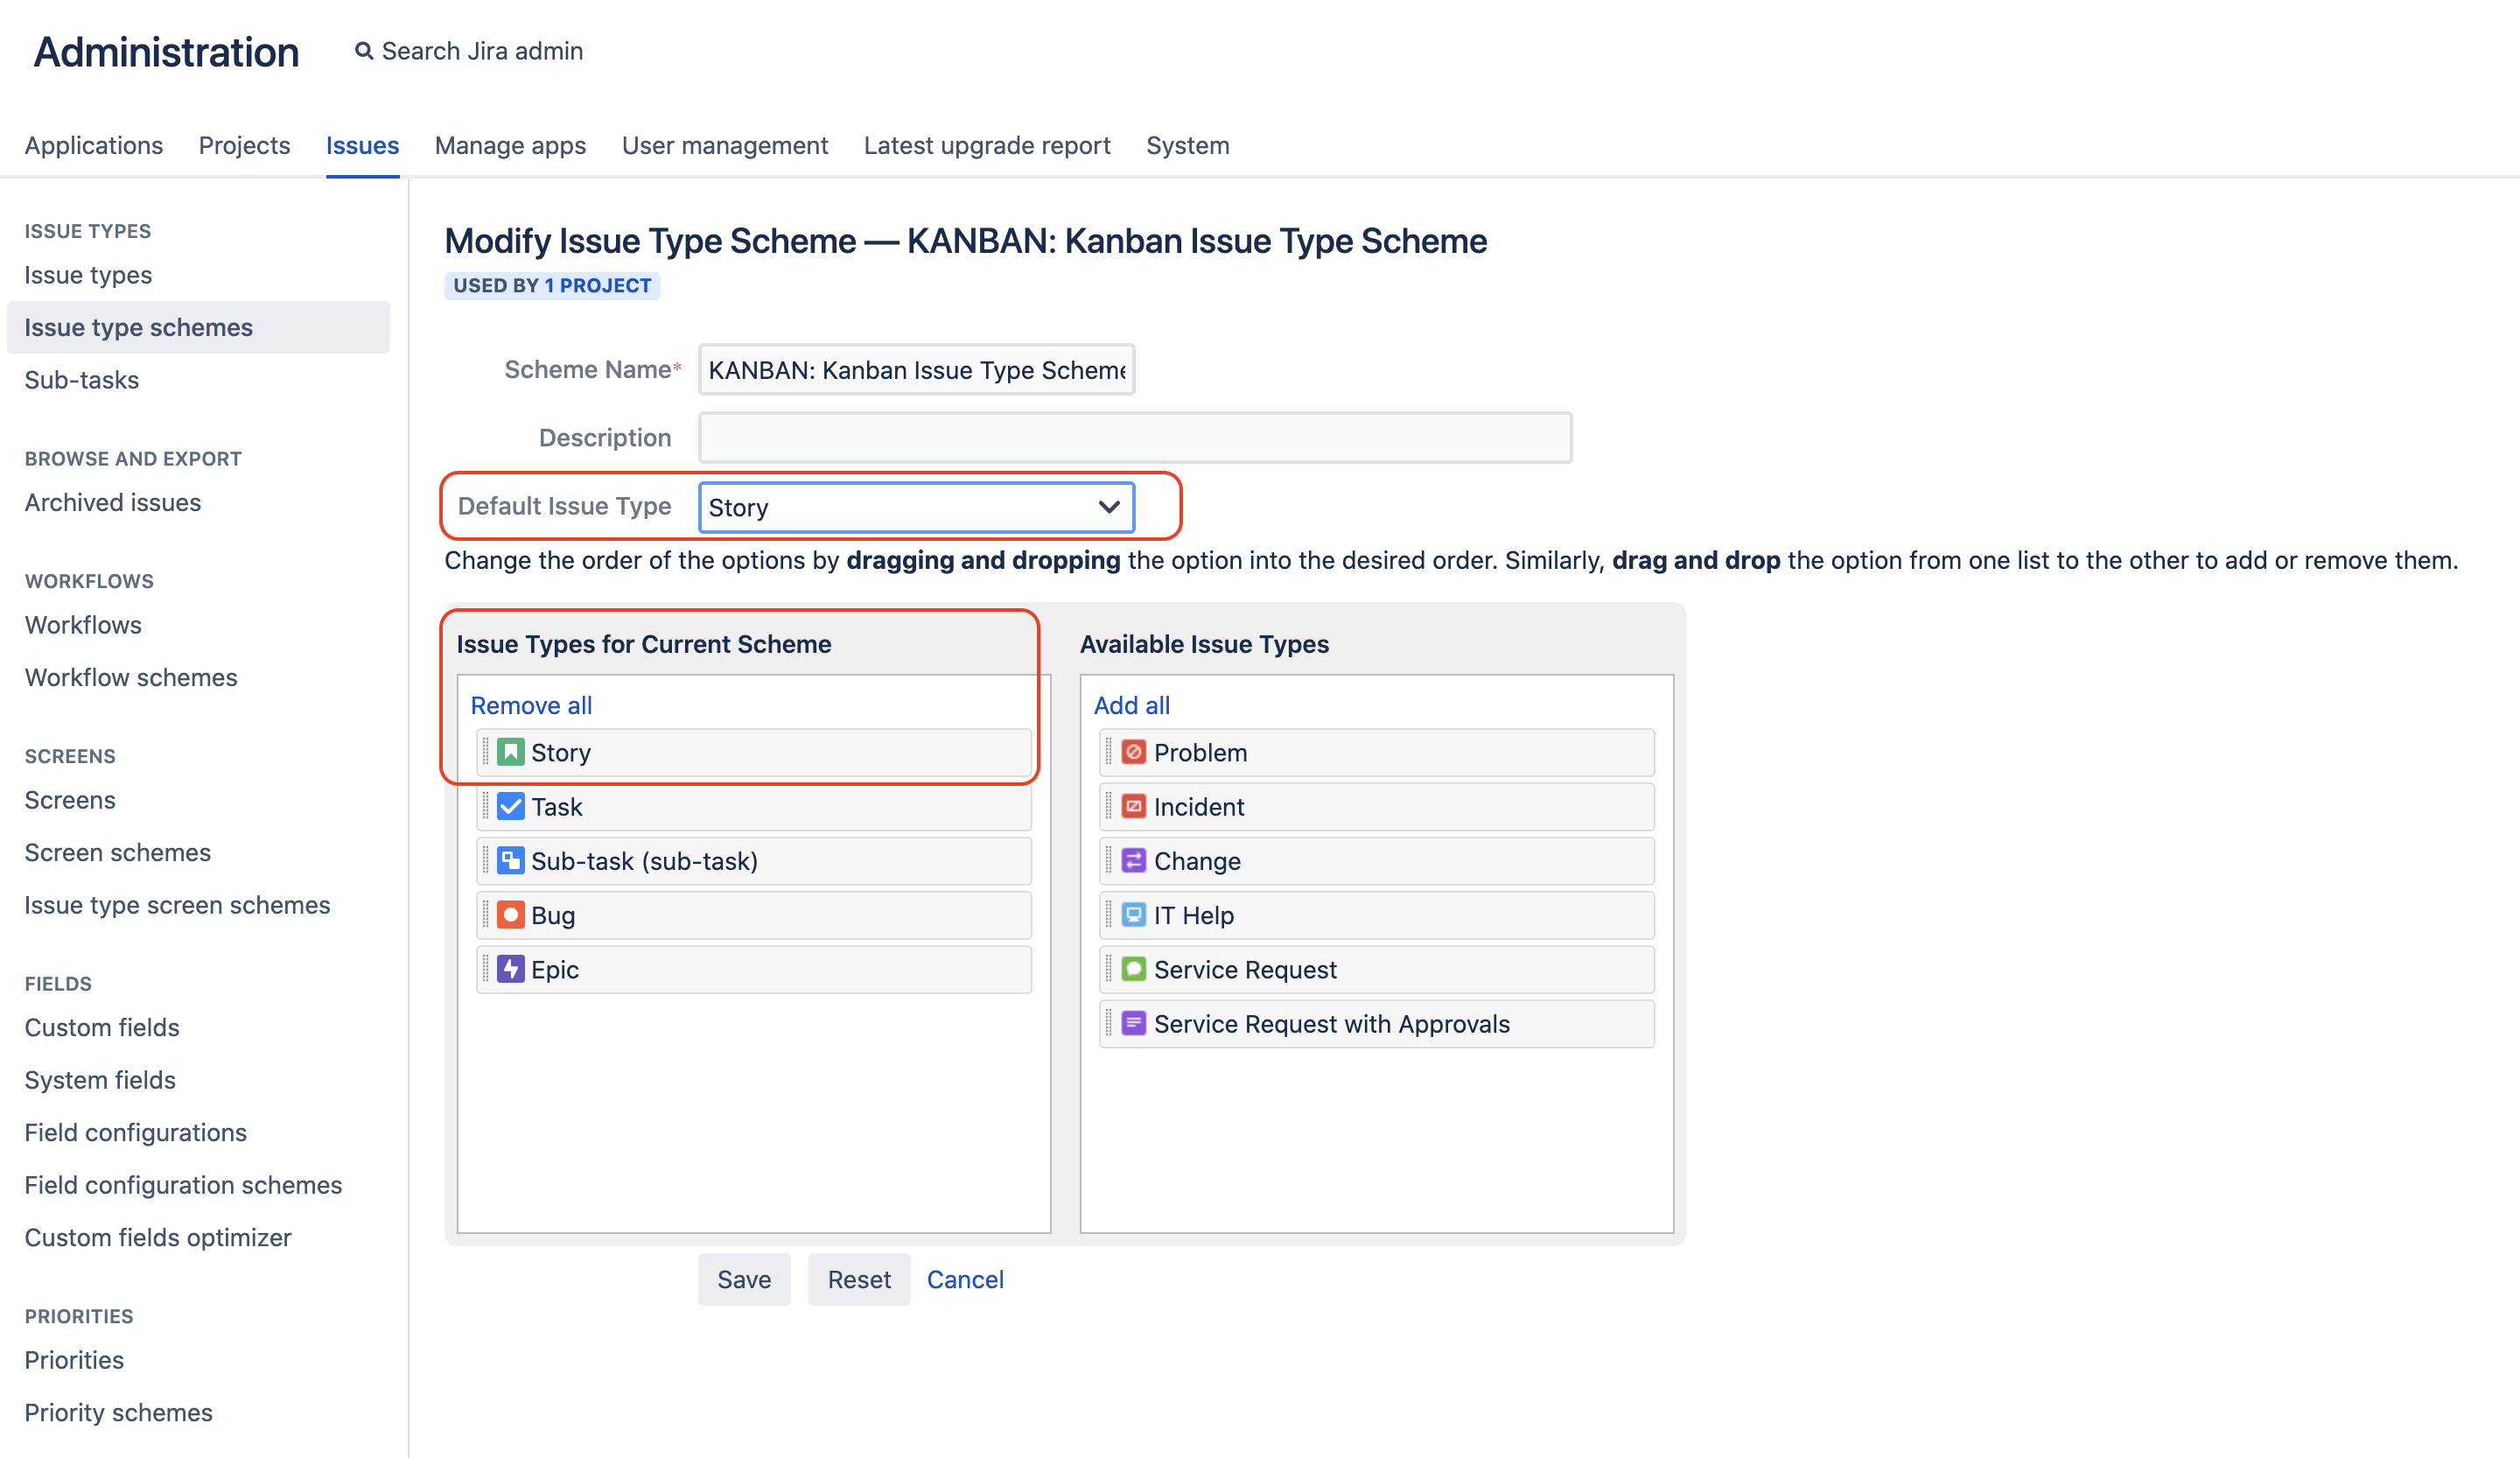
Select Save
Verify the change:
Open the Create Issue dialog from a project that uses the updated scheme.
Confirm the correct issue type is pre-selected in the Issue Type dropdown.
If you are testing with a user who has previously created issues in this project, use a different user account for verification.
Note: Jira DC clusters on version 9.10.0 and below
The last-used issue type is stored server-side per user — incognito windows will not bypass this behaviour. On 9.10.0+, this is no longer an issue.
When this won't apply:
The project uses a third-party app that replaces the standard Create Issue dialog with a custom UI.
The issue is created using a template button (e.g. "Create epic" in the classic board experience) — these have a hardcoded issue type that bypasses the scheme default.
The Create dialog is opened from a Scrum board or backlog — Jira pre-selects Story (or the board's context-bound type) regardless of the scheme default.
Was this helpful?