Bulk add custom field options with the Jira CSV Import tool
Platform Notice: Cloud Only - This article only applies to Atlassian apps on the cloud platform.
Summary
It is not well known that you can add multiple options to a Select List (multiple choices) custom fields, via a .csv External System Import. This article aims to shed some light on this process as it can assist admins in creating/updating this type of field.
Solution
Prepare the CSV file
To be able to add multiple options to the custom field, you will need to add as many columns as options you want to add to the field to the CSV file. Each of these column will include the field name in the header row, and the option in the non header row.
For example:
Let's assume that you have a Select Field custom field called "Multi Choice Field", and that you want to add 3 values to this field (Option 1, Option 2 and Option 3) in the issue key SCRUM-23
To update this field using the CSV import, you will need to have in the CSV file:
1 column which includes the issue key of the issue that you wish to update
1 column which includes the issue summary (this field is mandatory for the import to work)
3 columns, which each include 1 option to add to the custom field
The CSV file will look like this:
Issue key,Multi Choice Field,Multi Choice Field,Multi Choice Field,Summary
SCRUM-23,Option 1,Option 2,Option 3,"Some Summary"
Import the CSV file
To import the data, follow the steps outlined in this article, making sure to map our three columns to the appropriate fields. During the CSV import, you will go through the steps below:
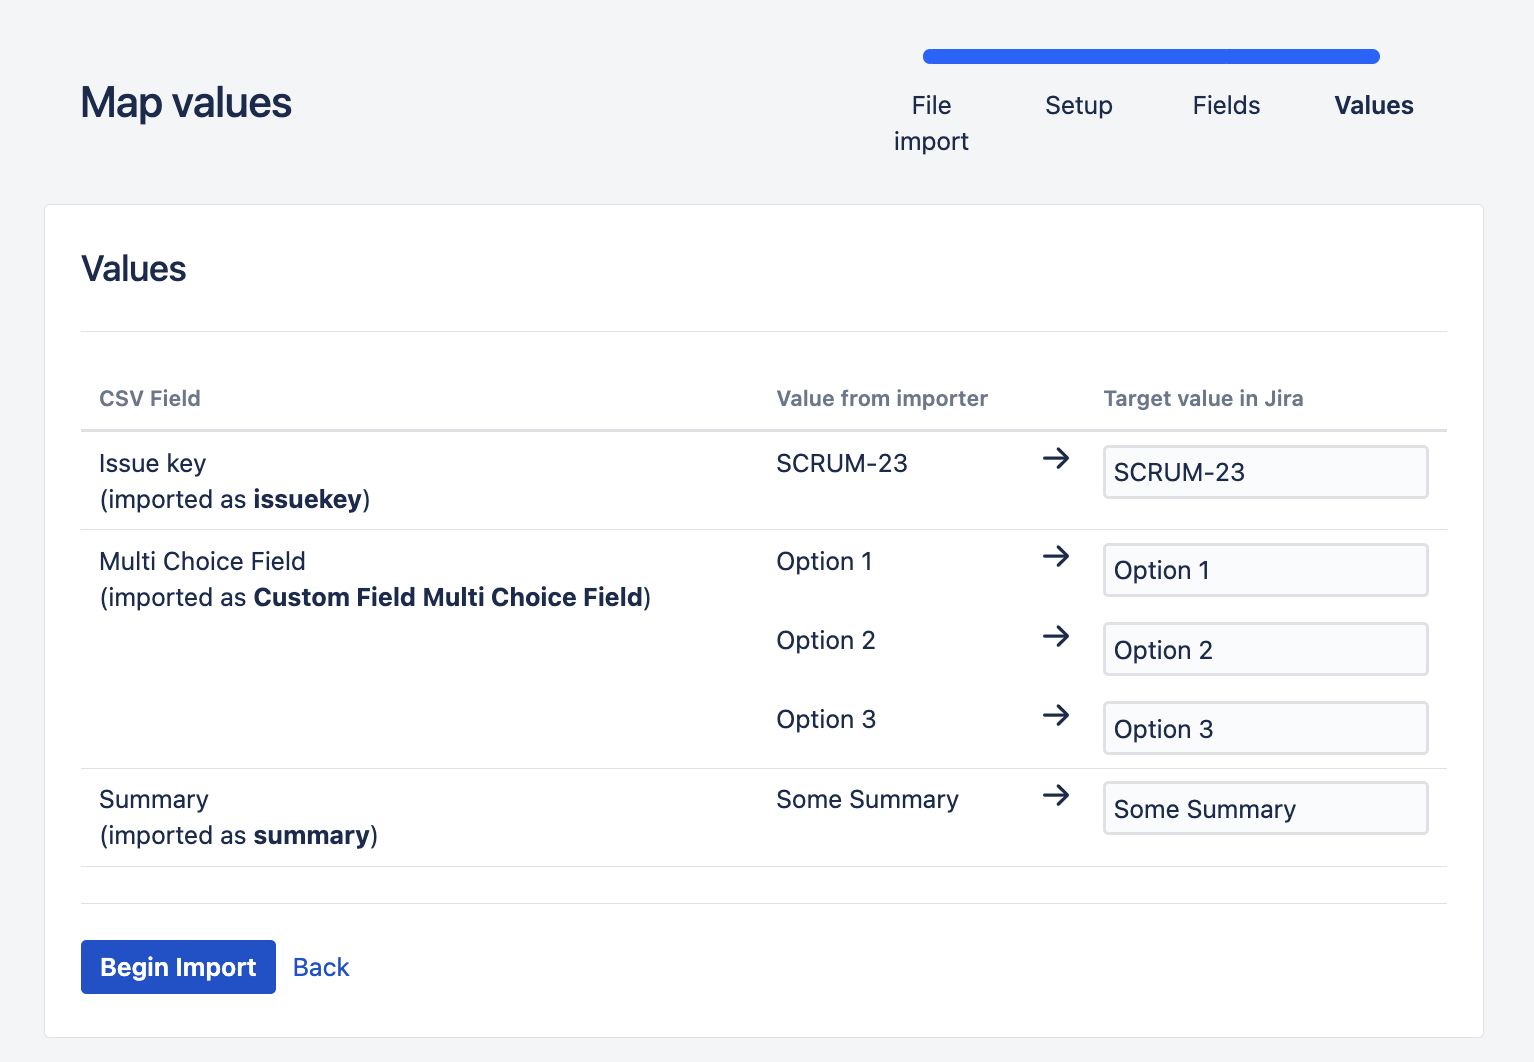
Map the fields listed in the CSV file to the fields in Jira
Map the options listed in the CSV file to the options configured in Jira
Please refer to the screenshot for an example:
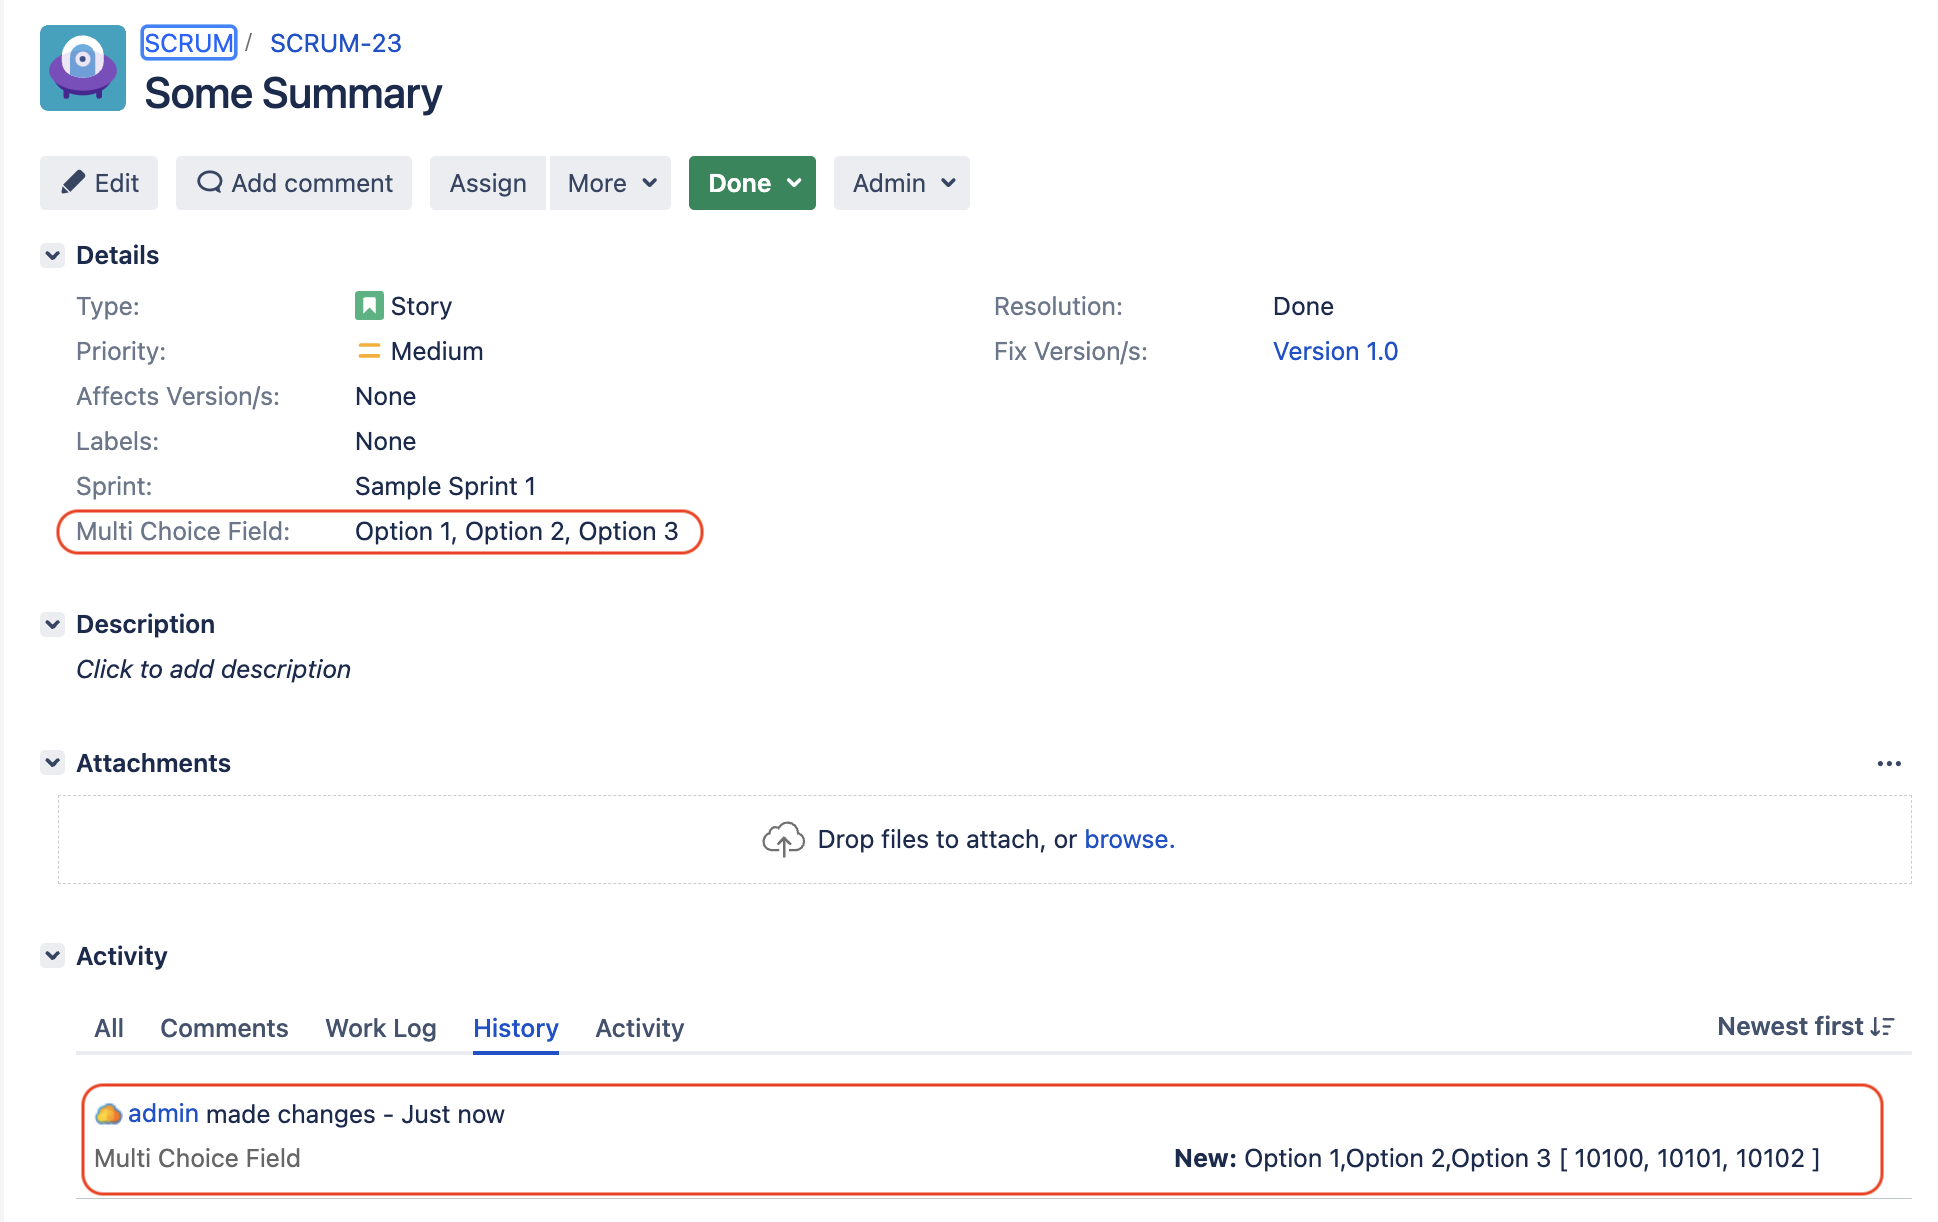
After the Import process is finished, you should see the values included in the .csv as valid options added to the Select Custom Field inside Jira.
Was this helpful?