How to automatically send email notification to assignee if a ticket is not updated for a certain time
Platform Notice: Data Center Only - This article only applies to Atlassian apps on the Data Center platform.
Note that this KB was created for the Data Center version of the product. Data Center KBs for non-Data-Center-specific features may also work for Server versions of the product, however they have not been tested. Support for Server* products ended on February 15th 2024. If you are running a Server product, you can visit the Atlassian Server end of support announcement to review your migration options.
*Except Fisheye and Crucible
Summary
This Knowledge Base document explains how to notify users and send notification emails when an assignee of a particular ticket/issue is not doing/updating any activity in a certain time stamp. This will help ensure that issues are not left unattended for too long and that the appropriate stakeholders are notified when action is needed.
Environment
Jira 8.X & 9.X
Diagnosis
For instance, we want to send a notification email when there has been no update for a specific time for example 2 days. It's also possible to include a custom message alert to notification.
Solution
Create a sample Project Automation by following the below steps:
Go to the project where you want to set up the automation and click on "Project settings" in the bottom left corner.
Click on "Project Automation" in the sidebar on the left-hand side.
Click on "Create rule" in the top right corner.
In the "Trigger" section, select "Scheduled" and set the frequency to "Every 1 day". We can set it according to business requirements
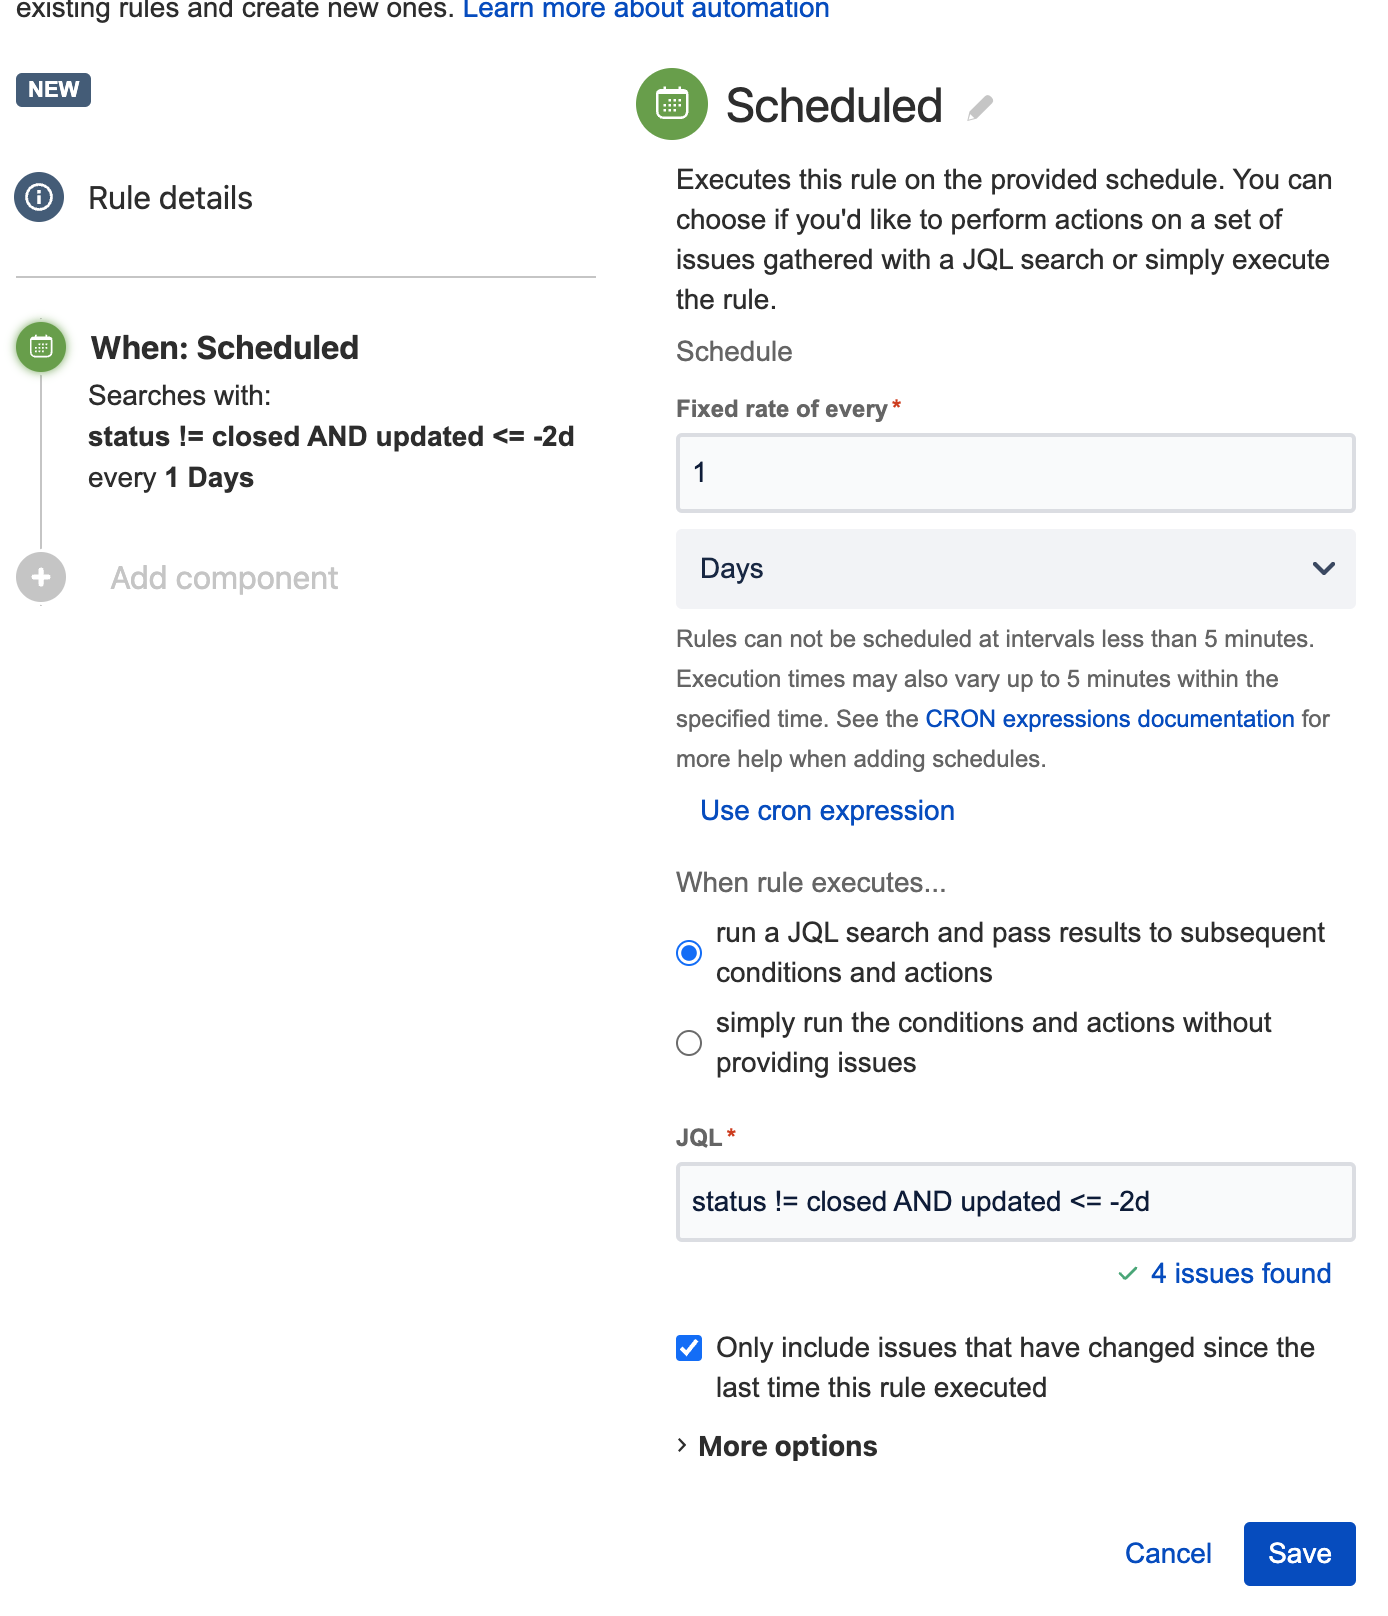
In the "JQL" field, enter the JQL query according to business requirements.
This JQL query will check if the issue status is not closed and if the issue was last updated more than 2 days ago.
In the "Actions" section, click on "Add action" and select "Send email".
Fill out the email details, including the email subject, recipient as Assignee, and message body.
Click on "Create" to save the automation rule.
Was this helpful?