Add custom fields to a workflow transition screen in Jira Data Center
Platform Notice: Data Center Only - This article only applies to Atlassian apps on the Data Center platform.
Note that this KB was created for the Data Center version of the product. Data Center KBs for non-Data-Center-specific features may also work for Server versions of the product, however they have not been tested. Support for Server* products ended on February 15th 2024. If you are running a Server product, you can visit the Atlassian Server end of support announcement to review your migration options.
*Except Fisheye and Crucible
Summary
This article walks you through the steps of how to add a screen to a workflow transition and how to include custom fields in this screen.
Environment
Jira Data Center version 8.x, 9.x, 10.x, 11.x
This article does not describe how to make any field from the transition screen mandatory.
If you are looking for a way to make any field mandatory on the transition screen, please refer to Make custom fields required in a workflow transition in Jira Data Center.
Solution
Example Scenario
A custom field name, Resolve Method, has been created. Now, we will have to create a new screen name, the Resolution screen, and map it to the Resolve Issue Transition.
Apply the steps to other Workflow transitions, Screens, and (Custom) Fields by exchanging the names.
Create a Screen and Add the Custom Field to the Screen
Log in as a user with Jira Administrator permission.
Navigate to Administration ⚙ , select Issues.
Click on Screens and click Add Screen.
Enter the Name and the Description of the Screen, then Add.
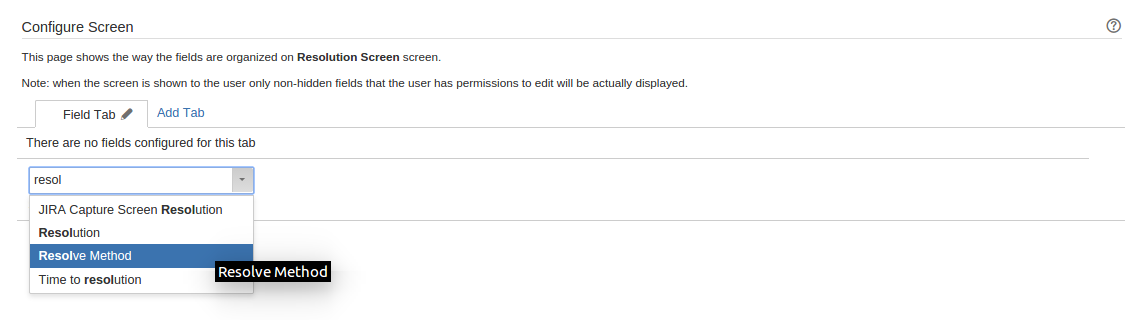
You can check that you are now on the Configure Screen page, or you can go to the page by using the Configure link at the bottom, where all the screens are listed.
Add the custom field created (Resolve Method ) to the screen.
Mapping a Screen to a Workflow Transition
Navigate to Administration ⚙, select Issues, and click on Workflows.
Click on the Edit link for the workflow that you would like to add the transition screen to.
Click on the Resolve Issue Transition, then select Edit in the pop-up window.

At the Edit Transition window, select Resolution Screen for the screen, then Save.
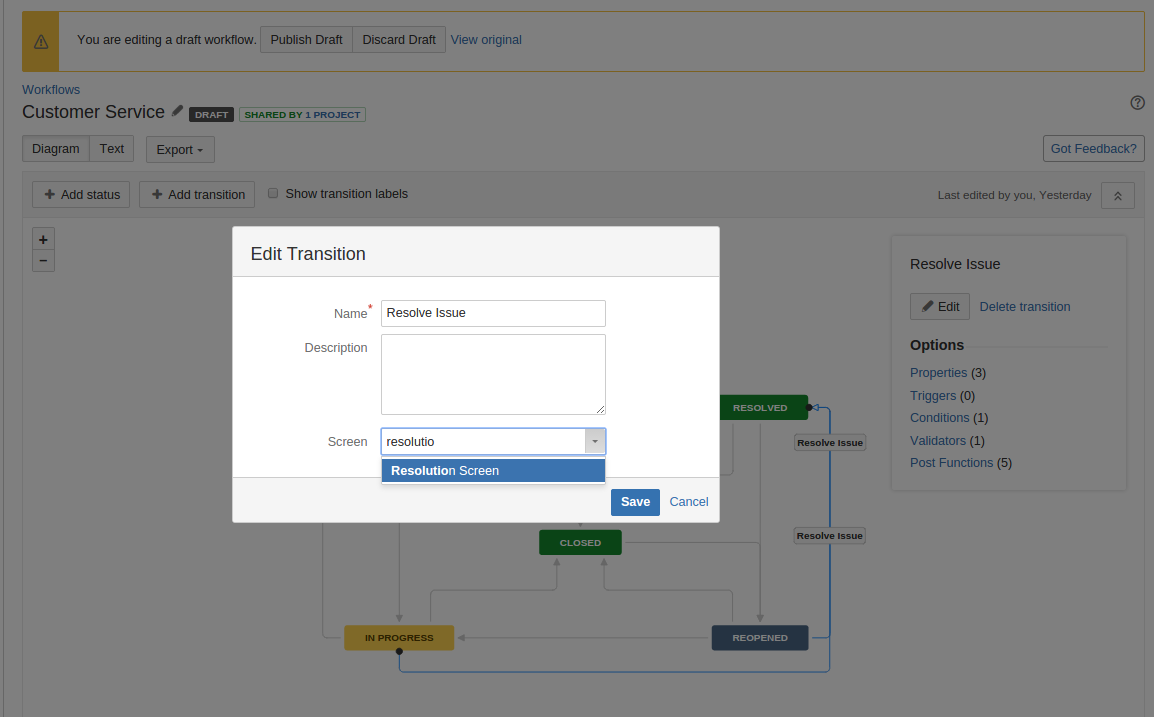
If it's an Active Workflow, remember to Publish Draft after you have done editing.
Otherwise, you will need to map the workflow to a workflow scheme and then associate the workflow scheme with a project to activate the workflow.
Result
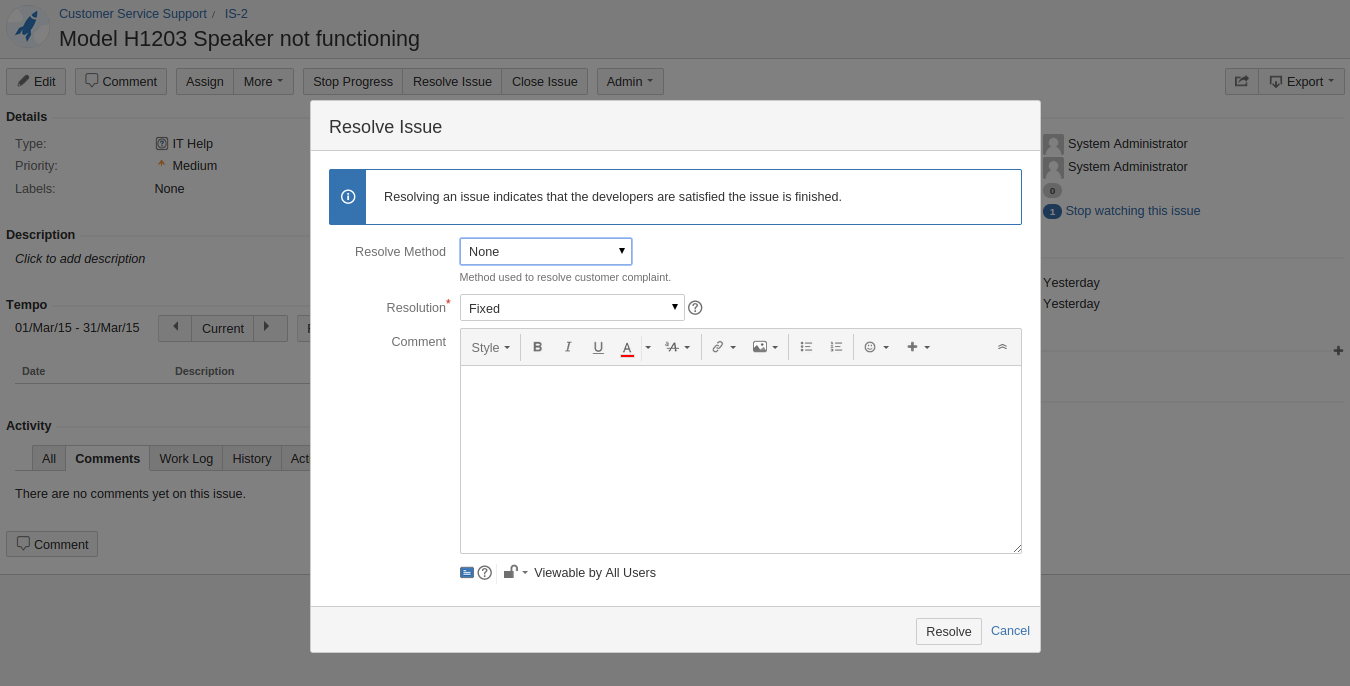
When you resolve an Issue, the Resolution Screen will pop up. On the transition screen, you can specify the Resolve Method.
Was this helpful?