Customize Jira Server and Data Center login gadget
Platform Notice: Data Center Only - This article only applies to Atlassian apps on the Data Center platform.
Note that this KB was created for the Data Center version of the product. Data Center KBs for non-Data-Center-specific features may also work for Server versions of the product, however they have not been tested. Support for Server* products ended on February 15th 2024. If you are running a Server product, you can visit the Atlassian Server end of support announcement to review your migration options.
*Except Fisheye and Crucible
Summary
The information in this page relates to customizations in Jira. Consequently, Atlassian Support cannot guarantee to provide any support for the steps described on this page as customizations are not covered under Atlassian Support Offerings. Please be aware that this material is provided for your information only and that you use it at your own risk.
Also, please be aware that customizations done by directly modifying files are not included in the upgrade process. These modifications will need to be reapplied manually on the upgraded instance.
In some usage scenarios, you may want to include a customized message on JIRA's login gadget to include messages you'd find useful or remove certain elements. Since there's no way to modify the gadget through JIRA's interface, you'll have to manually edit its source files using the command line (Terminal/CMD).
Solution
Jira Versions:
Jira Software 9.17 or earlier
Jira Service Management 5.17 or earlier
This does not apply to Jira 10
Process
⚠️Always remember to backup the files you modify so you can rollback in case anything goes wrong in the process.
For JIRA 8.x and above, you'll need to modify the gadget plugin
<JIRA_INSTALL>/atlassian-jira/WEB-INF/atlassian-bundled-plugins/jira-gadgets-plugin-X.X.X.jarTo make any changes to the JAR file, first you need to extract its contents.
Create a temporary directory, navigate into it, then run the following command. Modify <JIRA_INSTALL> and <X.X.X> accordingly to match the current installation:
jar xf <JIRA_INSTALL>/atlassian-jira/WEB-INF/atlassian-bundled-plugins/jira-gadgets-plugin-X.X.X.jarThis command will differ depending on the Jira version and installation, for example in Jira 8.20.10 the file is named jira-gadgets-plugin-8.20.10.jar
Ensure the current JAR is stored as a backup (renamed it or move it elsewhere)
The file to be modified is
login.soy, It is located under the extracted jar within the temporary directory structure/static/dashboarditem/loginModify the
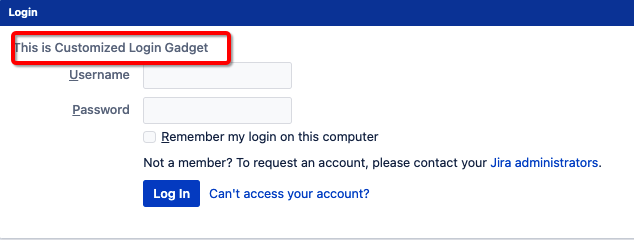
login.soyfile as per your requirement, for e.g. adding a new<div>element with a label to display a message.<div> <label> This is Customized Login Gadget </label> </div> <div class="field-group"> <label accesskey="u" for="login-form-username" id="usernamelabel">{getText('gadget.login.username', '<u>', '</u>')|noAutoescape}</label> <input class="text medium-field" id="login-form-username" name="os_username" type="text"> </div>Create a new JAR container after modifying the files and name it the same as the original JAR file (e.g.
jira-gadgets-plugin-8.20.10.jar). Run this command from the temporary directory created on Step 3:jar cvfm jira-gadgets-plugin-X.X.X.jar META-INF/MANIFEST.MF ./*Move the newly created jira-gadgets-plugin-X.X.X.jar file back into
<JIRA_INSTALL>/atlassian-jira/WEB-INF/atlassian-bundled-plugins/Restart JIRA and access the login page.
As a result, below is the customized login gadget:
Additional Customizations (Login Page)
To have a similar effect on login.jsp (when clicking "Log in" in the upper right corner or clicking "Log in again" on the logout page) it's also necessary to modify the loginpage.jsp, loginform.jsp, login.jsp files in <JIRA_INSTALL>/atlassian-jira/includes directory. For steps to edit these, please refer to Precompiling JSP pages.
Was this helpful?