Custom Field-Driven Approvers using Workflow
Platform Notice: Cloud Only - This article only applies to Atlassian apps on the cloud platform.
Summary
In certain scenarios, it is necessary to select different approvers based on the value of a custom field.
For instance, a budget approval might require different approvers based on the budget amount: if the budget is below a certain threshold, one person/group approves it, and if it exceeds that threshold, another person/group approves it.
Solution
This requirement can be fulfilled by using either: 1) Workflow conditions, or 2) an Automation rule.
This article provides steps for using Workflow conditions. For instructions on configuring an Automation rule, please refer to this link.
As an example here, a custom field named 'CustomNumber' will be used, although any field suitable for comparison can be implemented. A user will input a number into this field when creating an issue, representing a budget amount. If the entered value is less than 1000, it should be approved by UserA. Conversely, if the value is 1000 or more, it should be approved by UserB.
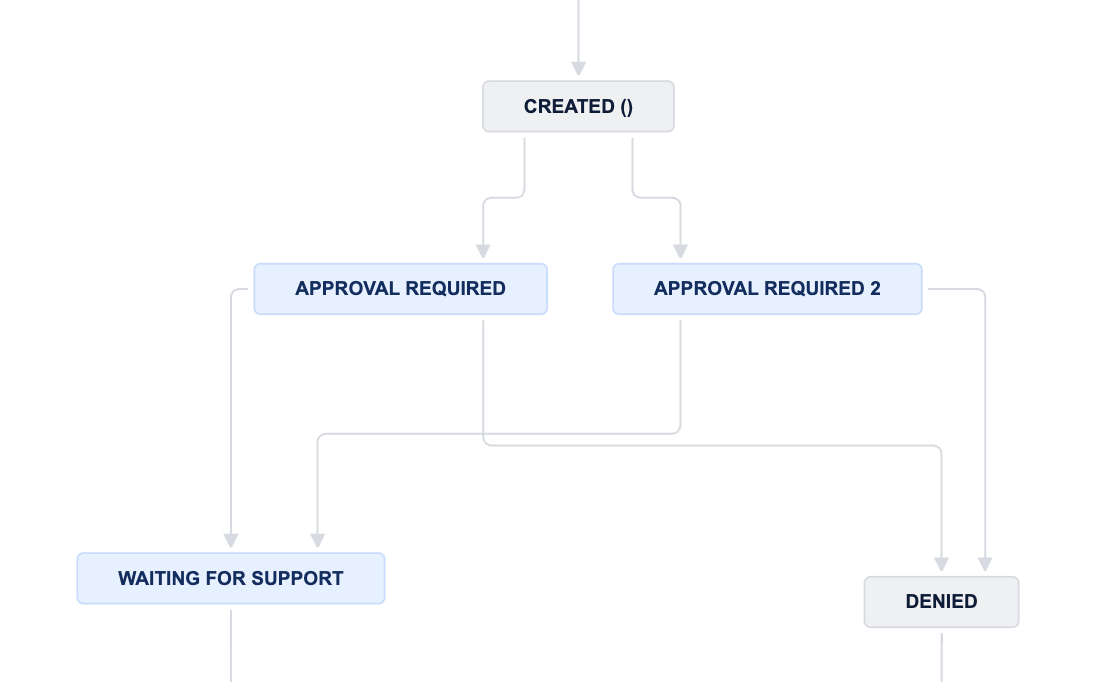
To implement this, two separate approval statuses and corresponding transitions are required, as outlined in the steps below:
Step 1: Design the Workflow with Conditional Approval Statuses
Create a workflow that incorporates distinct approval statuses for different users or groups.
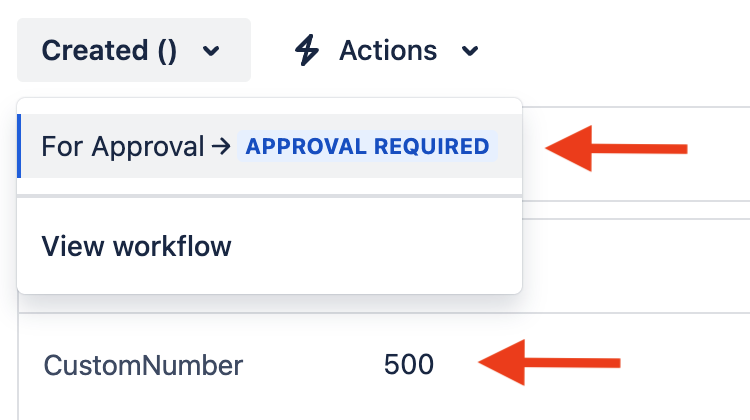
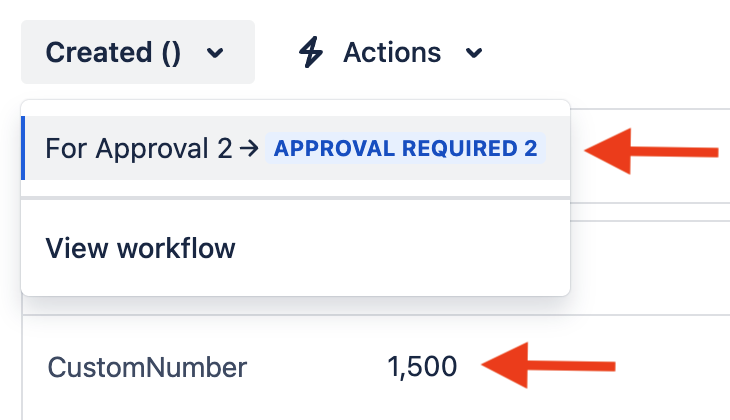
E.g. The workflow below includes an 'Approval Required' status for values less than 1000, and an 'Approval Required 2' status for values equal to or exceeding 1000.
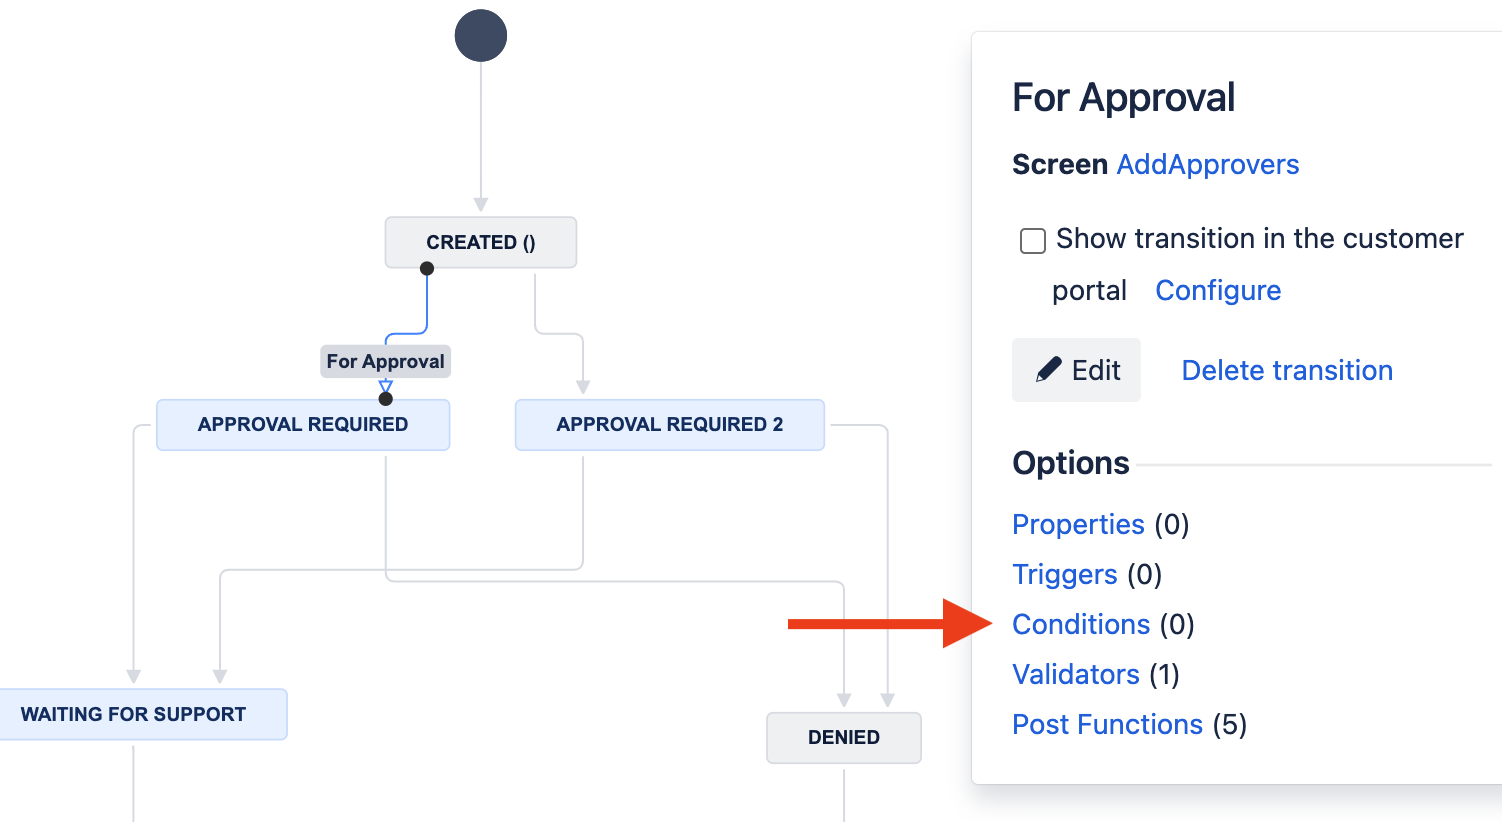
Step 2: Configure Conditional Transitions
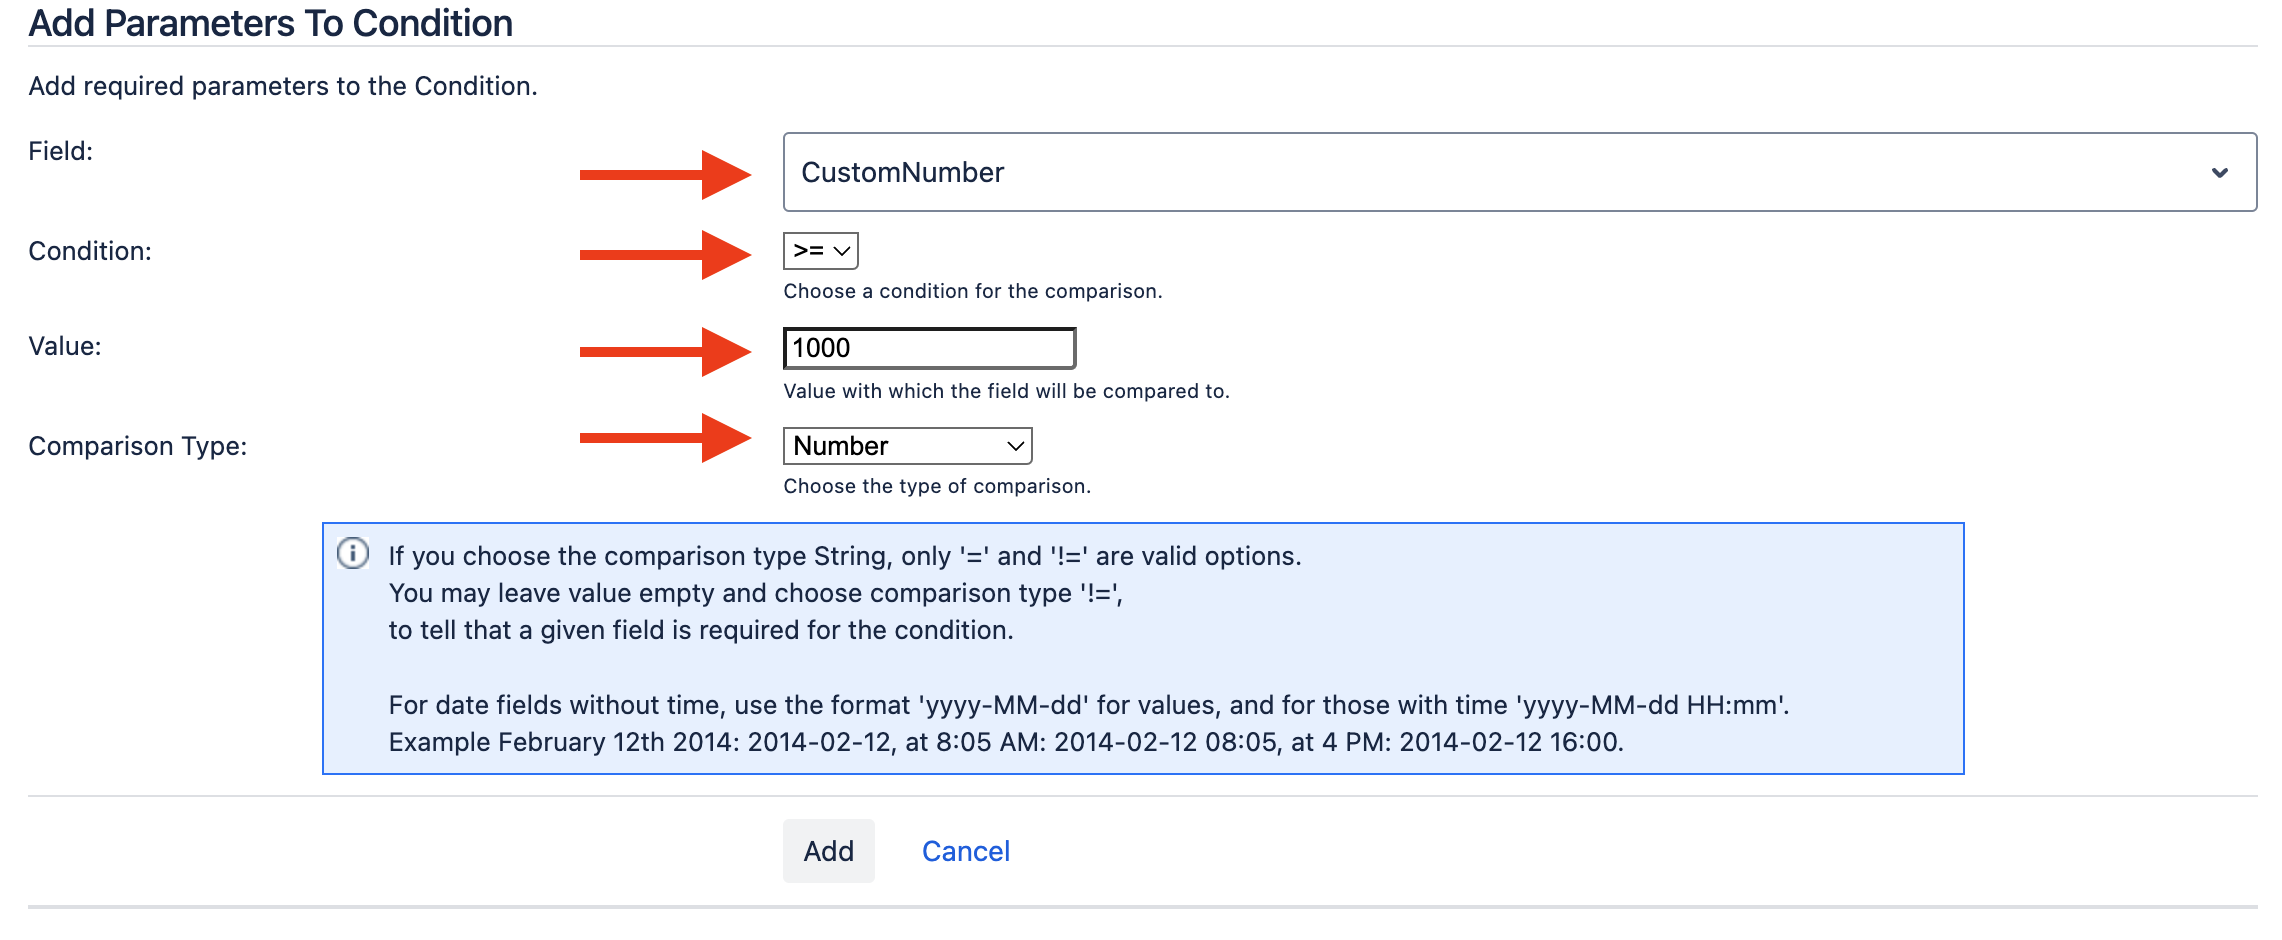
For each approval status, add transitions that will be used to check the 'CustomNumber' field value.
Select a transition and add a condition.
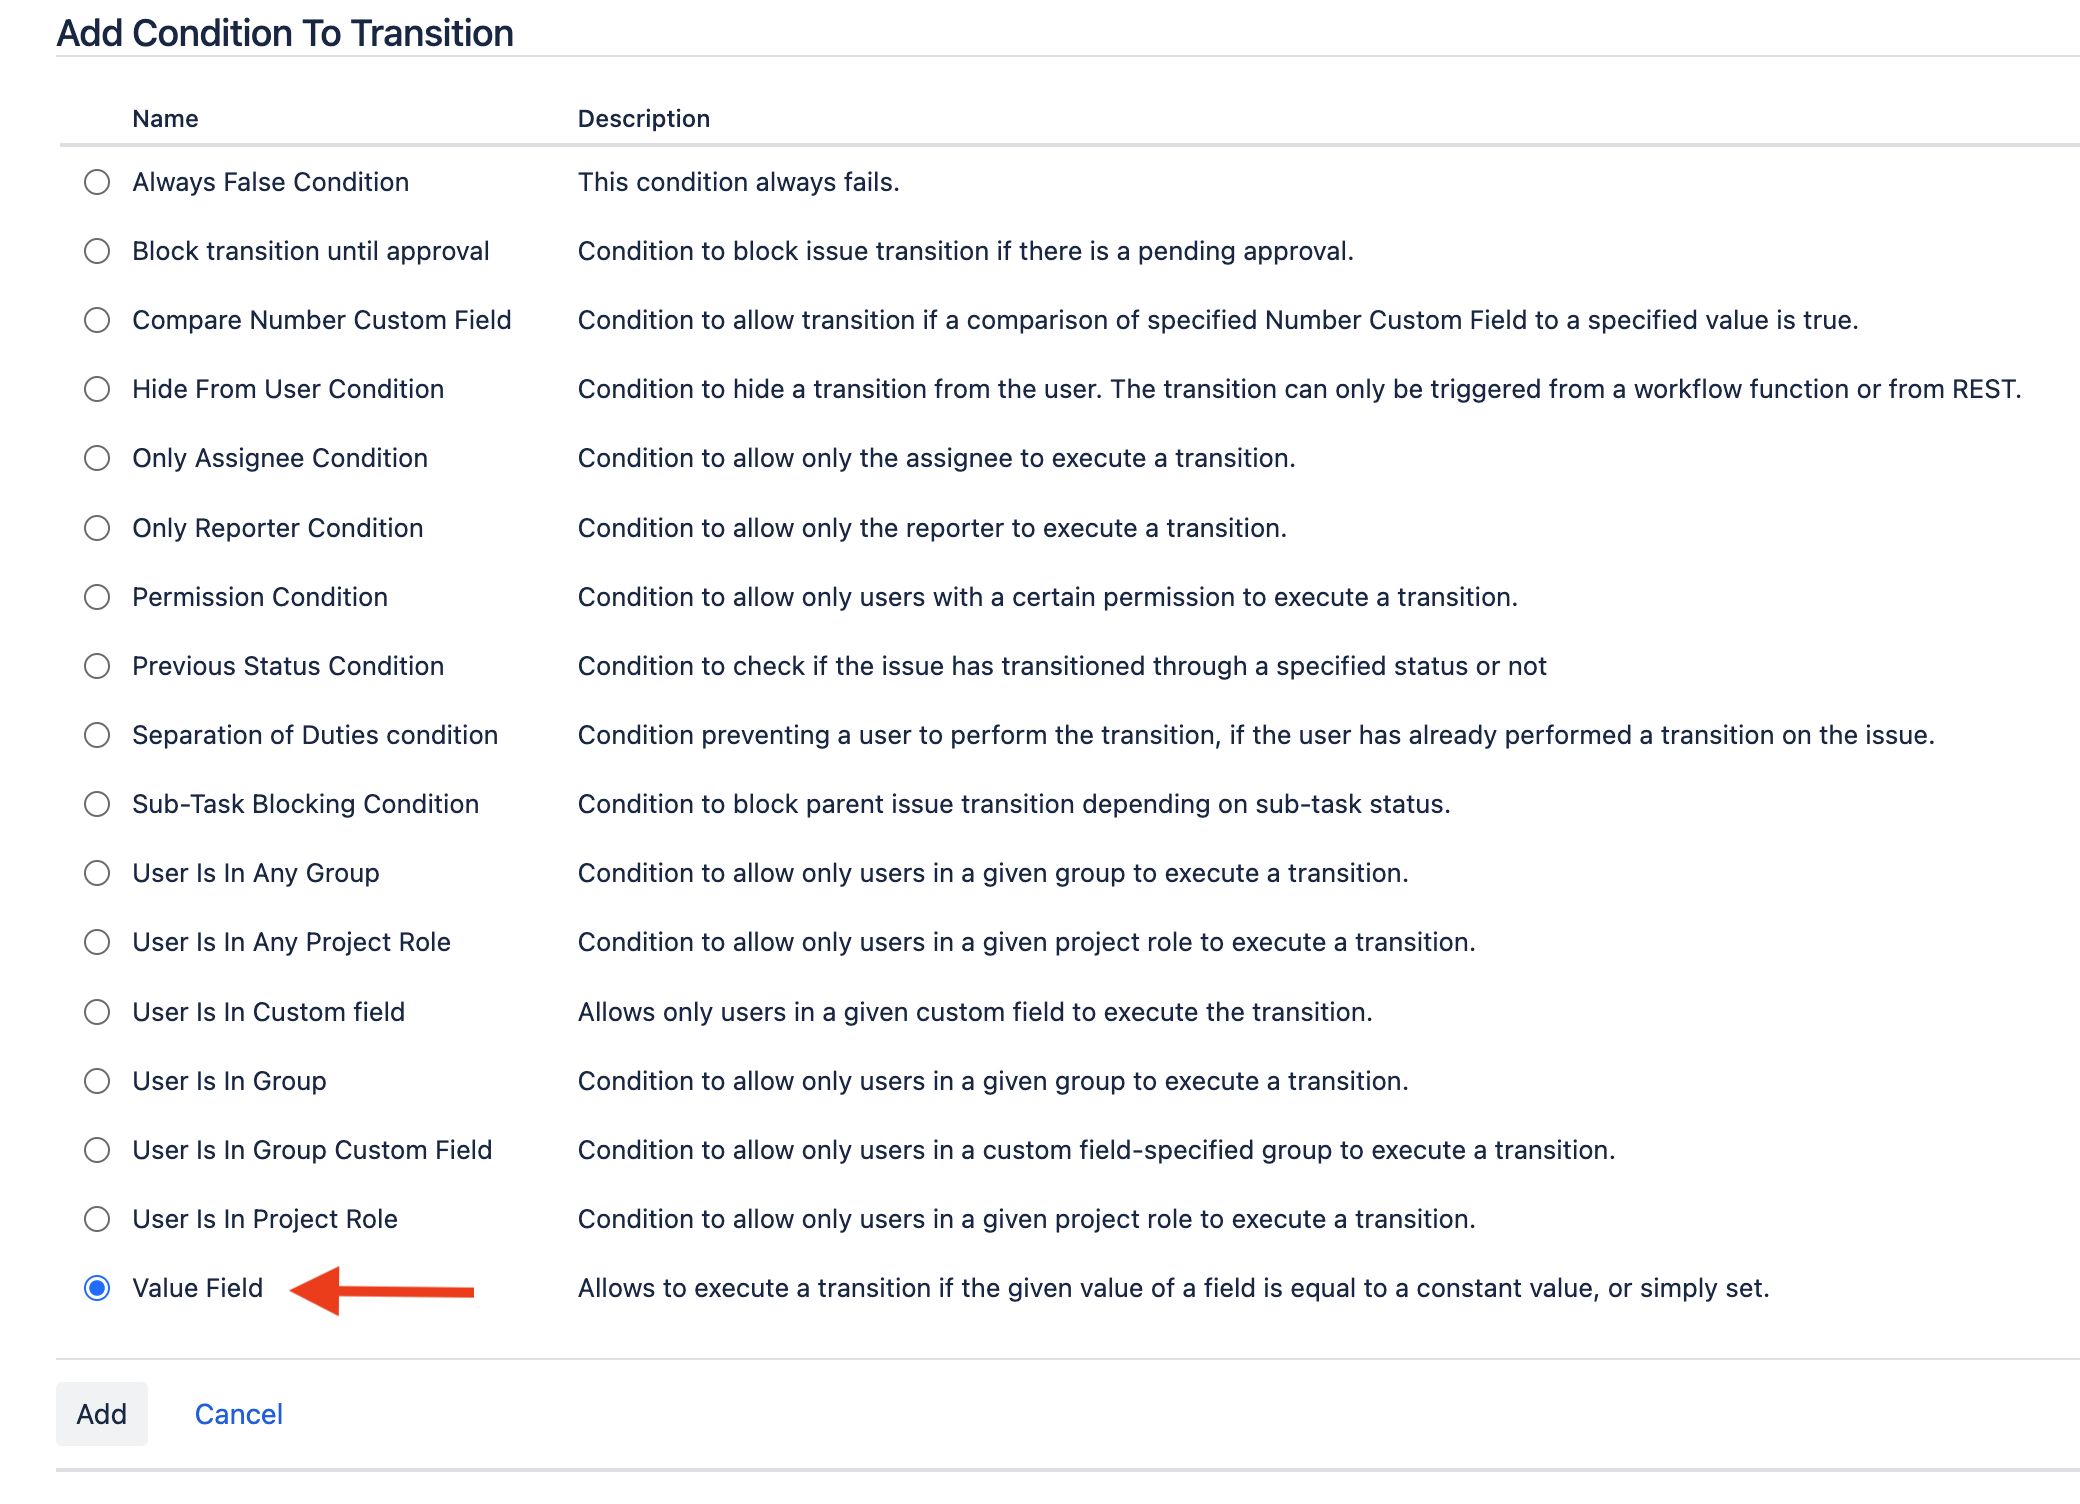
Select 'Value Field' and click Add.
Specify the field to compare ('CustomNumber'), the condition (e.g., less than 1000), and the comparison type (Number).
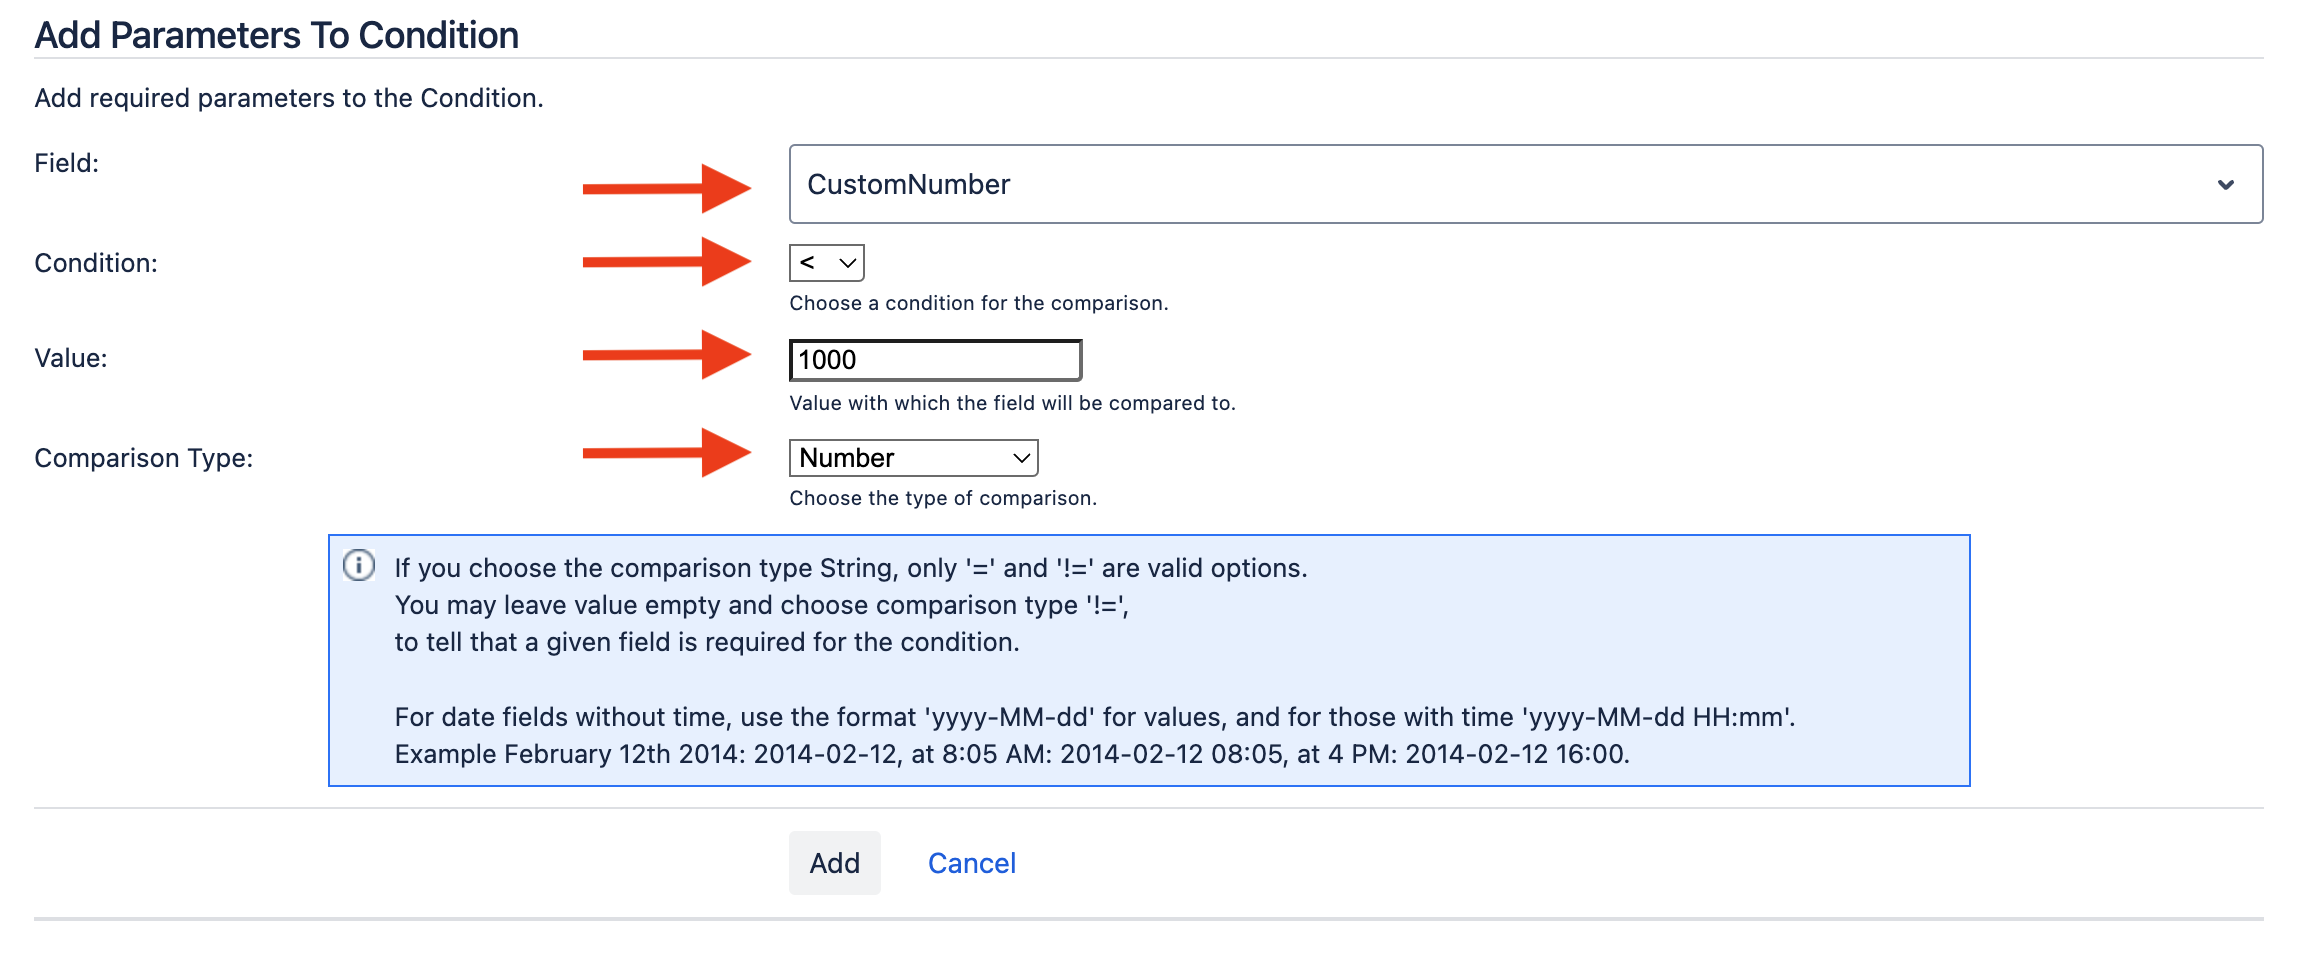
Click 'Add' and publish the draft workflow.
Step 3: Configure the Second Transition
Repeat the configuration process mentioned above in Step 2 for the transition to the 'Approval Required 2' status.
This time, ensure the condition checks for values greater than or equal to 1000 in the 'CustomNumber' field.
Click 'Add' and publish the draft workflow to finalize the setup.
Testing the Workflow:
If the 'CustomNumber' field has a value less than 1000, the transition will lead to the 'Approval Required' status.
If the 'CustomNumber' field has a value greater than or equal to 1000, the transition will lead to the 'Approval Required 2' status.
With these configurations, you can assign different users or groups to handle approvals or denials based on distinct statuses, allowing for a dynamic and tailored approval process.
Was this helpful?