Capture work Priority and Organization from the Description field
Platform Notice: Cloud Only - This article only applies to Atlassian apps on the cloud platform.
Summary
Learn how to use Automation to extract the values of the Priority and Organization fields from a table in the Description field.
Solution
Capture information from a table inside the Description field
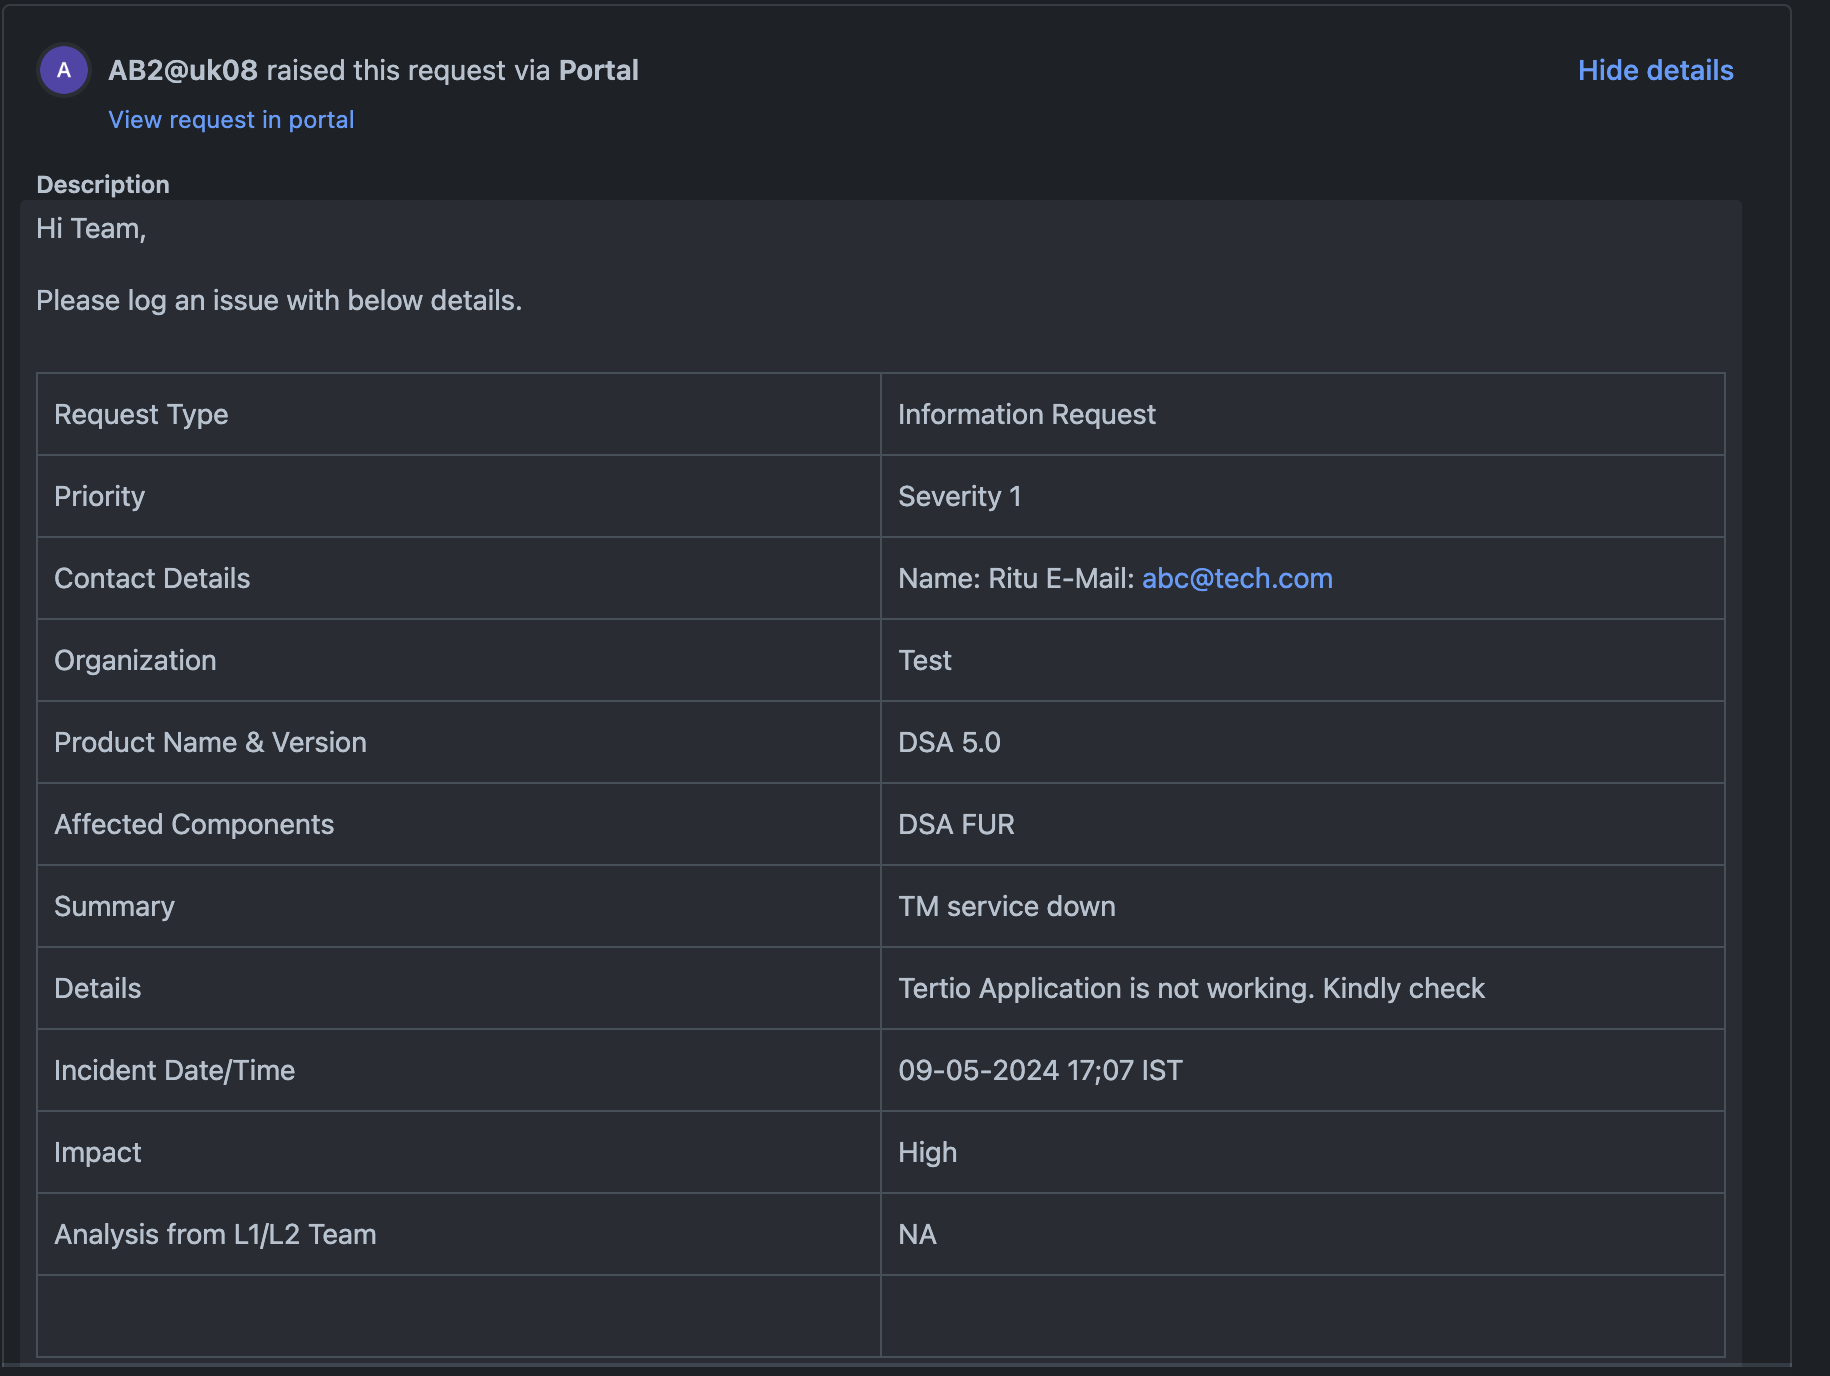
To configure this rule, we'll capture custom field data from a table sent under the Description field via email. For this example, the data format is as follows:
Priority | Severity 1 |
Organization | Test |
To capture these values in a custom field, the following conditions must be met:
The data format in the table must always be consistent.
The field values sent in the table must match the existing values/options in the custom field.
This is a complex use-case of automation, where you'll use Regex to extract exact values from a table.
Capture the data format of the table
First, we must analyze the data format (the raw data) of the table using an automation rule to capture Description field data in a variable as follows:
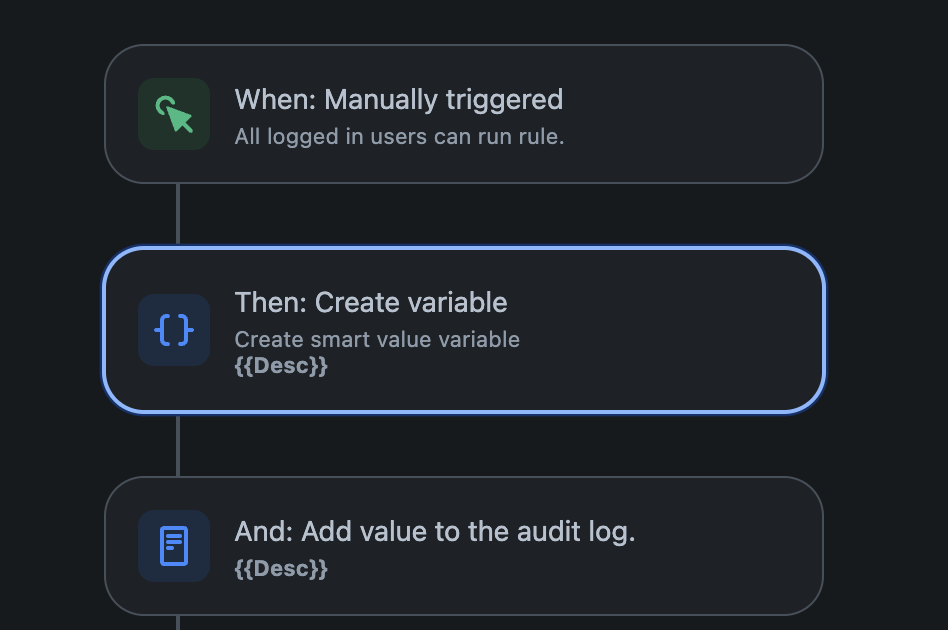
Create a rule using a ManualTrigger.
Add the Action: Create Variable. Create a smart value variable
{{Desc}}.Use the Action: Log action.
Run the rule on a work item that has a table in its Description. In the Automation rule logs, the table data should be captured in the Log action part.
In this example, the table is in a "|" format. This information allows creating a regex expression to capture the table data effectively.

Update the Priority field
Create a rule using the desired Trigger.
Add an Action: Create Variable. To capture the Priority (you can adapt to use other fields) add a variable to the Automation and assign it the following values:
Variable name: Priority
Smart value:
{{issue.description.substringBetween("|Priority|","|")}}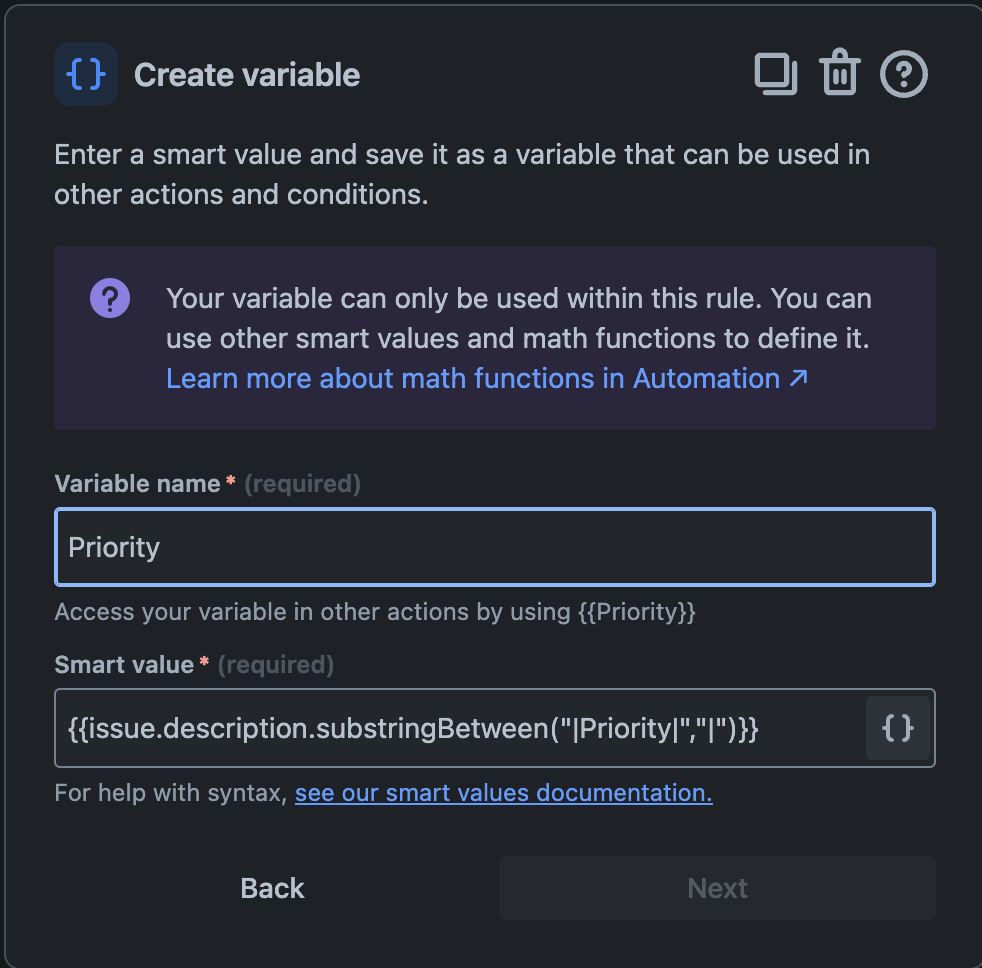
Include another Action in the rule, Edit work item. Use the variable you just created
{{Priority}}as the value for the Priority field.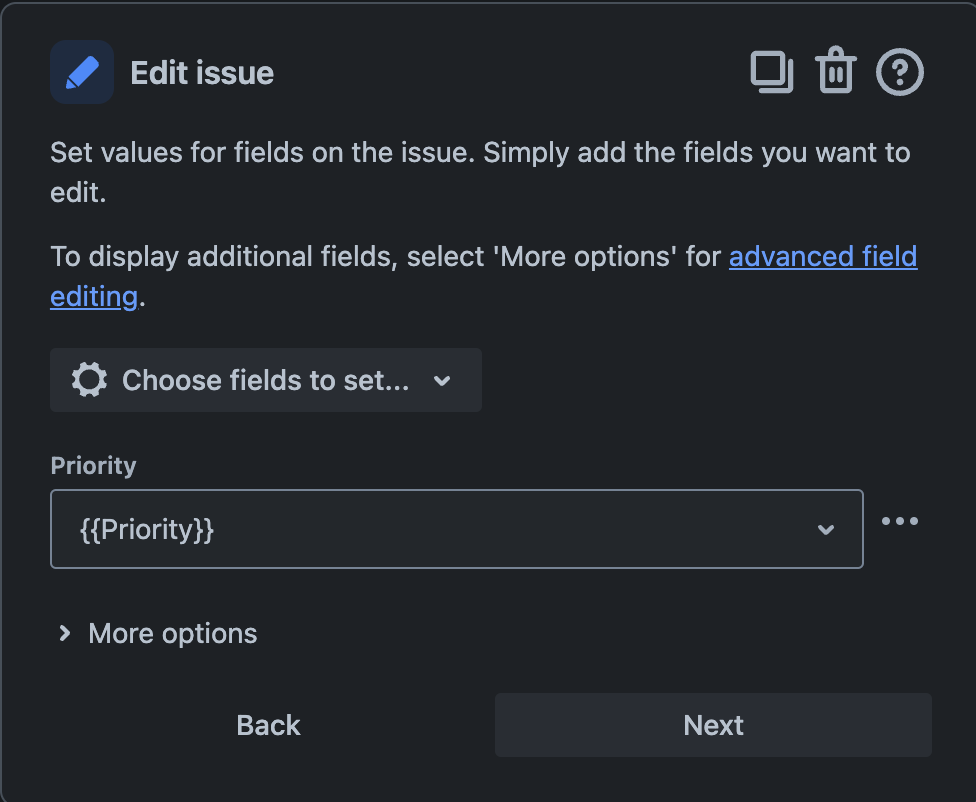
You can adapt the smart value and change the rule to edit other fields. For example:
For Affected Components: {{issue.description.substringBetween("|Affected Component|","|")}}
For Summary: {{issue.description.substringBetween("|Summary|","|")}}
Update the Organization field
Jira does not allow you to pass a variable to set the Organization field, which adds more complexity to achieving this using the "Send Web Request" action.
Add the Action: Create variable to store the Organization from the table inside a variable:
Variable name: Org
Smart value:
{{issue.description.substringBetween("|Organization|","|")}}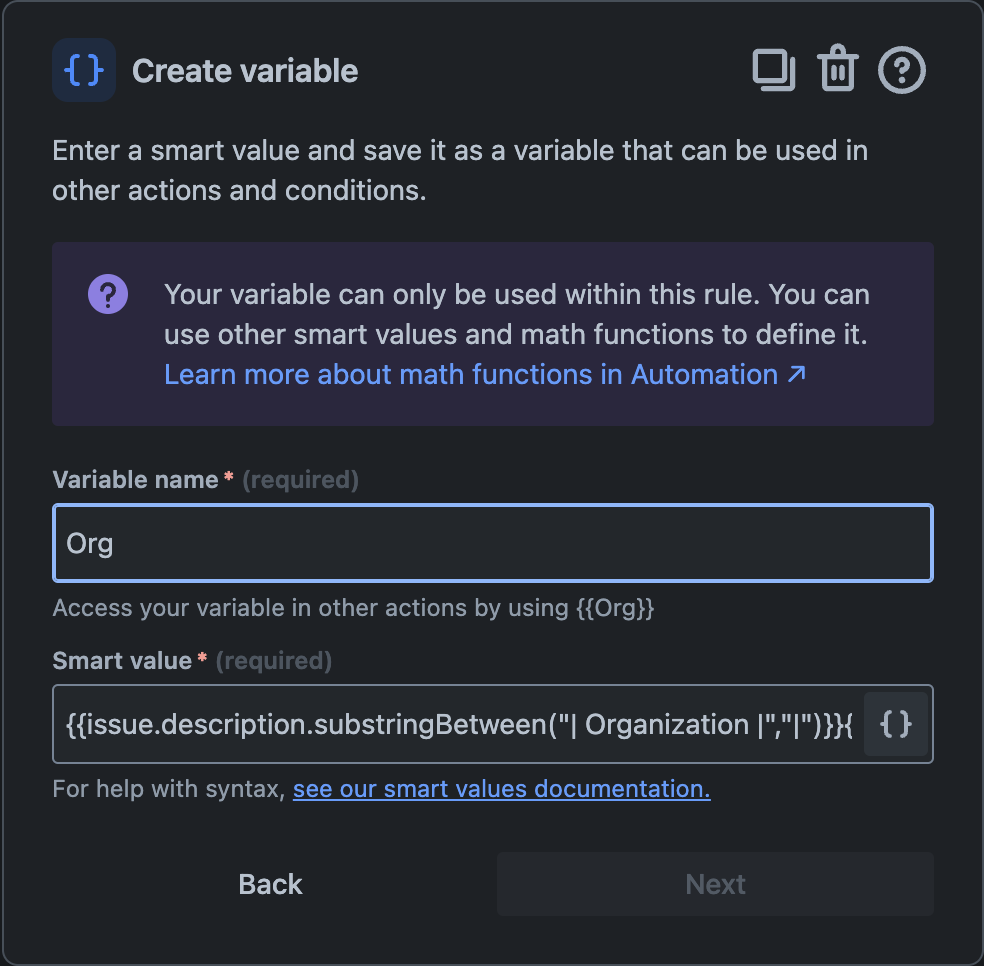
Add a new Action: Send Web Request. This will check if the Organization value captured from the table exists in the Project Organization, else it will create a new Organization in that project.
Web request URL: https://<Site URL>/rest/servicedeskapi/organization
HTTP method: POST
Web request body: Custom data
Custom data:
{
 "name": "{{Org}}"
}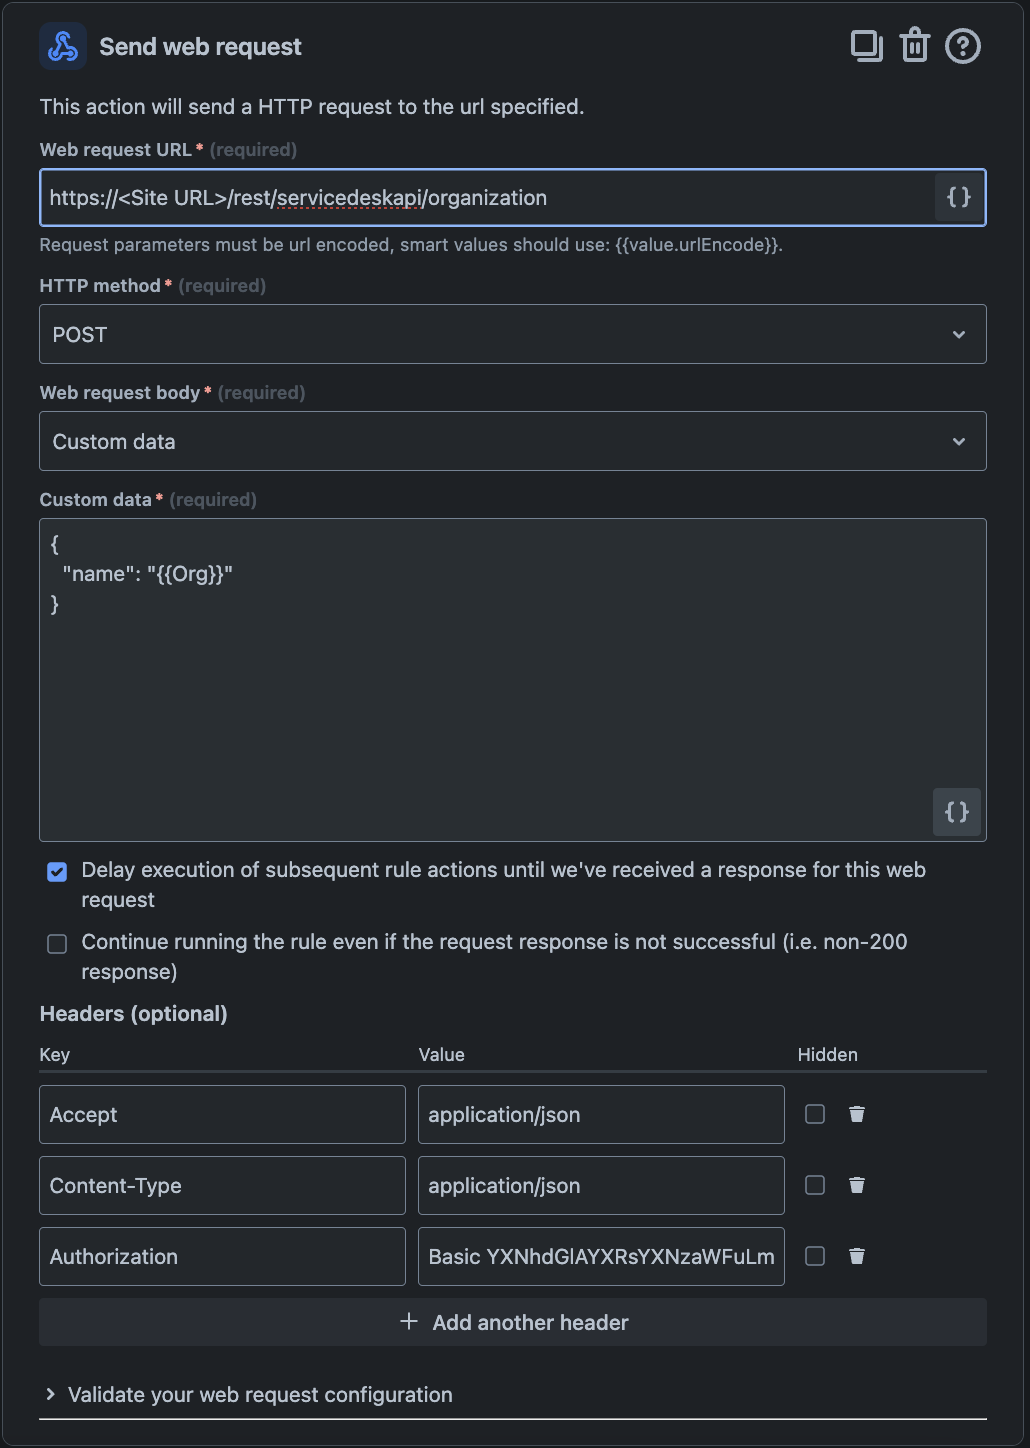
Add an Action: Log action. Capture the Webhook Response to see the output of the web request action. If the captured Organization exists, Jira Automation will show us the Organization ID and link in the Audit logs; otherwise, it will create a New Organization in that concerned project.
Log message:
{{webhookResponse.body}}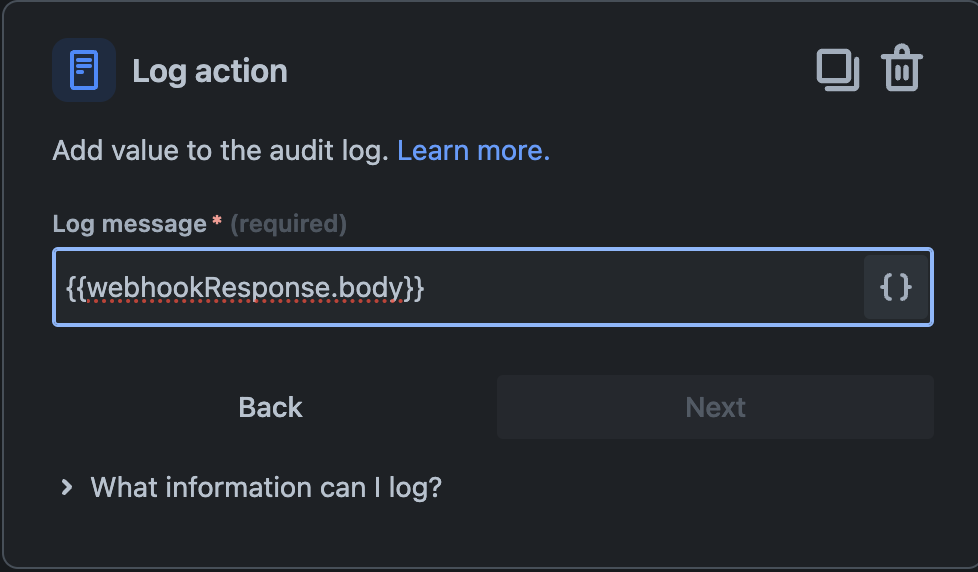

Add an Action: Edit issue to the rule.
Use Additional fields to edit the Organization using JSON and the smart value:
{
    "fields": {
        "customfield_10002": [{{webhookResponse.body.id}}]
    }
}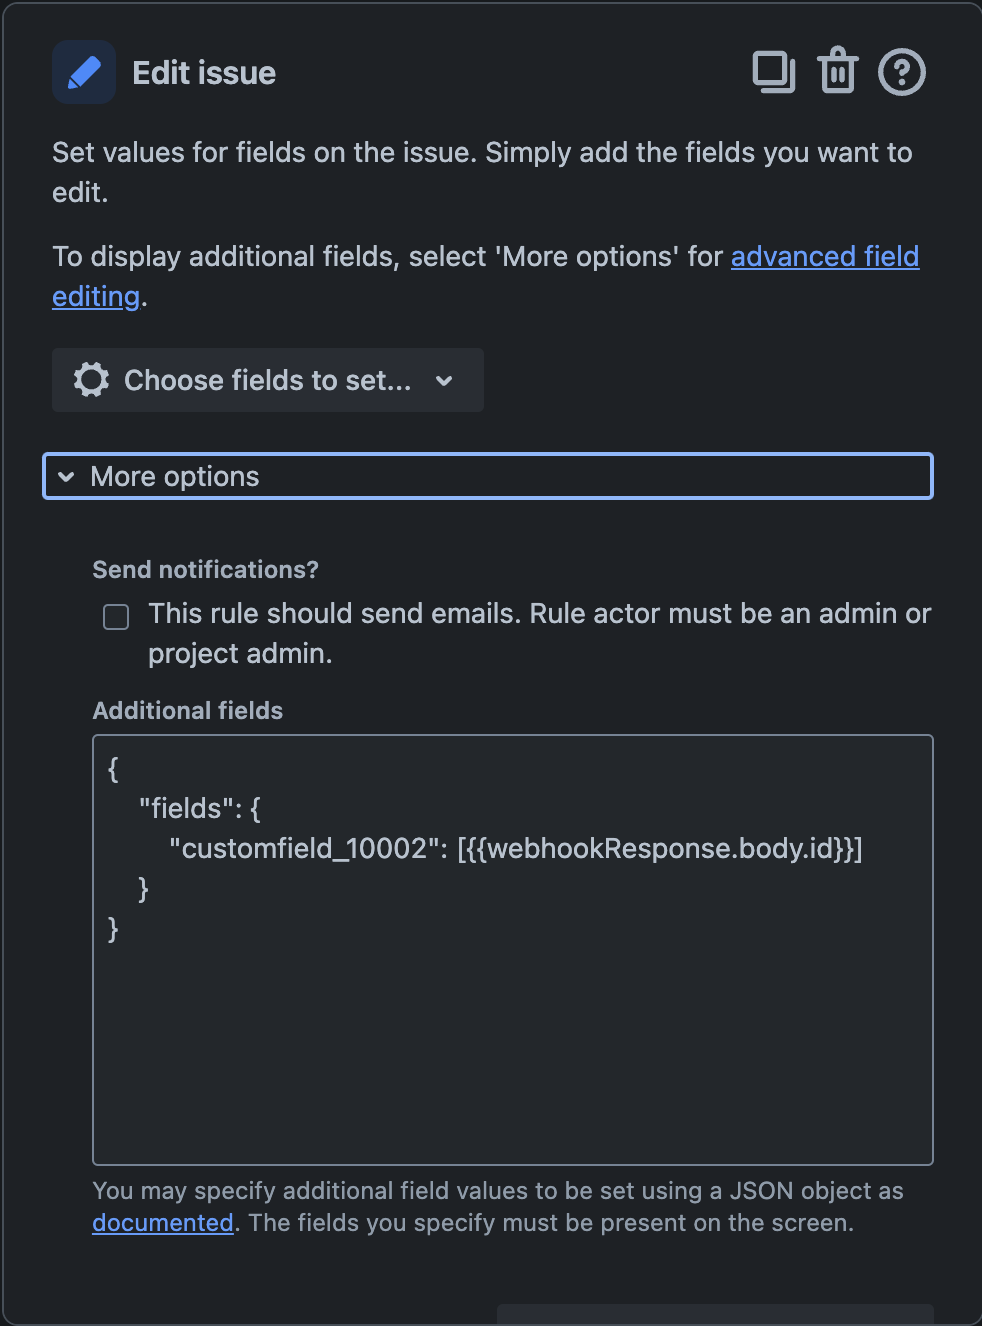
Was this helpful?