Set Request Type Automatically in Jira for Moved or Created Issues
Platform Notice: Cloud Only - This article only applies to Atlassian apps on the cloud platform.
Summary
Learn how to make Requests visible in the Customer portal by setting a Request Type.
Solution
Empty request types
This could happen when those Requests/tickets are moved from a non-Jira Service Management project (e.g., a Jira project) to a Service project. The following solution will use Jira Automation to solve this.
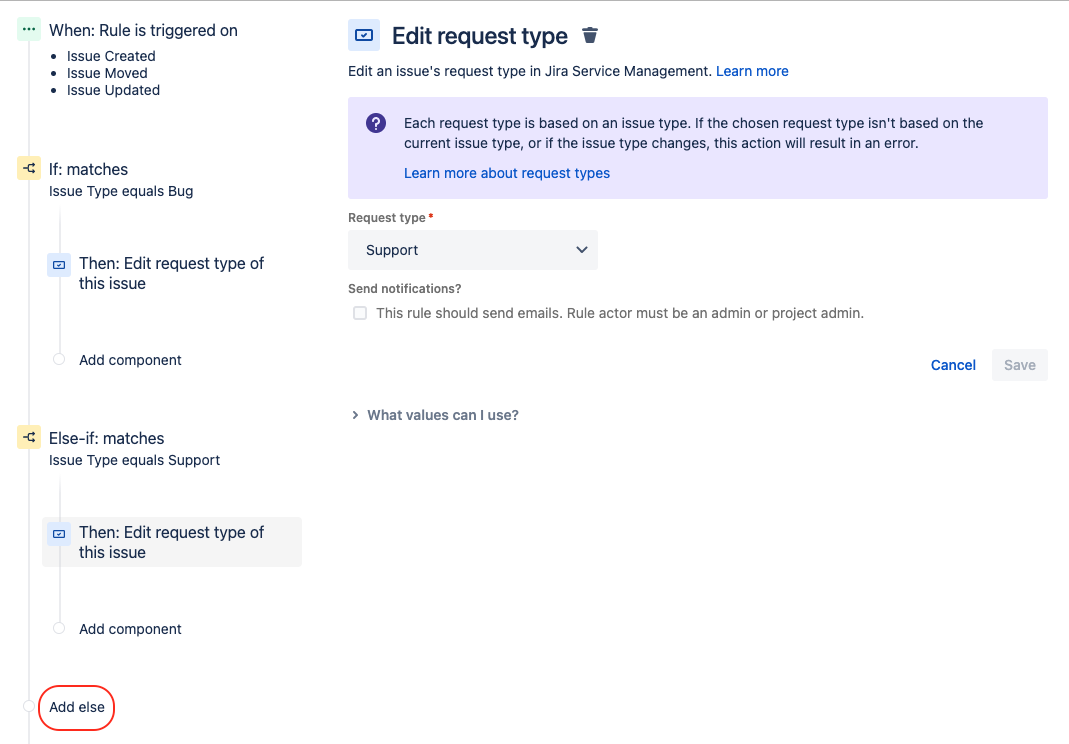
Creating an automation to fill the request types
Request types are linked to specific issue types and must match the issue type to be selected. If they don't match, the automation rule will fail. To prevent this, we'll set conditions to ensure a valid request type is chosen for each issue type in the project.
Go to your service project > Project settings > Automation > click on Create rule.
Select the trigger Multiple issue events and include the events "Issue Created", "Issue Moved", and "Issue Updated" (in order to cover all scenarios that cause the problem).
Click on New condition and select the option If / else block.
Click on Add conditions and choose Issue fields condition > select 'Field: Issue Type' / 'Condition: equals' / 'Value: Bug' (for example).
Click on New action > choose Edit request type > select a request type that is based on the Bug issue type > Save.
Click on Add else and repeat steps 4 and 5, selecting another issue type and choosing a request type associated with it (you can add multiple 'Else-if' blocks according to the number of issue types used in your project).
Give your rule a name and click on Turn it on.
Your rule should look like this:
For Jira Service Management Data Center, please visit Requests are not visible in the Customer Portal due to an empty Request Type in Jira Service Management
If notification issues persist after setting up the automation, verify request types are correctly configured for all issue types and test email notifications to confirm delivery.
Was this helpful?