Automatic Assign User from Project Roles to the Approver Field in Jira
Platform Notice: Cloud Only - This article only applies to Atlassian apps on the cloud platform.
Summary
To fetch the users from the project role and update those users in the "Approver" custom field.
Environment
Jira Service Management
Solution
To achieve this requirement we will use Jira Automation.
Add a Trigger:
Choose a trigger based on your workflow. Some common triggers are:
Issue Created
Issue Commented
Manual Trigger
Configure the trigger as needed for your project.
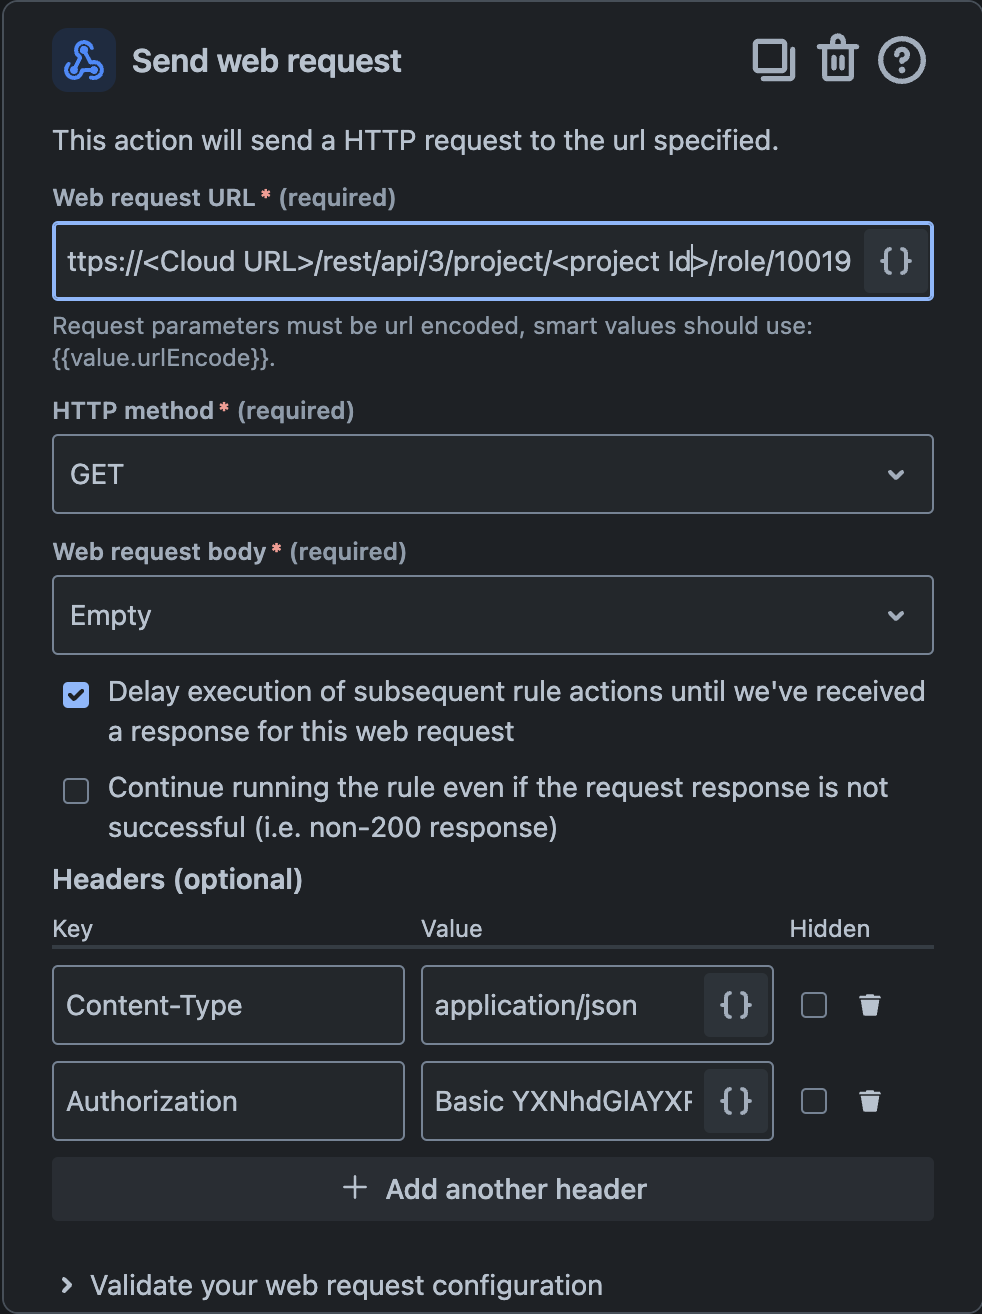
Add Web Request Action:
Click on Add Action and select Send Web Request.
Use the API Get project role for project endpoint to fetch project role (to create the needed API token use any Base64 encode)
Enter the following details
Web Request URL:  https://<site/instance URL>/rest/api/3/project/{projectIdOrKey}/role/{id}
HTTP Method:    GET
Web Request Body: Empty
Headers:         Content-Type        application/json
                 Authorization        Basic <EMAIL>:<API_TOKEN>
Important: Check the box "Delay execution of subsequent rule actions until we've received a response for this web request."
Add Action: Select "Log Action" and enter the below value
{
  "update": {
    "customfield_10003": [
      {{#webResponse.body.actors.actorUser}}
      { "set": { "id": "{{accountId}}" } } {{^last}}, {{/}}
      {{/}}
    ]
  }
}
Add Action: Select "Edit Issue" and enter the following value under "More Action":
{
  "update": {
    "customfield_10003": [
      {{#webResponse.body.actors.actorUser}}
      { "add": { "id": "{{accountId}}" } } {{^last}}, {{/}}
      {{/}}
    ]
  }
}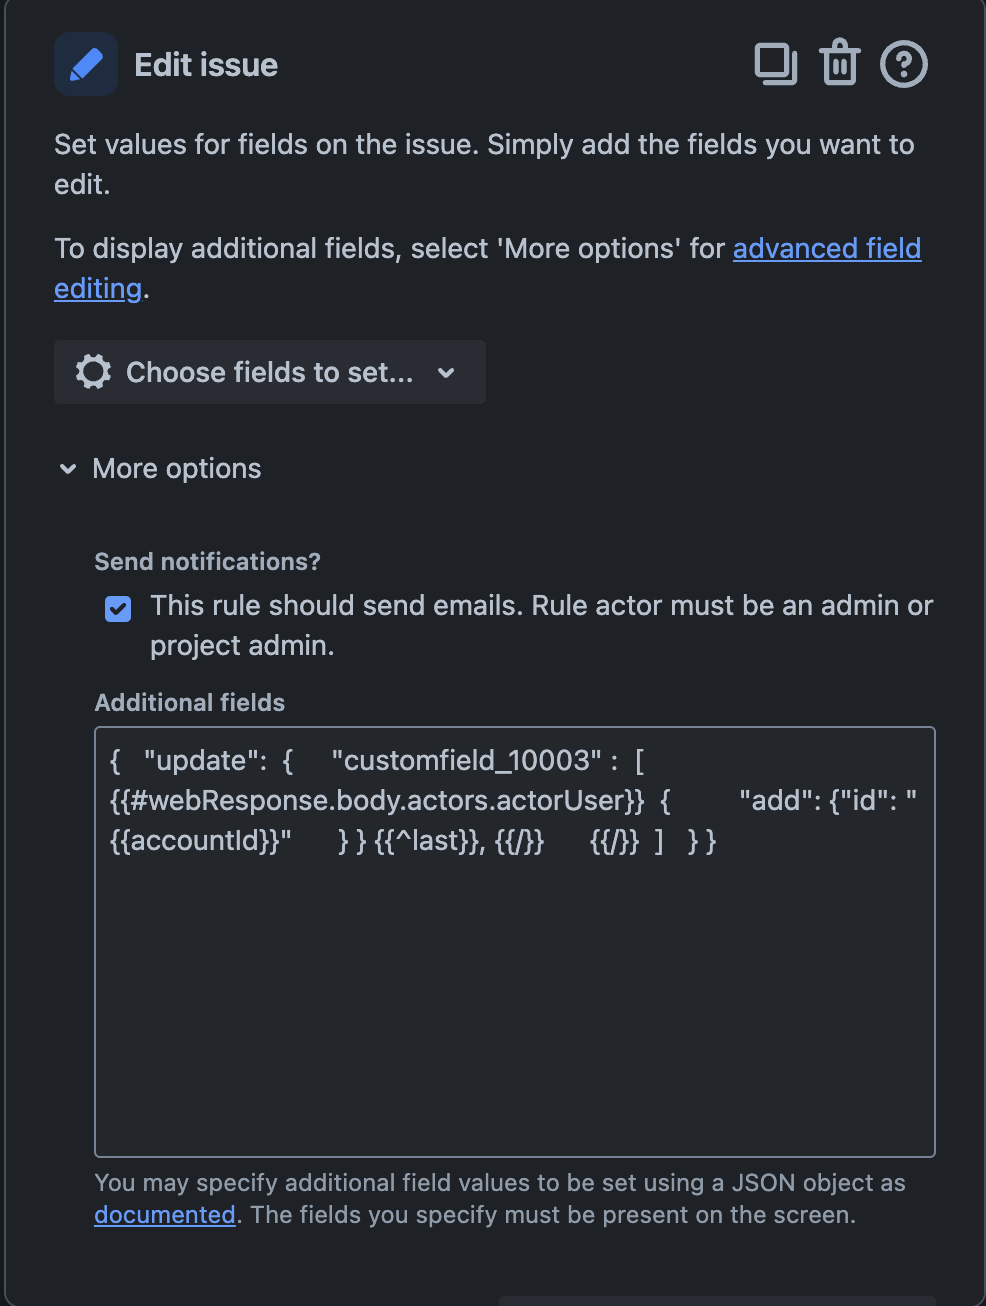
Now click on "Turn On Rule", enter below inputs and Turn on Rule:
Was this helpful?